
Crocheting a full coat with a hood, raglan shaping, and bell sleeves sounds intimidating. I get it. When you look at a project like this, your brain immediately starts listing all the reasons you should stick to dishcloths for another year. But here is the truth: if you can work a half double crochet and a single crochet, you already have the core skills this coat requires.
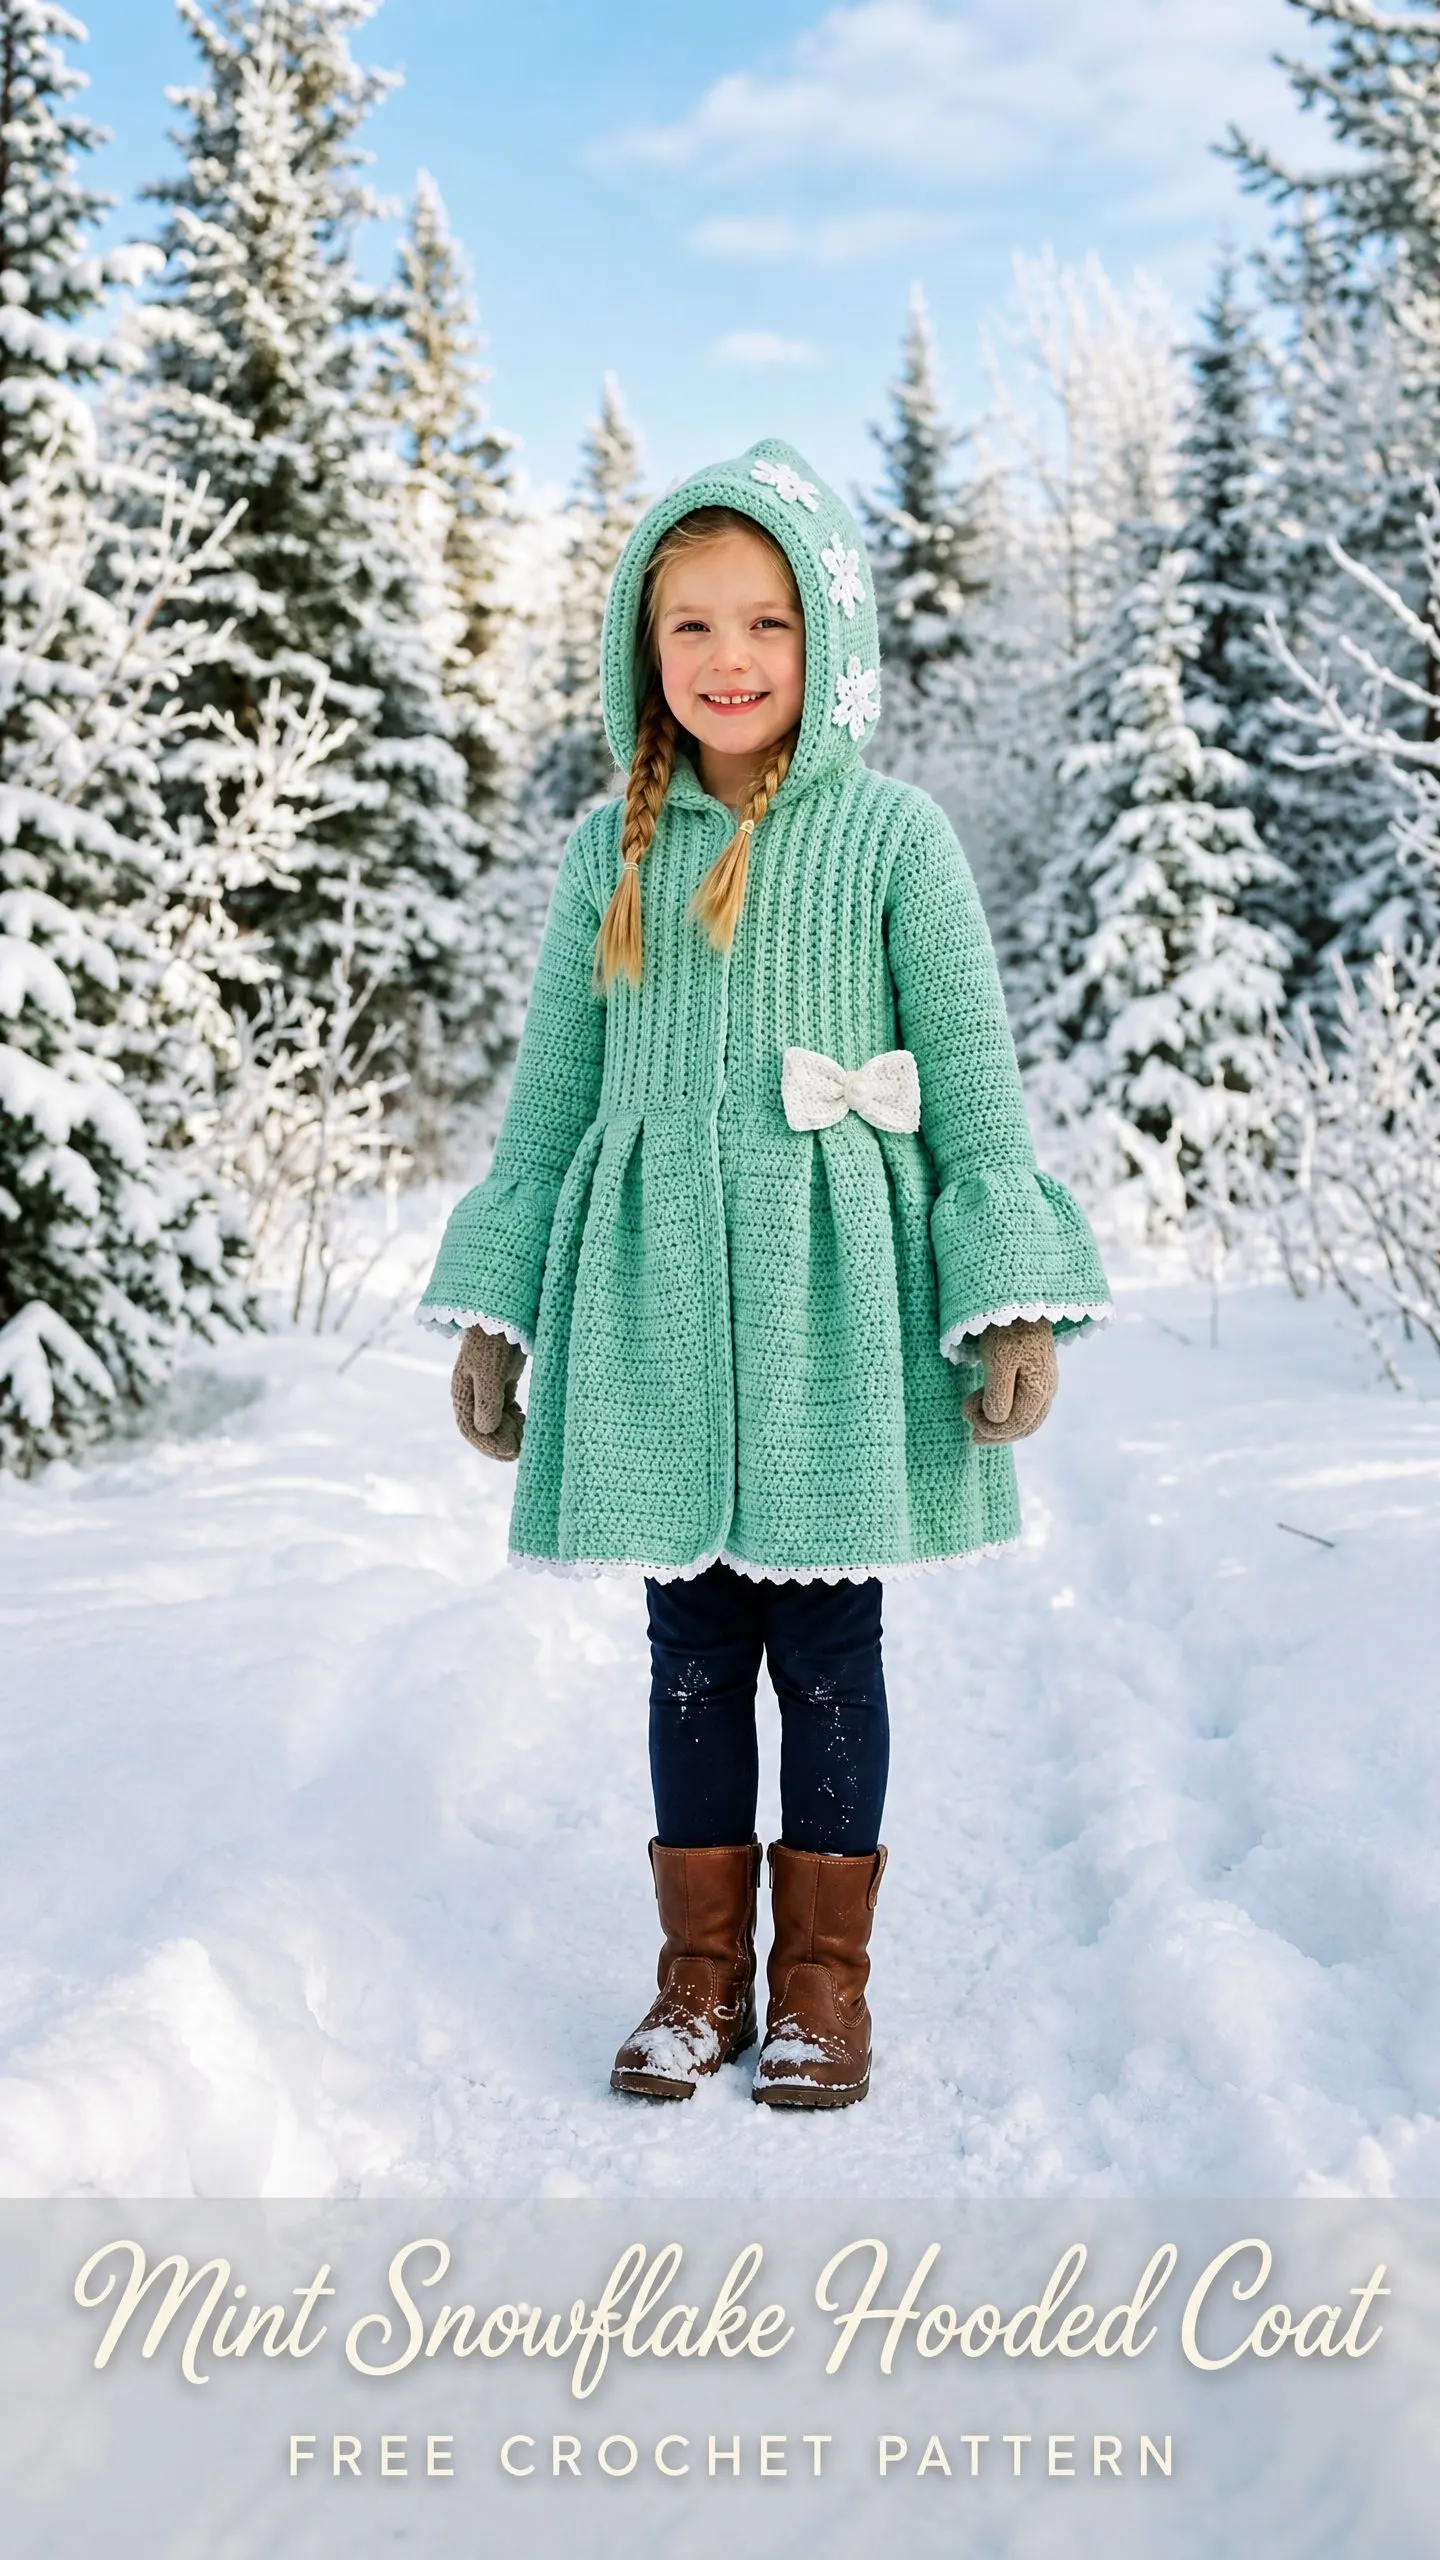
The construction method is actually what makes this manageable. You are not sewing a million pieces together at the end. Instead, you work from the top down, building the hood first, then the yoke, then the body, and finally picking up the sleeves. Each section flows naturally into the next. The raglan increases follow a simple rhythm. The flared skirt is just single crochet with occasional added stitches.
Whether you have tackled garments before or this is your first wearable project, I am going to walk you through every single step. We will cover the materials, break down the special stitches, and work through the pattern section by section. By the end, you will have a stunning mint green hooded coat with snowflake appliques that looks far more complicated than it actually is to make.
Why This Hooded Coat Pattern Works So Well
This coat has a lot going for it from a design perspective. The half double crochet ribbed texture on the yoke creates a stretchy, structured fabric that hugs nicely without being stiff. Working through the back loop only gives you those beautiful horizontal ridges that mimic knit ribbing. The skirt section switches to regular single crochet, which is slightly airier and allows the fabric to drape and swing naturally as the child moves.
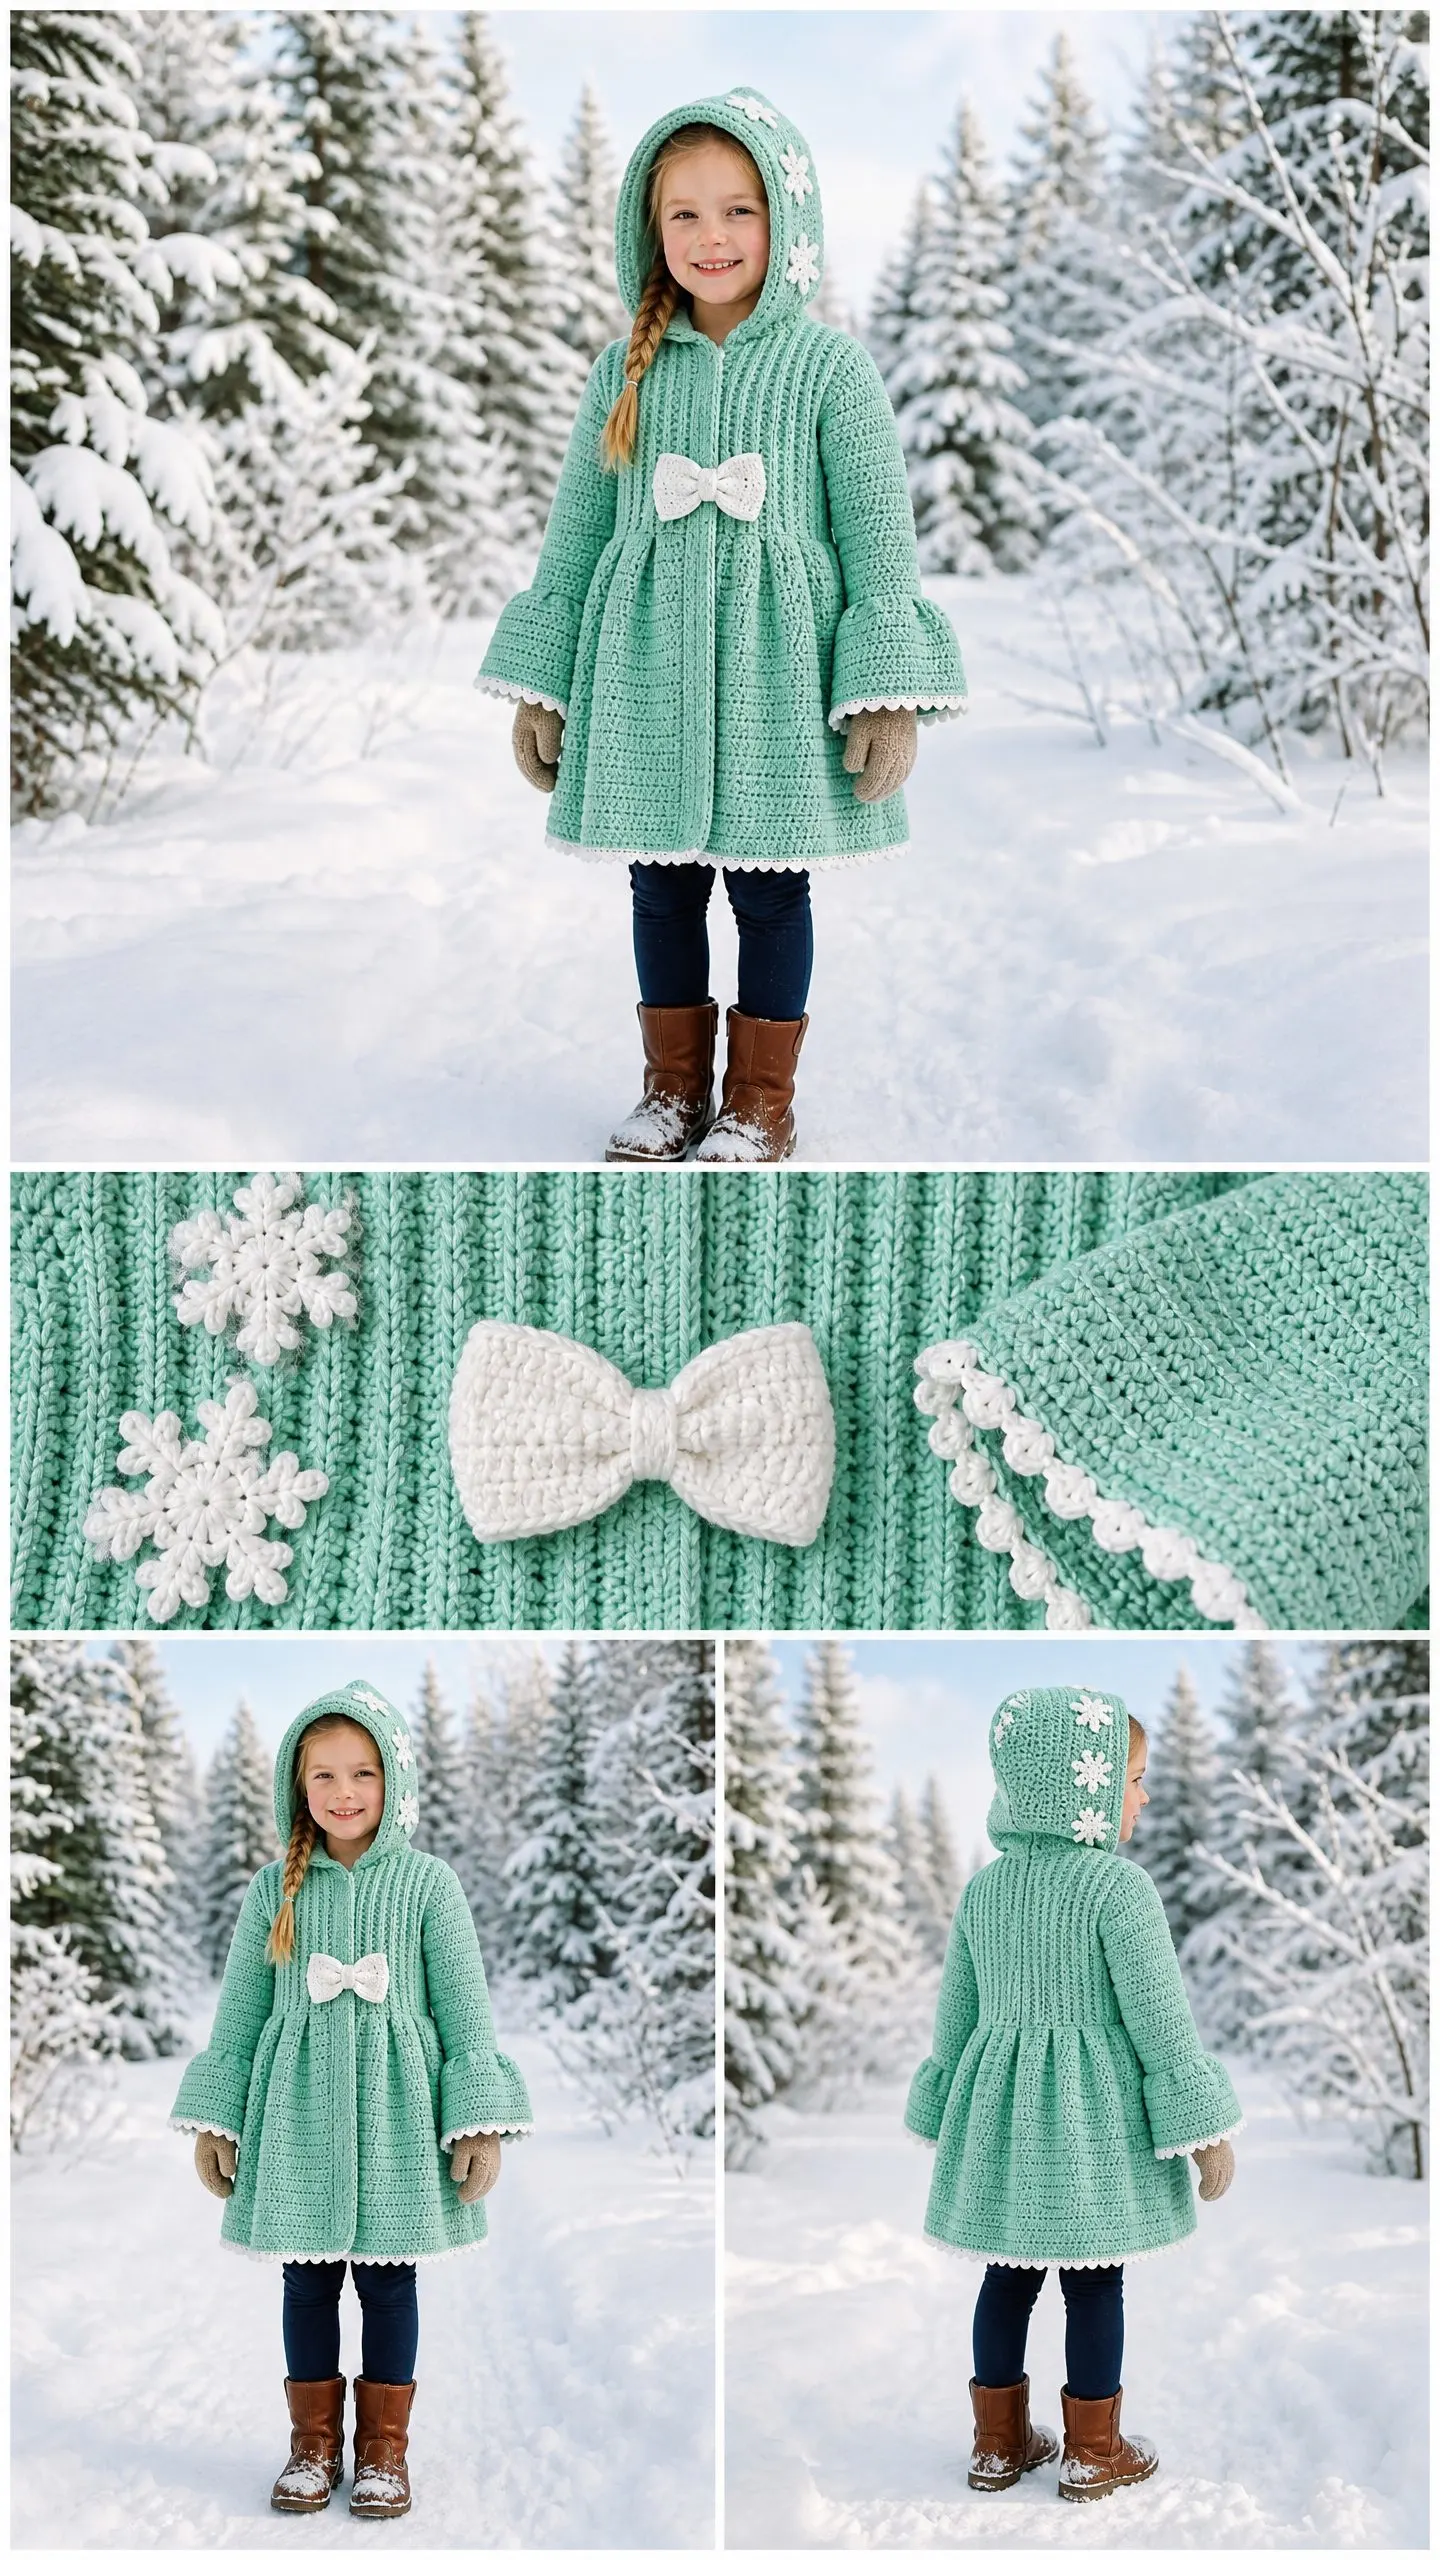
The bell sleeves are one of my favorite details. They start fitted at the upper arm and then flare dramatically at the cuff with a delicate picot edging in cream. The contrast edging ties everything together with the white crochet bow at center front and the snowflake appliques scattered across the hood.
Speaking of those snowflakes, they are worked separately and sewn on. This means you can make as many or as few as you want, position them exactly where they look best, and even add them to other projects later if you have extras.
Skill Level and Time Commitment
I would classify this pattern as intermediate to advanced. You should feel comfortable with:
If you are a confident beginner who has completed a few scarves, hats, and maybe a simple sweater, you can absolutely tackle this. Just take your time and read ahead before each section.
Time estimate: Plan for approximately 25 to 40 hours depending on the size you are making and how quickly you work. The snowflake appliques add another 2 to 4 hours on top of that. This is not a weekend project, but it is absolutely achievable over a few weeks of evening sessions.
Finished Measurements
The pattern includes four sizes ranging from toddler to school age:
Size 2T: Chest 22 inches, Length 18 inches, Sleeve 10 inches
Size 4T: Chest 24 inches, Length 20 inches, Sleeve 11 inches
Size 6: Chest 26 inches, Length 22 inches, Sleeve 12.5 inches
Size 8: Chest 28 inches, Length 24 inches, Sleeve 13.5 inches
Instructions are written for size 2T with larger sizes in parentheses separated by commas: 2T (4T, 6, 8). When only one number appears, it applies to all sizes.
Materials You Will Need
Yarn:
Hooks:
Notions:
Yarn Suggestions
Lion Brand Pound of Love works beautifully for this project. It is 100% acrylic with 1020 yards per 16 oz skein. One skein of mint plus a partial skein of cream covers all sizes, making this very economical.
Paintbox Yarns Simply DK held double is another excellent option. Holding two strands together gives you the correct gauge with lovely stitch definition.
Caron Simply Soft is incredibly soft against children’s skin and has nice drape for the skirt section. You will need 2 to 4 skeins in the main color and 1 skein in cream.
Whatever yarn you choose, make sure it meets gauge and is soft enough for a child to wear comfortably. Avoid yarns with more than 20 percent wool if the recipient has sensitivities.
Gauge
Getting gauge right is critical for a garment that needs to fit. Make a swatch before you start.
With J hook in single crochet (skirt stitch):
14 sc x 16 rows = 4 inches
With I hook in half double crochet through back loop only (yoke stitch):
13 hdc x 12 rows = 4 inches
If your swatch is too big, go down a hook size. Too small, go up a hook size.
Abbreviations and Stitch Definitions
Let me walk you through every abbreviation used in this pattern so there is no confusion.
blo = back loop only (insert your hook under just the back loop of the stitch instead of both loops)
ch = chain (the basic foundation stitch)
ch-sp = chain space (the gap created by a chain in the previous row)
dc = double crochet (yarn over, insert hook, pull up loop, yarn over, pull through 2 loops, yarn over, pull through remaining 2 loops)
hdc = half double crochet (yarn over, insert hook, pull up loop, yarn over, pull through all 3 loops at once)
hdc2tog = half double crochet 2 together, a decrease that turns 2 stitches into 1
inc = increase (work 2 stitches in the same stitch)
pm = place marker
rep = repeat
rnd = round
RS = right side (the public-facing side of your work)
sc = single crochet (insert hook, pull up loop, yarn over, pull through both loops)
sc2tog = single crochet 2 together, a decrease
sk = skip
sl st = slip stitch (insert hook, pull loop through stitch and loop on hook in one motion)
sm = slip marker (move the marker from the left needle to the right as you pass it)
st(s) = stitch(es)
t-ch = turning chain
WS = wrong side
yo = yarn over
Special Stitches Explained
Half Double Crochet Rib Stitch
This creates that beautiful stretchy ribbed texture on the yoke and hood. The secret is working every stitch through the back loop only.
1. Chain your foundation or join as instructed
2. For each stitch, insert your hook under only the back loop of the stitch below
3. Yarn over and pull up a loop (3 loops on hook)
4. Yarn over and pull through all 3 loops
That horizontal bar you leave unworked creates the raised ridge effect.
Picot Edging
This delicate trim appears at the sleeve cuffs and hem.
1. Work 1 single crochet in the indicated stitch
2. Chain 3
3. Slip stitch into the first chain you made (right at the base)
4. Work 1 single crochet in the next stitch
5. Repeat steps 2 through 4 across
Snowflake Applique
Use your G hook and cream yarn for these.
Round 1: Make a magic ring, chain 1, work 6 single crochet into the ring, join with a slip stitch to the first single crochet. (6 sc)
Round 2: Chain 6, slip stitch into the 2nd chain from hook, single crochet in next chain, half double crochet in next chain, double crochet in next chain, double crochet in next chain, slip stitch back into the base single crochet (this creates one spoke), chain 1, slip stitch into the next single crochet of Round 1. Repeat this sequence five more times to create 6 spokes total. Fasten off leaving a 12-inch tail for sewing.
Crochet Bow
With cream yarn and I hook, chain 21.
Row 1: Single crochet in 2nd chain from hook and in each chain across. (20 sc) Chain 1, turn.
Rows 2 through 6: Single crochet in each stitch across. (20 sc) Chain 1, turn.
Fasten off leaving a long tail. Fold the rectangle so both short ends meet at the center. Use the tail to wrap tightly around the center 6 to 8 times, cinch firmly, and knot securely at the back.
The Hood
The hood is worked flat as a single panel, then folded and seamed at the top.
Use your I hook and mint yarn.
Chain 29 (31, 33, 35).
Row 1 (WS): Half double crochet in 3rd chain from hook (this counts as your first hdc plus turning chain), half double crochet in each chain across. Chain 2, turn. (28, 30, 32, 34 hdc)
Row 2 (RS): Half double crochet through back loop only in each stitch across. Chain 2, turn. (28, 30, 32, 34 hdc)
Rows 3 through 34 (38, 42, 46): Repeat Row 2. (28, 30, 32, 34 hdc each row)
After your final row, do not fasten off. Fold the panel in half widthwise so the two short ends meet. Seam the top edge using a slip stitch seam with right sides together. Turn right side out.
The open long edge is now your face opening. The seamed edge is the crown. The bottom open edge will attach to the neckline later.
Optional face edge: With right side facing and J hook, work 1 round of single crochet evenly around the face opening at a rate of 1 single crochet per row end. Join with slip stitch and fasten off.
Checkpoint: Your finished seamed hood should measure approximately 8.5 (9, 9.5, 10) inches wide at the face opening and 11 (12, 13, 14) inches from crown to neck edge.
The Yoke
The yoke uses raglan construction, which means you will place markers at four points and increase at those points to create the sleeve and body shaping simultaneously.
Neckline Foundation
Chain 56 (60, 64, 68) with your I hook and mint yarn.
Row 1 (RS, Yoke Setup Row): Half double crochet in 3rd chain from hook and in each chain across. (55, 59, 63, 67 hdc including turning chain)
Place your markers to divide the sections:
Section counts for Row 1:
Right front: 5 (5, 6, 6) sts
Right sleeve: 8 (9, 9, 10) sts
Back: 28 (30, 32, 35) sts
Left sleeve: 8 (9, 9, 10) sts
Left front: 5 (5, 6, 6) sts
Raglan Increase Rows
On every right side row, you will increase at each of the four raglan marker points. This adds 8 stitches per right side row. Wrong side rows are worked even with no increases.
How to work the increase: Half double crochet through back loop only across to 1 stitch before the marker, work 2 hdc-blo in the next stitch, slip the marker, work 2 hdc-blo in the next stitch, continue across. Repeat at all four markers.
Row 2 (WS): Hdc-blo across, slipping markers as you reach them. No increases. (54, 58, 62, 68 sts)
Row 3 (RS, Inc): Work increases at all 4 markers. +8 sts. (62, 66, 70, 76 sts)
Row 4 (WS): Even. (62, 66, 70, 76 sts)
Continue this pattern of increasing on RS rows and working even on WS rows:
Row 5 (RS, Inc): 70, 74, 78, 84 sts
Row 6 (WS): Even
Row 7 (RS, Inc): 78, 82, 86, 92 sts
Row 8 (WS): Even
Row 9 (RS, Inc): 86, 90, 94, 100 sts
Row 10 (WS): Even
Row 11 (RS, Inc): 94, 98, 102, 108 sts
Row 12 (WS): Even
Row 13 (RS, Inc): 102, 106, 110, 116 sts
Row 14 (WS): Even
Row 15 (RS, Inc): 110, 114, 118, 124 sts
Row 16 (WS): Even
Row 17 (RS, Inc): 118, 122, 126, 132 sts
Row 18 (WS): Even
For sizes 6 and 8 continue:
Row 19 (RS, Inc): 134, 140 sts
Row 20 (WS): Even
For size 8 only:
Row 21 (RS, Inc): 148 sts
Row 22 (WS): Even
Section counts after all raglan rows:
Size 2T: Right front 13, right sleeve 24, back 44, left sleeve 24, left front 13. Total: 118 sts
Size 4T: Right front 13, right sleeve 25, back 46, left sleeve 25, left front 13. Total: 122 sts
Size 6: Right front 15, right sleeve 27, back 50, left sleeve 27, left front 15. Total: 134 sts
Size 8: Right front 16, right sleeve 30, back 56, left sleeve 30, left front 16. Total: 148 sts
Checkpoint: Your yoke should measure approximately 6 (6.5, 7, 7.5) inches from the neckline chain to the bottom.
Body Separation
Now you will separate the sleeves from the body. On the next right side row:
1. Work across right front stitches
2. Place right sleeve stitches on a stitch holder or scrap yarn
3. Chain 2 for the underarm
4. Work across back stitches
5. Place left sleeve stitches on holder
6. Chain 2 for the underarm
7. Work across left front stitches
Body stitch count after separation:
Size 2T: 13 + 2 + 44 + 2 + 13 = 74 sts
Size 4T: 13 + 2 + 46 + 2 + 13 = 76 sts
Size 6: 15 + 2 + 50 + 2 + 15 = 84 sts
Size 8: 16 + 2 + 56 + 2 + 16 = 92 sts
The Skirt
Switch to your J hook. The skirt is worked in single crochet with periodic increase rows to create the flared A-line shape.
Skirt Row 1 (RS): Single crochet in each stitch across. Chain 1, turn. (74, 76, 84, 92 sc)
Skirt Row 2 (WS): Single crochet across. Chain 1, turn. (74, 76, 84, 92 sc)
Skirt Row 3 (Increase Row, RS): Single crochet 3 (front band), single crochet across body increasing 8 stitches evenly spaced, single crochet 3 (front band). Chain 1, turn. (82, 84, 92, 100 sc)
Skirt Rows 4 through 5: Single crochet across even. Chain 1, turn.
Skirt Row 6 (Increase Row, RS): Add 8 more single crochet evenly. Chain 1, turn. (90, 92, 100, 108 sc)
Skirt Rows 7 through 9: Single crochet across even.
Skirt Row 10 (Increase Row, RS): Add 8 more single crochet evenly. Chain 1, turn. (98, 100, 108, 116 sc)
Skirt Rows 11 through 14: Single crochet across even.
Skirt Row 15 (Increase Row, RS): Add 8 more single crochet evenly. Chain 1, turn. (106, 108, 116, 124 sc)
Skirt Rows 16 through 20: Single crochet across even.
Skirt Row 21 (Increase Row, RS): Add 6 single crochet evenly. Chain 1, turn. (112, 114, 122, 130 sc)
Continue working even rows until your skirt reaches the target length:
Hem Edging
With J hook and cream yarn, attach at the bottom right front corner with right side facing.
Row 1: Chain 1. Work single crochet across entire bottom hem edge.
Row 2: Work picot edging across: single crochet in first stitch, (chain 3, slip stitch in first chain of chain-3, single crochet in next stitch) across. Fasten off.
The Sleeves
Return held sleeve stitches to your J hook. Attach mint yarn at center underarm chain with right side facing.
Round 1: Single crochet across underarm chain (2 sts), then single crochet in each held sleeve stitch around, join with slip stitch. (26, 27, 29, 32 sc)
Rounds 2 through 4: Single crochet in each stitch around. (26, 27, 29, 32 sc)
Round 5 (Decrease Round): Work sc2tog at each underarm point, single crochet remaining stitches. (24, 25, 27, 30 sc)
Continue working even rounds until sleeve measures approximately 7 (8, 9.5, 10.5) inches from underarm, leaving about 3 inches for the bell cuff.
Bell Cuff Increase Rounds
Round 1: Increase in every 3rd stitch around. (32, 33, 36, 40 sc)
Round 2: Single crochet around even.
Round 3: Increase in every 4th stitch around. (40, 41, 45, 50 sc)
Round 4: Single crochet around even.
Round 5: Increase in every 5th stitch around. (48, 49, 54, 60 sc)
Round 6: Single crochet around even.
Cuff Edging: With cream yarn, work picot edging around the cuff opening. Fasten off.
Repeat for second sleeve.
Checkpoint: Each sleeve should measure approximately 10 (11, 12.5, 13.5) inches from underarm to cuff tip.
Front Band and Neckline Finish
With right side facing and I hook, attach cream yarn at bottom right front edge.
Row 1: Work single crochet evenly up the right front edge, across any exposed neckline stitches, and down the left front edge. Chain 1, turn.
Row 2: Single crochet across even. Chain 1, turn.
Row 3: For the buttonhole side, work evenly spaced buttonholes: (sc 2, ch 1, sk 1) spaced 2 inches apart, 4 to 6 times. Single crochet remaining stitches. Chain 1, turn.
Row 4: Single crochet across, working 1 sc in each chain-1 space. Chain 1, turn.
Row 5: Single crochet across. Fasten off.
Sew snaps or buttons at marked positions.
Hood Attachment
Align the bottom edge of the hood with the neckline. With I hook and mint yarn, right side facing, slip stitch or single crochet the hood bottom edge to the neckline edge. Work through both layers. Fasten off and weave in ends.
Finishing Touches
Work 3 to 5 snowflake appliques. Sew 2 to 3 on the top and left side of the hood exterior. Add 1 to the lower right front of the coat if desired.
Attach the crochet bow at center front, approximately 1.5 inches below the neckline.
Weave in all ends. Wet block the finished coat by submerging in cool water, gently pressing out excess moisture, and pinning to a blocking mat. Allow to dry completely before wearing.
Care Instructions
For most acrylic yarns: machine wash cold on gentle cycle, lay flat to dry. Do not tumble dry on high heat or iron.
Size Customization Tips
To lengthen the coat, add more even rows to the skirt. Every 4 rows adds approximately 1 inch.
To widen the chest, add 6 to 8 stitches to the neckline foundation and add 1 to 2 additional raglan increase rows.
To lengthen sleeves, work additional even rounds before beginning the bell cuff increases.
I hope you love making this coat as much as I loved designing it. The combination of that soft mint color, the structured hood, and those sweet snowflake details creates something truly special for the little one in your life. If you found this pattern helpful, please save it to your Pinterest boards so you can find it easily when you are ready to start. And I would absolutely love to see your finished coats, so drop a comment below or tag me when you complete yours!
You Might Also Like
- Dusty Rose Bobble Purse Free Crochet Pattern
- Rose Romance Tote Bag Free Crochet Pattern
- Mint Green Lacy Baby Dress Free Crochet Pattern
- Golden Honey Highland Cow Amigurumi Free Crochet Pattern
