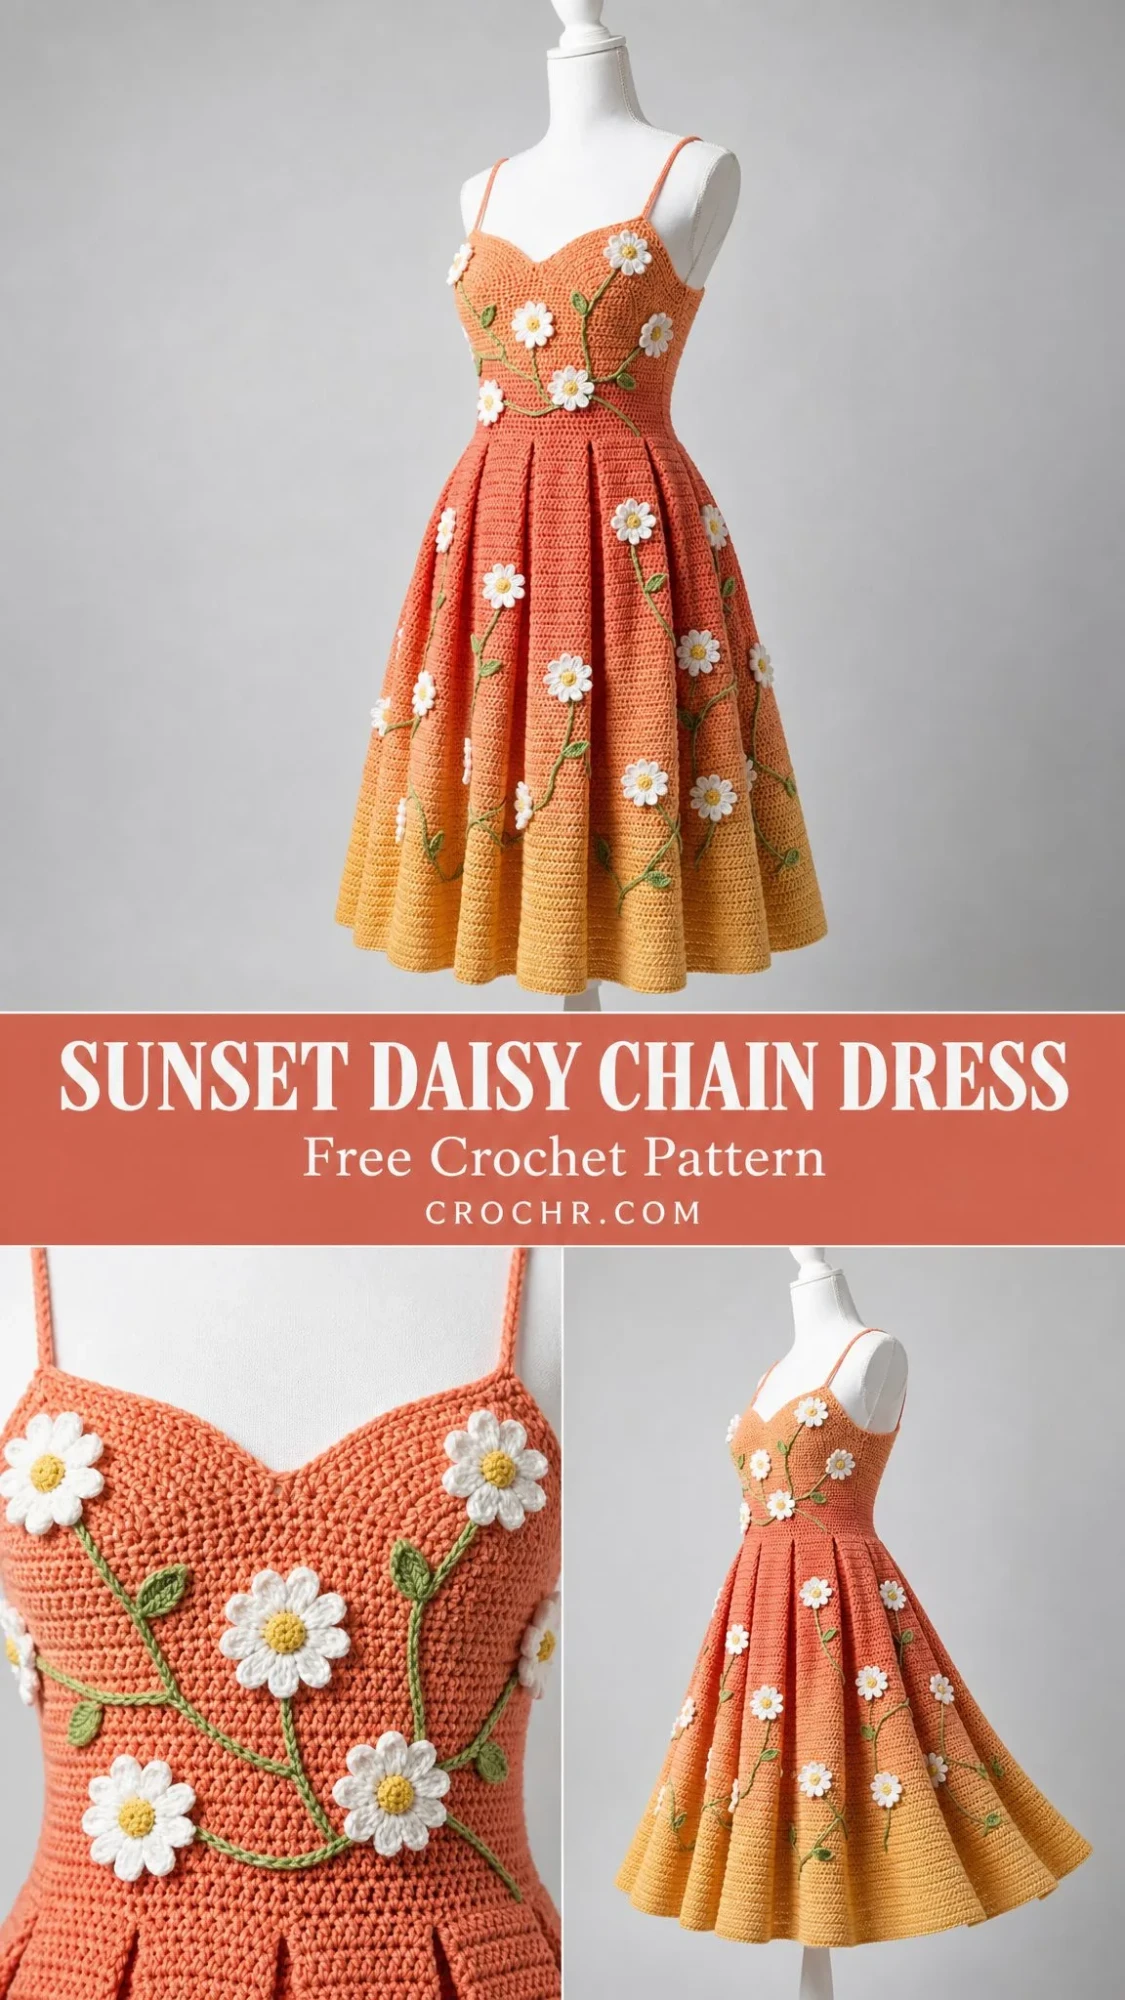
When I sat down to design this dress, I had a very specific vision in mind. I wanted something that felt like a warm summer evening, with colors that shifted from soft peach to coral to golden yellow, like the sky just before the sun dips below the horizon. The dimensional daisies and trailing vines needed to look organic and whimsical, not stiff or forced.
Get the Ad-Free PDF Pattern
You can find the free pattern below, or you can purchase the ad-free printable PDF from my shop.
Get the Printable PDF →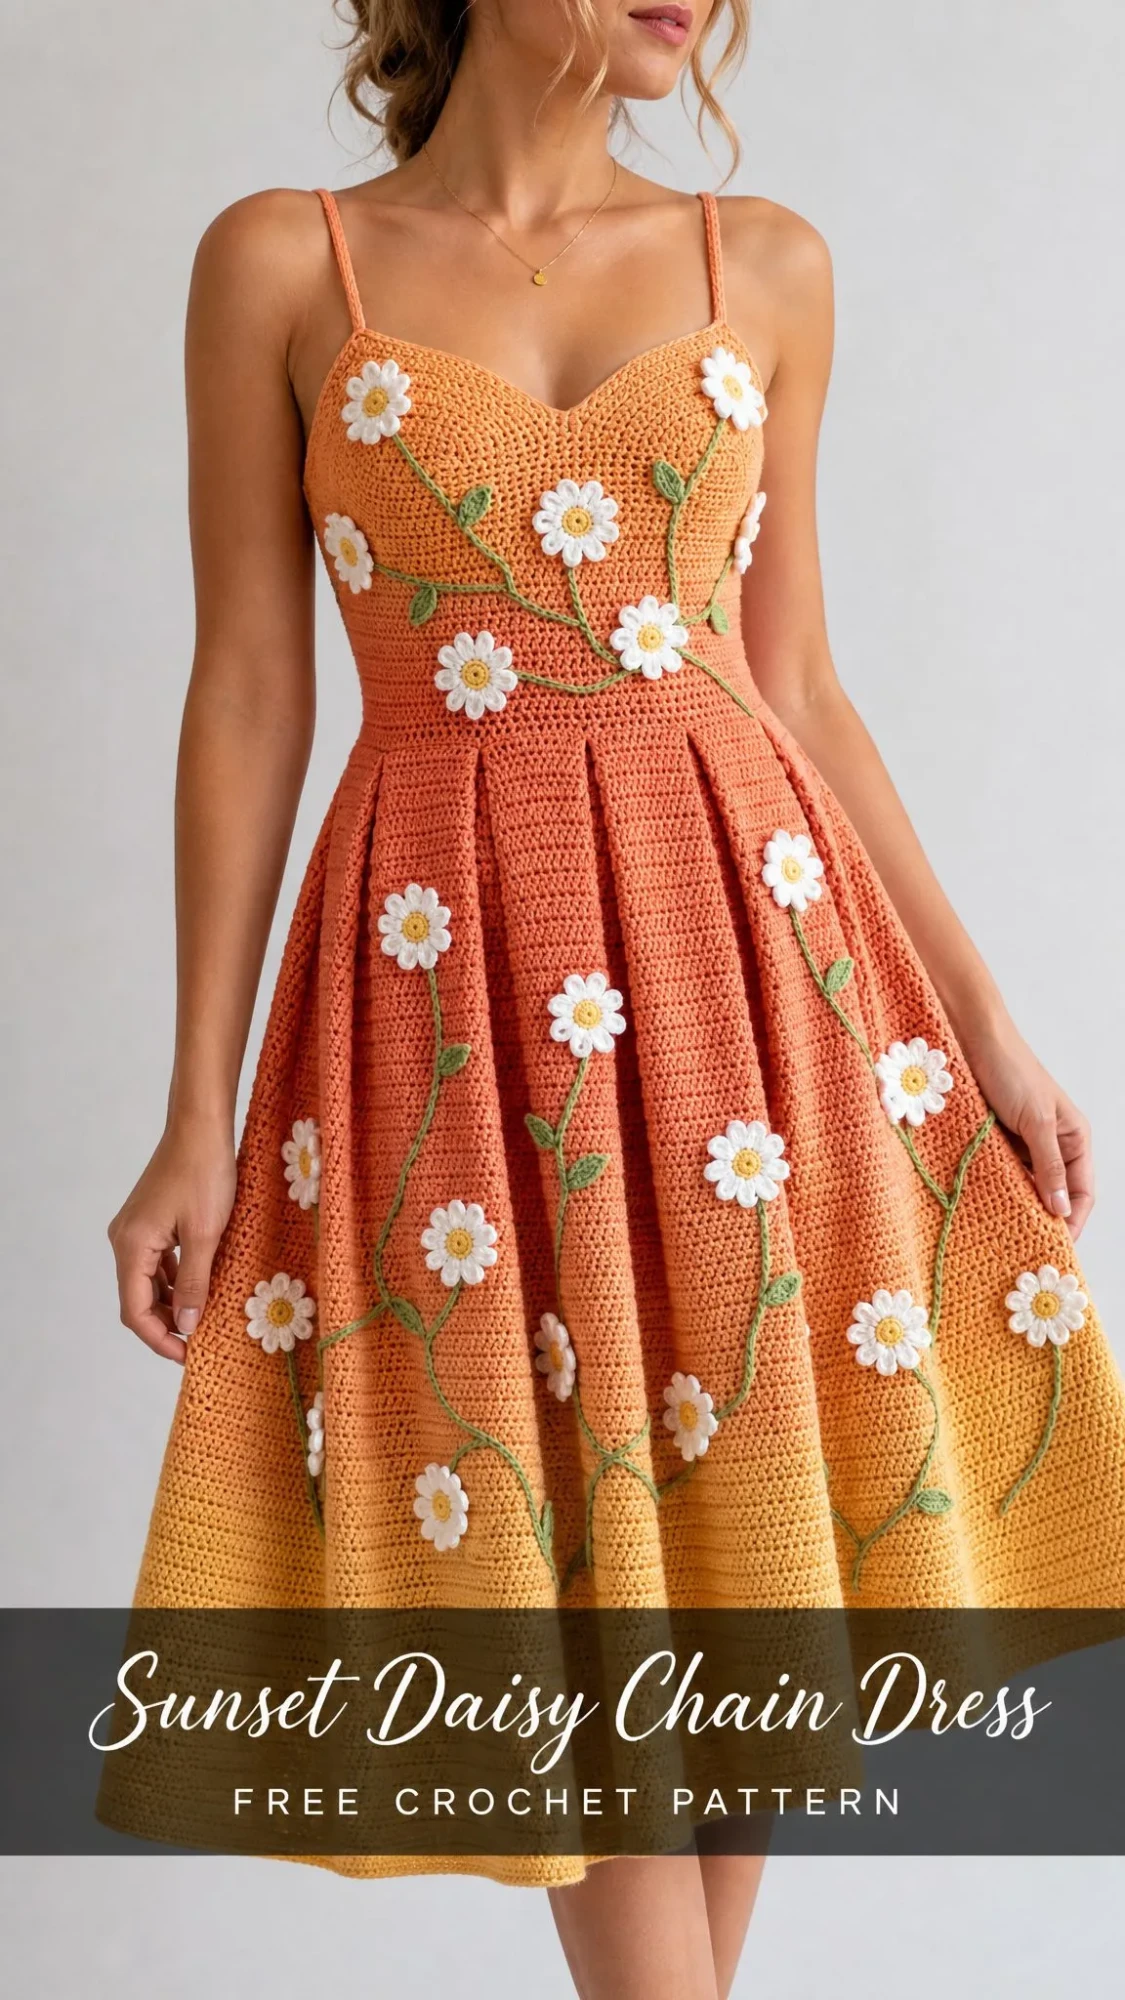
I spent hours figuring out how to make the bodice fitted but comfortable, how to get the skirt to flare just right, and how to attach those flowers so they would stay put through wear and washing. The sweetheart neckline took some trial and error, but once I got those cup shaping decreases just right, everything clicked into place.
I am SO thrilled with how this turned out. The ombre effect, the way the daisies cascade down the skirt, the soft drape of the cotton blend yarn. This is the kind of project that makes you fall in love with crochet all over again.
About This Crochet Pattern
The Sunset Daisy Chain Dress is an intermediate level project that combines a fitted sweetheart bodice with a gathered, flared skirt worked in the round. You will learn shaping techniques, joined rounds, applied motifs, embroidery style crochet vines, seaming, and fit adjustments. Expect to spend about 22 to 30 hours on this project, depending on how quickly you work the motifs and finishing details.
Construction overview: The front bodice and back bodice are worked flat from the waist up. Once both pieces are complete, you seam the sides and add a row of edging around the top. The skirt is then joined to the waist and worked downward in rounds, gradually increasing to create that beautiful flared shape. Straps, daisies, leaves, and vines are all added at the very end.
Finished Measurements
This pattern is designed for a 34 to 36 inch (86.5 to 91.5 cm) full bust and a 28 inch (71 cm) waist. The lace up back gap allows for adjustment, so the bodice is lightly fitted with about 0 to 2 inches (0 to 5 cm) of negative ease depending on how tightly you lace it.
Here are the key measurements for the finished dress:
Keep in mind that your individual results may vary depending on your yarn choice, tension, hook size, and finishing technique. You might need to make small adjustments to achieve the closest possible result to the finished project shown.
Materials You Will Need
Yarn: DK weight or light worsted cotton or cotton bamboo blend. The sample uses three sunset colors plus small amounts of white, yellow, and green for the daisies, centers, and vines.
Yardage breakdown:
Hooks:
Adjust your hook size as needed to match gauge.
Notions: Stitch markers, yarn needle, blocking pins, measuring tape, 6 small sew in snaps or an optional zipper, removable markers for motif placement.
Yarn Suggestions
If you need help choosing yarn, here are three options that work beautifully for this pattern:
1. Lion Brand 24/7 Cotton DK offers crisp stitch definition and sturdy bodice structure.
2. Paintbox Cotton DK has a broad color range that is perfect for sunset shading.
3. Hobbii Rainbow Cotton 8/6 provides smooth cotton with clear motif texture.
Substitution tip: Choose a smooth DK cotton or cotton blend with good body. Avoid very drapey yarn for the bodice unless you plan to add lining or firmer edging for support.
Gauge
Getting your gauge right is essential for this project because the fit depends on it.
Bodice gauge: 18 single crochet (sc) and 20 rows = 4 inches (10 cm) after blocking, using 4.0 mm hook.
Skirt gauge: 16 half double crochet (hdc) and 14 rounds = 4 inches (10 cm) after blocking, using 4.0 mm hook.
Swatch, wash or steam block, then measure. The finished measurements in this pattern depend on matching both stitch and row gauge. If your swatch is too small, go up a hook size. If it is too large, go down.
Stitch Guide and Abbreviations
Before you begin, familiarize yourself with these terms. All instructions are written in US crochet terminology.
UK crocheters: US sc = UK dc, US hdc = UK htr, US dc = UK tr.
Special Stitches
sc2tog (single crochet 2 together): Insert hook in next stitch, yarn over and pull up a loop. Insert hook in following stitch, yarn over and pull up a loop. Yarn over and pull through all 3 loops on hook. This decreases by 1 stitch.
Standing sc: Make a slip knot on hook, insert hook in indicated stitch, yarn over and pull up a loop, yarn over and pull through both loops. This lets you join yarn without a slip stitch.
Invisible join: Cut yarn and pull tail through final stitch. Thread needle under both loops of first stitch of round, then back down through center of final stitch. Tighten gently for a seamless finish.
Daisy petal: In indicated stitch: slip stitch, chain 4, double crochet in same stitch, chain 4, slip stitch in same stitch. One petal made.
Left Handed Note
Left handed crocheters may work the instructions as written. Your rounds will travel in the opposite direction, so place the first vine on the opposite side if you want the same visual flow when worn.
Front Bodice Instructions (Peach)
Pattern notes: Chain 1 to turn does not count as a stitch. Work flat rows in single crochet unless otherwise stated. Place a marker at the first and last stitch of shaping rows to help you track increases. Seam sides after both bodice pieces are complete. The back opening is finished after the skirt is attached.
Progress points to check your work: Front waist foundation should measure 14 inches (35.5 cm). Front bodice after Row 26 should measure about 5.2 inches (13 cm) tall and 16.7 inches (42.5 cm) wide.
Foundation: Ch 64.
Row 1: Sc in 2nd ch from hook and each ch across. (63 sc)
Rows 2 through 6: Ch 1, turn, sc across. (63 sc)
Row 7: Ch 1, turn, 2 sc in first st, sc across to last st, 2 sc in last st. (65 sc)
Row 8: Sc across. (65 sc)
Rows 9, 11, 13, 15, 17: Increase as Row 7. Your counts will be: 67, 69, 71, 73, 75 sc.
Rows 10, 12, 14, 16, 18 through 26: Sc across, keeping the count reached on the previous row. Row 26 ends with 75 sc.
Left Cup Shaping
Row 27: Ch 1, turn, sc in first 31 sts. Leave remaining stitches unworked. (31 sc)
Rows 28 through 32: Ch 1, turn, sc2tog at neck edge only, sc across. Your counts will be: 30, 29, 28, 27, 26 sc.
Fasten off.
Right Cup Shaping
Skip center 13 stitches on Row 26. Join peach at opposite outer edge for right cup. Work Rows 27 through 32 to mirror left cup, decreasing at neck edge only. You will end with 26 sc at the top.
Back Bodice Instructions (Peach)
Foundation: Ch 64.
Row 1: Sc in 2nd ch from hook and each ch across. (63 sc)
Rows 2 through 8: Ch 1, turn, sc across. (63 sc)
Rows 9, 11, 13: Ch 1, turn, 2 sc in first st, sc across to last st, 2 sc in last st. Your counts will be: 65, 67, 69 sc.
Rows 10, 12, 14 through 24: Sc across, keeping the count reached on the previous row. Row 24 ends with 69 sc.
Do not fasten off if you will continue directly to back top edging. Otherwise fasten off, leaving a long tail.
Side Seams and Straps
Block front and back lightly before seaming. With right sides together, seam side edges from waist to underarm, leaving top edges open. Add one row of sc around upper bodice, working 2 sc in each front cup corner and 3 sc for every 4 row ends along back edges.
Straps: With 3.5 mm hook, join at top of front cup. Chain 54 for a 12 inch (30.5 cm) strap. Slip stitch to matching back top edge, turn and slip stitch back across chain. Repeat for second strap. Adjust chain length before finishing to get the right fit for your body.
Skirt Instructions (Coral to Gold)
With RS facing and 4.0 mm hook, join coral at center back waist.
Rnd 1: Work 126 hdc evenly around waist seam, join. (126 hdc)
Rnd 2: Ch 1, 2 hdc in each st around, join. (252 hdc)
Rnds 3 through 15: Ch 1, hdc around, join. (252 hdc)
Rnd 16: [Hdc in next 13 sts, 2 hdc in next st] 18 times, join. (270 hdc)
Rnds 17 through 31: Hdc around. (270 hdc)
Color change: Change to golden yellow after Rnd 35, blending tails at side seam.
Rnd 32: [Hdc in next 14 sts, 2 hdc in next st] 18 times, join. (288 hdc)
Rnds 33 through 47: Hdc around. (288 hdc)
Rnd 48: [Hdc in next 15 sts, 2 hdc in next st] 18 times, join. (306 hdc)
Rnds 49 through 63: Hdc around. (306 hdc)
Hem Rnd 64: Sc around, invisible join. (306 sc)
Daisy Motifs
You will make 14 large daisies and 6 small daisies for this dress.
Large Daisy
With yellow, make a magic ring.
Rnd 1: Ch 1, 8 sc in ring, join. Fasten off.
Join white in any stitch.
Rnd 2: Work 1 daisy petal in each st around. (8 petals)
Fasten off with long tail for sewing.
Small Daisy
With yellow, make a magic ring, work 6 sc in ring, join. Join white and work 1 petal in each st. (6 petals)
Fasten off with long tail.
Leaves (Make 24)
With green and 3.5 mm hook, ch 7.
Sl st in 2nd ch, sc in next ch, hdc in next 2 ch, sc in next ch, sl st in last ch.
Working along opposite side of chain: sl st, sc, hdc in next 2 ch, sc, sl st.
Fasten off leaving tail for sewing.
Vine Placement and Assembly
Use green yarn and surface slip stitch or embroidery chain stitch to create curved vines before sewing daisies fully down. This gives you flexibility to adjust placement.
Placement guide:
Add leaves in pairs along the curves of the vines. Keep flowers away from side seams by at least 1 inch (2.5 cm) for comfortable wear.
Back Opening and Closure
Turn center back into a neat placket by working 2 rows of sc along each back edge, using a ratio of 3 sc for every 4 row ends. Sew 3 small snaps to the upper back opening or install an invisible zipper by hand.
For a decorative lace up version, work ch 3 loops every 1 inch (2.5 cm) along each back edge and lace with a 36 inch (91.5 cm) crochet chain.
Blocking and Finishing
Weave in all ends except motif tails used for sewing. Steam block bodice flat to measurements. Block skirt by pinning the hem into a smooth circle without stretching the waist. Shape daisies with fingers while damp or steamed.
Size Customization Tips
To widen waist: Add or remove stitches in multiples of 2 on both front and back foundations. Total waist stitches must be divisible by 18 if you want to keep the skirt increase intervals exactly as written. For a different waist count, place 18 increases evenly in Rnds 16, 32, and 48.
To change bust depth: Add or remove straight rows before cup shaping. Every 5 rows changes height by about 1 inch (2.5 cm).
To change skirt length: Add or remove plain hdc rounds before the hem. Every 3 to 4 rounds changes length by about 1 inch (2.5 cm).
To adjust straps: Pin dress on body or dress form before fastening strap to back. The strap should sit flat without lifting the front cup.
Troubleshooting Common Issues
Bodice too loose: Add firmer top edging, tighten back closure, or seam side edges 1/4 inch (6 mm) deeper.
Bodice too tight: Use lace up back loops, add a small crochet side gusset, or rework side seams with less seam allowance.
Skirt ruffles at waist: Steam block pleats downward. If the join is bulky, remove Rnd 2 and increase only every other stitch for a slimmer skirt.
Hem flips: Add one more sc round using a smaller hook and block flat.
Daisies curl: Steam gently and tack petals at two points each, leaving the edges dimensional.
Care Instructions
Hand wash cool with mild soap. Roll in a towel to remove excess water. Lay flat to dry, shaping skirt and motifs. Do not hang when wet. Store folded with tissue under the bodice to protect the straps and flowers.
Quick Reference Stitch Counts
Keep this handy while you work:
Front bodice counts: Foundation 63. Rows 7, 9, 11, 13, 15, 17 increase to 65, 67, 69, 71, 73, 75. Rows 18 through 26 stay 75. Each cup starts with 31 sts, then decreases to 26 sts at top.
Back bodice counts: Foundation 63. Rows 9, 11, 13 increase to 65, 67, 69. Rows 14 through 24 stay 69.
Skirt counts: Waist pickup 126. Rnd 2 expands to 252. Rnd 16 to 270. Rnd 32 to 288. Rnd 48 to 306. Hem stays 306.
Construction Order Summary
1. Crochet front bodice
2. Crochet back bodice
3. Block and seam sides
4. Work top edging and straps
5. Work skirt downward from waist
6. Make daisies and leaves
7. Add vines, sew motifs, finish closure, block
Thank you so much for choosing this Sunset Daisy Chain Dress crochet pattern. I hope you love making it as much as I loved designing it. If you create your own version, I would absolutely love to see it. Tag me on Instagram or share your photos on Facebook so I can admire your beautiful work.
If this pattern caught your eye, go ahead and save it to your Pinterest boards so you can find it when you are ready to start. And please drop a comment below if you make this dress. I read every single one and it always makes my day to hear how your projects turn out.
Want a Quick & Easy Printable Version?
Get a clean, beautifully formatted PDF of this pattern — easy to follow step by step, ready to print or save on any device. No scrolling, no distractions, just the pattern.
Get the Printable PDF →