This is one of the most STUNNING doll dress projects I have ever had the pleasure of creating. Seriously, if you want a pattern that looks like it belongs in a fairy tale but actually comes together in a weekend, you have found it.
Get the Ad-Free PDF Pattern
You can find the free pattern below, or you can purchase the ad-free printable PDF from my shop.
Get the Printable PDF →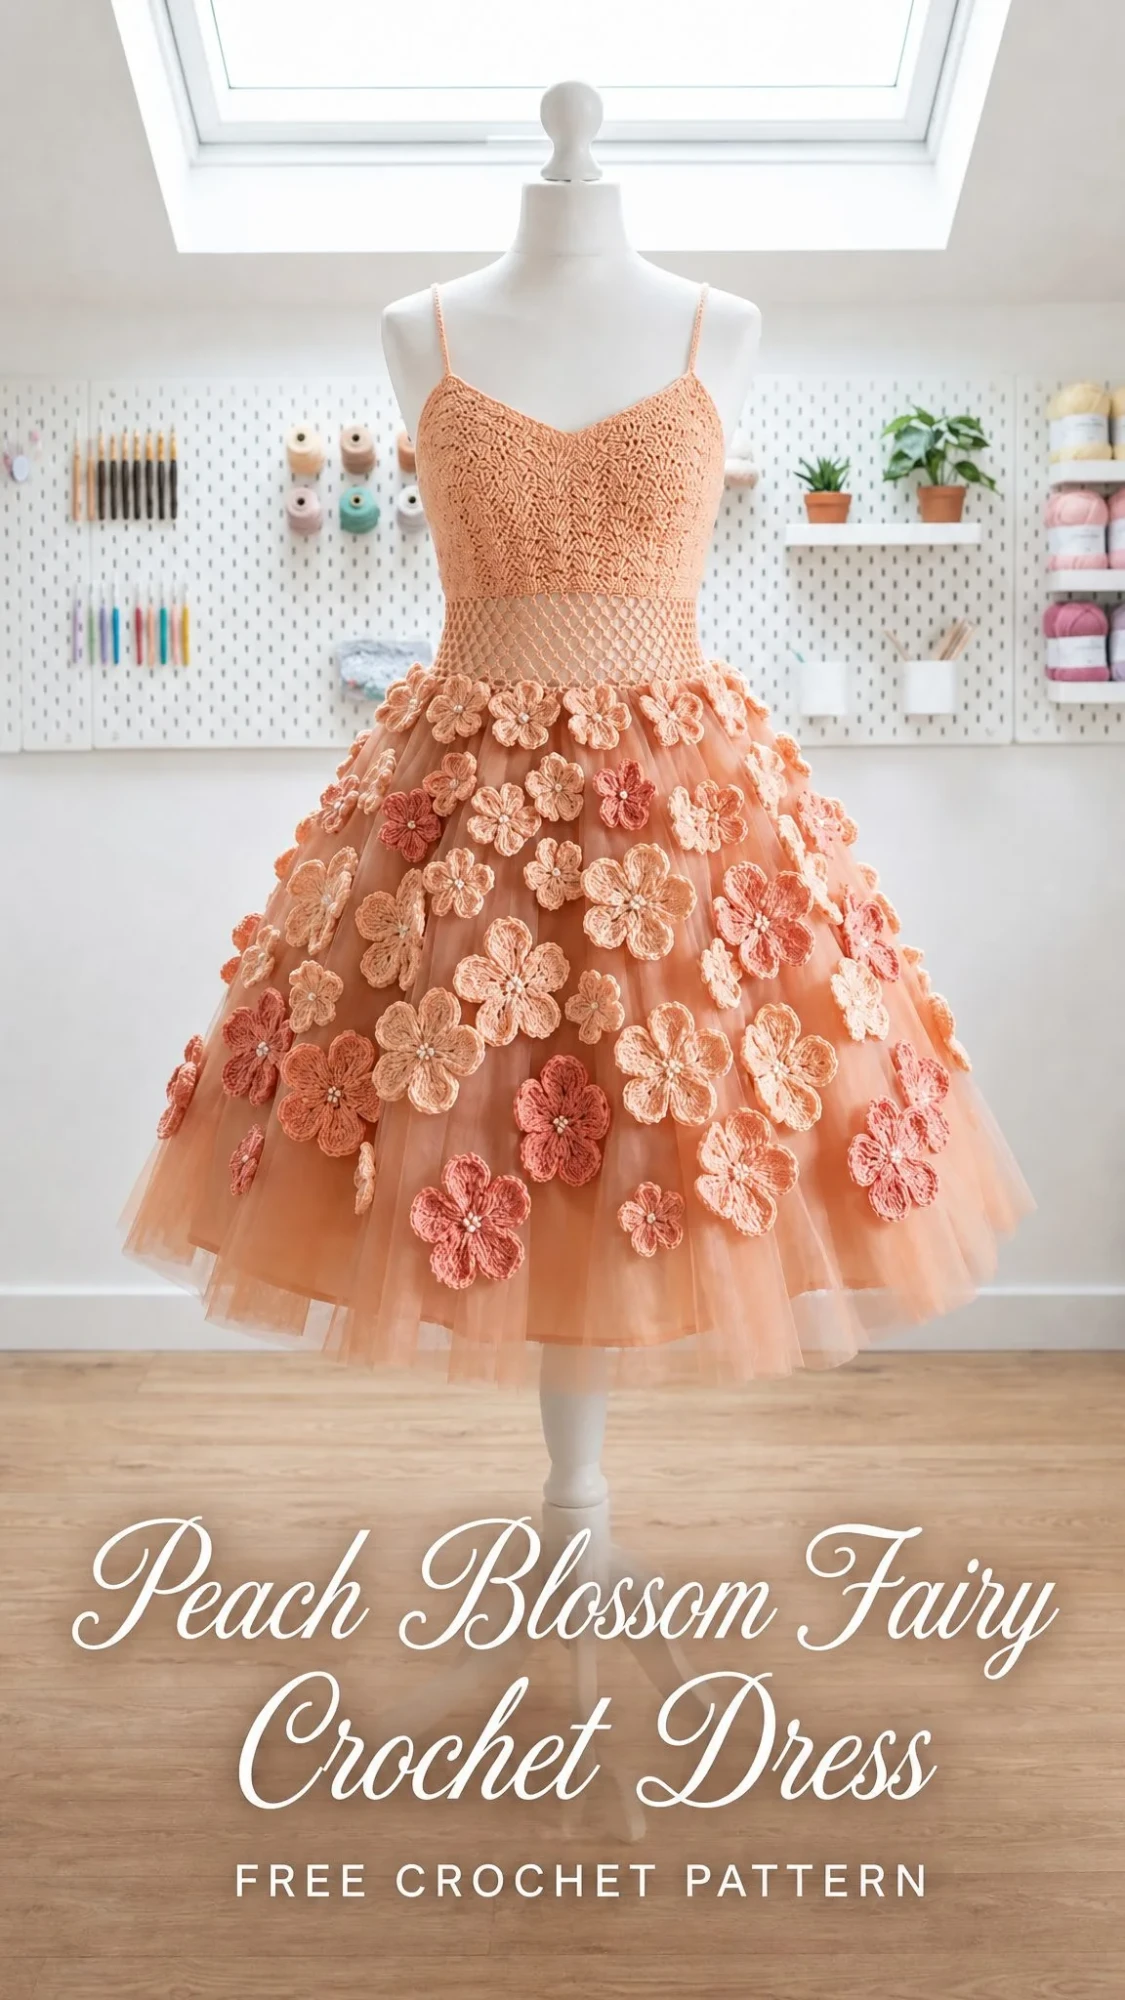
The Peach Blossom Fairy dress combines a textured crochet bodice with dreamy tulle and scattered flower appliques. The whole thing takes about 8 to 10 hours from start to finish. That includes all 24 blossoms and the finishing touches.
Whether you are making this for a keepsake doll, a gift, or just because you deserve to create something beautiful, this pattern delivers impressive results without requiring advanced skills. Let me walk you through every single step.
About This Peach Blossom Fairy Crochet Pattern
This dress fits a 30 cm (11.8 inch) doll and features three main components: a shaped single crochet bodice, an open mesh waistband, and a gathered tulle skirt covered in handmade blossom appliques. The finished dress measures approximately 6.6 inches (16.8 cm) from the top edge to the tulle hem, with a chest measurement of 7.25 inches (18.5 cm).
The skill level is intermediate. You will be working with a smaller gauge than typical projects, shaping the bodice with decreases, assembling tulle fabric, and creating dimensional flower embellishments. If you have completed a few amigurumi or garment projects before, you are absolutely ready for this.
Materials You Will Need
Gathering your supplies before starting makes this project flow so much smoother. Here is everything the pattern calls for:
Yarn:
The pattern suggests Paintbox Yarns Cotton DK, Stylecraft Naturals Organic Cotton DK, or Hobbii Friends Cotton 8/6. Choose a smooth cotton or cotton blend that gives firm stitch definition. This matters because a floppy fabric will not hold the bodice shape properly.
Tulle:
Hook:
Notions:
Substitution tip: If your fabric feels floppy, go down a hook size. If the bodice turns out too small, go up a hook size, but only after checking your gauge first.
Gauge Information
Getting gauge right on this pattern really matters because the dress needs to fit the doll properly. With your 2.75 mm hook, chain 31 and work single crochet in the second chain from hook and across for 30 single crochet stitches. Work 32 rows total.
Block lightly, then measure. Your center 24 stitches and 28 rows should measure 4 inches (10 cm).
Based on this gauge, your measurements will work out as follows:
Stitch Guide and Abbreviations
This pattern uses US crochet terminology. If you typically work from UK patterns, remember that US single crochet (sc) equals UK double crochet (dc), and US double crochet (dc) equals UK treble crochet (tr).
ch = chain
sl st = slip stitch
sc = single crochet (insert hook, yarn over, pull up a loop, yarn over, pull through both loops)
dc = double crochet (yarn over, insert hook, yarn over, pull up a loop, yarn over, pull through 2 loops, yarn over, pull through remaining 2 loops)
sc2tog = single crochet two stitches together (a decrease that turns 2 stitches into 1)
BLO = back loop only (insert your hook under just the back loop of the stitch instead of both loops)
st(s) = stitch(es)
rep = repeat
RS/WS = right side / wrong side
Textured bodice stitch: Work standard single crochet, inserting your hook under both loops unless BLO is specifically named. The compact cotton fabric creates that lovely beaded texture you see in the photos.
Invisible decrease: Insert your hook in the front loop of the next stitch and the front loop of the following stitch, yarn over, pull through both front loops, yarn over, pull through 2 loops. This creates a neater decrease than the standard method.
Blossom petal: In the indicated stitch or ring, work (slip stitch, chain 2, 3 double crochet, chain 2, slip stitch). This creates one rounded petal.
Bodice Instructions
Work the bodice flat in your peach cotton yarn. The chain 1 at the start of each row does not count as a stitch. Keep your first and last stitch firm because these edges become the back opening of the dress.
Foundation: Chain 45. Single crochet in the second chain from hook and in each chain across. Turn. (44 sc)
Row 1: Chain 1, single crochet in each stitch across. Turn. (44 sc)
Row 2: Chain 1, single crochet in each stitch across. Turn. (44 sc)
Row 3: Chain 1, sc2tog, single crochet in the next 40 stitches, sc2tog. Turn. (42 sc)
Rows 4 and 5: Chain 1, single crochet in each stitch across. Turn. (42 sc)
Row 6: Chain 1, sc2tog, single crochet in the next 38 stitches, sc2tog. Turn. (40 sc)
Rows 7 through 10: Chain 1, single crochet in each stitch across. Turn. (40 sc)
Checkpoint: Before moving on, measure your bodice. It should be about 7.3 inches (18.6 cm) across the top, 6.7 inches (16.9 cm) across the waist, and 1.4 inches (3.6 cm) tall before edging.
Back seam: With wrong sides together, seam only the lower 4 rows of the back edges. Leave the upper portion open so you can dress the doll later. You will add a snap or ribbon tie during finishing.
Waist Mesh and Straps
Join your peach yarn at the back waist. You will now work in joined rounds around the 40 stitch lower bodice edge.
Round 1: Chain 1, single crochet in each waist stitch around. Join with a slip stitch to the first single crochet. (40 sc)
Round 2: Chain 4 (this counts as double crochet plus chain 1), skip the next stitch. Double crochet in the next stitch, chain 1, skip the next stitch. Repeat from to around. Join to the third chain. (20 dc + 20 chain 1 spaces)
Round 3: Chain 4, skip the next chain 1 space. Double crochet in the next double crochet, chain 1, skip the next chain 1 space. Repeat from to around. Join. (20 dc + 20 chain 1 spaces)
Round 4: Chain 1, work 2 single crochet in each double crochet and 2 single crochet in each chain 1 space around. Join. (80 sc)
Making the Straps (Make 2)
Mark the front top edge 10 stitches in from each side. Join your yarn at the first mark, chain 23, single crochet in the second chain from hook and in each chain back to the bodice (22 sc total). Sew the strap to the matching back top edge. Repeat for the second strap.
Top edging: Single crochet evenly around the upper bodice and straps, placing 1 single crochet in each top stitch and 1 single crochet in the side of each strap stitch. Keep the edging flat and do not force extra stitches.
Checkpoint: Your waist mesh should sit open and airy, with 20 vertical mesh columns visible. The skirt base should have 80 single crochet stitches for gathering and flower spacing.
Tulle Skirt Assembly
Cut two peach tulle strips, each measuring 5 x 32 inches (13 x 81 cm). Layer them together to create fullness.
Sew a long running stitch about 1/4 inch (6 mm) from one long edge. Gather the fabric evenly until the top edge matches your 80 single crochet skirt base.
Pin the gathered tulle inside the crochet waist so the tulle seam sits just below Round 4. Sew through the base of the 80 single crochet stitches, catching the tulle gathers every 2 to 3 stitches. Overlap the tulle ends at center back by about 1/2 inch (1.3 cm) and trim the hem into a soft bell shape.
Optional crochet hem veil: If you want an extra decorative touch, join peach cotton at center back of Round 4. Chain 5, skip 3 single crochet, slip stitch in the next single crochet. Repeat from to around. This creates 20 loops. Fasten off and weave in your ends.
Tulle shaping tip: Steam lightly from a distance or finger press the layers. Never place a hot iron directly on tulle. The skirt should flare softly rather than hang straight down.
Blossom Appliques
Make 24 blossoms total: 14 in peach, 8 in coral, and 2 mixed color feature blossoms. Use your 2.75 mm hook and leave 8 inch (20 cm) tails for sewing.
Small Blossom (Make 8)
Create a magic ring, chain 1. Work 5 single crochet into the ring, pull snug, slip stitch to the first single crochet. Work one blossom petal in each single crochet (remember, a blossom petal is: slip stitch, chain 2, 3 double crochet, chain 2, slip stitch). Fasten off. Add a pearl bead to the center while sewing.
Large Blossom (Make 16)
Create a magic ring, chain 1. Work 6 single crochet into the ring, pull snug, slip stitch to the first single crochet.
Round 2: Work 2 single crochet in each stitch around. Join. (12 sc)
Round 3: Blossom petal in the next stitch, slip stitch in the next stitch. Repeat from to around. (6 petals)
Fasten off.
Mixed Feature Blossoms (Make 2)
Work the large blossom center in peach, then change to coral for the petal round.
Blossom Placement Guide
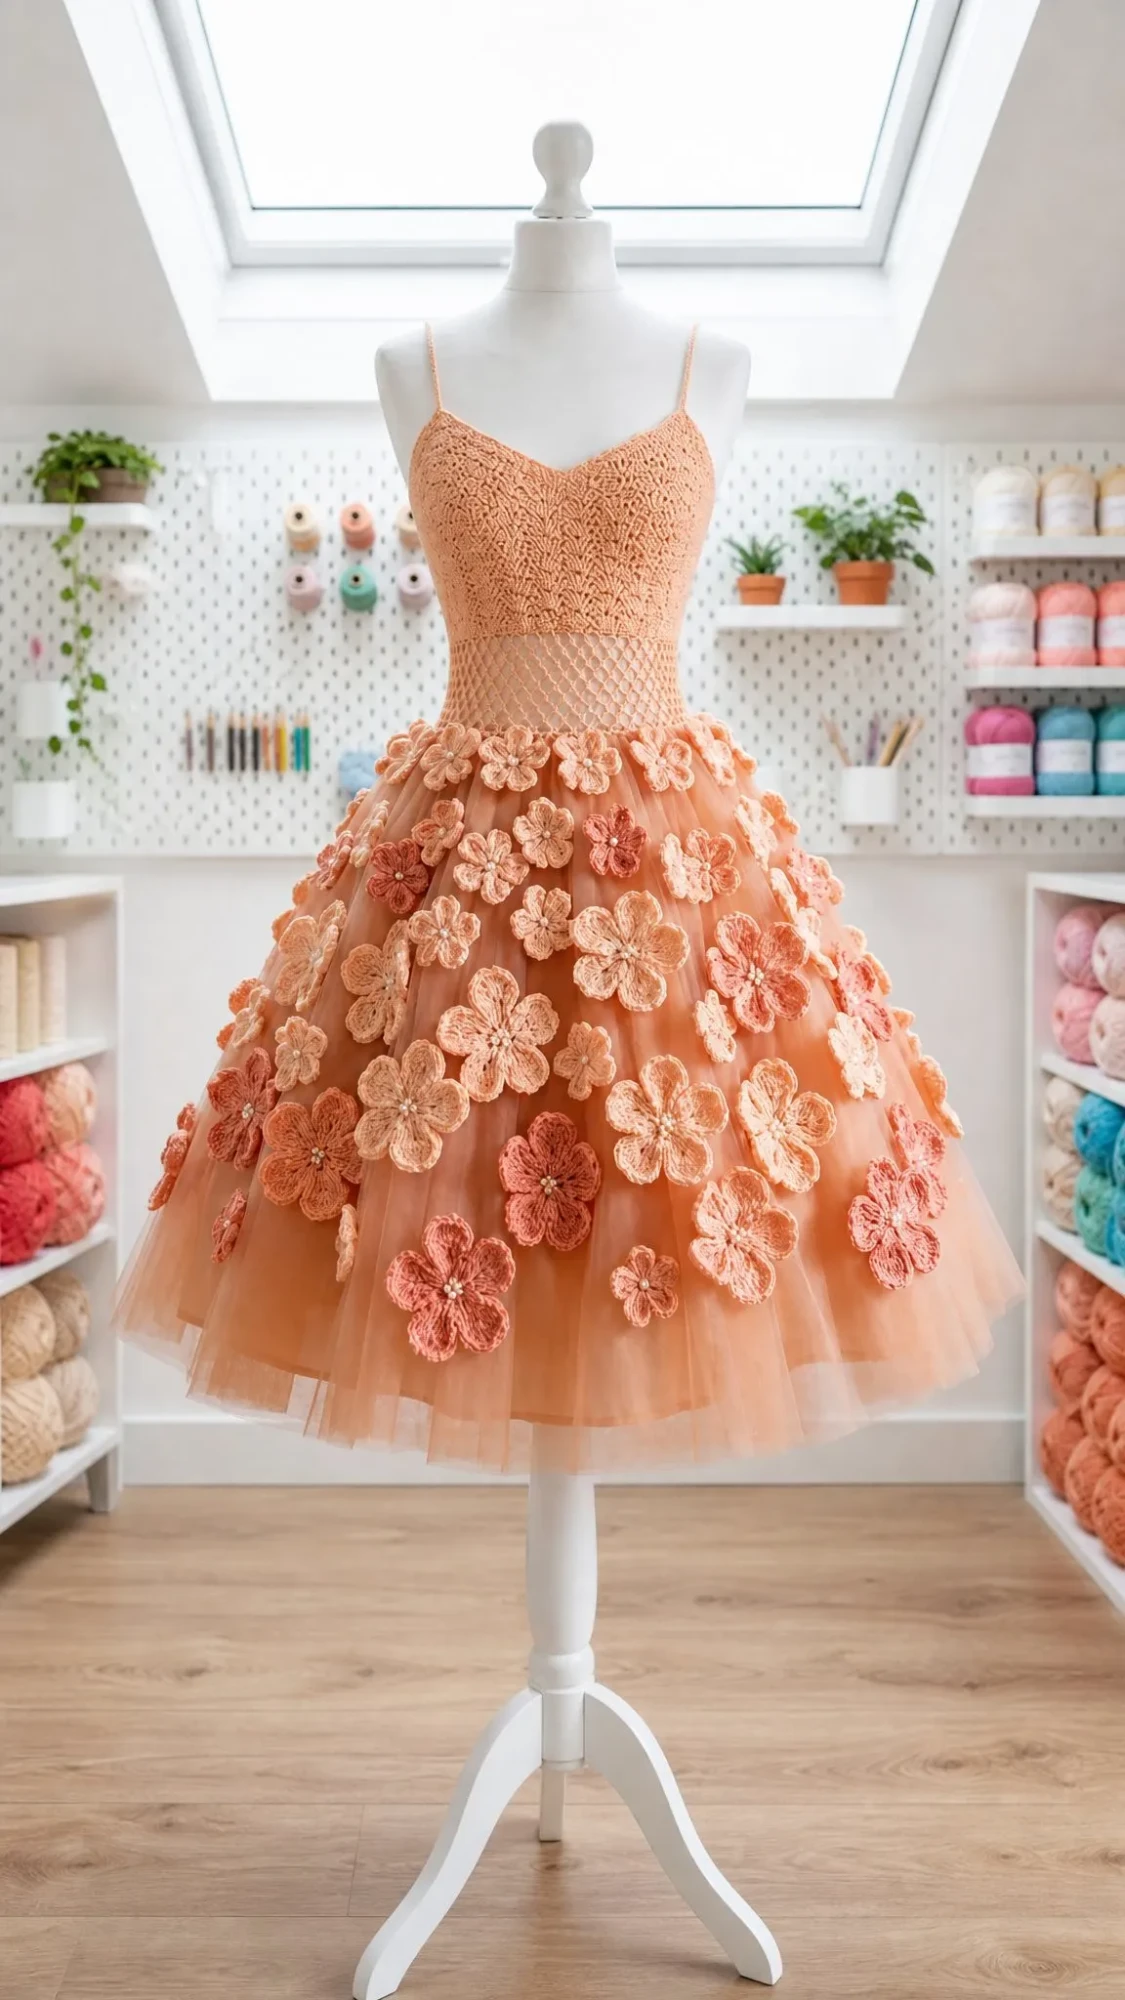
Place 10 blossoms around the front of the skirt, 6 around the back, and 4 on each side. Position larger blossoms lower on the tulle and smaller blossoms closer to the waist. Keep the back overlap area clear so the dress opens easily for dressing the doll.
Assembly and Finishing
Step 1: Weave in all your crochet ends before attaching the tulle. Leave the flower sewing tails intact for now.
Step 2: Sew the lower back seam of the bodice if you have not already. Add one small snap at the upper back opening, or thread a ribbon tie through the upper edging.
Step 3: Attach the tulle evenly around the 80 single crochet skirt base. Check that the tulle hangs level before knotting your sewing thread.
Step 4: Pin all your blossoms in place first. Sew each through the flower center and one petal edge so it stays dimensional but secure.
Step 5: Sew a pearl bead to each flower center. Knot on the inside of the tulle or between the tulle layers to hide your thread.
Step 6: Lightly block the bodice only. Shape the straps and waist mesh with pins and allow to dry flat.
Final checkpoint: The dress should slip over your doll from the feet upward, close at the upper back, and sit with the mesh band at the natural waist. Finished length is about 6.6 inches (16.8 cm).
Fit Customization and Sizing Adjustments
Making it larger or smaller: Add or subtract 4 foundation chains for approximately 0.67 inches (1.7 cm) of chest change at the stated gauge. Keep your starting count even. For every 4 stitches added at the upper edge, keep the same decrease rows and finish with 4 more waist stitches. Increase the skirt base by working 2 single crochet in every waist stitch on Round 4.
Adjusting strap length: Add or remove chains before crocheting back along the strap. A 23 chain strap gives about 3.7 inches (9.4 cm) before sewing.
Care Instructions
Spot clean with cool water and mild soap. Gently squeeze in a towel to remove excess water. Reshape the tulle by hand and dry flat. Avoid machine washing after the beads are attached.
Troubleshooting Common Issues
Bodice too tight: Use a larger hook or add 4 foundation chains. Always match gauge before resizing.
Waist mesh twists: Join each round carefully and count your 20 double crochet columns before moving on to the next round.
Skirt looks sparse: Add a third 5 x 32 inch tulle layer, or gather your two layers more tightly.
Flowers droop: Add a second tiny tack stitch at one petal edge and keep the center bead snug.
Final Thoughts on the Peach Blossom Fairy Crochet Dress Pattern
This dress truly is something special. The combination of the textured crochet bodice, airy mesh waistband, and fluffy tulle skirt scattered with dimensional blossoms creates a piece that looks like it took weeks to make. But you and I know the truth: it is totally achievable in a weekend.
I hope you love making this Peach Blossom Fairy dress as much as I enjoyed designing it. The little details, like the pearl bead centers and the mix of peach and coral flowers, really bring this piece to life. Every dress will have its own personality based on your flower placement and color choices.
Thank you so much for choosing this pattern for your next project. If you make this dress, I would absolutely love to see it! Tag me on Instagram or share a photo on Facebook. Seeing your creations genuinely makes my day.
If you want to come back to this Peach Blossom Fairy crochet pattern later, go ahead and save it to your Pinterest boards now. And please drop a comment below when you finish yours. I cannot wait to hear how it turns out for you!
Want a Quick & Easy Printable Version?
Get a clean, beautifully formatted PDF of this pattern — easy to follow step by step, ready to print or save on any device. No scrolling, no distractions, just the pattern.
Get the Printable PDF →