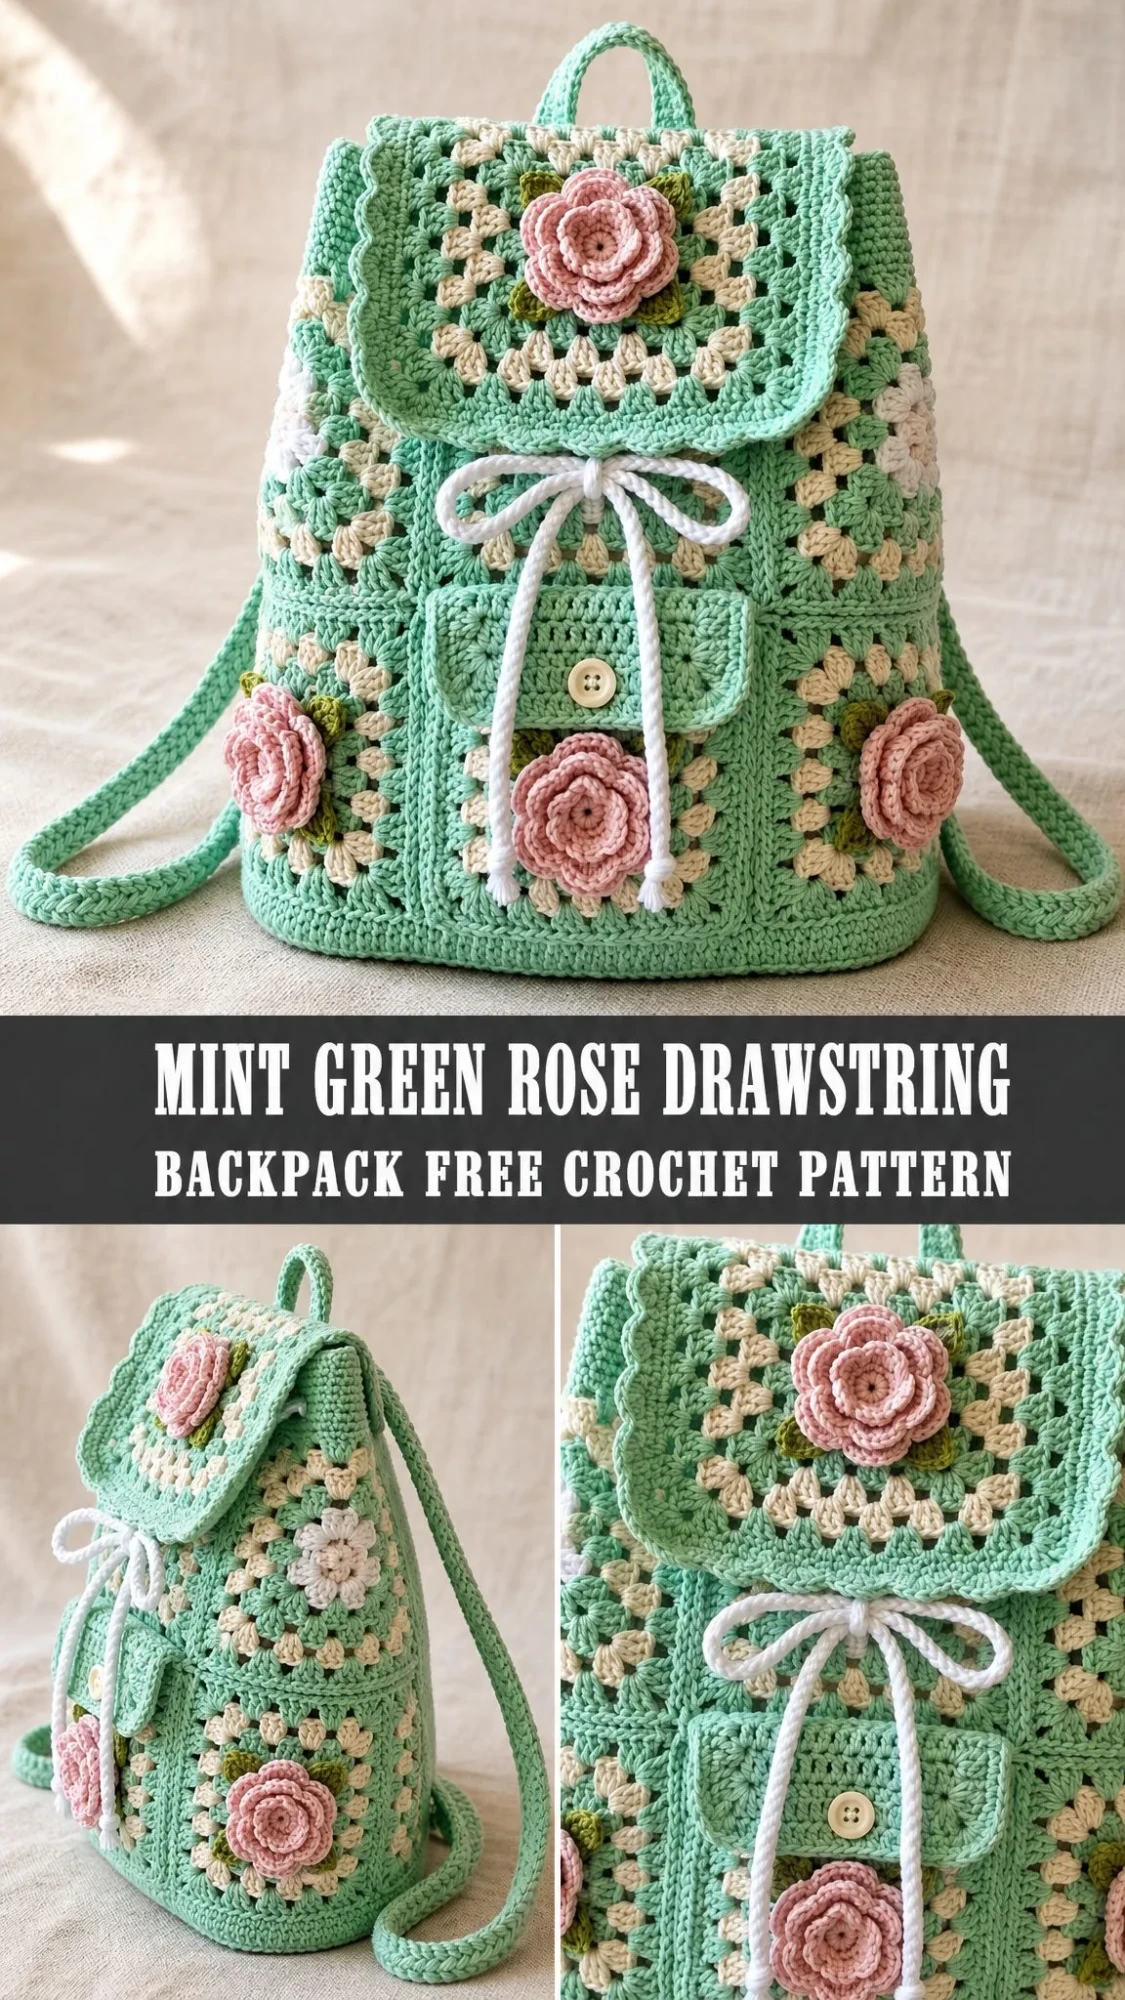
This is a granny square backpack with a drawstring closure, scalloped flap, front pocket, and rose appliques. It uses double crochet clusters, single crochet, and I-cord techniques. The finished bag measures 9.5 inches wide by 11 inches tall by 4.75 inches deep. If you can make a basic granny square and follow assembly steps, you can make this backpack.
Get the Ad-Free PDF Pattern
You can find the free pattern below, or you can purchase the ad-free printable PDF from my shop.
Get the Printable PDF →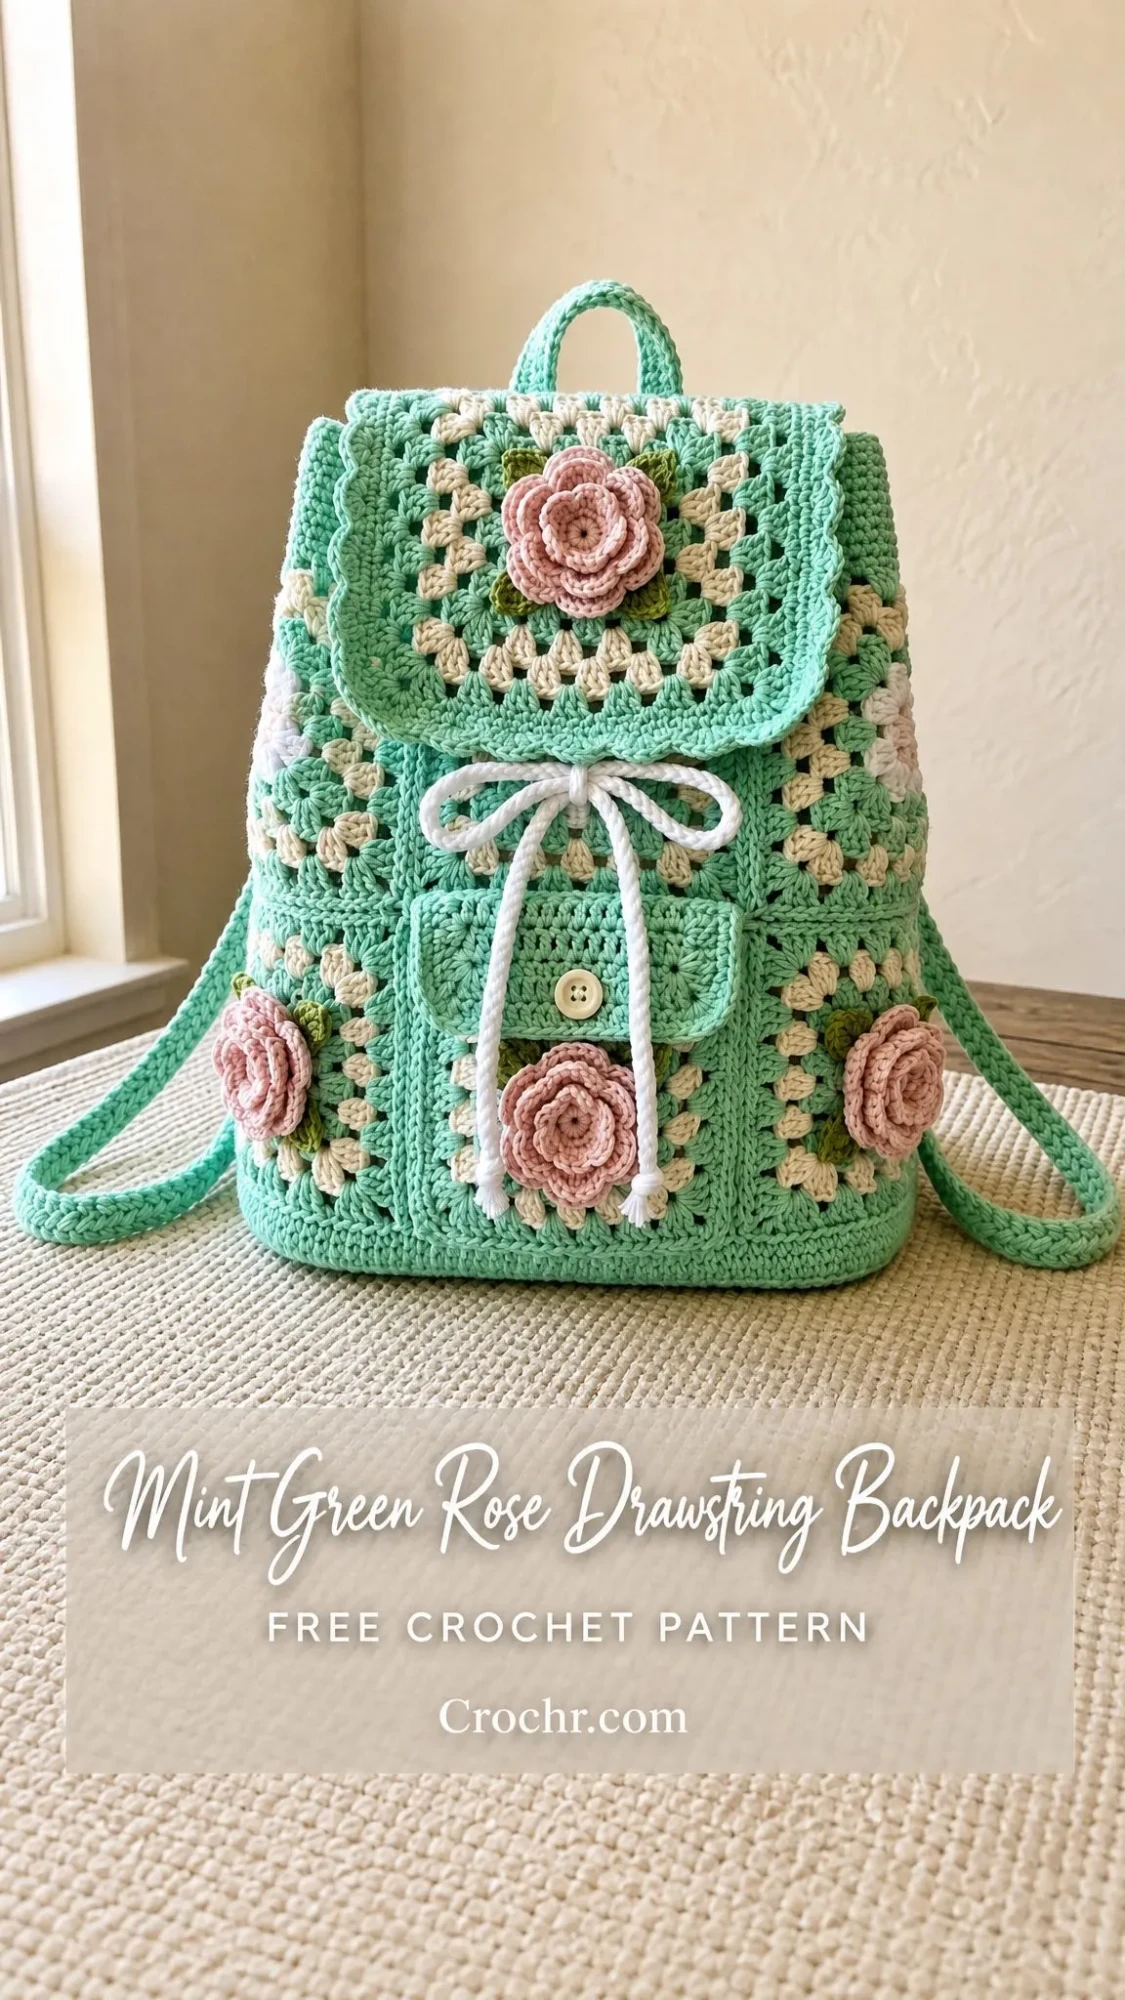
The construction breaks down into manageable pieces. You will make twelve granny squares, join them into panels, add a solid base, create straps and a drawstring channel, then finish with decorative roses and leaves. The pattern is rated intermediate because it combines several techniques, but none of them are difficult on their own.
Why You Will Love This Backpack Pattern
This backpack has that vintage handmade charm that never goes out of style. The granny squares create a lightweight but sturdy structure, and the cotton yarn gives it body without making it stiff. The roses add a feminine touch, but you could easily leave them off for a simpler look.
I love that this bag is practical too. The drawstring keeps everything secure, the front pocket holds small items, and the shoulder straps are adjustable based on how long you make your I-cords. It works for kids or adults depending on your strap length.
The mint green and cream color combination feels fresh and springtime ready, but you could swap in any colors that make you happy. Navy and white would look classic. Mustard and rust would give it a boho vibe. The pattern is flexible enough to make it your own.
Materials You Will Need
Before you start, gather everything so you can work without interruptions.
Yarn (Worsted or Aran Weight Cotton):
Recommended Yarn Brands:
Hook:
Notions:
Choose a smooth worsted or aran weight cotton that gives firm fabric. Acrylic can work, but cotton gives better structure and holds its shape over time. Buy extra mint yarn if you plan to lengthen the straps or add a lining seam allowance.
Gauge
Getting gauge right matters for this project because you need all your squares to match.
Main granny square after Round 6 and light blocking: 4.75 inches or 12 cm square
Solid single crochet: 17 stitches and 18 rows equals 4 inches or 10 cm
Make a test square before starting. If your square is larger than 4.75 inches, try a smaller hook. If it is smaller, try a larger hook. Match gauge before starting the full project.
Abbreviations and Special Stitches
Let me walk you through the abbreviations and special techniques you will use throughout this pattern.
Standard Abbreviations:
Special Stitches:
Granny Cluster: Work 3 double crochet stitches in the indicated chain space. This is the building block of every granny square in this pattern.
Join-as-you-seam: Hold pieces with right sides together. Slip stitch through back loops only. This keeps seams flexible and neat.
I-cord: Chain 3. Pull up a loop in the 2nd and 3rd chain from hook. Remove 2 loops from hook, chain 1 with the loop on hook, replace the next loop and chain 1, replace the last loop and chain 1. Repeat from the beginning to your desired length. This creates a rounded cord perfect for straps and drawstrings.
Scallop: In one stitch, work 5 double crochet stitches. Skip 1 stitch before and after unless the instruction gives different spacing.
Note for UK Crocheters: US single crochet equals UK double crochet. US double crochet equals UK treble.
Note for Left-Handed Crocheters: Work the same instructions in the opposite direction. For assembly, mirror the strap and rose placement so the pocket and drawstring bow sit centered on the front.
Construction Overview
Before diving into the instructions, here is how everything comes together:
1. Make twelve main granny squares: 4 for the front, 4 for the back, and 4 for the sides
2. Join squares into four panels: front 2×2, back 2×2, and two side panels 1×2
3. Make one solid single crochet base
4. Make one flap, one pocket, two shoulder straps, one top handle, two drawstring cords, three roses, and six leaves
5. Assemble everything and add finishing touches
Carry unused colors loosely at joins or fasten off for the cleanest color changes. Block motifs before assembly to ensure consistent sizing.
Main Granny Square Instructions (Make 12)
Color Sequence: Round 1 in B (Cream), Round 2 in A (Mint), Round 3 in B, Round 4 in A, Round 5 in B, Round 6 in A. Join each round with a slip stitch to the first stitch unless stated otherwise.
Round 1: With B, make a magic ring. Chain 3 (this counts as your first double crochet). Work 2 double crochet in the ring, chain 2. Work (3 double crochet, chain 2) 3 more times. Pull the ring closed. Join. (12 dc + 4 corner ch-2 spaces)
Round 2: Change to A. Slip stitch to the corner chain space. In each corner chain space, work (3 double crochet, chain 2, 3 double crochet). Chain 1 between corners. Join. (24 dc + 4 ch-1 spaces + 4 corners)
Round 3: Change to B. In each corner, work (3 double crochet, chain 2, 3 double crochet). In each chain-1 space along the sides, work 3 double crochet, then chain 1. Join. (36 dc + 8 ch-1 spaces + 4 corners)
Round 4: Change to A. Repeat Round 3 logic, placing 3 double crochet in every side chain-1 space and corners in every corner. Join. (48 dc + 12 ch-1 spaces + 4 corners)
Round 5: Change to B. Repeat Round 4 logic. Join. (60 dc + 16 ch-1 spaces + 4 corners)
Round 6: With A, work 3 single crochet in each corner chain space and 1 single crochet in every double crochet and chain-1 space around. Join. (88 sc)
Motif Checkpoint: Each blocked square should measure 4.75 inches or 12 cm. The outer edge has 22 single crochet per side including corner stitches.
Joining the Panels
Once you have all twelve squares blocked to size, join them into panels.
Front Panel: Join 4 squares into a 2×2 rectangle. This should measure about 9.5 x 9.5 inches or 24 x 24 cm.
Back Panel: Join 4 squares the same way as the front.
Side Panels: Join 2 squares stacked vertically for each side. Each side panel should measure about 4.75 x 9.5 inches or 12 x 24 cm.
Finishing the Panels: After joining, work 1 round of single crochet around each panel in Color A, placing 3 single crochet in outer corners.
Solid Base Instructions
The base is worked in solid single crochet for stability.
With A, chain 42.
Row 1: Single crochet in the 2nd chain from hook and each chain across. Turn. (41 sc)
Rows 2-20: Chain 1, single crochet in each stitch across. Turn. (41 sc)
Edging: Single crochet evenly around the entire base. Work 41 stitches across each long edge, 20 stitches across each short edge, and 3 single crochet in each corner. (134 sc)
Base Checkpoint: The base should measure about 9.5 x 4.75 inches or 24 x 12 cm before joining. Steam lightly and pin flat.
Front Pocket Instructions
With A, chain 22.
Row 1: Single crochet in the 2nd chain from hook and each chain across. Turn. (21 sc)
Rows 2-12: Chain 1, single crochet in each stitch across. Turn. (21 sc)
Row 13: Chain 1, single crochet 2 together, single crochet 17, single crochet 2 together. Turn. (19 sc)
Row 14: Chain 1, single crochet 2 together, single crochet 15, single crochet 2 together. Turn. (17 sc)
Row 15: Chain 1, single crochet across. Fasten off. (17 sc)
Flap Instructions
Make 1 main granny square through Round 6, then add scallops on three sides only. Leave the top edge straight for seaming to the back of the bag.
Scallop Edging: Attach A at the top-left corner. Work down the side, across the lower edge, and up the other side as follows: Skip 1 single crochet, work 5 double crochet in the next single crochet, skip 1 single crochet, slip stitch in the next single crochet. Repeat around, adjusting by 1 single crochet at corners to keep scallops flat. Fasten off.
Shoulder Straps (Make 2)
With A, make an I-cord 25 inches or 64 cm long for each strap.
Sizing Options:
Leave 10 inch or 25 cm tails for sewing.
Top Handle (Make 1)
With A, make an I-cord 7 inches or 18 cm long. Leave tails for sewing securely to the back top edge.
Drawstring Cords (Make 2)
With E (White), make two I-cords, each 31.5 inches or 80 cm long. Knot the ends after threading.
Rose Applique (Make 3)
With C (Dusty Rose), chain 41.
Row 1: Single crochet in the 2nd chain from hook and each chain across. Turn. (40 sc)
Row 2: Work (single crochet in next stitch, half double crochet in next stitch, 3 double crochet in next stitch, half double crochet in next stitch, single crochet in next stitch). Repeat 8 times total. Fasten off with a long tail. (56 sts / 8 petals)
Finishing the Rose: Roll the strip into a rose shape, keeping the lower edge even. Sew through the base several times to secure.
Leaves (Make 6)
With D (Leaf Green), chain 7. Slip stitch in the 2nd chain, single crochet in the next chain, half double crochet in the next chain, double crochet in the next 2 chains, 5 half double crochet in the last chain. Rotate to work the opposite side: double crochet in the next 2 chains, half double crochet in the next, single crochet in the next, slip stitch in the last. Fasten off.
Assembly Instructions
Now comes the exciting part where everything comes together.
Step 1: Join the front panel to the left side panel with right sides together using slip stitch through back loops. Join the side to the back, the back to the other side, and the final side to the front. You now have a tube.
Step 2: Pin the base to the lower edge of the tube, matching front and back centers and side centers. Seam with slip stitch or whipstitch.
Step 3 (Drawstring Channel): Around the top edge with A, work Round 1 as single crochet evenly around. For Round 2, chain 3, skip 2 single crochet, double crochet in the next single crochet. Then chain 1, skip 1 single crochet, double crochet in the next single crochet. Repeat around, keeping an even number of openings. For Round 3, single crochet in each double crochet and chain space.
Step 4: Sew the flap’s straight top edge to the back top edge, centered. The scalloped edge folds to the front.
Step 5: Sew the pocket to the front center, leaving the top open. Sew the button to the pocket flap area and use one scallop opening as a button loop, or add a small chain-8 loop.
Step 6: Thread the drawstrings in opposite directions through the channel. Tie a bow at the front.
Step 7: Sew shoulder straps to the upper back and lower back corners. Sew the handle to the top back edge. Reinforce with several passes.
Step 8: Sew roses and leaves in place. Weave in ends and block lightly.
Assembly Checkpoint: Before adding the flap and decorations, the bag body should measure about 9.5 inches or 24 cm across the front, 4.75 inches or 12 cm deep, and 10.5-11 inches or 27-28 cm tall including the top channel.
Rose and Leaf Placement
Sew one rose centered on the flap, one on the lower front near the pocket, and one on a side panel. Tuck two leaves under each rose before the final stitches.
Size Customization Tips
For a wider bag: Add one granny square to the front and back width. Add a longer base to match.
For a taller bag: Add one square to the panel height or add extra single crochet rounds above the top squares before the channel.
For longer straps: Add I-cord length before sewing, not after assembly.
Finishing and Blocking
Steam or wet block squares to the same size before joining. Do not over-stretch the open granny sections.
For a crisp bag, sew in a simple cotton lining by hand after the crochet body is complete.
Hide all yarn tails inside seams or behind appliques.
Care Instructions
Hand wash cool and reshape flat to dry. If using cotton yarn, expect a little softening after the first wash. Remove or protect the button before heavy washing.
Troubleshooting Common Issues
Squares are different sizes: Block to 4.75 inches or 12 cm and adjust hook size if a square is more than 0.25 inches or 6 mm off.
Top edge flares: Work the channel with fewer picked-up stitches or use a smaller hook for the top rounds.
Base pulls inward: Add one extra single crochet edging round to the base before seaming.
Straps stretch: Use the smaller hook, sew a ribbon to the back of each strap, or make a firmer cord.
Final Thoughts on This Drawstring Backpack Pattern
This Mint Green Rose Drawstring Backpack crochet pattern combines classic granny square construction with modern details like the scalloped flap and rolled rose appliques. It is a project that looks impressive but builds from techniques you probably already know. Take your time with the assembly steps and do not skip blocking your squares.
The finished backpack makes a beautiful gift or a treat for yourself. It is perfect for spring outings, farmers market trips, or just adding a handmade touch to your everyday carry.
I hope you enjoy making this as much as I enjoyed designing it. If you have any questions as you work through the pattern, take a deep breath and re-read the section. Most confusion clears up on a second look.
Thank you so much for choosing this pattern for your next project. I would love to see your finished backpack, so please share your photos on Instagram or Facebook and tag me. Seeing your creations is the best part of designing.
If you found this pattern helpful, save it to your Pinterest boards so you can find it easily when you are ready to start. And please leave a comment below if you make this backpack. I love hearing which color combinations you choose and how you customize the design to make it your own.
Want a Quick & Easy Printable Version?
Get a clean, beautifully formatted PDF of this pattern — easy to follow step by step, ready to print or save on any device. No scrolling, no distractions, just the pattern.
Get the Printable PDF →