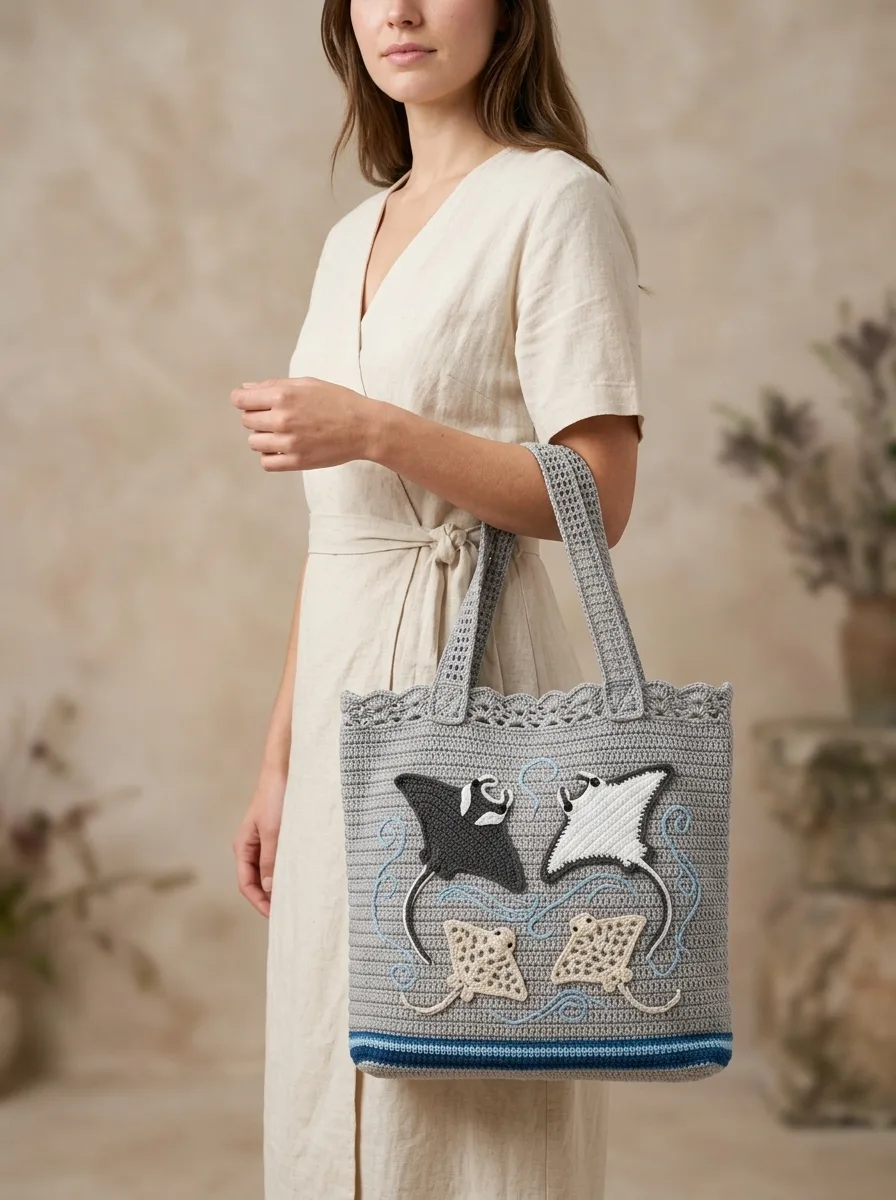
Looking for a sturdy beach bag that actually holds everything and sparks conversation? This manta ray crochet beach carryall works up in worsted weight cotton, features simple single and double crochet stitches, and makes an incredible gift for the ocean lover in your life. The appliqué rays are beginner friendly and stitch up quickly as separate pieces before being sewn onto the finished bag. Whether you are heading to the beach, the pool, or just need a roomy everyday tote, this one delivers.
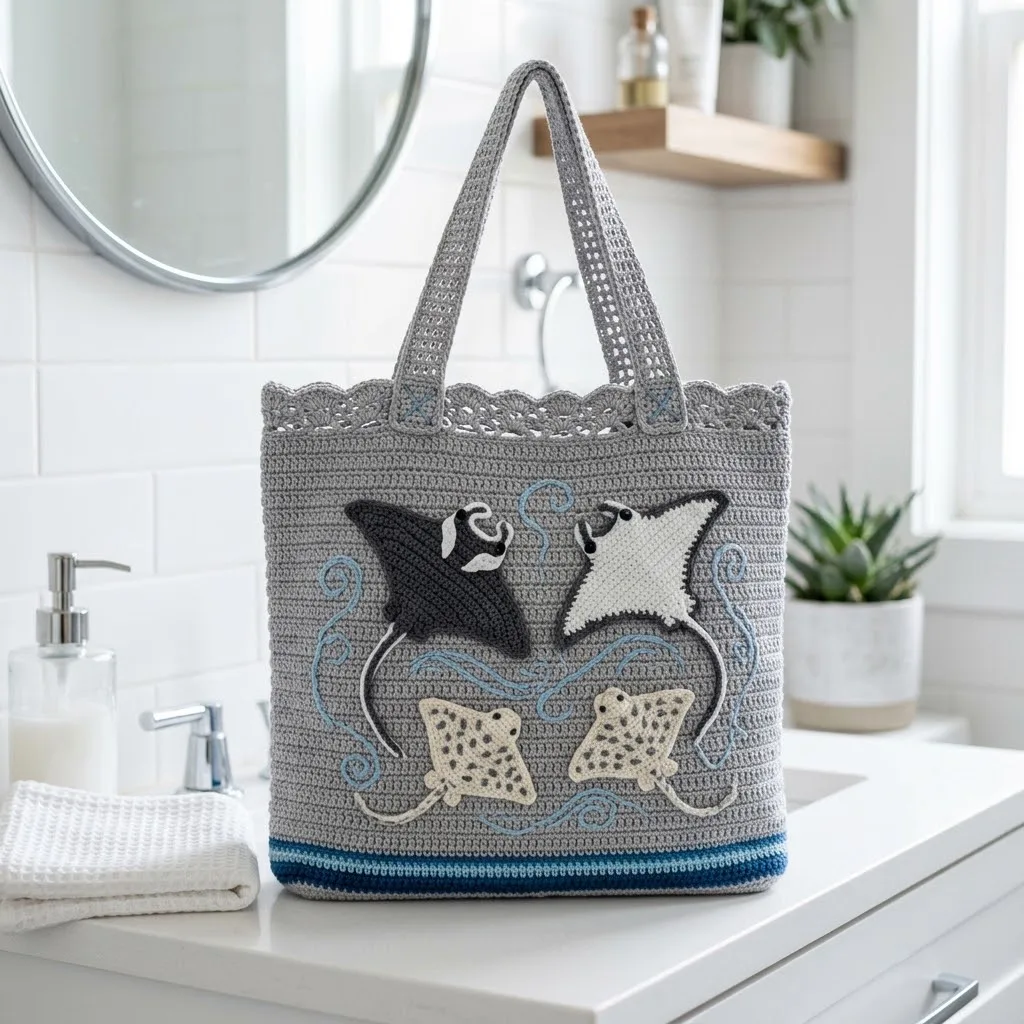
I designed this carryall to be practical first. It stands upright on its own, fits towels and sunscreen with room to spare, and those sweet manta rays add personality without being fussy. The main body is worked in the round with no seaming until the very end. If you can crochet a rectangle and follow a simple appliqué pattern, you can absolutely make this bag.
Why You Will Love This Crochet Beach Tote Pattern
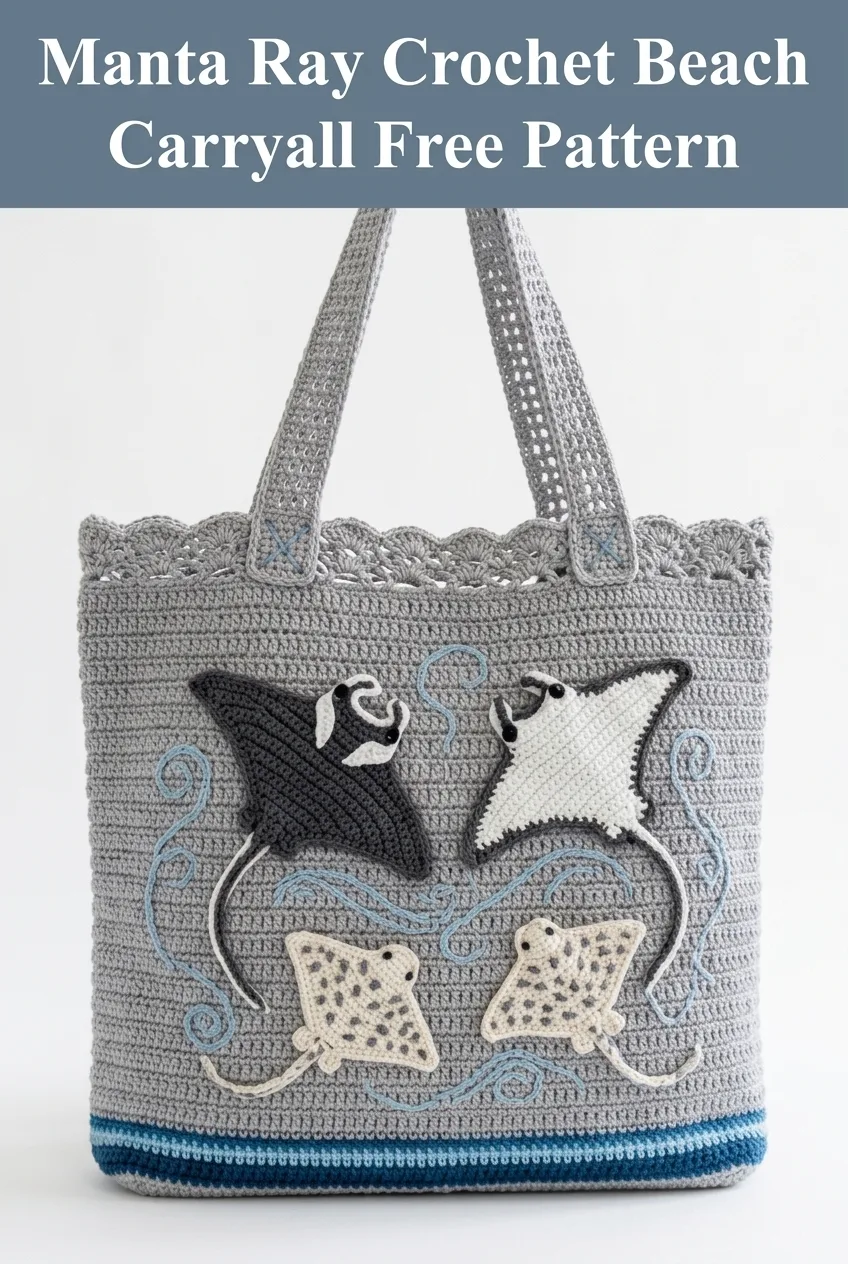
This manta ray beach carryall combines function with coastal charm. The gray cotton body provides a neutral canvas that lets those striking black, white, and spotted manta ray appliqués really pop. The decorative scalloped edging at the top adds a feminine touch without compromising the bag’s durability.
The striped bottom section in teal and blue creates visual interest and reinforces the ocean theme. Those swirling embroidered details around the rays suggest water movement, bringing the whole design to life.
What makes this bag special:
Materials Needed
Gather these supplies before you begin. Having everything ready makes your crochet time more relaxing.
Yarn:
– Black (manta ray body)
– White (manta ray underside)
– Cream with brown speckles or cream plus brown for spots (spotted rays)
– Teal blue (bottom stripe accent)
– Medium blue (bottom stripe)
– Light blue (embroidered water swirls)
Hook:
Notions:
Gauge:
14 single crochet stitches and 16 rows = 4 inches in single crochet
Gauge matters for this project. A tighter gauge creates a sturdier bag that holds its shape.
Abbreviations and Stitch Definitions
Let me walk you through every stitch abbreviation before we start. Even if you know these, a quick refresher never hurts.
Ch = Chain. Wrap yarn over hook, pull through loop on hook. This creates your foundation.
Sl st = Slip stitch. Insert hook into stitch, yarn over, pull through both loops at once. Used for joining rounds.
Sc = Single crochet. Insert hook into stitch, yarn over and pull up a loop (two loops on hook), yarn over and pull through both loops. This is your basic building block stitch.
Dc = Double crochet. Yarn over, insert hook into stitch, yarn over and pull up a loop (three loops on hook), yarn over and pull through two loops, yarn over and pull through remaining two loops. Taller than single crochet.
Hdc = Half double crochet. Yarn over, insert hook into stitch, yarn over and pull up a loop (three loops on hook), yarn over and pull through all three loops at once.
Inc = Increase. Work two stitches into the same stitch to add width.
Dec = Decrease. Work two stitches together as one to reduce width.
Sk = Skip. Pass over the indicated stitch without working into it.
Skill Level
This pattern is rated intermediate. You should be comfortable with:
If you are a confident beginner ready to level up, this is an excellent project. The bag body is repetitive and meditative. The appliqués are where the detail work happens, and you can take those slowly.
Crochet Beach Carryall Pattern Instructions
Bag Base
The base is worked flat in rows, then you will pick up stitches around the entire perimeter to work the body in the round. This creates a sturdy, seamless bottom.
Row 1: With gray yarn and H hook, ch 37. Sc in 2nd ch from hook and in each ch across. (36 sc)
Row 2: Ch 1, turn. Sc in each sc across. (36 sc)
Rows 3 through 18: Repeat Row 2. (36 sc each row)
At the end of Row 18, do not fasten off. You will now work around the entire rectangle.
Joining Round for Body
Round 1: Ch 1, do not turn. Work 3 sc in the corner stitch. Sc evenly down the short side, working approximately 18 sc. Work 3 sc in the corner. Sc 36 across the bottom edge (working into the foundation chain). Work 3 sc in the corner. Sc 18 up the remaining short side. Work 3 sc in the final corner. Sc 36 across the top of Row 18. Sl st to first sc to join. Place marker. (Approximately 120 sc)
Count your stitches. You want an even number divisible by 4 for the pattern to work smoothly. Adjust by adding or skipping one stitch in a corner if needed.
Bag Body
Now we work in continuous rounds. Move your stitch marker up each round to track your progress.
Rounds 2 through 5: With teal blue, sc in each sc around. (120 sc)
Rounds 6 through 8: Change to medium blue. Sc in each sc around. (120 sc)
Rounds 9 through 55: Change to gray. Sc in each sc around. (120 sc)
Your bag body should measure approximately 12 inches tall from the base at this point. Keep your tension consistent. Too loose and the bag will stretch and sag. Too tight and it will not hold much.
Textured Band Section
Around Rounds 20 and 40, you will notice subtle horizontal texture lines in the original design. To achieve this effect:
Texture Round (work at Rounds 20 and 40): Sc in the back loop only of each sc around. (120 sc)
This creates a raised ridge on the right side of your work. Resume working through both loops for all other rounds.
Top Lace Border
This decorative edging gives the carryall its elegant finish.
Round 56: Ch 3 (counts as dc), dc in each sc around. Sl st to top of ch 3 to join. (120 dc)
Round 57: Ch 1, sc in same st. *Sk 2 dc, 5 dc in next dc (shell made), sk 2 dc, sc in next dc.* Repeat from * to * around. Sl st to first sc to join.
Round 58: Ch 3, 2 dc in same sc. *Sc in center dc of shell, 5 dc in next sc.* Repeat from * to * around, ending with sc in center dc of last shell, 2 dc in first sc. Sl st to top of ch 3 to join.
Fasten off and weave in ends.
Handles (Make 2)
The handles use an open mesh pattern that provides airflow and flexibility. This makes them comfortable to carry even when the bag is heavy.
Row 1: With gray yarn, ch 61. Dc in 5th ch from hook. *Ch 1, sk 1 ch, dc in next ch.* Repeat from * to * across. (29 dc, 28 ch-1 spaces)
Row 2: Ch 4 (counts as dc plus ch 1), turn. Dc in next dc. *Ch 1, dc in next dc.* Repeat across. (29 dc, 28 ch-1 spaces)
Rows 3 through 5: Repeat Row 2.
Edging: Ch 1, do not turn. Sc evenly around the entire handle, working 3 sc in each corner. Sl st to first sc to join. Fasten off.
Attachment: Pin handles to inside of bag, positioning them approximately 3 inches from each side seam. The handles should sit about 1 inch below the scalloped border. Whip stitch securely in place, going over the attachment area twice for strength.
Manta Ray Appliqué Patterns
You will make four rays total. Two large ones in black and white, two smaller spotted ones in cream.
Large Manta Ray (Make 2, one in black, one in white)
Body:
Row 1: Ch 2, 3 sc in 2nd ch from hook. (3 sc)
Row 2: Ch 1, turn. 2 sc in first sc, sc in next sc, 2 sc in last sc. (5 sc)
Row 3: Ch 1, turn. 2 sc in first sc, sc in each sc to last sc, 2 sc in last sc. (7 sc)
Rows 4 through 8: Repeat Row 3, increasing at each end. (15 sc at end of Row 8)
Row 9: Ch 1, turn. Sc in each sc across. (15 sc)
Row 10: Ch 1, turn. Sc2tog, sc to last 2 sc, sc2tog. (13 sc)
Rows 11 through 14: Repeat Row 10. (5 sc at end of Row 14)
Tail: Ch 15, sl st in 2nd ch from hook and in each ch back to body. Fasten off.
Wings (Make 2 per ray):
Row 1: Ch 2, 2 sc in 2nd ch from hook. (2 sc)
Row 2: Ch 1, turn. 2 sc in each sc. (4 sc)
Row 3: Ch 1, turn. 2 sc in first sc, sc in next 2 sc, 2 sc in last sc. (6 sc)
Rows 4 through 6: Repeat Row 3. (12 sc at end of Row 6)
Row 7: Ch 1, turn. Sc2tog, sc to last 2, sc2tog. (10 sc)
Row 8: Repeat Row 7. (8 sc)
Fasten off, leaving a long tail for sewing.
Sew wings to body at the widest point, angling them outward to create that distinctive manta ray silhouette.
Small Spotted Manta Ray (Make 2 in cream)
Follow the Large Manta Ray pattern but stop increasing at Row 6 instead of Row 8. This creates a smaller ray approximately 60% the size of the large ones.
After completing, use brown yarn and a tapestry needle to embroider French knots randomly across the body for the spotted effect. Space them irregularly for a natural look.
Appliqué Placement and Attachment
Lay your completed bag flat. Arrange the four manta rays in a pleasing composition. The original design shows the two large rays swimming in opposite directions near the top third of the bag. The two smaller spotted rays swim near the bottom, also in different directions.
Pin each ray in place and step back to check the arrangement. Adjust until you are happy with the balance.
Using matching yarn and a whip stitch, sew each ray securely to the bag body. Stitch around the entire perimeter of each piece, including the wings and tail.
Water Swirl Embroidery
Thread your tapestry needle with light blue yarn. Using a simple chain stitch or backstitch, embroider curving lines around the manta rays to suggest water movement. Follow the natural curves of the rays, letting your lines flow organically.
Do not overthink this part. Imperfect swirls look more like real water than precise ones.
Finishing Your Manta Ray Beach Carryall
Block your bag lightly by stuffing it with tissue paper or a towel and letting it sit overnight. This helps the stitches settle and the bag hold its shape.
Check all your ends are woven in securely. For a bag that will carry weight, weave ends through at least 2 inches of stitches in multiple directions.
Consider adding a fabric lining if you plan to carry small items that might poke through. A simple drawstring pouch sewn inside also prevents items from falling out.
Pattern Customization Ideas
Color variations: Try navy blue with white rays, sandy beige with brown rays, or go bold with teal and coral.
Size adjustments: Add or subtract 12 stitches from your base chain and adjust body rounds accordingly. Each 12 stitch increment changes the width by approximately 3 inches.
Alternative appliqués: Love the construction but want different creatures? Swap the manta rays for sea turtles, jellyfish, or starfish using the same basic shaping principles.
Skip the appliqués: The bag body is beautiful on its own. Work it in a self-striping cotton for visual interest without the extra work.
Care Instructions
Hand wash in cool water with mild detergent. Reshape while damp and lay flat to dry. Cotton may shrink slightly with washing, so avoid hot water and the dryer.
For sandy beach days, shake the bag out thoroughly before washing. Sand trapped in stitches can wear down the yarn fibers over time.
I really hope you enjoy making this manta ray crochet beach carryall as much as I enjoyed designing it. These ocean creatures are so graceful, and seeing them come to life in yarn form never gets old. If you make one, I would absolutely love to see it. Tag me on Instagram or share a photo on Facebook so I can cheer you on.
Go ahead and pin this crochet pattern to your Pinterest boards so you can find it when you are ready to start. And please drop a comment below if you have questions or just want to say hello. I read every single one, and your messages truly make my day. Happy stitching, friend.
