I call this one "The Sunday Garden" because that is exactly when I designed it. I was sitting on my porch with my coffee, staring at my sadly neglected real succulents, and thought, "What if I could crochet plants that would actually survive my care?" I pulled out my old green notebook, the one with the coffee stains and random stitch counts, and started sketching. Three cups of coffee later, I had the bones of this pattern. The terracotta pot came first, then the chunky rosettes, then those little trailing bits that spill over the edge. I made the first one for my sister who loves plants but travels too much to keep them alive. Now she has an entire windowsill of crocheted succulents, and honestly, they look better than my real ones ever did.
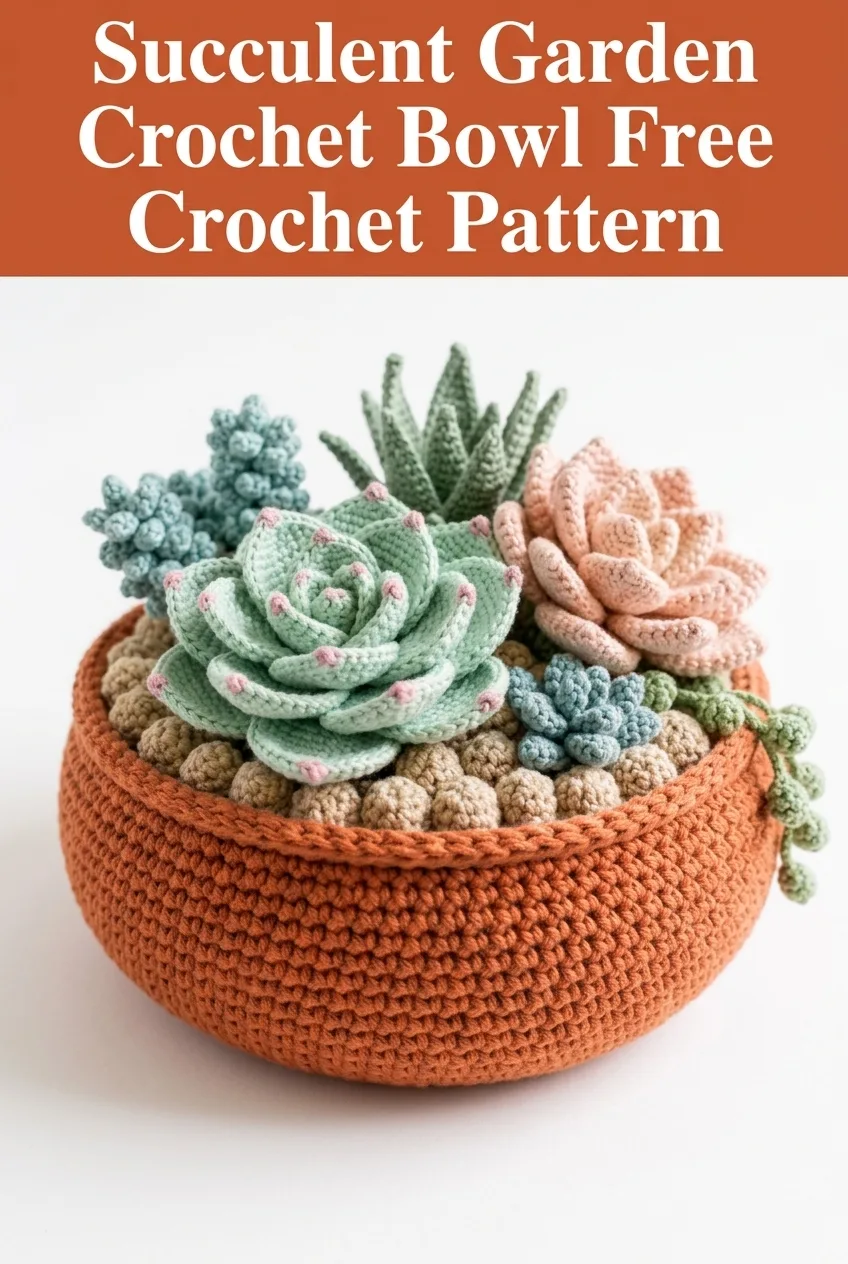
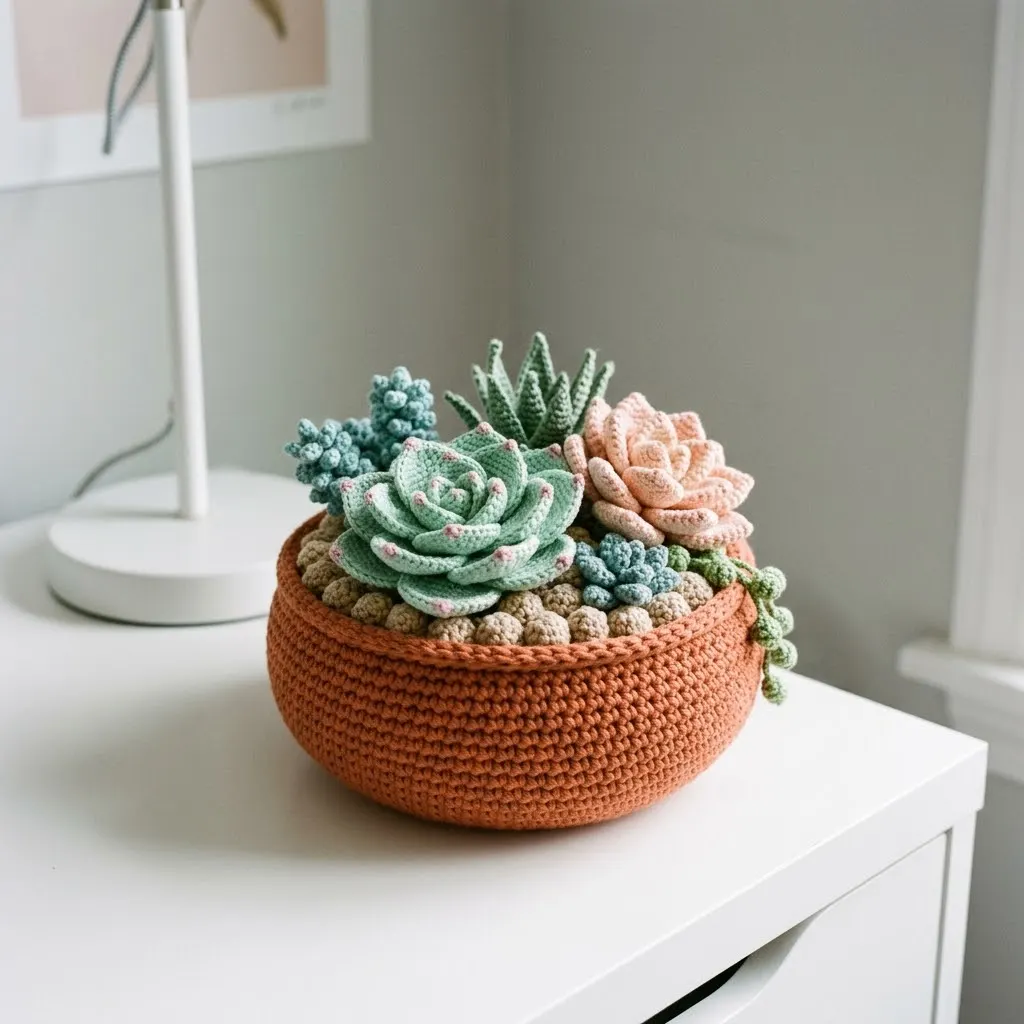
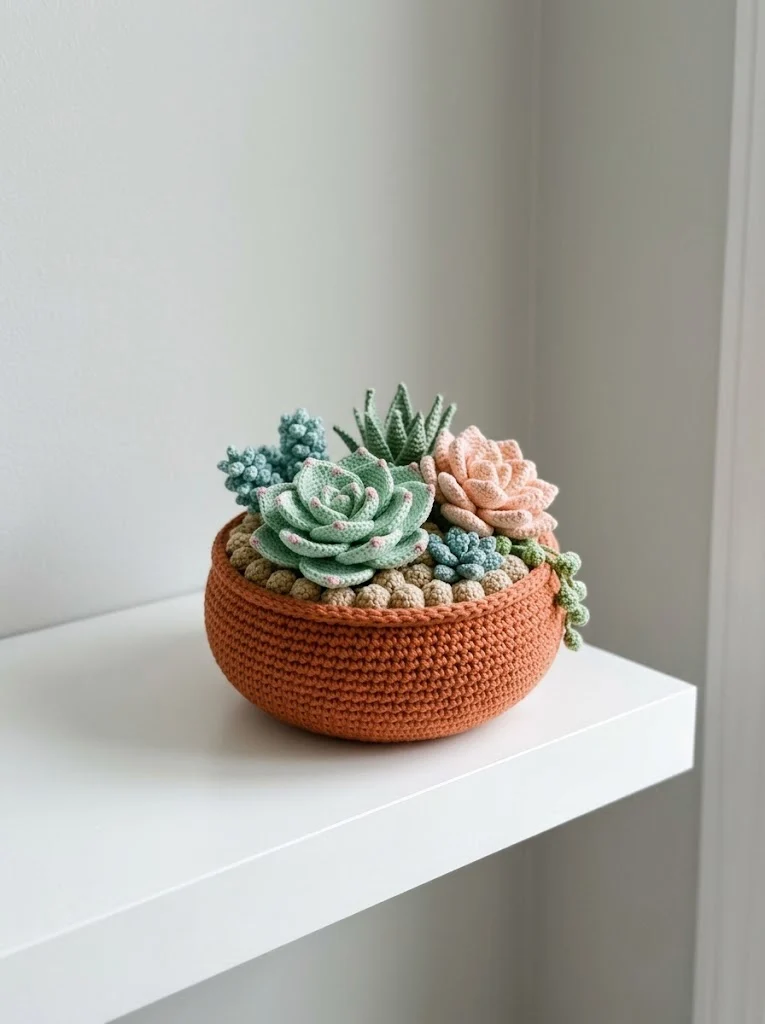
This crochet succulent garden pattern brings together everything I love about amigurumi and home decor in one satisfying project. You will create a realistic terracotta bowl filled with layered rosettes, spiky aloe leaves, trailing string of pearls, and textured pebble filler. The best part? No watering required, and it looks stunning on a bookshelf, desk, or nightstand.
Why You Will Love This Crochet Succulent Pattern
This project hits that sweet spot between impressive and achievable. When people see the finished piece, they always gasp a little. It looks complex and artistic. But here is the truth: each individual element uses basic stitches you probably already know. The magic comes from layering simple shapes together.
Single crochet (sc) forms the backbone of nearly every piece. Increases (inc) and decreases (dec) shape the curves. A few slip stitches (sl st) join things cleanly. That is genuinely it for most of the components.
The succulent garden also makes a thoughtful handmade gift for plant lovers, new homeowners, or anyone who appreciates botanical decor without the maintenance. It works up over a weekend if you are focused, or stretch it out over a week of evening stitching.
Skill Level
Intermediate beginner to intermediate. If you have made a few amigurumi projects or crocheted in the round before, you have the skills for this. The pattern involves multiple small components assembled together, which requires patience more than advanced technique.
Complete beginners: I would recommend making a simple amigurumi ball or two first to get comfortable with working in continuous rounds and basic shaping. Then come back to this pattern. You will feel much more confident.
Materials Needed for Your Crochet Succulent Bowl
Yarn
You will need worsted weight yarn (Category 4) in the following colors:
I used 100% cotton yarn for a clean stitch definition and that matte botanical look. Acrylic works beautifully too and costs less. Cotton holds its shape better for sculptural pieces like this.
Tools
Gauge
Gauge is not critical for this decorative project. Your finished bowl should measure approximately 6 inches (15 cm) wide and 2.5 inches (6 cm) tall using the hook and yarn specified. If your bowl looks significantly larger or smaller, adjust your hook size.
Abbreviations and Stitch Definitions
Let me walk you through every stitch abbreviation before we start. Refer back here anytime you need a refresher.
Ch = Chain. Wrap yarn over hook, pull through loop on hook. This creates your foundation or adds height.
Sl st = Slip stitch. Insert hook, yarn over, pull through stitch AND loop on hook in one motion. Used for joining or moving across stitches invisibly.
Sc = Single crochet. Insert hook, yarn over, pull up a loop (2 loops on hook), yarn over, pull through both loops. Your most basic building block stitch.
Inc = Increase. Work 2 single crochet stitches into the same stitch. This makes your work grow wider.
Dec = Invisible decrease. Insert hook through front loops only of the next 2 stitches, yarn over, pull through both front loops, yarn over, pull through both loops on hook. Creates a nearly invisible decrease for smooth shaping.
BLO = Back loop only. Work your stitch into just the back loop of the previous stitch, leaving the front loop untouched. Creates a ridge texture.
FLO = Front loop only. Work into just the front loop.
Magic ring = An adjustable starting loop that closes completely with no hole. If you struggle with magic rings, chain 2 and work your first round stitches into the second chain from hook instead.
Pattern Notes
The Terracotta Bowl Pattern
This bowl uses a classic amigurumi shaping technique. You will work from the center base outward, then up the sides with strategic shaping to create that rounded pot look.
Bowl Base and Sides
Round 1: Magic ring, 6 sc into ring, pull tight. (6 sts)
Round 2: Inc in each st around. (12 sts)
Round 3: *Sc 1, inc* repeat around. (18 sts)
Round 4: *Sc 2, inc* repeat around. (24 sts)
Round 5: *Sc 3, inc* repeat around. (30 sts)
Round 6: *Sc 4, inc* repeat around. (36 sts)
Round 7: *Sc 5, inc* repeat around. (42 sts)
Round 8: *Sc 6, inc* repeat around. (48 sts)
Round 9: Working in BLO only, sc in each st around. (48 sts)
This back loop only round creates the bottom edge ridge of your pot. Very satisfying.
Round 10: Sc in each st around. (48 sts)
Round 11: Sc in each st around. (48 sts)
Round 12: *Sc 7, inc* repeat around. (54 sts)
Rounds 13 to 15: Sc in each st around. (54 sts)
Round 16: *Sc 8, inc* repeat around. (60 sts)
Round 17: Sc in each st around. (60 sts)
Round 18: Working in FLO only, sc in each st around. (60 sts)
This front loop only round creates the rim detail at the top of your pot.
Round 19: Sl st in each st around. Fasten off and weave in ends. (60 sts)
Optional: Cut a cardboard circle about 5 inches across and place it in the bottom of your bowl for stability. This helps the bowl hold its shape when filled.
Large Mint Green Rosette Succulent
This is your centerpiece succulent. You will make three layers of petals that stack together to form a realistic echeveria shape.
Center Spiral (Make 1)
Row 1: Ch 20. Starting in 2nd ch from hook: sc 1, hdc 1, dc 2, *dc 2 in next ch* repeat 4 times, dc 2, hdc 2, sc 2. Do not turn.
Roll this strip into a tight spiral starting from the single crochet end. Stitch the bottom closed with your tapestry needle to secure. This forms the tight center bud.
Inner Petals (Make 5)
Round 1: Magic ring, 4 sc into ring. (4 sts)
Round 2: Inc in each st. (8 sts)
Round 3: *Sc 1, inc* repeat around. (12 sts)
Round 4: Sc in each st around. (12 sts)
Round 5: *Sc 1, dec* repeat around. (8 sts)
Stuff lightly. Flatten and pinch the base. Leave a long tail for sewing.
Outer Petals (Make 7)
Round 1: Magic ring, 6 sc into ring. (6 sts)
Round 2: Inc in each st. (12 sts)
Round 3: *Sc 1, inc* repeat around. (18 sts)
Rounds 4 to 5: Sc in each st around. (18 sts)
Round 6: *Sc 1, dec* repeat around. (12 sts)
Round 7: Dec around. (6 sts)
Stuff lightly before closing. Fasten off with long tail.
Assembly
Arrange the 5 inner petals around the center spiral in a circle, overlapping slightly. Stitch in place. Then arrange the 7 outer petals around the inner layer, staggering them so they peek between the inner petals. Stitch everything securely to a small base circle if desired, or leave the bottom open for assembly into the bowl.
Tip for realism: Use a tiny bit of pink yarn to add small stitches at the petal tips. Real echeveria often have pinkish edges.
Medium Peach Rosette
Follow the same construction as the large rosette but scale down:
This creates a smaller rosette that nestles nicely beside the main one.
Aloe Plant
These spiky leaves add wonderful textural contrast.
Aloe Leaf (Make 5 to 6)
Row 1: Ch 18.
Row 2: Starting in 2nd ch from hook: sl st 1, sc 2, hdc 3, dc 5, hdc 3, sc 2, sl st 1. (17 sts)
Row 3: Ch 1, turn. Working in BLO: sl st 1, sc 2, hdc 3, dc 5, hdc 3, sc 2, sl st 1.
Fasten off with long tail. The leaf will naturally curl slightly. This is perfect.
Assembly
Bundle the aloe leaves together at their bases, fanning them outward. Stitch the bases together tightly. The leaves should point upward and outward like a real aloe.
Trailing String of Pearls
This is the cascading element that spills over the pot edge. So charming.
Pearl Strand (Make 2 to 3)
Foundation: Ch 25.
Pearl 1: In 4th ch from hook: 3 dc in same ch, sl st in next ch.
Skip 2 ch, sl st in next ch.
Pearl 2: 3 dc in same ch, sl st in next ch.
Continue this pattern, making a pearl every 3rd to 4th chain, until you reach the end. Fasten off.
The strand should look like little bumpy balls connected by a slim chain. Make 2 or 3 strands of varying lengths for a natural look.
Small Teal Rosette
Make one tiny rosette using only:
This tiny rosette fills gaps beautifully.
Pebble Filler
These small bobbles fill the space around your succulents and mimic decorative stones.
Pebble (Make 15 to 20 in various tan and taupe colors)
Round 1: Magic ring, 6 sc into ring. (6 sts)
Round 2: Inc in each st. (12 sts)
Round 3: Sc in each st around. (12 sts)
Round 4: Dec around. (6 sts)
Stuff firmly. Close with tapestry needle. These should be firm little balls, slightly irregular in shape. The imperfection looks more realistic.
Final Assembly
Now for the fun part. Arranging your garden.
Step 1: Stuff the bottom third of your bowl loosely with fiberfill or yarn scraps. This gives your succulents something to anchor into.
Step 2: Place your large mint rosette slightly off center. This is your focal point.
Step 3: Position the peach rosette beside it, overlapping edges slightly.
Step 4: Tuck the aloe plant toward the back, leaves fanning upward.
Step 5: Add the small teal rosette near the front edge.
Step 6: Drape the string of pearls strands over the bowl rim, letting them cascade down the side.
Step 7: Fill all remaining gaps with pebbles. Push them down into the stuffing so they stay put.
Step 8: Using your tapestry needle and matching yarn, tack the larger succulents to each other and to the bowl sides with a few hidden stitches. This prevents shifting.
Step back and admire your work. Adjust any elements that look too crowded or sparse. Trust your eye.
Care Instructions
Your finished succulent garden is entirely surface washable. Dust with a lint roller or use a hairdryer on cool setting. Spot clean any marks with mild soap and water. Do not machine wash or the stuffing will shift.
Customization Ideas
Color variations: Try burgundy, purple, or silvery blue green for different succulent varieties. Variegated yarn creates beautiful organic color gradients.
Bowl alternatives: Make the bowl in gray for a concrete planter look, or cream for a ceramic effect.
Size adjustments: Double all stitch counts for a larger statement piece, or halve them for a tiny desktop version.
Add more variety: Research different succulent shapes online and adapt the basic petal and leaf techniques. Haworthia, sedum, and sempervivum all have distinct silhouettes you could recreate.
Thank you so much for choosing this pattern for your next project. I genuinely hope your crocheted succulent garden brings you as much joy as mine brings me every time I walk past my bookshelf. If you make your own version, please tag me on Instagram or share a photo in our Facebook group. I absolutely love seeing how everyone interprets the design with their own color choices.
If this pattern is calling your name but you are not quite ready to start today, pin it to your crochet board on Pinterest so you can find it easily later. And if you do make it, drop a comment below and tell me which succulent was your favorite to crochet. I always say the aloe leaves are the most satisfying, but the little string of pearls wins hearts every time.
