Looking for a stunning home decor piece that never needs watering? This crochet monstera plant brings all the tropical vibes of a real houseplant without any of the maintenance. The pattern uses basic stitches like single crochet and chains, making it perfect for adventurous beginners ready to try something sculptural. Each leaf works up in about an hour, so you can create a full plant over a weekend. This makes an incredible housewarming gift or a gorgeous addition to your own shelf styling.
Why You’ll Love This Crochet Monstera Plant Pattern
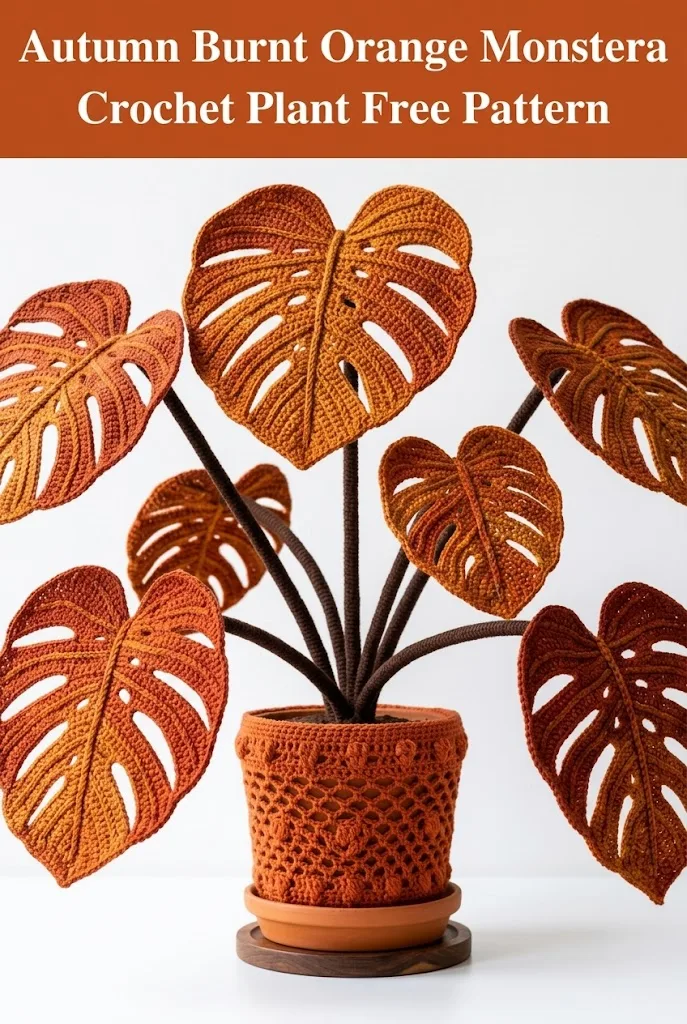
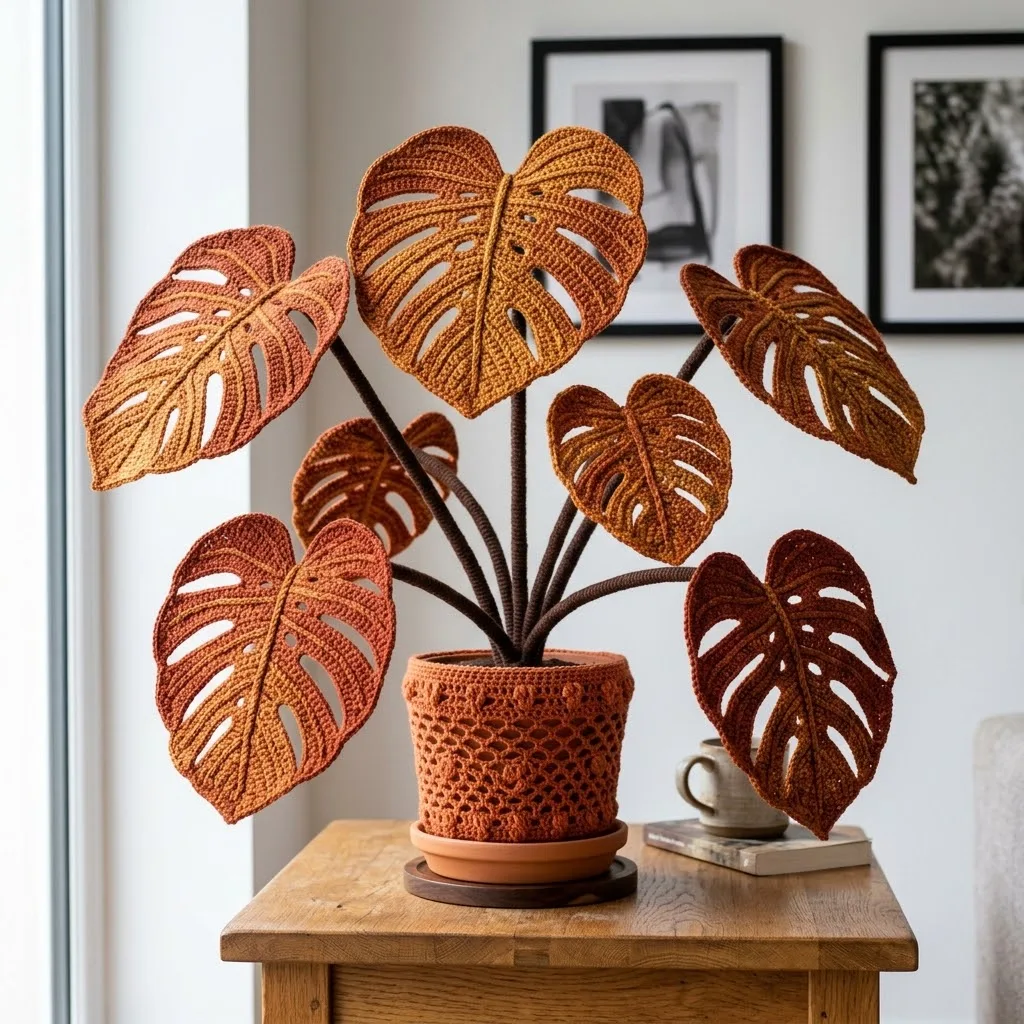
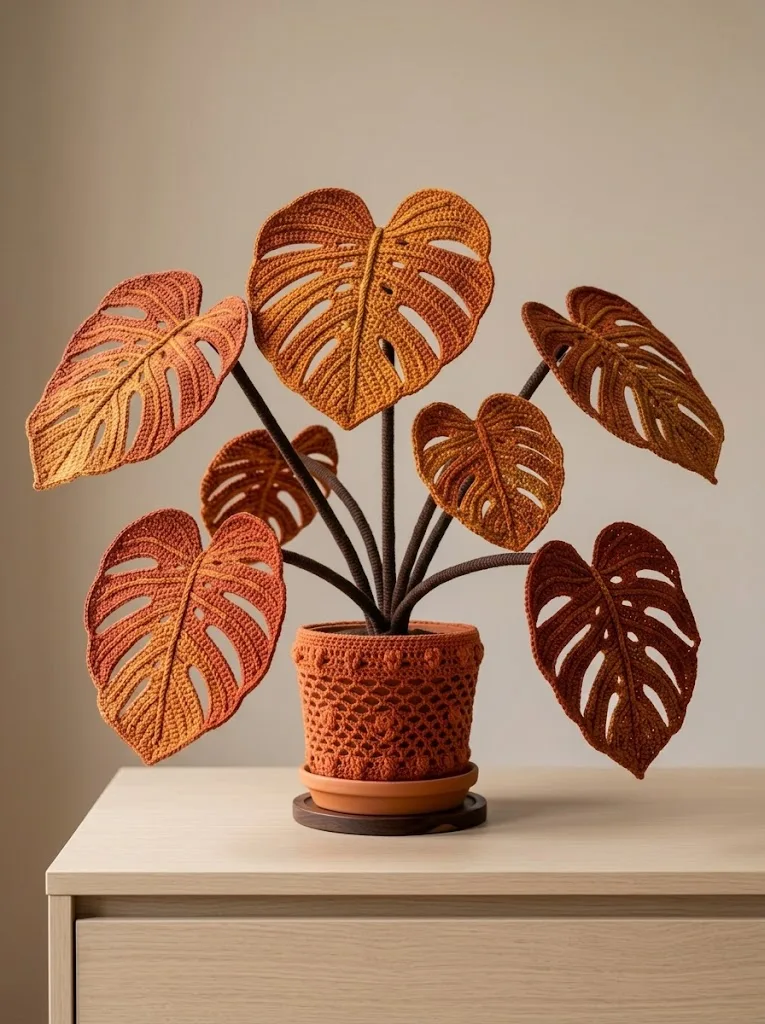
I absolutely fell in love with creating this autumn-toned monstera. The burnt orange, rust, and golden copper colors give it a warm seasonal feel that works beautifully from September through November. But honestly? I keep mine out year-round because it adds such a cozy vibe to my living room.
What makes this crochet monstera plant pattern special is the realistic fenestrations. Those are the signature holes and splits in monstera leaves that make them so recognizable. We create these using strategic chain spaces and careful shaping. The result looks incredibly lifelike from across the room.
The wrapped stems give this project a polished professional finish. You’ll learn a simple wrapping technique that covers wire supports completely. This means your leaves stand upright and can be positioned exactly how you want them.
Skill Level
Intermediate beginner to confident beginner. If you can work single crochet, double crochet, chains, and increases, you have all the skills needed. The shaping might feel unfamiliar at first, but I walk you through every step.
Finished Measurements
Materials Needed
Yarn
– Burnt orange: 150 yards
– Rust brown: 100 yards
– Golden copper: 100 yards
– Dark brown (for stems): 80 yards
– Terracotta orange (for pot cover): 120 yards
Cotton or cotton blend yarn works beautifully for this project. It holds its shape well and gives crisp stitch definition. Acrylic works too if that’s what you have in your stash.
Tools
Abbreviations and Stitch Definitions
Let me break down every stitch you’ll use in this crochet tutorial.
Ch (chain): Yarn over, pull through the loop on your hook. This creates a foundation or adds height.
Sl st (slip stitch): Insert hook, yarn over, pull through both the stitch and the loop on your hook in one motion. Used for joining and moving across stitches invisibly.
Sc (single crochet): Insert hook into stitch, yarn over, pull up a loop (2 loops on hook), yarn over, pull through both loops. Creates a short, dense stitch.
Hdc (half double crochet): Yarn over, insert hook into stitch, yarn over, pull up a loop (3 loops on hook), yarn over, pull through all 3 loops. Slightly taller than single crochet.
Dc (double crochet): Yarn over, insert hook into stitch, yarn over, pull up a loop (3 loops on hook), yarn over, pull through 2 loops, yarn over, pull through remaining 2 loops. Creates a taller stitch with nice drape.
Inc (increase): Work 2 stitches into the same stitch. This makes the fabric wider.
Dec (decrease): Work 2 stitches together as one. For sc2tog: insert hook into first stitch, pull up a loop, insert hook into next stitch, pull up a loop (3 loops on hook), yarn over, pull through all 3. This narrows the fabric.
Sk (skip): Miss the next stitch and work into the following one. Creates intentional gaps.
Gauge
16 sc and 18 rows = 4 inches in single crochet with 5.0mm hook.
Gauge matters less for home decor than for garments. If your leaves come out slightly larger or smaller, that actually adds to the natural look. Real monstera leaves vary in size too!
Pattern Notes
Step-by-Step Crochet Pattern
Large Monstera Leaf (Make 2 pieces per leaf)
You’ll need 2 to 3 large leaves for a full plant. I made mine in burnt orange and golden copper.
Foundation: Ch 28.
Row 1: Sc in 2nd ch from hook, sc in each ch across. (27 sc)
Row 2: Ch 1, turn. Sc in first 5 sts, ch 3, sk 3, sc in next 4 sts, ch 3, sk 3, sc in next 5 sts, ch 3, sk 3, sc in last 4 sts. (18 sc, 3 ch-3 spaces)
Row 3: Ch 1, turn. Sc in first 4 sts, 3 sc in ch-3 space, sc in next 5 sts, 3 sc in ch-3 space, sc in next 4 sts, 3 sc in ch-3 space, sc in last 5 sts. (27 sc)
Row 4: Ch 1, turn. Inc in first st, sc in next 25 sts, inc in last st. (29 sc)
Row 5: Ch 1, turn. Sc in first 6 sts, ch 4, sk 4, sc in next 9 sts, ch 4, sk 4, sc in last 6 sts. (21 sc, 2 ch-4 spaces)
Row 6: Ch 1, turn. Sc in first 6 sts, 4 sc in ch-4 space, sc in next 9 sts, 4 sc in ch-4 space, sc in last 6 sts. (29 sc)
Row 7: Ch 1, turn. Inc in first st, sc in each st across to last st, inc in last st. (31 sc)
Row 8: Ch 1, turn. Sc in first 7 sts, ch 5, sk 5, sc in next 7 sts, ch 5, sk 5, sc in last 7 sts. (21 sc, 2 ch-5 spaces)
Row 9: Ch 1, turn. Sc in first 7 sts, 5 sc in ch-5 space, sc in next 7 sts, 5 sc in ch-5 space, sc in last 7 sts. (31 sc)
Rows 10-12: Ch 1, turn. Sc in each st across. (31 sc)
Row 13: Ch 1, turn. Dec, sc in each st to last 2 sts, dec. (29 sc)
Row 14: Ch 1, turn. Sc in first 5 sts, ch 4, sk 4, sc in next 11 sts, ch 4, sk 4, sc in last 5 sts. (21 sc, 2 ch-4 spaces)
Row 15: Ch 1, turn. Sc in first 5 sts, 4 sc in ch-4 space, sc in next 11 sts, 4 sc in ch-4 space, sc in last 5 sts. (29 sc)
Rows 16-17: Ch 1, turn. Dec, sc to last 2 sts, dec. (25 sc after Row 17)
Row 18: Ch 1, turn. Sc in each st across. (25 sc)
Rows 19-22: Ch 1, turn. Dec, sc to last 2 sts, dec. (17 sc after Row 22)
Rows 23-26: Ch 1, turn. Dec, sc to last 2 sts, dec. (9 sc after Row 26)
Row 27: Ch 1, turn. Dec, sc in next 5 sts, dec. (7 sc)
Row 28: Ch 1, turn. Dec, sc in next 3 sts, dec. (5 sc)
Row 29: Ch 1, turn. Dec, sc in next st, dec. (3 sc)
Row 30: Ch 1, turn. Sc3tog. (1 sc)
Fasten off, leaving a long tail for seaming.
Creating the Leaf Splits
This is where the magic happens! The chain spaces create the fenestrations, but we need to cut and finish them to look like real monstera holes.
For each ch-space opening:
1. Carefully cut the center chain of each chain space
2. Unravel back to the solid stitches on each side
3. Using your tapestry needle, weave the loose ends into the surrounding stitches
4. This creates open holes that mimic natural leaf fenestrations
Don’t panic if this feels scary. Take it slow. The chain spaces are specifically designed to be cut. Work over a table so you can see what you’re doing clearly.
Medium Monstera Leaf (Make 2 pieces per leaf)
Work the same as the large leaf but start with Ch 22 instead of 28. Reduce each row count proportionally by working 4 fewer stitches in the foundation and adjusting the spacing of chain gaps. Make 2 to 3 medium leaves.
Small Monstera Leaf (Make 2 pieces per leaf)
For younger monstera leaves without fenestrations:
Foundation: Ch 16.
Row 1: Sc in 2nd ch from hook, sc across. (15 sc)
Rows 2-4: Ch 1, turn. Inc in first st, sc to last st, inc. (21 sc after Row 4)
Rows 5-8: Ch 1, turn. Sc in each st across. (21 sc)
Rows 9-14: Ch 1, turn. Dec, sc to last 2 sts, dec. (9 sc after Row 14)
Rows 15-17: Ch 1, turn. Dec, sc to last 2 sts, dec. (3 sc after Row 17)
Row 18: Ch 1, turn. Sc3tog. (1 sc)
Fasten off. Make 1 to 2 small leaves without cutting any holes.
Wrapped Stems
Each leaf needs a sturdy stem. Here’s how to create them.
Step 1: Cut floral wire 2 inches longer than desired stem length.
Step 2: With dark brown yarn and 4.0mm hook, ch 4. Sl st in first ch to form ring.
Step 3: Working in continuous rounds, sc around the wire, encasing it completely. Work approximately 5 to 6 sc per round, pushing stitches tightly together.
Step 4: Continue until wire is covered, leaving 1 inch exposed at top.
Step 5: Sl st to close. Fasten off and weave in end.
The exposed wire at the top gets sandwiched between your two leaf pieces when you join them.
Assembling Each Leaf
1. Place two matching leaf pieces wrong sides together
2. Insert the exposed wire between layers at the pointed bottom
3. Using matching yarn, whip stitch or slip stitch around the entire edge
4. Leave the wire securely sandwiched inside
5. The leaf should now stand upright on its stem
Lacy Pot Cover
This decorative cover transforms a plain terracotta pot into something special.
Foundation: Ch 4, sl st to first ch to form ring.
Round 1: Ch 1, 8 sc in ring. Sl st to first sc. (8 sc)
Round 2: Ch 1, inc in each st around. Sl st to first sc. (16 sc)
Round 3: Ch 1, *sc in first st, inc in next st* around. Sl st to first sc. (24 sc)
Round 4: Ch 1, *sc in first 2 sts, inc in next st* around. Sl st to first sc. (32 sc)
Round 5: Ch 1, *sc in first 3 sts, inc in next st* around. Sl st to first sc. (40 sc)
Rounds 6-8: Continue increasing pattern until base fits pot bottom. (Approximately 56 to 64 sc)
Side Rounds: Work even in sc for 2 rounds.
Lacy Pattern Round: *Sc in first st, ch 3, sk 2 sts* around. Sl st to first sc.
Next Round: *Sc in sc, 3 sc in ch-3 space* around. Sl st to first sc.
Repeat these two rounds until cover reaches pot rim. Fasten off.
Slip cover over pot. It should fit snugly.
Final Assembly
1. Insert floral foam snugly into pot
2. Arrange stems by pushing wire ends into foam
3. Position largest leaves at back, medium in middle, small at front
4. Bend stems and leaves to create natural angles
5. Hot glue stem bases if needed for extra security
6. Place pot on saucer
Care Instructions
Your finished crochet monstera plant can be gently dusted with a soft brush. Avoid direct sunlight which may fade the colors over time. If yarn gets dusty, a quick blast of compressed air works wonders.
Tips for Success
Blocking helps. Lightly steam or wet block each leaf before assembly. This evens out your stitches and makes shaping easier.
Wire gauge matters. 18 gauge is stiff enough to hold shape but flexible enough to bend. Going thinner means floppy leaves. Going thicker makes it hard to crochet around.
Color placement is personal. I alternated my colors randomly, but you could do an ombre effect or match all leaves. Make it yours!
I hope this crochet monstera plant pattern brings a little handmade joy into your home. These leaves are so satisfying to create, and the finished plant always gets compliments from visitors. If you make one, I would absolutely love to see it! Tag me on Instagram or share a photo in my Facebook group.
Save this pattern to your Pinterest boards so you can find it when you’re ready to start. And please drop a comment below if you give it a try. I read every single one and it truly makes my day to see your creations come to life!
