Go grab that gorgeous worsted weight yarn you’ve been saving for something special. You know the one. It’s been sitting in your stash waiting for a project worthy of its beauty, and this is it. This diamond lattice vest combines surface crochet cables with textured stitches to create a stunning Aran-inspired garment that looks far more complicated than it actually is. I won’t lie to you. This is an intermediate to advanced project that requires patience and attention to detail. But if you’re ready to level up your crochet skills and create something truly impressive, this vest will reward every hour you put into it.
Why You’ll Love This Crochet Vest Pattern
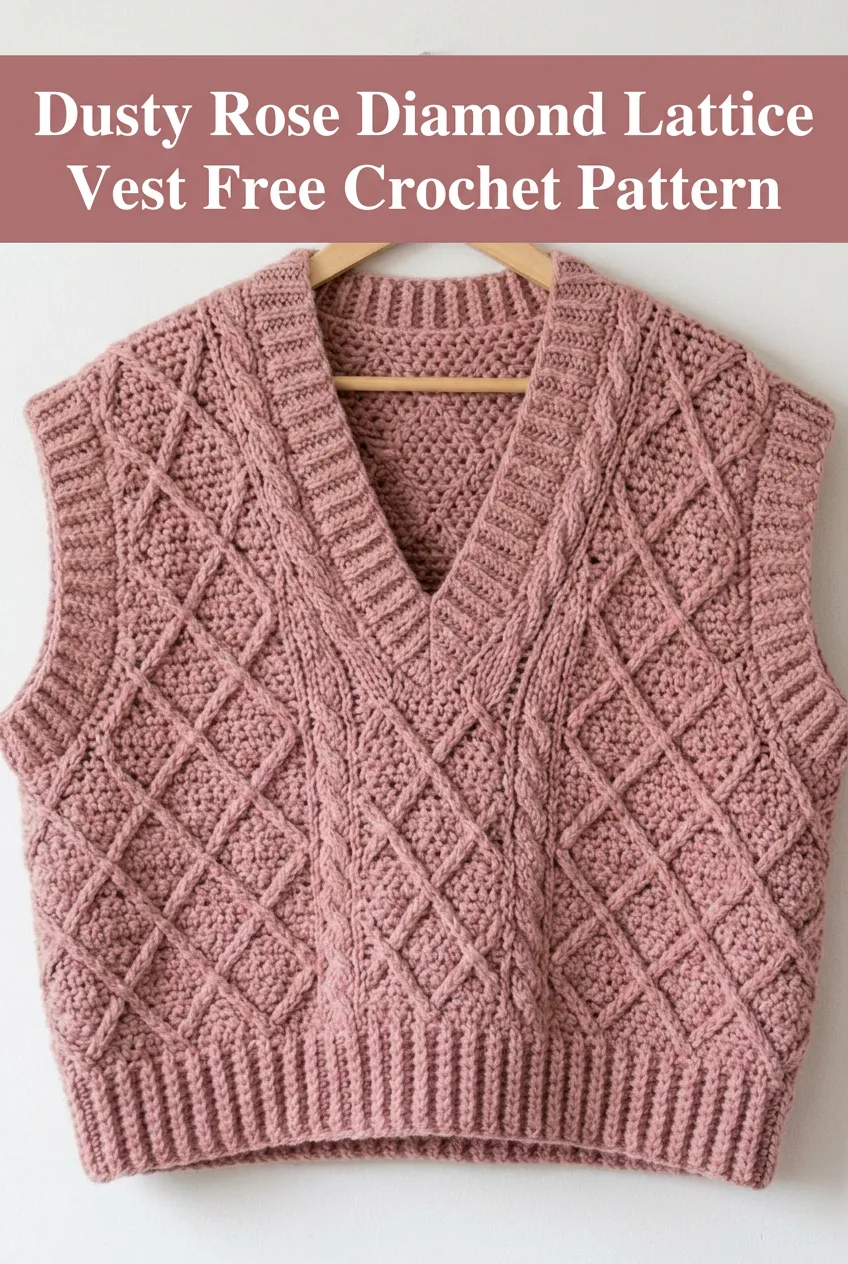
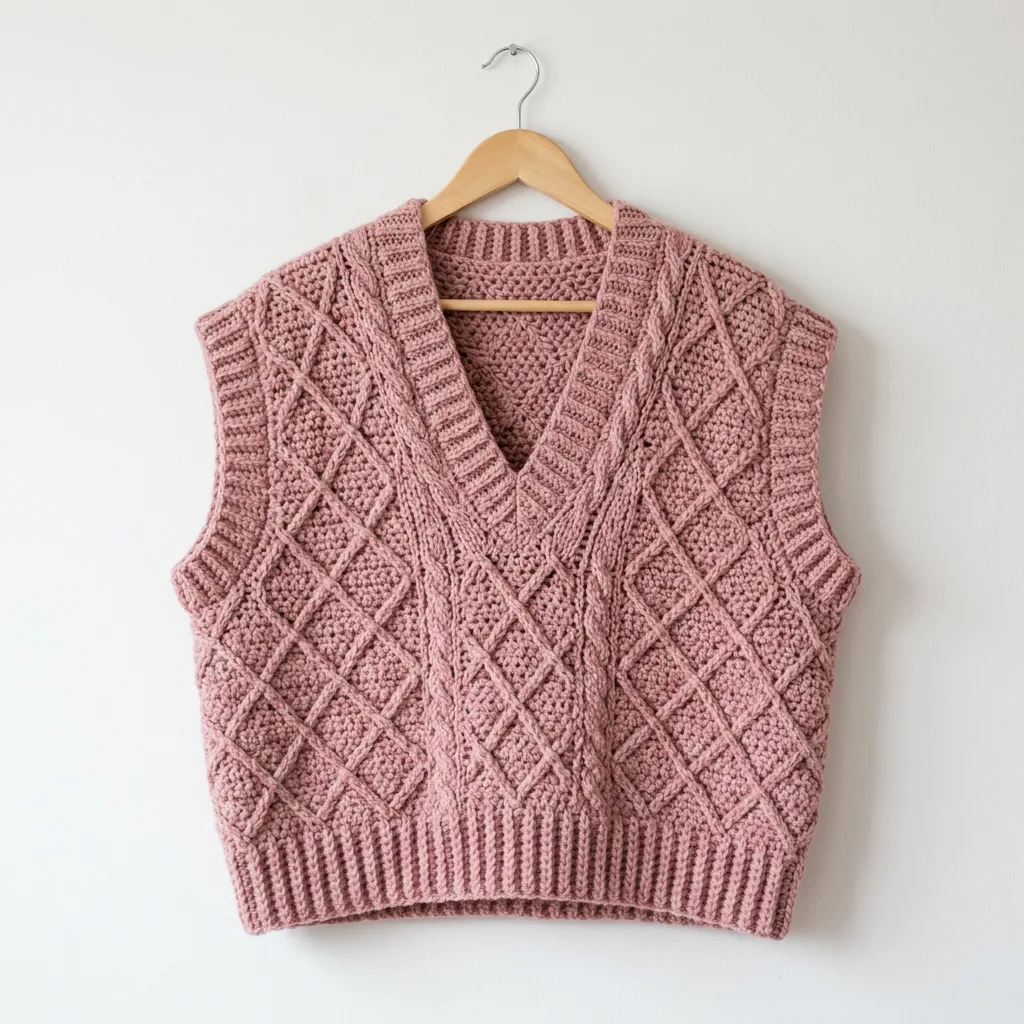
This V-neck sweater vest features a striking diamond lattice pattern across the body panels, ribbed edges at the hem and armholes, and elegant cable detailing along the neckline. The dusty rose color showcases every stitch beautifully, but this design would look gorgeous in any solid color that lets the texture shine.
The construction method makes this vest more approachable than you might expect. You’ll work flat panels for the front and back, then seam them together. The ribbing is worked separately and attached, giving you clean professional edges. Surface crochet creates those beautiful raised diamond lines without the complexity of traditional cable techniques worked into the fabric.
What makes this pattern special:
Materials Needed for Your Diamond Lattice Vest
Yarn:
Approximately 600 to 800 yards of worsted weight yarn (weight category 4). The sample uses a wool or wool-blend yarn in a dusty rose shade. Wool holds stitch definition beautifully for textured patterns like this one. Acrylic blends will work but may not showcase the cables quite as crisply.
Recommended yarn characteristics:
Hook:
Notions:
Gauge (Don’t Skip This!)
I know checking gauge isn’t the exciting part, but for a garment that needs to fit properly, this step matters. Trust me on this one.
Main fabric gauge: 14 stitches and 16 rows equals 4 inches in the textured body pattern using larger hook.
Ribbing gauge: 16 stitches and 18 rows equals 4 inches in ribbing pattern using smaller hook.
Work a swatch at least 5 inches square. Block it the same way you’ll block your finished vest. If your gauge is off, adjust your hook size. Too many stitches per inch means you need a larger hook. Too few means you need a smaller hook.
Skill Level and Techniques
This is an intermediate to advanced crochet pattern. You should be comfortable with the following before starting:
Stitches and Abbreviations Used:
Chain (ch): The foundation loop that starts most crochet. Yarn over, pull through the loop on your hook.
Single crochet (sc): Insert hook into stitch, yarn over and pull up a loop (two loops on hook), yarn over and pull through both loops. This creates a short, dense stitch.
Half double crochet (hdc): Yarn over, insert hook into stitch, yarn over and pull up a loop (three loops on hook), yarn over and pull through all three loops. Slightly taller than single crochet.
Double crochet (dc): Yarn over, insert hook into stitch, yarn over and pull up a loop (three loops on hook), yarn over and pull through two loops, yarn over and pull through remaining two loops. Creates a taller, more open fabric.
Slip stitch (sl st): Insert hook into stitch, yarn over and pull through both the stitch and the loop on your hook in one motion. Used for joining and surface work.
Front post double crochet (fpdc): Yarn over, insert hook from front to back to front around the post (vertical part) of the stitch below, yarn over and pull up a loop, complete as a regular double crochet. This creates raised texture on the front of your work.
Back post double crochet (bpdc): Same as fpdc, but insert hook from back to front to back around the post. The raised texture appears on the back of your work.
Skip (sk): Pass over the indicated number of stitches without working into them.
Decrease (dec): Combine two stitches into one. For sc2tog, work a single crochet but stop before the final yarn over, work another partial single crochet in the next stitch, then yarn over and pull through all three loops on hook.
Pattern Notes Before You Begin
Read through the entire pattern before starting. Seriously. This will save you confusion later and help you understand how the pieces come together.
The body of this vest uses a combination of single crochet and half double crochet to create the textured background. The diamond lattice is added after the panels are complete using surface slip stitch, which is much easier than working cables into the fabric as you go.
All turning chains count as a stitch unless otherwise noted.
Place markers at regular intervals to help you track your diamond pattern placement later. I recommend marking every 10 stitches along your foundation row.
Finished Measurements
This pattern creates an oversized, cropped vest. The sample shown measures approximately:
For a fitted look, work fewer foundation chains. For a longer length, add additional rows before armhole shaping.
Step by Step Crochet Pattern Instructions
Back Panel
Foundation Row: Using larger hook, ch 78.
Row 1: Sc in 2nd ch from hook, *hdc in next ch, sc in next ch* repeat across, turn. (77 sts)
Row 2: Ch 1 (does not count as st), sc in first st, *hdc in next st, sc in next st* repeat across, turn. (77 sts)
Rows 3 through 50: Repeat Row 2. Your panel should measure approximately 12.5 inches from the foundation.
Armhole Shaping:
Row 51: Sl st in first 6 sts, ch 1, sc in same st, *hdc in next st, sc in next st* across until 5 sts remain, leave remaining sts unworked, turn. (65 sts)
Row 52: Ch 1, sc2tog, work in pattern across until 2 sts remain, sc2tog, turn. (63 sts)
Rows 53 through 56: Repeat Row 52. (55 sts after Row 56)
Rows 57 through 72: Work even in pattern without decreases. (55 sts)
Shoulder Shaping:
Row 73: Ch 1, work in pattern across first 18 sts, leave remaining sts unworked, turn. (18 sts)
Row 74: Work in pattern across. Fasten off.
Skip center 19 stitches for back neck. Rejoin yarn to remaining 18 stitches and work Rows 73 and 74 for second shoulder.
Front Panel (Make 2, reversing shaping)
Foundation Row: Using larger hook, ch 40.
Row 1: Sc in 2nd ch from hook, *hdc in next ch, sc in next ch* repeat across, turn. (39 sts)
Row 2: Ch 1, sc in first st, *hdc in next st, sc in next st* repeat across, turn. (39 sts)
Rows 3 through 50: Repeat Row 2.
Armhole and V-Neck Shaping (Right Front):
Row 51: Sl st in first 6 sts, ch 1, sc in same st, work in pattern across, turn. (33 sts)
Row 52: Ch 1, work in pattern across until 2 sts remain at armhole edge, sc2tog, turn. (32 sts)
Row 53: Ch 1, sc2tog at armhole edge, work in pattern across until 2 sts remain at neck edge, sc2tog, turn. (30 sts)
Rows 54 through 56: Continue decreasing at armhole edge only. (27 sts after Row 56)
Rows 57 through 72: Decrease 1 stitch at neck edge every other row while keeping armhole edge straight. (18 sts after Row 72)
Row 73: Work even in pattern. Fasten off.
For Left Front, reverse all shaping. Work armhole decreases at the opposite edge and neck decreases at the opposite edge.
Ribbing for Bottom Hem
Row 1: Using smaller hook, ch 11.
Row 2: Sc in 2nd ch from hook, sc in each ch across, turn. (10 sts)
Row 3: Ch 1, working in back loops only (blo), sc in each st across, turn. (10 sts)
Rows 4 through 154: Repeat Row 3 until ribbing measures approximately 42 inches unstretched, or the width of your joined front and back panels.
Fasten off, leaving a long tail for seaming.
Ribbing for Armholes (Make 2)
Work same as bottom hem ribbing, but only for 36 rows or until ribbing measures approximately 9 inches unstretched.
V-Neck Ribbing
Work same as bottom hem ribbing for 100 rows, or until ribbing measures approximately 26 inches unstretched. This piece will wrap around the entire V-neckline.
Surface Crochet Diamond Lattice
This is where the magic happens. Surface crochet means you’re working slip stitches on top of your finished fabric to create raised lines. It’s much easier than it sounds.
How to work surface crochet:
1. Hold your yarn behind the fabric.
2. Insert hook from front to back through a stitch.
3. Pull up a loop to the front.
4. Insert hook into the next stitch along your diagonal line.
5. Yarn over from behind and pull through both the fabric and the loop on your hook (one slip stitch made).
6. Continue along your marked diagonal.
Creating the diamond pattern:
The diamonds on this vest form a lattice with approximately 4 inch repeats. Using stitch markers, mark diagonal lines across your front and back panels.
Starting at the bottom left corner of the back panel, work a surface slip stitch line diagonally upward to the right, skipping approximately 2 stitches and 2 rows between each insertion point. When you reach the edge, fasten off.
Repeat parallel lines approximately every 12 stitches across the panel.
Then work diagonal lines in the opposite direction, crossing your first set of lines to create diamonds.
For the front panels, continue the diamond pattern, matching the spacing from the back panel.
Cable Detail Along V-Neck
The cables running along the V-neckline are created using front post stitches worked into the surface crochet lines.
After completing the surface crochet on the front panels, work a second pass along each diagonal line using front post slip stitches, inserting your hook around the surface slip stitches rather than through the fabric. This adds dimension and creates the twisted cable appearance.
Assembly Instructions
Step 1: Block all pieces to measurements. Wet blocking works best for wool. Lay flat, pin to measurements, and allow to dry completely.
Step 2: Seam shoulders using mattress stitch or your preferred method.
Step 3: Seam side panels from hem to armhole.
Step 4: Attach bottom ribbing to hem edge, stretching slightly to fit and creating a gathered effect.
Step 5: Attach armhole ribbing around each armhole opening.
Step 6: Attach V-neck ribbing, starting at one shoulder, working down around the V, and ending at the other shoulder. Ease around the point of the V, folding slightly for a clean finish.
Step 7: Weave in all ends securely.
Customization Tips for Your Crochet Vest
Adjusting the fit: Add or subtract foundation chains in multiples of 2 to change the width. Add or remove rows before armhole shaping to change the length.
Yarn substitutions: Any worsted weight yarn will work, but yarns with good stitch definition will showcase the texture best. Avoid chenille, boucle, or very fuzzy yarns.
Color suggestions: Cream, charcoal, forest green, mustard, and burgundy would all look stunning. Variegated yarns may obscure the cable and lattice detail.
Troubleshooting Common Issues
My diamonds don’t line up: Mark your pattern placement before starting the surface crochet. Take your time and count stitches carefully.
The ribbing is too tight: Use a larger hook for the ribbing, or work your single crochets more loosely.
My gauge is off: This is normal. Adjust hook size and reswatch until you match gauge.
The surface crochet puckers: You’re pulling too tightly. Keep your tension relaxed and let the slip stitches lie naturally on the surface.
Care Instructions
Hand wash in cool water with a gentle wool wash. Lay flat to dry, reshaping while damp. Store folded rather than hung to prevent stretching.
I hope you absolutely love making this diamond lattice vest as much as I loved designing it. Thank you so much for trusting me with your crafting time. It means the world. If you make this vest, I would love to see it! Tag me on Instagram or share a photo in our Facebook group. Seeing your versions is honestly the best part of my job.
If this pattern is calling your name but you’re not quite ready to start today, go ahead and pin it to your crochet board on Pinterest so you can find it when the mood strikes. And if you do make it, drop a comment below and tell me about your experience. I read every single one, and I’m always here to help if you get stuck!
