
Crochet garments intimidate a lot of makers. I get it. The idea of constructing an entire dress from yarn feels overwhelming, especially when you see those gorgeous tiered skirts and fitted bodices. But here’s the truth: if you can work a double crochet and follow a pattern one section at a time, you can absolutely make this dress.
Get the Ad-Free PDF Pattern
You can find the free pattern below, or you can purchase the ad-free printable PDF from my shop.
Get the Printable PDF →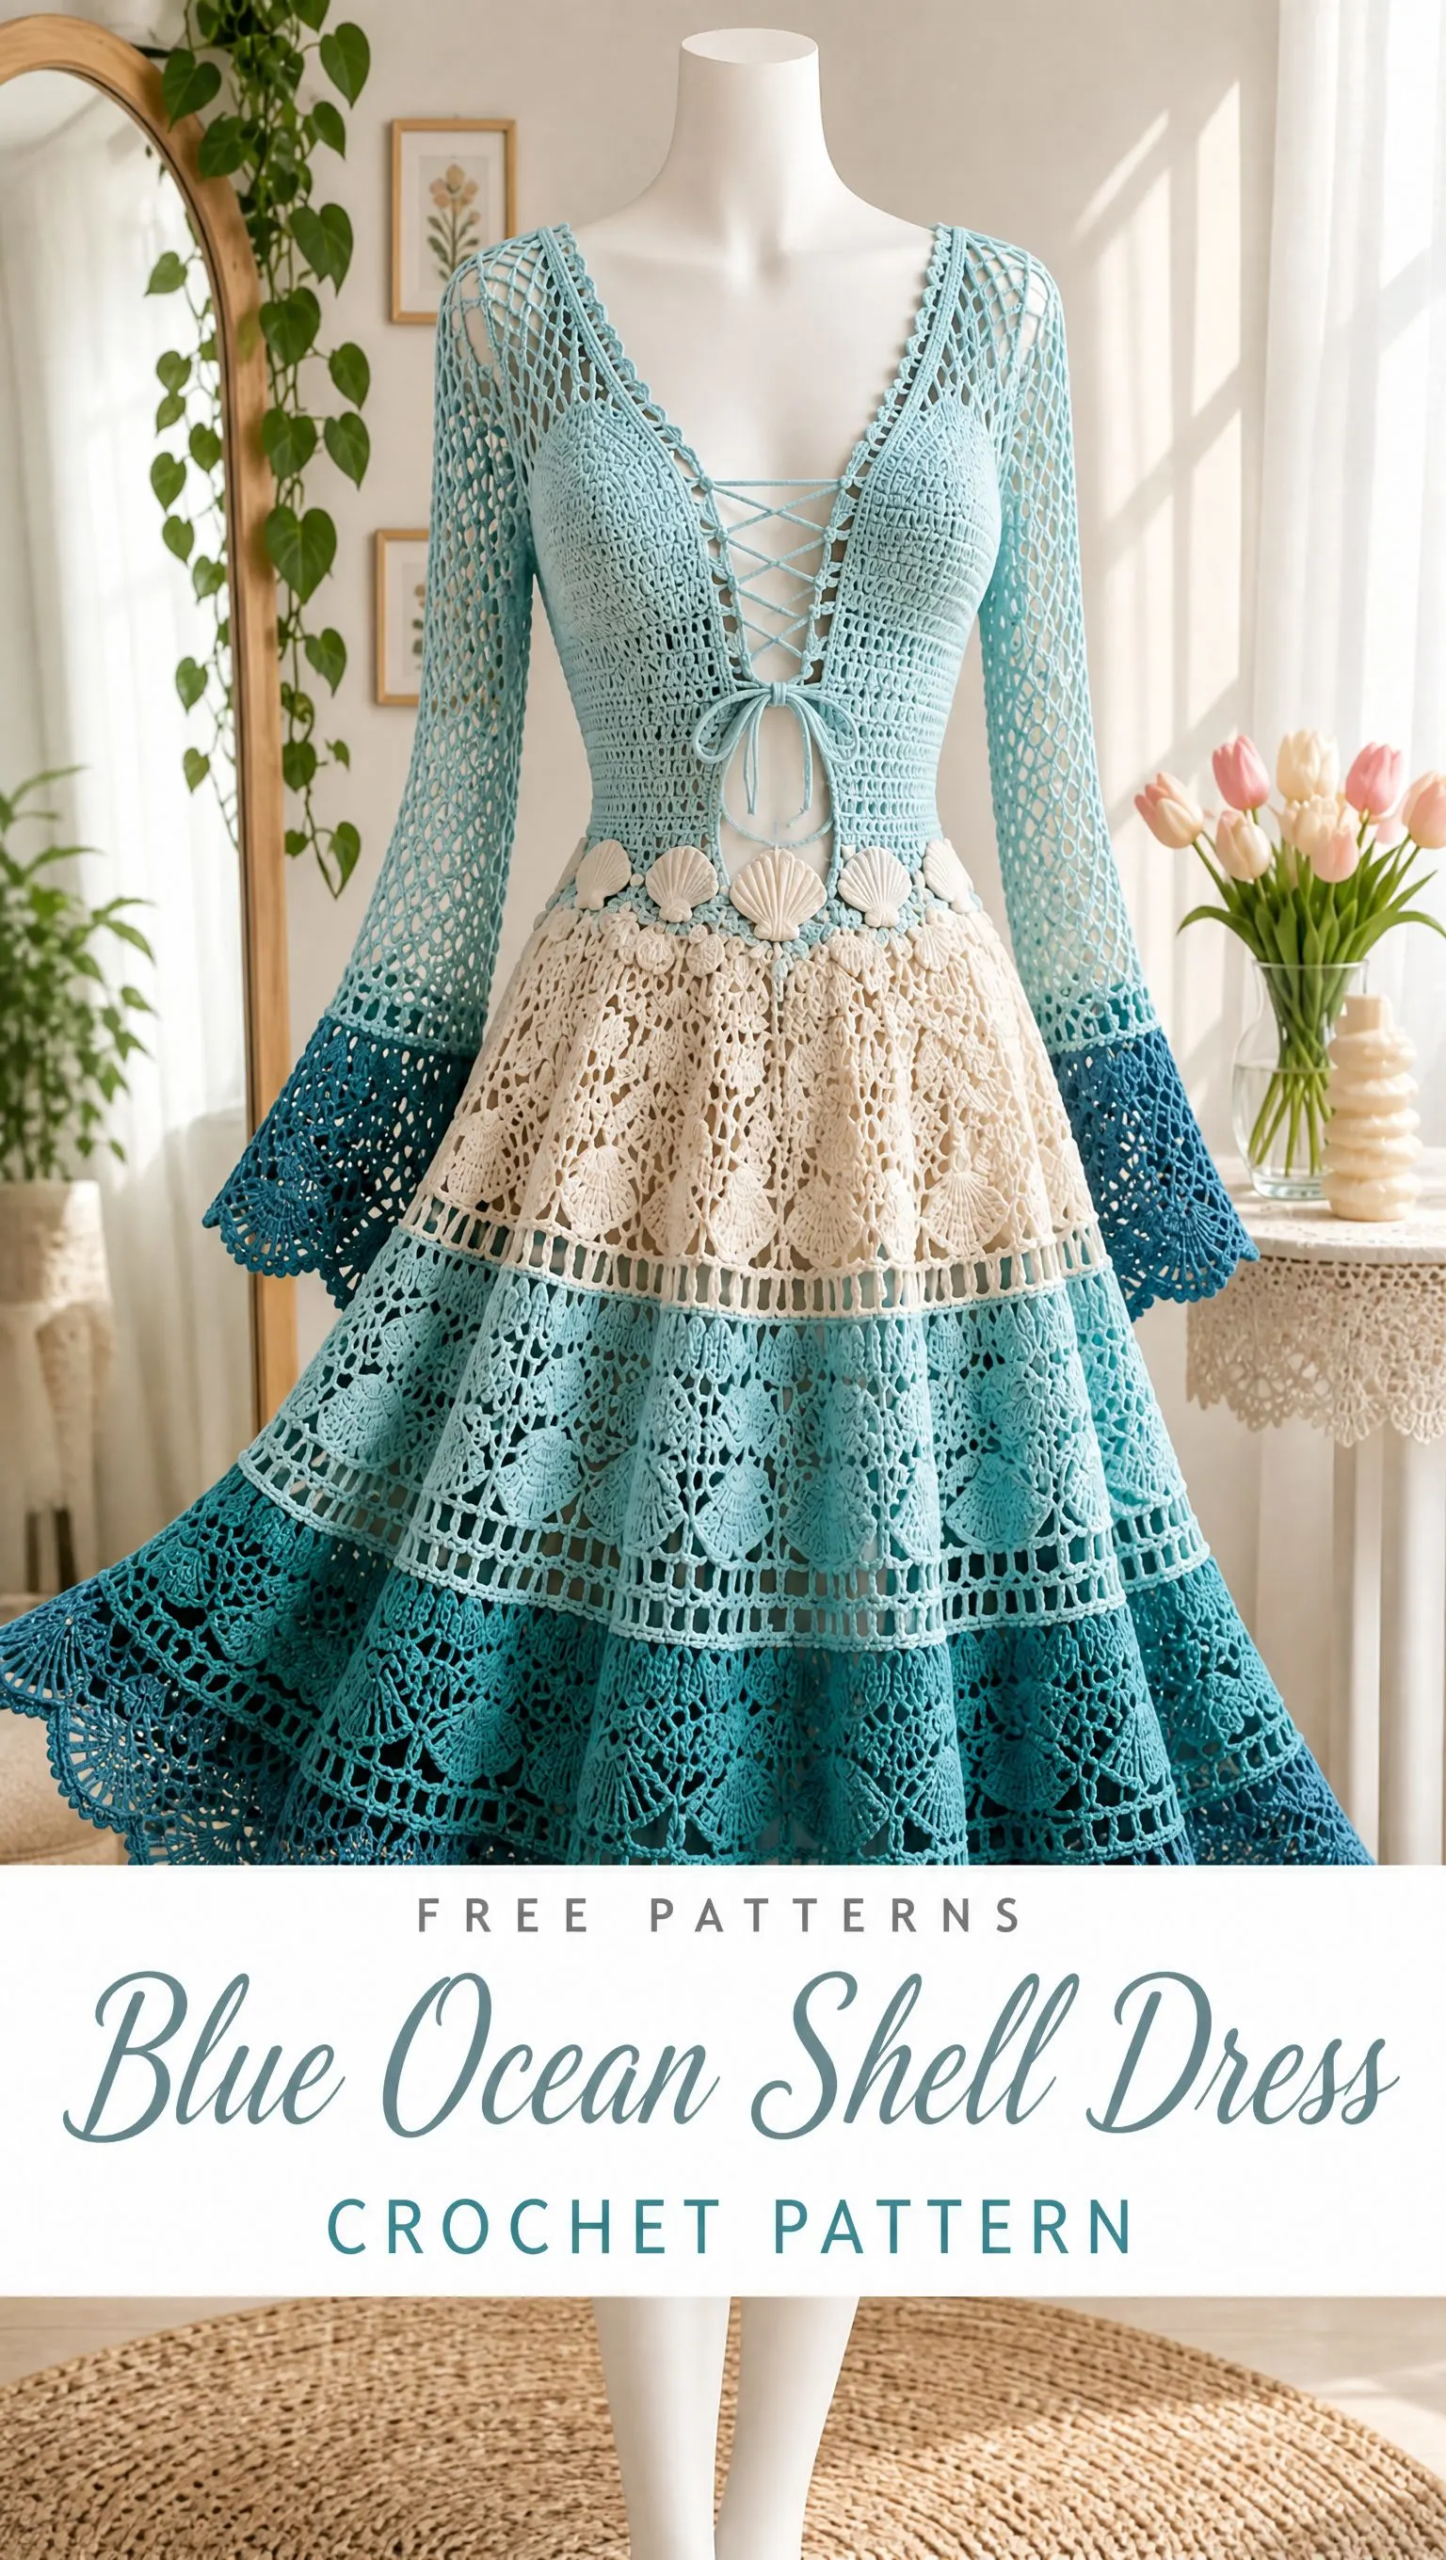
The Blue Ocean Shell Dress looks far more complicated than it actually is. The "shell" stitch is just five double crochets worked into the same stitch. That’s it. The mesh sections? Chains and double crochets. The construction is top-down, which means you can try it on as you go and adjust the fit along the way.
Whether you’re an intermediate crocheter ready to tackle your first wearable or an advanced maker looking for a stunning summer project, this pattern breaks everything down into manageable pieces. Let’s walk through it together.
About This Blue Ocean Shell Dress Pattern
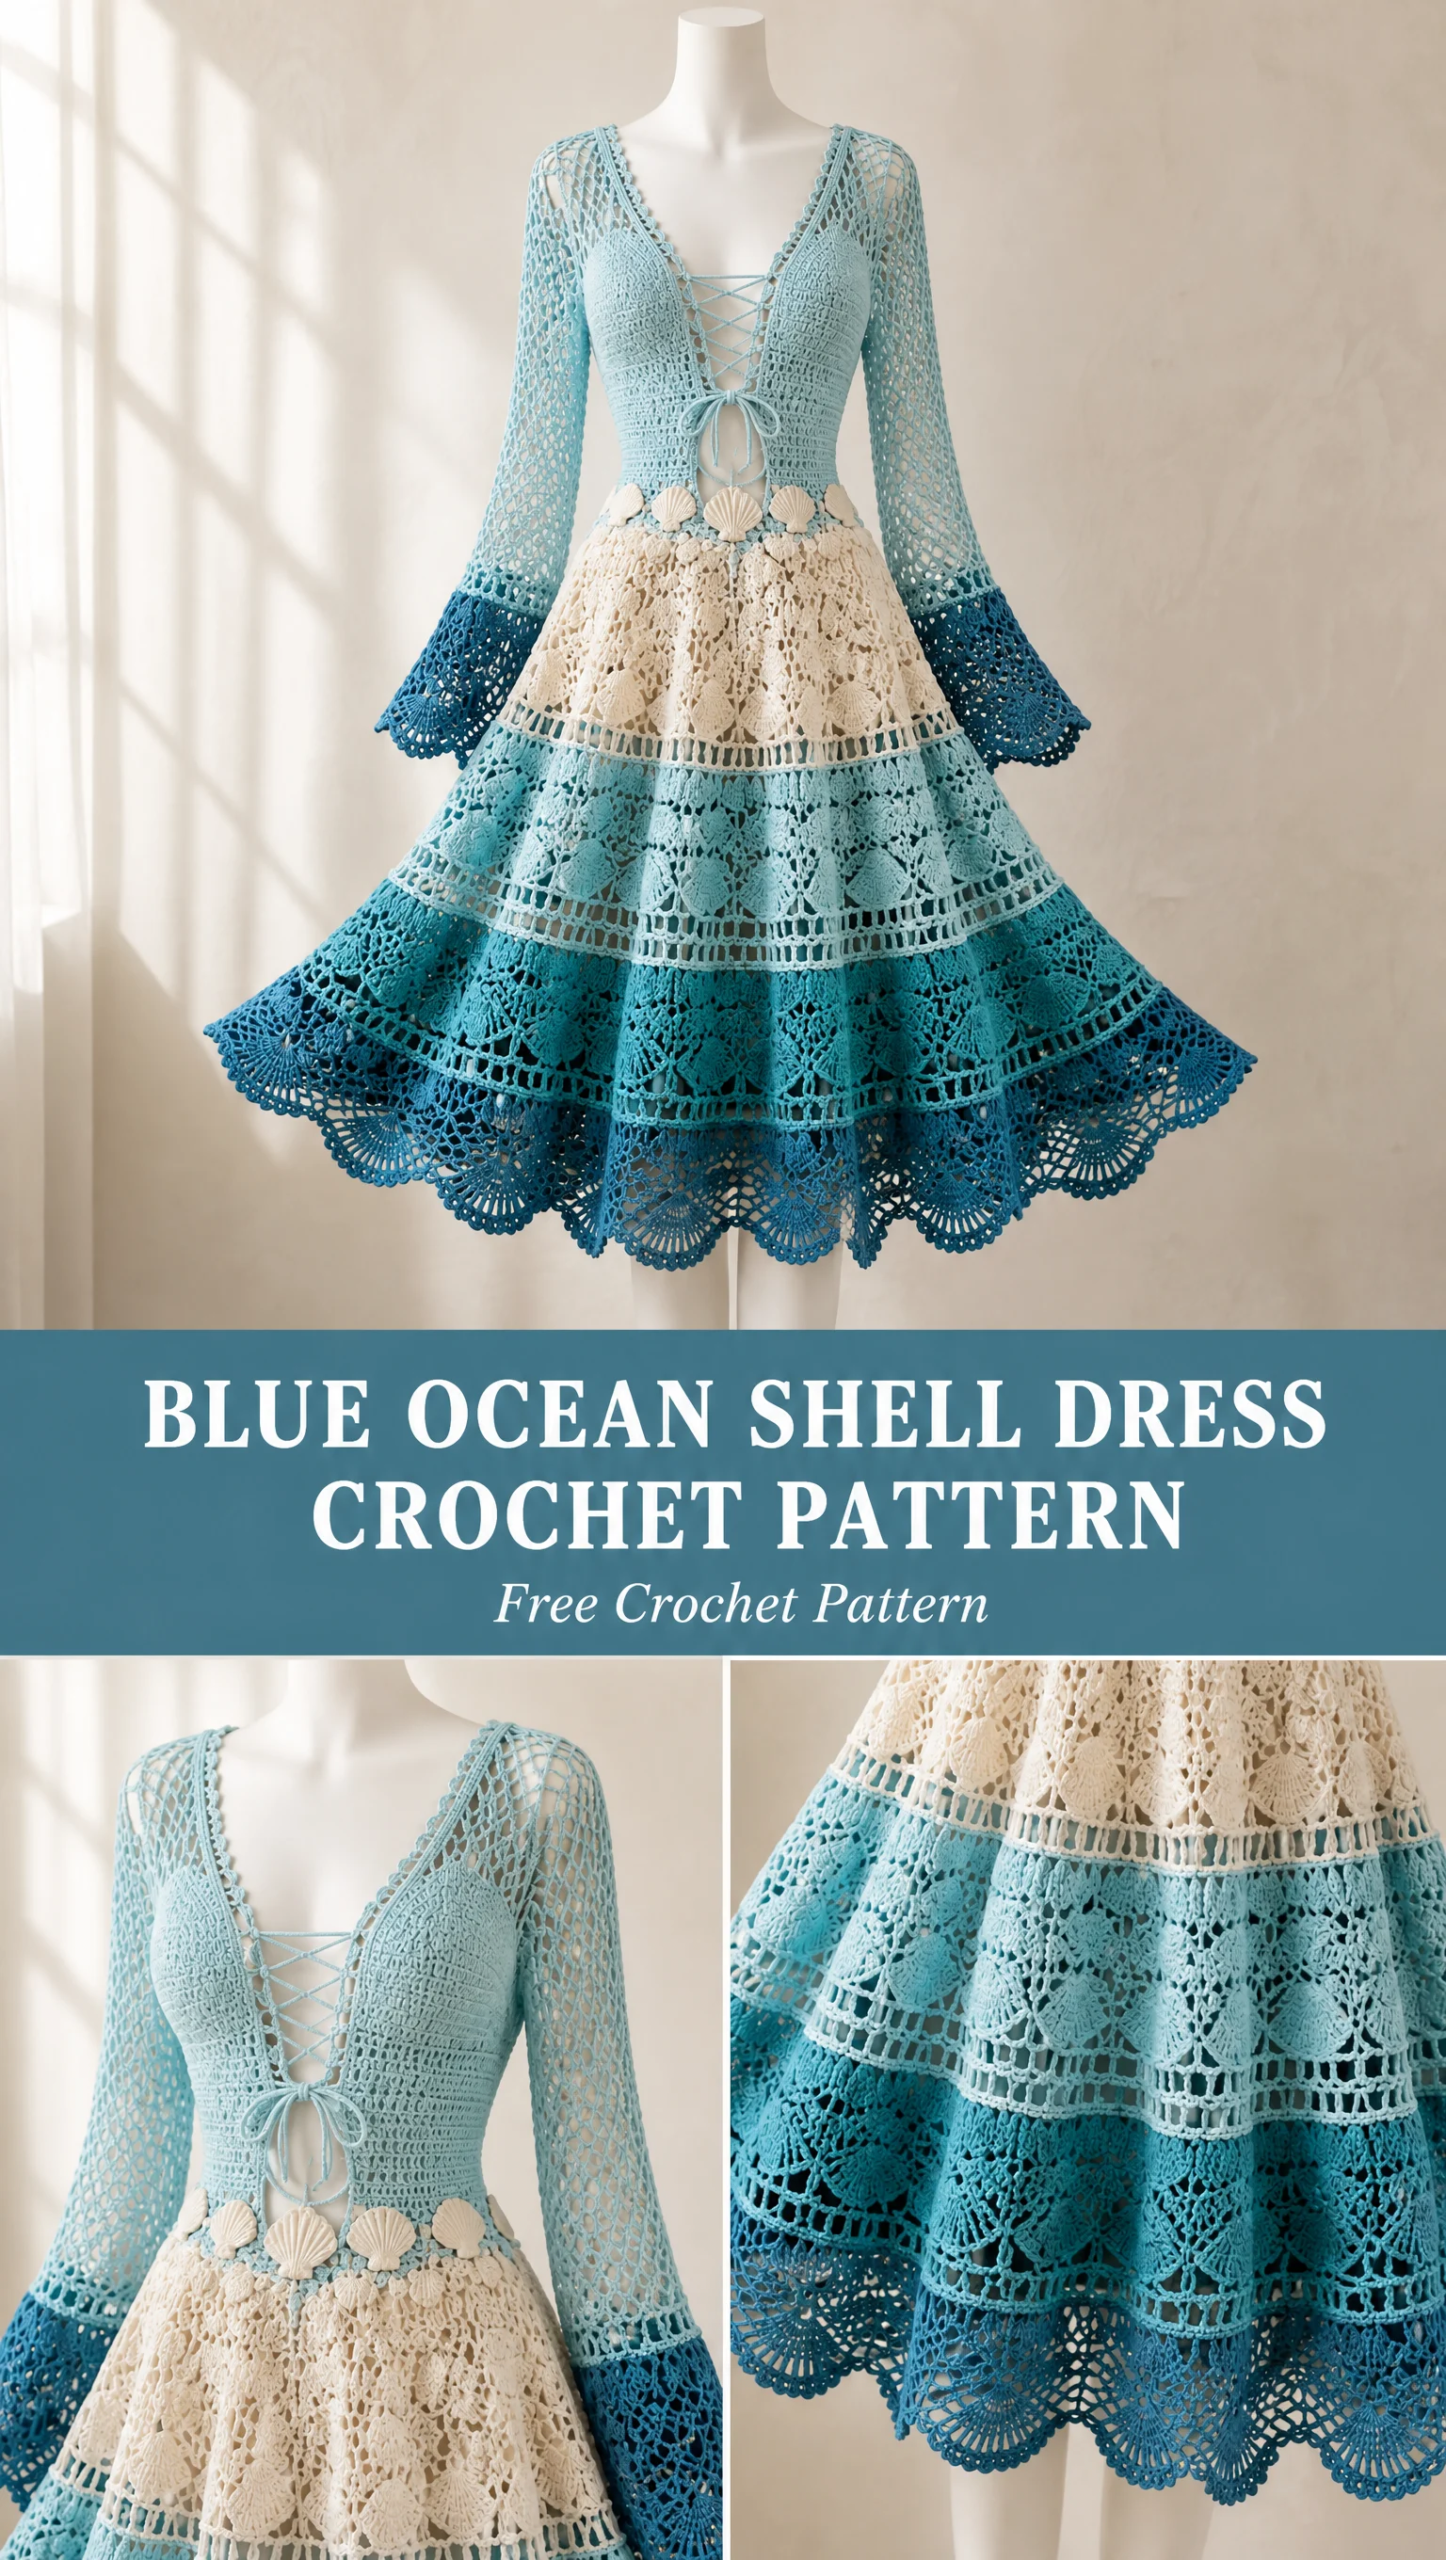
This knee-length crochet dress features a fitted bodice with a deep V neckline, long bell sleeves, and a flowing tiered skirt that moves beautifully when you walk. The ocean-inspired color palette transitions from pale aqua at the bodice through ivory, aqua, and teal in the skirt, finishing with a deep teal scalloped hem.
The construction method is beginner-friendly for garment making. You’ll work the bodice from the top down, create the sleeves as separate panels, then attach the skirt directly at the waist and work downward in tiers. This approach lets you customize the fit at every stage.
Skill Level: Intermediate to Advanced
Garment Type: Knee-length crochet dress
Construction: Top-down bodice with attached tiered skirt and separate sleeve panels
Suggested Size: Adjustable XS-XL by changing bust foundation chains and repeats
Materials You’ll Need
Gathering your materials before you start makes the whole process smoother. Here’s everything this pattern requires:
Yarn:
Cotton is the best choice for this dress because it provides beautiful stitch definition, has a lovely drape, and keeps you cool in warm weather. Sport weight or fingering weight yarns will give you that delicate lace-like appearance you see in the finished piece.
Tools:
A note about hook size: The hook recommendation is a starting point. Your personal tension matters more than the number on your hook. If your fabric feels stiff, go up a size. If it’s too loose and floppy, go down.
Gauge
Approximately 24 double crochet (dc) stitches and 12 rows in a 10 cm (4 inch) square.
Adjust your hook size to achieve a soft drape while keeping stitch definition. For a dress, you want fabric that flows and moves with your body, not fabric that stands up on its own. Take time to swatch before starting. I know swatching isn’t the fun part, but it saves you from frogging an entire bodice later.
Stitches Used
Let me define every stitch and technique you’ll use in this pattern. Even if you know these stitches well, read through to make sure we’re speaking the same language.
ch: chain — Yarn over, pull through the loop on your hook. This creates the foundation for most crochet work.
sc: single crochet — Insert hook into stitch, yarn over and pull up a loop (2 loops on hook), yarn over and pull through both loops.
hdc: half double crochet — Yarn over, insert hook into stitch, yarn over and pull up a loop (3 loops on hook), yarn over and pull through all 3 loops.
dc: double crochet — Yarn over, insert hook into stitch, yarn over and pull up a loop (3 loops on hook), yarn over and pull through 2 loops (2 loops remain), yarn over and pull through remaining 2 loops.
sl st: slip stitch — Insert hook into stitch, yarn over and pull through both the stitch and the loop on your hook in one motion. Used for joining rounds or moving across stitches invisibly.
shell: 5 dc worked into the same stitch — This is the signature stitch of the dress. Work five double crochets all into one stitch or space. It creates that fan-like shell shape you see throughout the skirt.
mesh: ch spaces with dc anchors — A combination of chain spaces and double crochet stitches that creates an open, lacy fabric. The exact chain count will vary by section.
picot: ch 3, slip stitch into first chain — A tiny decorative bump. After making 3 chains, insert your hook into the first chain you made (not the one on your hook) and slip stitch. This creates a small point or "picot" that adds elegance to edges.
Bodice Pattern
The bodice is where your fit happens, so take your time here. You’ll work from the upper bust down to the waist.
Step 1: Foundation
Create a chain that fits comfortably around your upper bust. The exact number of chains depends on your size and your gauge. Measure your upper bust, check your gauge swatch, and calculate the chains needed.
Join without twisting. Place a stitch marker at the join point. This is your side seam.
Step 2: Waist Shaping
Rounds 1 through 8: Work alternating double crochet (dc) and mesh rows in pale aqua yarn. Increase gradually at side seams for shaping.
The alternating texture creates visual interest while the increases allow the bodice to expand from the narrower upper bust to the fuller lower bust. Place stitch markers at your increase points to keep them consistent round after round.
Step 3: Deep V Neckline
Work the front panels separately. Decrease toward the center front while maintaining lace edges on both sides of the V.
Add crossed chain ties through evenly spaced eyelets. These ties are both functional and decorative, allowing you to adjust the neckline depth to your comfort level.
Tip for beginners: When working the V neckline, you’ll turn your work instead of joining rounds. Mark your right side to keep track of which side you’re on.
Step 4: Underbust Opening
Leave a small oval opening at center front. This is the decorative cutout visible just below where the ties meet.
Reinforce the edge with single crochet (sc) and picot trim. This step is important because it stabilizes the opening and prevents stretching over time.
Step 5: Waist Detail
Attach small ivory shell motifs evenly around the waistline. These create a visual transition between the bodice and skirt and add that charming seashell detail you see in the finished dress.
Sleeves
The sleeves are worked flat as rectangular panels, then shaped and finished with bell cuffs. This construction method is easier than working in the round for long sleeves.
Step 1: Create long rectangular mesh panels from shoulder width to wrist. The open mesh pattern allows the sleeves to drape beautifully without adding bulk.
Step 2: Shape gently by decreasing toward the wrist. This taper creates a more fitted look through the forearm before the bell cuff flares out.
Step 3: Finish with sea-blue bell cuffs using shell stitch rounds. The color transition from pale aqua to deep teal at the cuffs ties the sleeves to the skirt’s color story.
Step 4: Sew sleeves with invisible mattress-style joins. Take your time with this step. A neat seam makes the difference between handmade and homemade.
Skirt Construction
The skirt attaches directly at the waist and works downward in three color-blocked tiers. Each tier uses shell stitches separated by mesh rows, expanding gradually for that gorgeous flowing shape.
Attach yarn at the waist to begin.
Tier 1: Ivory Shell Band
Rounds 1 through 8:
Work shell stitches separated by mesh rows. Increase evenly for a flowing skirt.
This first tier in ivory creates a soft, feminine contrast against the aqua bodice. The shells are your main design element, with mesh rows between them adding openwork and drape.
Tier 2: Aqua Shell Band
Rounds 9 through 18:
Continue shell repeats with aqua yarn. Add narrow mesh separators between shell rows.
The aqua tier brings the bodice color into the skirt, creating visual continuity. By now your skirt circumference is noticeably larger, and the garment is really taking shape.
Tier 3: Teal Ocean Band
Rounds 19 through 30:
Use teal yarn and continue expanding the circumference.
This tier transitions into the deeper ocean colors. The increased circumference at this point creates beautiful movement in the finished dress.
Final Hem: Deep Teal Scalloped Fan Lace
The hem is a showstopper. This three-round edging creates dramatic scalloped fans that catch the eye and finish the dress with elegance.
Round 1: Mesh foundation. This creates the base for your fan shells.
Round 2: Work fan shells across each mesh section. These are larger than the standard shells, creating more dramatic scallops.
Round 3: Add picot edging to each fan tip. The picots add delicate points to each scallop and give the hem a lacy, finished appearance.
Finishing Your Blue Ocean Shell Dress
You’re so close to wearing this beautiful creation. These finishing steps make all the difference.
Block the dress gently to reveal shell texture. Wet blocking works best for cotton. Soak the dress in cool water, gently squeeze out excess water (don’t wring), and lay flat on blocking mats. Shape the shells and fans with your fingers and let dry completely.
Weave in all ends securely. With multiple color changes, you’ll have quite a few ends. Weave each one through several stitches on the wrong side, then back in the opposite direction. Trim close to the fabric.
Check neckline ties and sleeve seams. Make sure ties are even in length and seams lie flat.
Add lining if desired for additional coverage. The mesh and shell construction creates an openwork fabric. A simple slip or lining in a coordinating color provides coverage while still showing off your beautiful stitch work.
Care Instructions
Hand wash your Blue Ocean Shell Dress in cool water using a gentle detergent. Lay flat to dry on a clean towel, reshaping as needed. Cotton can stretch when wet, so avoid hanging while drying.
Complete Assembly Order
Follow this sequence for best results:
1. Crochet bodice
2. Add neckline shaping and ties
3. Create sleeves and attach
4. Crochet skirt tiers downward
5. Add shell motifs at waistline
6. Finish hem lace
7. Block and shape the completed dress
Final Thoughts on This Crochet Dress Pattern
This Blue Ocean Shell Dress pattern creates a flowing, ocean-inspired crochet dress with layered shell textures, lace details, and a soft handcrafted finish. It’s the kind of garment that makes people ask, "You made that?" And you’ll get to say yes.
The key to success with any crochet garment is patience. Work one section at a time. Try it on as you go. Don’t be afraid to frog and redo if something doesn’t fit right. The cotton yarn is forgiving, and the construction method allows for adjustments.
Thank you so much for choosing this pattern for your next project. I truly hope you love making it as much as I loved designing it.
If this Blue Ocean Shell Dress is calling your name, go ahead and save this pattern to your Pinterest boards so you can find it when you’re ready to cast on. And please, if you make this dress, leave a comment below or tag me on social media. Seeing your finished projects absolutely makes my day!
Want a Quick & Easy Printable Version?
Get a clean, beautifully formatted PDF of this pattern — easy to follow step by step, ready to print or save on any device. No scrolling, no distractions, just the pattern.
Get the Printable PDF →You Might Also Like
- Dusty Rose Bobble Stitch Baby Romper Free Crochet Pattern
- Sunset Orange Butterfly Bag Free Crochet Pattern
- Dusty Rose Gradient Crochet Mini Dress Free Pattern
- Lavender Rose Baby Romper Free Crochet Pattern
