
If you’ve been searching for a table runner pattern that feels both heirloom-quality and refreshingly modern, this Blue Porcelain Lace Runner deserves a spot at the top of your list. The striking cobalt and white color combination draws direct inspiration from classic porcelain pottery, creating a piece that looks far more intricate than the construction actually requires.
Get the Ad-Free PDF Pattern
Scroll down for the full pattern, or get the ad-free printable PDF from the shop.
Get the Printable PDF →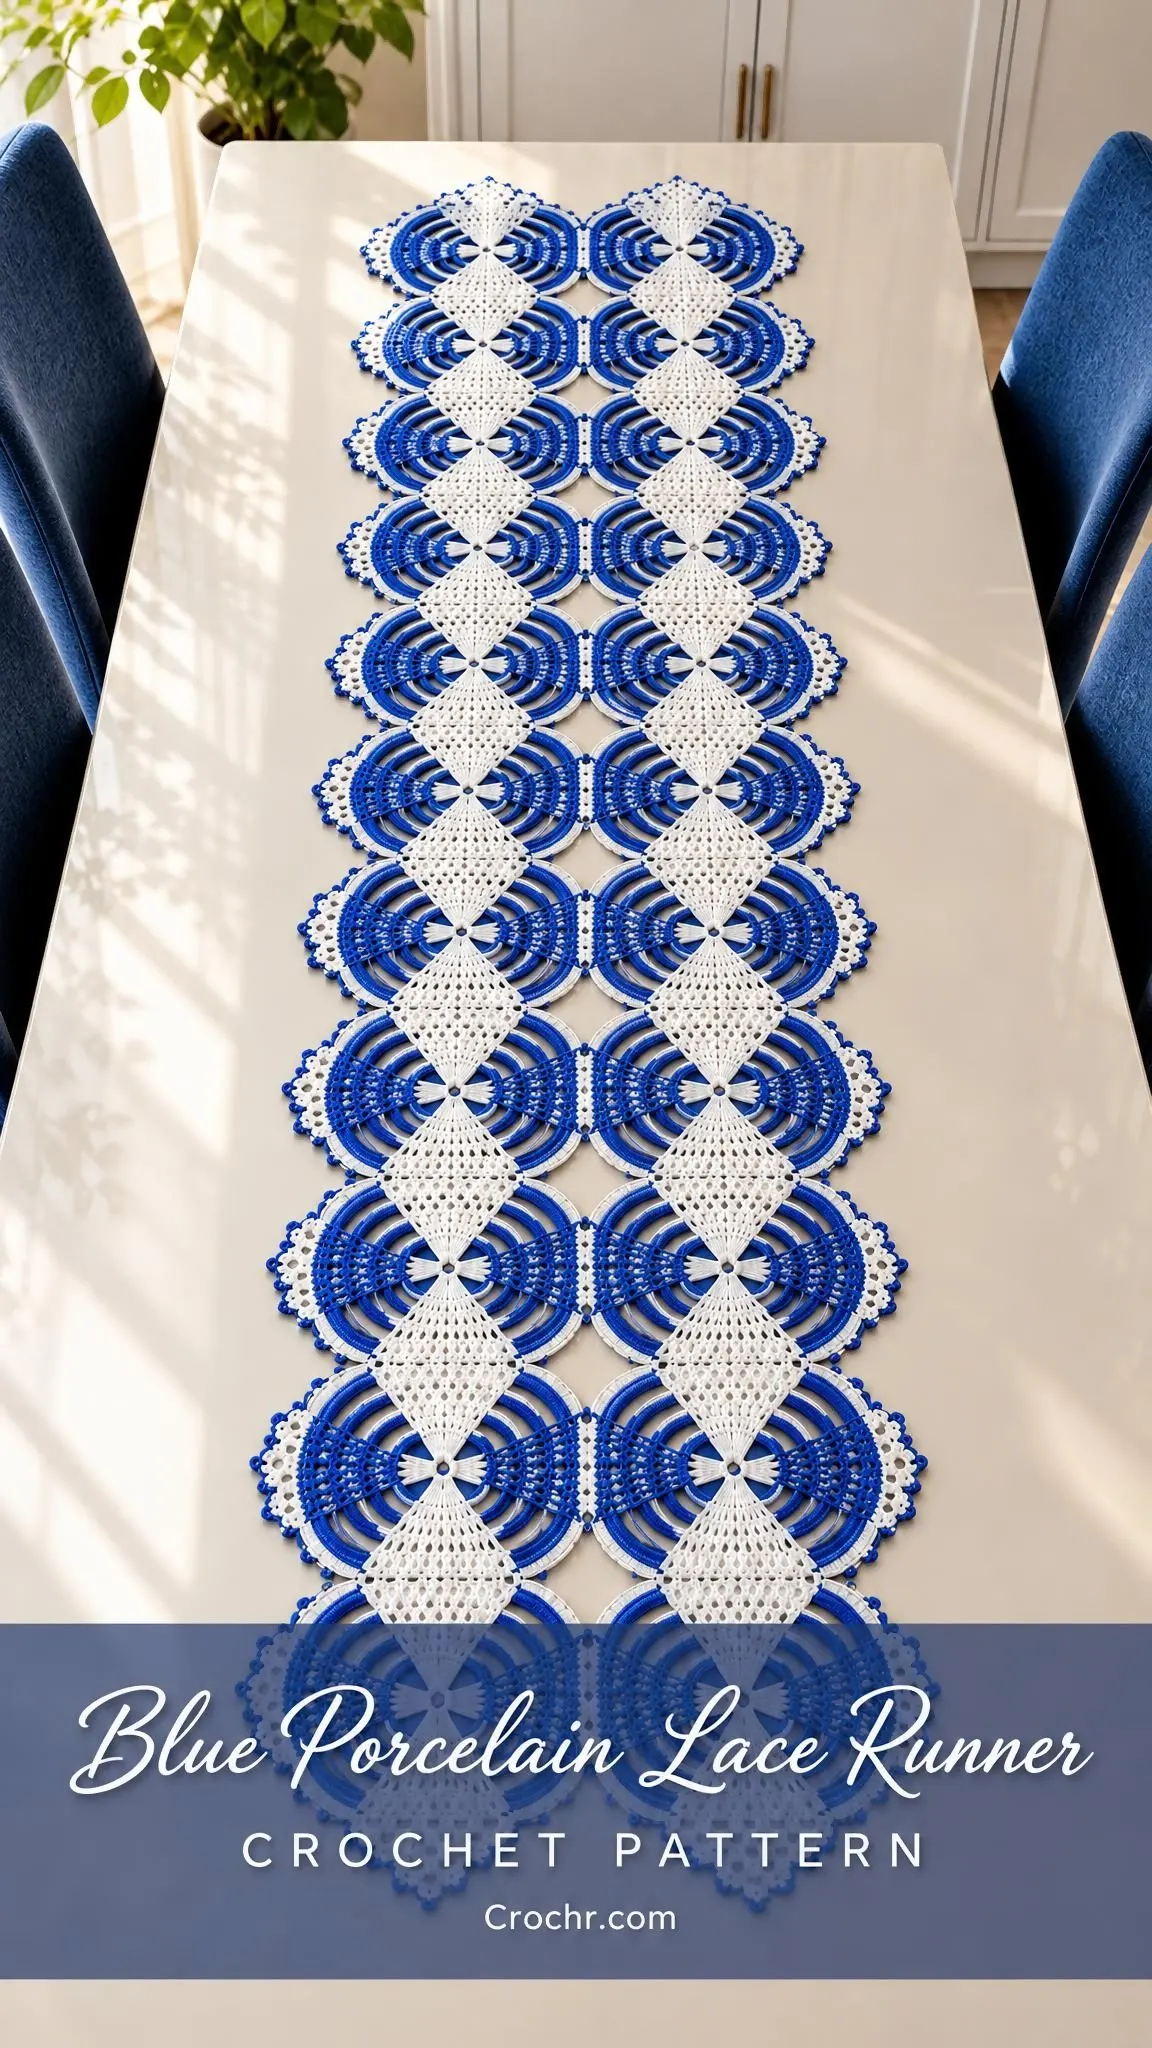
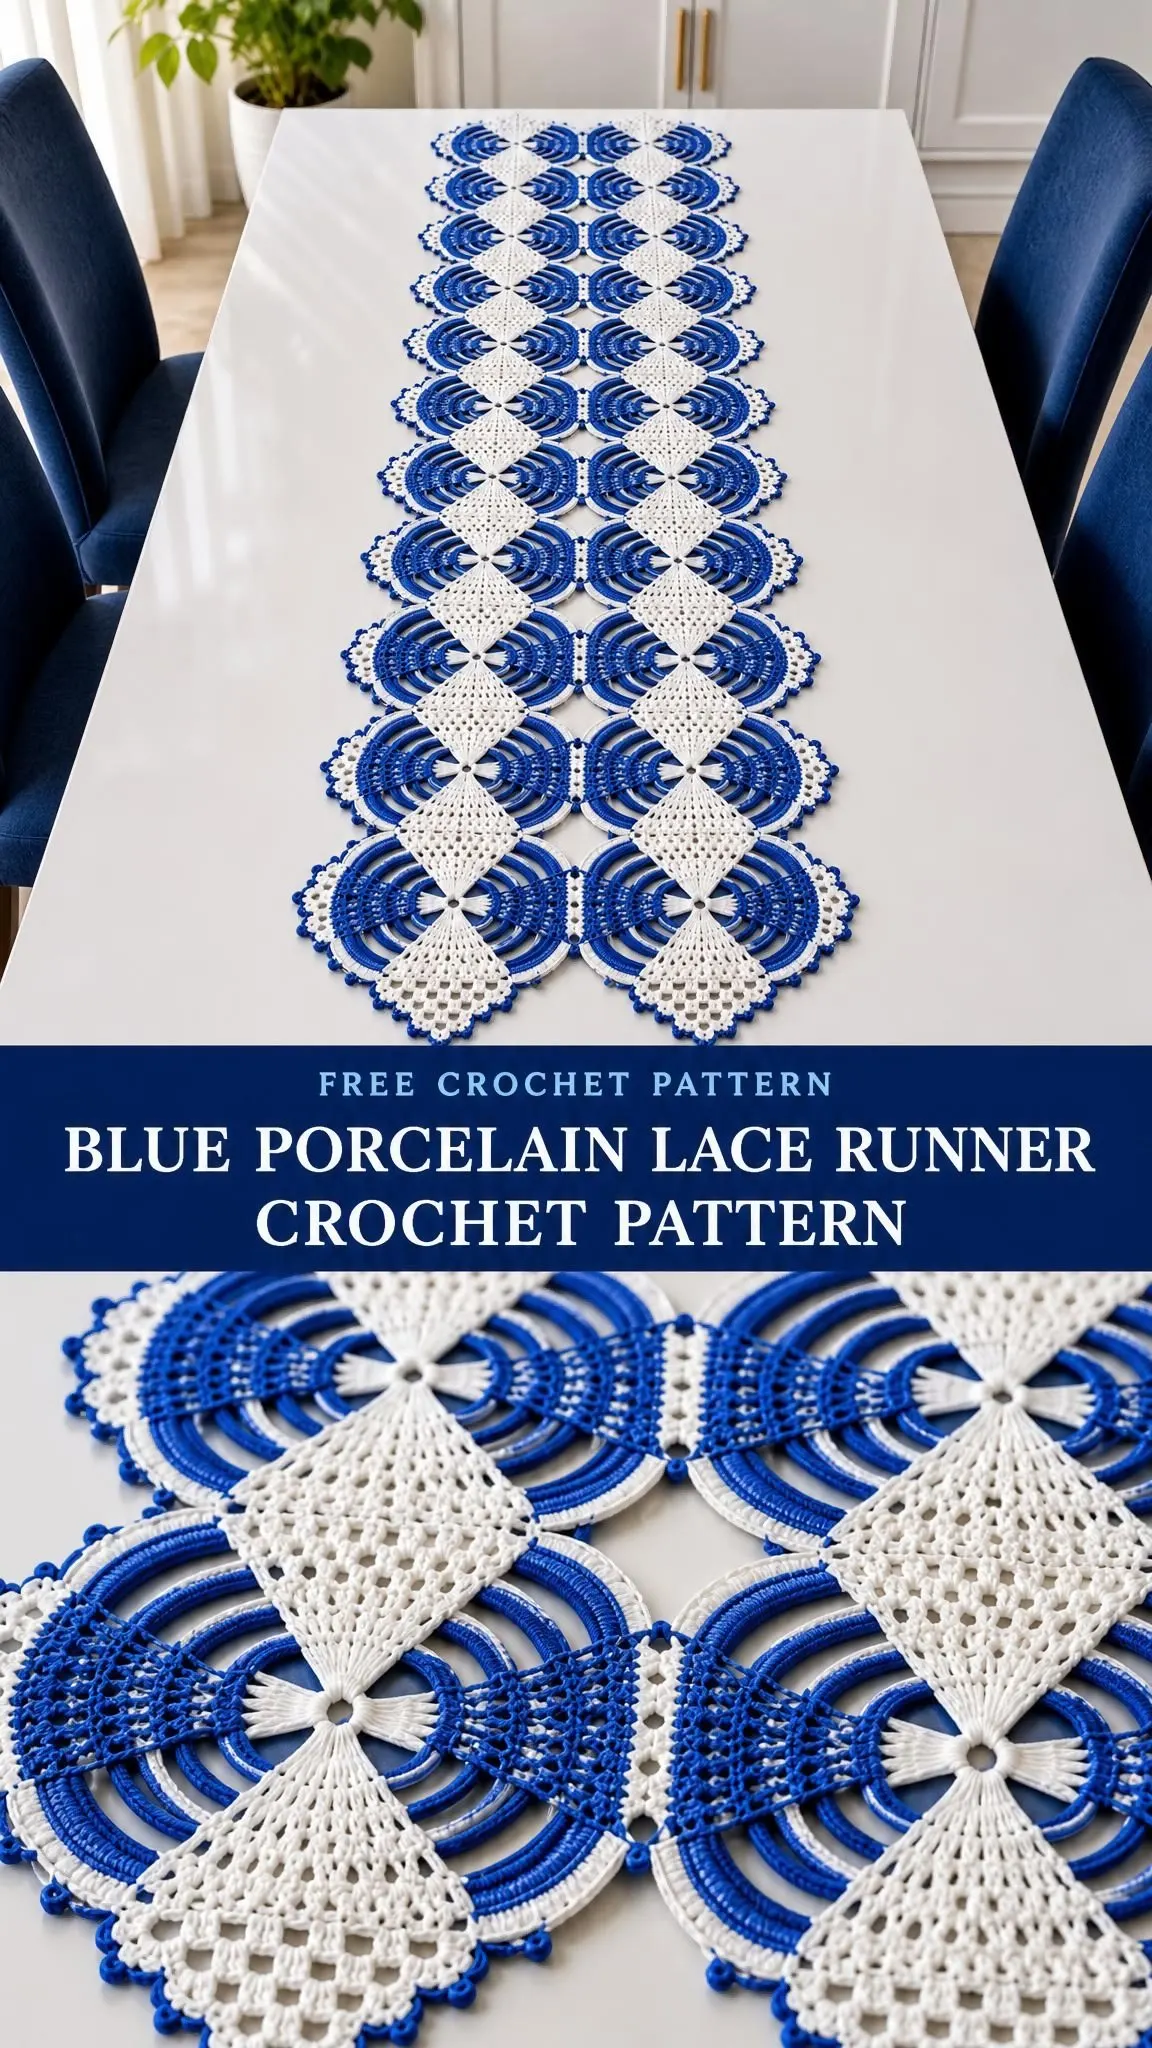
What sets this design apart from other lace runner patterns is the clever two-element approach. Rather than working one continuous piece with complicated color changes, you’ll create separate circular medallions and elongated filet diamonds, then join them into a stunning 128 x 32 cm finished runner. It’s modular crochet at its finest.
Whether you’re dressing up your own dining table or creating a meaningful handmade gift, this pattern delivers serious visual impact. The combination of airy chain arches in cobalt blue with crisp white filet work creates that beloved blue-and-white aesthetic that never goes out of style.
Why This Lace Runner Pattern Works So Beautifully
The secret to this design’s elegant appearance lies in its construction method. Instead of wrestling with complicated colorwork within a single piece, you’ll work each element separately. The circular medallions feature concentric chain arches in cobalt blue, while the center details and filet diamonds use white thread. This separation keeps your work clean and your tension consistent.
Each medallion measures 16 cm in diameter after blocking, with exactly 16 radial repeats creating perfect symmetry. The elongated filet diamonds measure approximately 9 cm wide by 14 cm long, sized precisely to nestle beautifully in the center of each circle.
The modular approach also means you can work on this project anywhere. Toss a medallion-in-progress into your bag for waiting rooms or lunch breaks. No massive piece to wrangle until final assembly.
Materials You’ll Need
Before you begin, gather these supplies. Using the correct thread weight and hook size is essential for achieving the proper gauge and finished dimensions.
Yarn:
- Color A (cobalt blue): 150 g of Size 3 mercerized crochet cotton, approximately 250 m per 50 g
- Color B (white): 150 g of Size 3 mercerized crochet cotton, approximately 250 m per 50 g
Hook:
- 2.5 mm crochet hook, or size needed to achieve gauge
Notions:
- Fine tapestry needle
- Rustproof pins
- Tape measure
- Blocking mat
- Towels for wet blocking
Important thread notes: Use colorfast cotton from one dye lot to ensure consistent color throughout your runner. A smooth, mercerized thread gives the crispest arches, while fuzzy yarn obscures the delicate lace pattern. The amounts listed include a small allowance for gauge swatches and any adjustments.
Gauge Information
Getting gauge right matters tremendously for lace work. Your blocked circular medallion should measure 16 cm in diameter. Your filet diamond should measure approximately 9 cm wide by 14 cm long after blocking.
Make one of each motif, wash, block, and measure when fully dry before committing to the full project.
Troubleshooting gauge issues:
- If your medallion cups inward, loosen your chain arches
- If your medallion ruffles, verify your repeat count is exactly 16
- Change hook size as needed to reach 16 cm without forcing the lace
The join spacing between medallions adds about 0 to 0.5 cm, so your finished total dimensions are approximate.
Abbreviations and Special Stitches
This pattern uses US crochet terminology. If you typically work from UK patterns, note that US single crochet (sc) equals UK double crochet (dc), US half double crochet (hdc) equals UK half treble (htr), US double crochet (dc) equals UK treble (tr), and US treble crochet (tr) equals UK double treble (dtr).
Standard abbreviations:
- ch = chain
- sl st = slip stitch
- sc = single crochet (insert hook, yarn over, pull through, yarn over, pull through both loops)
- hdc = half double crochet
- dc = double crochet (yarn over, insert hook, yarn over, pull through, yarn over, pull through two loops twice)
- tr = treble crochet (yarn over twice, insert hook, yarn over, pull through, then yarn over and pull through two loops three times)
- st(s) = stitch(es)
- sp = space
- RS/WS = right side/wrong side
- rep = repeat
Special stitch definitions:
Filet cell: Chain 2 followed by a treble crochet (tr) in the next tr. An open cell has two chains between its treble posts.
Turning chain notes: On diamond rows, the turning chain 4 counts as the first tr. At an increase edge, chain 6 counts as one tr plus chain 2.
Picot: Chain 3, then slip stitch in the first of those three chains. This creates a small decorative bump along the edge.
Joining bridge: Chain 2, slip stitch in the corresponding edge loop of the next medallion, chain 2, slip stitch back into the starting loop.
Stitch counts in brackets exclude joining slip stitches unless specifically stated.
Pattern Notes Before You Begin
Read through all instructions before starting. Brackets enclose repeats, and you’ll work each repeat the stated number of times. Join each round to its first counted stitch, keeping the right side (RS) facing for all motifs.
When changing colors, complete the color change on the final yarn over of the last stitch, then fasten off unused colors.
All measurements refer to washed, dry, blocked fabric. For reference, 1 inch equals 2.54 cm.
Medallion orientation: All medallions have 16 radial repeats. Number your outer loops 1 through 16 clockwise, with loop 1 at the top. Loop 5 points right, loop 9 points to the bottom, and loop 13 points left. This numbering system becomes essential during assembly.
Construction Overview
You’ll create this runner in stages:
- Crochet 16 circular medallions
- Crochet 16 filet diamonds
- Block all pieces separately
- Join circles into an 8 x 2 grid
- Center one diamond on each circle and sew lightly
- Add any finishing touches and final blocking
Finished piece counts:
- Round medallions: 16 pieces at 16 cm diameter each
- Filet diamonds: 16 pieces at 9 x 14 cm each
- Joined runner: 1 piece at approximately 128 x 32 cm
Circular Medallion Instructions
Make 16 identical medallions.
Round 1 (Color B, white): Create an adjustable ring. Chain 3 (this counts as your first dc), then work 15 dc into the ring. Tighten the ring and join to the top of the chain 3. [16 dc]
Round 2 (Color B): Chain 4 (this counts as dc plus ch 1). Dc in next dc, ch 1. Repeat from to 15 more times. Join to the third chain of starting chain. [16 dc, 16 ch-1 spaces]
Round 3 (Color A, cobalt blue): Join in any ch-1 space, chain 1. Sc in next ch-1 space, ch 3. Repeat from to 16 times total. Join to first sc. [16 sc, 16 ch-3 arches]
Round 4 (Color A): Slip stitch into first arch, chain 1. Sc in next arch, ch 5. Repeat from to 16 times. Join. [16 sc, 16 ch-5 arches]
Round 5 (Color A): Slip stitch into first arch, chain 1. Sc in next arch, ch 7. Repeat from to 16 times. Join. [16 sc, 16 ch-7 arches]
Round 6 (Color A): Slip stitch into first arch, chain 1. Sc in next arch, ch 9. Repeat from to 16 times. Join. [16 sc, 16 ch-9 arches]
Round 7 (Color A): Slip stitch into first arch, chain 1. Sc in next arch, ch 11. Repeat from to 16 times. Join. [16 sc, 16 ch-11 arches]
Round 8 (Color B, white): Join in any outer arch. In each arch around, work: 5 sc, picot, 6 sc. Join and fasten off. [176 sc, 16 picots]
Blocking each medallion: Pin each outer picot evenly around a 16 cm circle on your blocking mat.
Elongated Filet Diamond Instructions
Make 16 identical diamonds.
Row 1 (Color B, white): Chain 7. Work tr in the seventh chain from hook. The initial six chains count as the first tr plus ch 2. [2 tr posts, 1 open cell]
Row 2: Chain 6, turn. Tr in first tr (this creates your first new cell). Ch 2, tr in last tr. Ch 2, tr in same last tr. [4 tr posts, 3 cells]
Row 3: Chain 6, turn. Tr in first tr. Ch 2, tr in next tr. Repeat from to 3 times. Ch 2, tr in same last tr. [6 tr posts, 5 cells]
Row 4: Chain 6, turn. Tr in first tr. Ch 2, tr in next tr. Repeat from to 5 times. Ch 2, tr in same last tr. [8 tr posts, 7 cells]
Row 5: Chain 6, turn. Tr in first tr. Ch 2, tr in next tr. Repeat from to 7 times. Ch 2, tr in same last tr. [10 tr posts, 9 cells]
Row 6 (begin decreases): Turn. Slip stitch across first ch-2 space into second tr. Ch 4 (counts as first tr). Ch 2, tr in next tr. Repeat from to 7 times. Leave last cell unworked. [8 tr posts, 7 cells]
Row 7: Turn. Slip stitch across first ch-2 space into second tr. Ch 4. Ch 2, tr in next tr. Repeat from to 5 times. Leave last cell unworked. [6 tr posts, 5 cells]
Row 8: Turn. Slip stitch across first ch-2 space into second tr. Ch 4. Ch 2, tr in next tr. Repeat from to 3 times. Leave last cell unworked. [4 tr posts, 3 cells]
Row 9: Turn. Slip stitch across first ch-2 space into second tr. Ch 4, ch 2, tr in next tr. Leave last cell unworked. Fasten off. [2 tr posts, 1 cell]
Blocking diamonds: Block each piece elongated, distributing the increases evenly so the widest point (the 9-cell center at Row 5) measures about 9 cm wide.
Placement and Assembly
Arranging medallions:
Lay all circles right side up in 8 rows by 2 columns. Orient all loop 1 points toward one end of the runner. Place diamonds lengthwise over circles, keeping all four cardinal join points accessible.
Joining medallions:
You’ll need Color B (white), your 2.5 mm hook, and a tapestry needle.
Join Pass 1 (lengthwise joins): Along each lane, create a joining bridge from loop 9 of one circle to loop 1 of the next circle. Also bridge adjacent loops: loop 8 to loop 2, and loop 10 to loop 16. These stabilizing joins prevent twisting. [14 joins x 3 bridges each]
Join Pass 2 (width joins): Join loop 5 of each left circle to loop 13 of its right neighbor. Add stabilizing joins from loop 4 to loop 14, and loop 6 to loop 12. [8 joins x 3 bridges each]
Checkpoint: Your grid should have 16 medallions with 22 motif-to-motif joins. No circles should be twisted.
Attaching the Diamonds
Sewing Pass 1: Center each diamond vertically on its circle. Tack the upper and lower tips plus both widest corners with two small stitches per point. [64 tack points total]
Sewing Pass 2: Tack the diamond center to the ring center, being careful not to collapse the open cells. [16 central tacks]
Checkpoint: Every diamond should lie flat. The arches remain open, and the underside has no long loose thread floats.
Edgings and Details
Edging Pass 1: Keep the Round 8 picots on all exposed loops around the perimeter. At joined loops, fold picots inward and secure them under the join with one tack stitch.
Detail Pass 2: Verify every exposed picot has exactly 3 chains and a proper closing slip stitch.
Checkpoint: The outside contour should appear balanced. All attachments should withstand a gentle pull, and no joining tails should be visible on the right side.
Final Finishing
Weaving ends: Weave all ends through dense single crochet sections in two directions for at least 2 cm. Trim only after the final blocking.
Final wet blocking: Soak the completed runner briefly in cool water. Roll in a towel to remove excess moisture, then pin to approximately 128 x 32 cm on your blocking mat. Verify all medallions measure 16 cm diameter and all diamonds match their intended dimensions.
Important: Allow the runner to dry completely before removing pins. The finished runner should lie flat without cupping, twisting, or overstretched chain arches.
Care Instructions
Hand wash your finished runner in cool water with a color-safe mild detergent. Do not wring. Roll in a towel to remove water and reblock flat to dry.
Avoid chlorine bleach and direct high heat. This decorative runner is not heat-resistant, so always use a protective mat under hot dishes. Keep cotton away from candles and open flames. If you have children or pets, ensure no loose threads are accessible.
Tips for Success
Working with mercerized cotton: This thread has a lovely sheen but can feel slippery at first. Your tension will improve as you work through the first few medallions.
Blocking matters: Lace absolutely requires blocking to look its best. Don’t skip this step, even for the individual motifs before assembly.
Take your time with assembly: The joining process transforms separate motifs into one cohesive piece. Rushing can lead to twisted medallions or uneven spacing.
Consider a practice medallion: If you’re new to thread crochet, make one complete medallion as practice before committing to all 16.
Make It Your Own
While the cobalt blue and white combination creates that classic porcelain look, this pattern adapts beautifully to other color schemes. Consider burgundy and cream for a warmer aesthetic, or navy and silver for an elegant winter table setting.
You could also adjust the runner length by adding or removing medallion rows. Each row of two medallions adds approximately 16 cm to the total length.
This Blue Porcelain Lace Runner is exactly the kind of project that becomes a treasured heirloom. The modular construction keeps the work manageable, while the finished piece delivers stunning visual impact that looks impossibly intricate.
Thank you so much for choosing this pattern for your next project. If you make this runner, I would absolutely love to see your finished piece. Share your photos on Instagram or Facebook and tag them so fellow crocheters can admire your beautiful work.
Save this pattern to your Pinterest boards so you can find it whenever inspiration strikes, and please drop a comment below if you decide to make it. Hearing about your color choices and seeing your finished runners is always such a joy.
Want a Quick & Easy Printable Version?
Get a clean, beautifully formatted PDF of this pattern — easy to follow step by step, ready to print or save on any device. No scrolling, no distractions, just the pattern.
Get the Printable PDF →You Might Also Like
- Mint and Sage Green Baby Dress Free Crochet Pattern
- Autumn Copper Sunflower Runner Crochet Pattern
- Little Mermaid Baby Dress Set Free Crochet Pattern
- Ocean Blue Boho Crochet Beach Set Free Crochet Pattern