
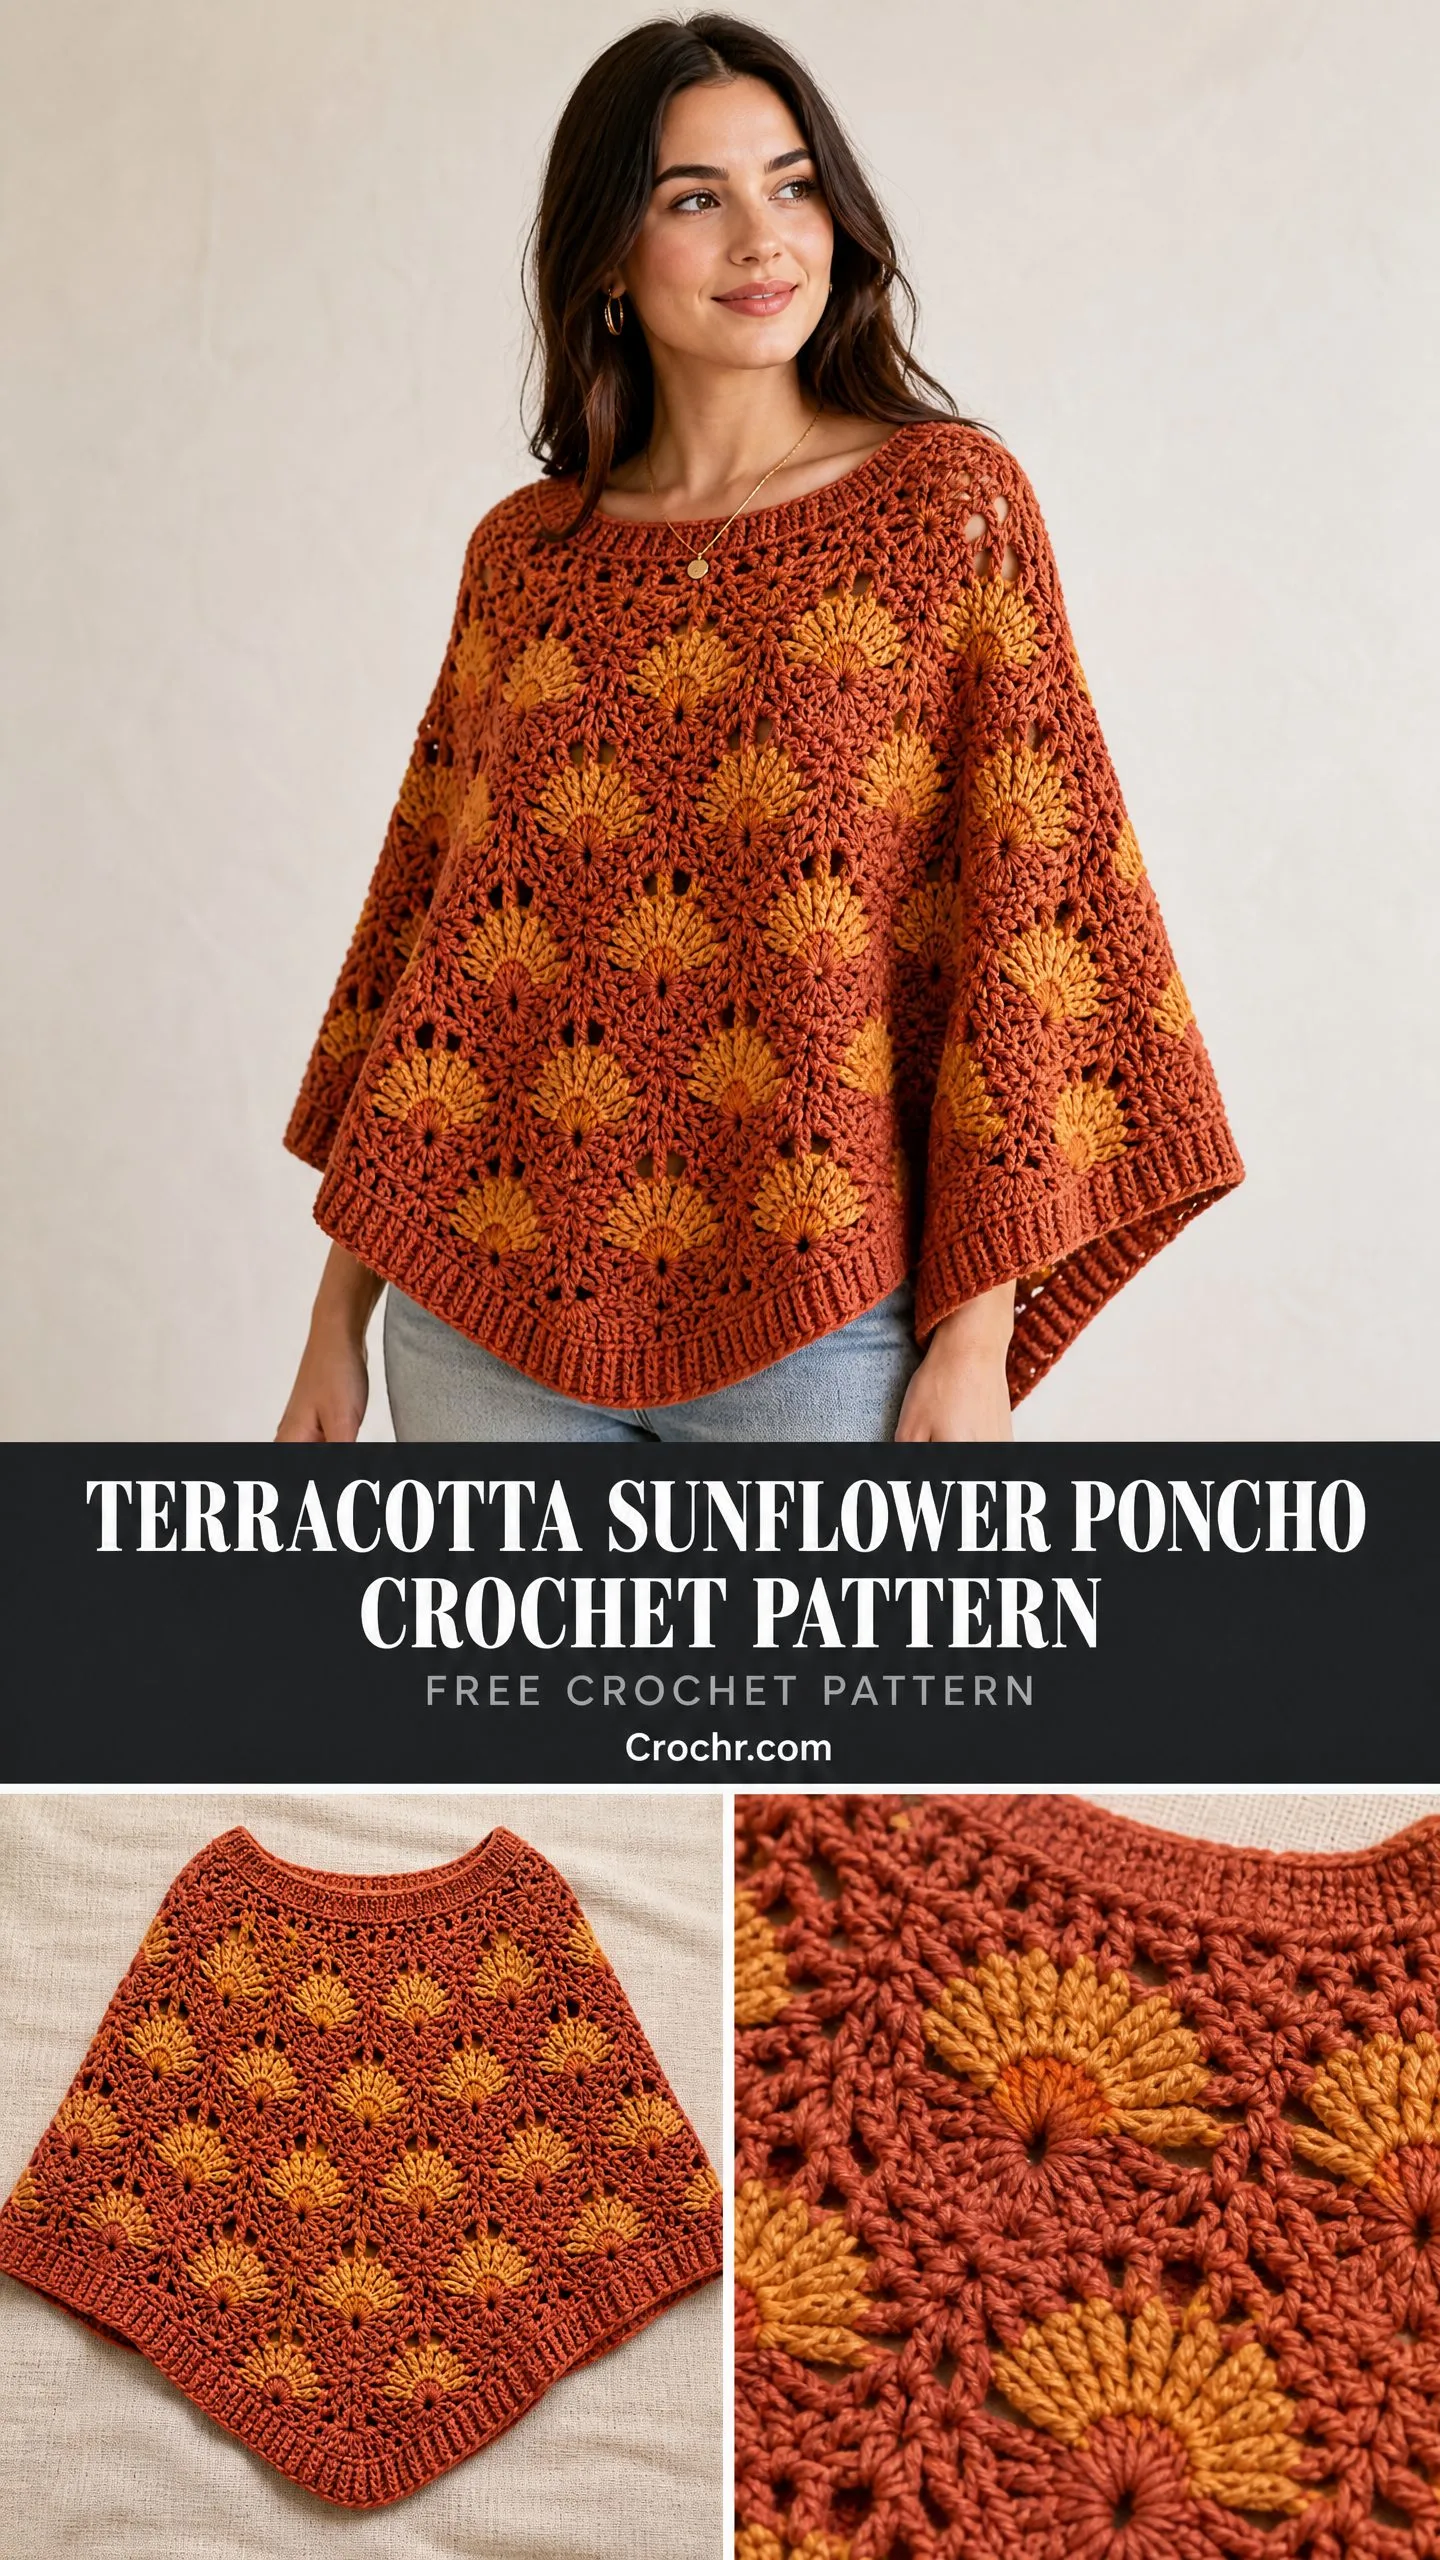
This is a relaxed triangular poncho with raised sunflower motifs. It uses half double crochet, double crochet, and treble crochet stitches. The construction starts from the neck opening and works outward with joined motifs.
Get the Ad-Free PDF Pattern
You can find the free pattern below, or you can purchase the ad-free printable PDF from my shop.
Get the Printable PDF →
The skill level is intermediate. You will need worsted weight yarn in terracotta, golden, cream, and sage green. The finished size is adult medium, but the pattern is adjustable.
If you love autumn colors and botanical designs, this one is for you. The layered sunflowers add beautiful texture without being overly complicated.
Why You Will Love This Poncho Pattern
This Terracotta Sunflower Poncho combines cozy warmth with stunning visual appeal. The rich terracotta base creates a perfect backdrop for the dimensional sunflower decorations scattered across the front and shoulders. Each sunflower features layered golden petals, a textured dark center, and delicate sage leaf accents tucked between the blooms.
The construction method is satisfying and keeps things interesting. You start with a stretchy ribbed neckline, work the body in increasing rounds, then create and attach the sunflower motifs separately. This means you are never bored with repetitive stitching. The variety of techniques makes this project feel like an adventure rather than a chore.
The relaxed triangular shape drapes beautifully and flatters most body types. A decorative scalloped border with picot details finishes the lower edge, giving the whole piece a polished handmade look. Whether you wear it over jeans and a tee or dress it up for an autumn gathering, this poncho delivers warmth and style in equal measure.
Materials You Will Need
Gather these supplies before you begin:
Yarn (Worsted Weight):
Tools:
The yardage range for the terracotta yarn accounts for size adjustments. If you plan to make a larger poncho, lean toward the higher end. The accent colors have more flexibility since the motifs can vary in number based on your preference.
Gauge Information
Approximately 14 double crochet (dc) stitches x 8 rows equals 4 inches.
Adjust your hook size to achieve a soft drape. This poncho should feel fluid and comfortable, not stiff. If your gauge swatch feels rigid, go up a hook size. If it feels too loose and floppy, go down a size.
To make a gauge swatch, chain 20 and work double crochet rows until you have a square. Measure the center section, avoiding the edges which can distort.
Abbreviations and Stitch Definitions
Here are all the stitches you will use in this pattern:
ch = chain: Yarn over, pull through the loop on your hook. This creates the foundation for most crochet work.
sl st = slip stitch: Insert hook, yarn over, pull through both the stitch and the loop on your hook in one motion. Used for joining and moving across stitches invisibly.
sc = single crochet: Insert hook, yarn over and pull up a loop (2 loops on hook), yarn over and pull through both loops. The shortest basic stitch.
hdc = half double crochet: Yarn over, insert hook, yarn over and pull up a loop (3 loops on hook), yarn over and pull through all 3 loops. Slightly taller than single crochet with a nice texture.
dc = double crochet: Yarn over, insert hook, yarn over and pull up a loop, (yarn over, pull through 2 loops) twice. A versatile medium-height stitch.
tr = treble crochet: Yarn over twice, insert hook, yarn over and pull up a loop, (yarn over, pull through 2 loops) three times. A tall stitch that creates the sunflower petals.
inc = increase: Work two stitches in the same stitch to add width.
sp = space: The gap created by chain stitches, often used for corner increases.
Step by Step Pattern Instructions
Section 1: Foundation Neck Opening
The neckline uses back loop only half double crochet to create a stretchy, comfortable fit that slips easily over the head.
Chain 72 loosely. Join with a slip stitch to form a ring, being careful not to twist the chain.
Round 1: Ch 2, work hdc in each chain around. Join with sl st. (72 hdc)
Rounds 2 through 6: Work hdc in the back loop only for a stretchy neckline band. Join each round.
Fasten off after Round 6.
Working in the back loop only creates a ribbed texture that has natural stretch. This is the same technique used in cuffs and hat brims. Take your time with these rounds since the neckline is what people see first when you wear the poncho.
Section 2: Poncho Body
Now you will build the main body of the poncho using corner increases to create the triangular shape.
Attach terracotta yarn below the neckline (on the opposite side of the ribbing from where you will wear it against your neck).
Round 1: Ch 3 (counts as first dc), work dc around the neckline evenly. Place stitch markers at the front center and back center. Join.
Round 2: At each marked point, work (2 dc, ch 2, 2 dc) to create the four poncho corners. Continue dc around between the corners. Join.
Repeat increasing rounds until the poncho reaches shoulder width and desired length. Each round, you will work the corner increase (2 dc, ch 2, 2 dc) into the ch-2 space at each corner point. Work dc in each stitch between corners.
The four corners create the classic poncho shape with points at the front, back, and sides. The front and back points will drape down while the side corners rest on your shoulders.
Section 3: Sunflower Motifs
Make 8 to 10 sunflower circles. These are worked separately and attached later, so you can adjust the number based on your desired look.
Center (using dark brown yarn):
Create a magic ring.
Round 1: Work 12 sc into the ring. Pull the ring closed and join. (12 sc)
Round 2: Work 2 sc in each stitch around. (24 sc)
Fasten off and switch to golden yarn.
Petals:
Attach golden yarn and work around the circle:
ch 3, work 3 tr in the same stitch, ch 3, sl st in the next stitch
Repeat this sequence around to create layered petals. You will have 12 petals when complete.
Optional cream highlight: Add a round of cream yarn around selected petals for extra dimension. This creates the sun-kissed effect visible in the design.
The treble crochet clusters create the characteristic pointed sunflower petal shape. Do not worry if your first flower looks a bit wonky. They improve as you get into the rhythm.
Section 4: Leaf Motifs
Make 12 to 16 leaves using sage green yarn.
Ch 8.
Working along the chain: sc in second ch from hook, hdc, dc, tr, dc, hdc, sc.
Slip stitch back down the opposite side of the chain to create the leaf shape.
Fasten off, leaving a tail for sewing.
These simple leaves tuck between the sunflowers beautifully. The progression from sc to tr and back creates a natural leaf shape with a pointed tip.
Section 5: Joining Motifs
Now comes the fun part of arranging your garden.
Arrange sunflower motifs diagonally across the front and shoulder area of the poncho. Play with the layout before attaching anything. Take a photo of your arrangement so you remember the placement.
Join with slip stitches or invisible mattress-style crochet joins. To do a mattress join, use your yarn needle to weave through the edge stitches of both the motif and the poncho body, pulling gently to create an invisible seam.
Attach leaves between flowers for a natural garden arrangement. Angle them in different directions as real leaves would grow.
You can also attach motifs as you arrange them one by one. Some crocheters prefer to pin everything first, while others like to commit as they go. Either method works.
Section 6: Decorative Border
The border adds a finished edge with feminine scallop details.
Round 1: Attach terracotta yarn around the lower edge and work sc evenly around the entire poncho hem. Join.
Round 2 (Shell Border): Work 5 dc in one stitch, skip 2 stitches, sl st in next stitch. Repeat around. Join.
Round 3 (Picot Details): Ch 3, sl st into the first chain to form a picot, sl st into the next stitch. Repeat around.
Fasten off.
The shells create a wavy scalloped edge, and the picots add tiny decorative points. Together they give the border a delicate lace-like appearance.
Section 7: Finishing
Weave in all ends using your yarn needle. Work the tails back through several stitches, then reverse direction for security. Trim close to the fabric.
Block gently to open the lace texture. Wet blocking works well for this project. Soak the poncho in cool water, gently squeeze out excess water (do not wring), and lay flat on a blocking mat or clean towels.
Shape the neckline and pointed drape while drying. Pin the corners to emphasize the triangular silhouette. Allow to dry completely before wearing.
Customization Tips
For a larger poncho: Continue the increasing body rounds before adding the border. Each additional round adds approximately one inch to the length and width.
For a shorter style: Reduce the number of increase rounds. A cropped version that sits at the waist creates a different look entirely.
Adjusting sunflower placement: You can cluster the flowers more densely on one shoulder, scatter them evenly, or create an asymmetrical arrangement. The pattern is flexible to your artistic vision.
Care Instructions
Hand wash gently in cool water with a mild detergent. Do not agitate or twist the fabric. Squeeze out excess water by pressing between towels. Lay flat to dry, reshaping as needed.
Avoid hanging this poncho when wet, as the weight of the water can stretch the fabric. Store folded in a drawer or on a shelf rather than on a hanger.
Finished Look
You will have a cozy autumn-inspired crochet poncho with a rich terracotta base, dimensional sunflower decorations, and a soft handmade botanical finish. The combination of the warm earth tones and cheerful golden flowers makes this piece perfect for crisp fall days, harvest festivals, or anytime you want to feel wrapped in handmade comfort.
The texture from the layered petals and leaves adds visual interest that photographs beautifully. This poncho makes a stunning gift for anyone who appreciates thoughtful handmade items.
I hope you enjoy making this Terracotta Sunflower Poncho Crochet Pattern as much as I enjoyed designing it. If you found this helpful, please save it to your Pinterest boards so you can find it when you are ready to start. And if you make one, I would absolutely love to see it. Drop a comment below or tag me on social media with your finished poncho!
Want a Quick & Easy Printable Version?
Get a clean, beautifully formatted PDF of this pattern — easy to follow step by step, ready to print or save on any device. No scrolling, no distractions, just the pattern.
Get the Printable PDF →You Might Also Like
- Rose Quartz Butterfly Cape Crochet Pattern
- Lavender Dream Crescent Purse with Silver Accents Free Crochet Pattern
- Neon Lime Snake Plant Amigurumi Free Crochet Pattern
- Lavender Garden Granny Square Bag Free Crochet Pattern
