
I found this design tucked into an old project notebook from a few years back, sketched out during a spring afternoon when the bluebells were blooming in my neighbor’s garden. I had named it "Garden Bell" in the margins, with little arrows pointing to where I wanted the flowers to cascade down the edges. The original version was made for my niece’s birthday, and she wore it until the cotton practically fell apart.
Get the Ad-Free PDF Pattern
You can find the free pattern below, or you can purchase the ad-free printable PDF from my shop.
Get the Printable PDF →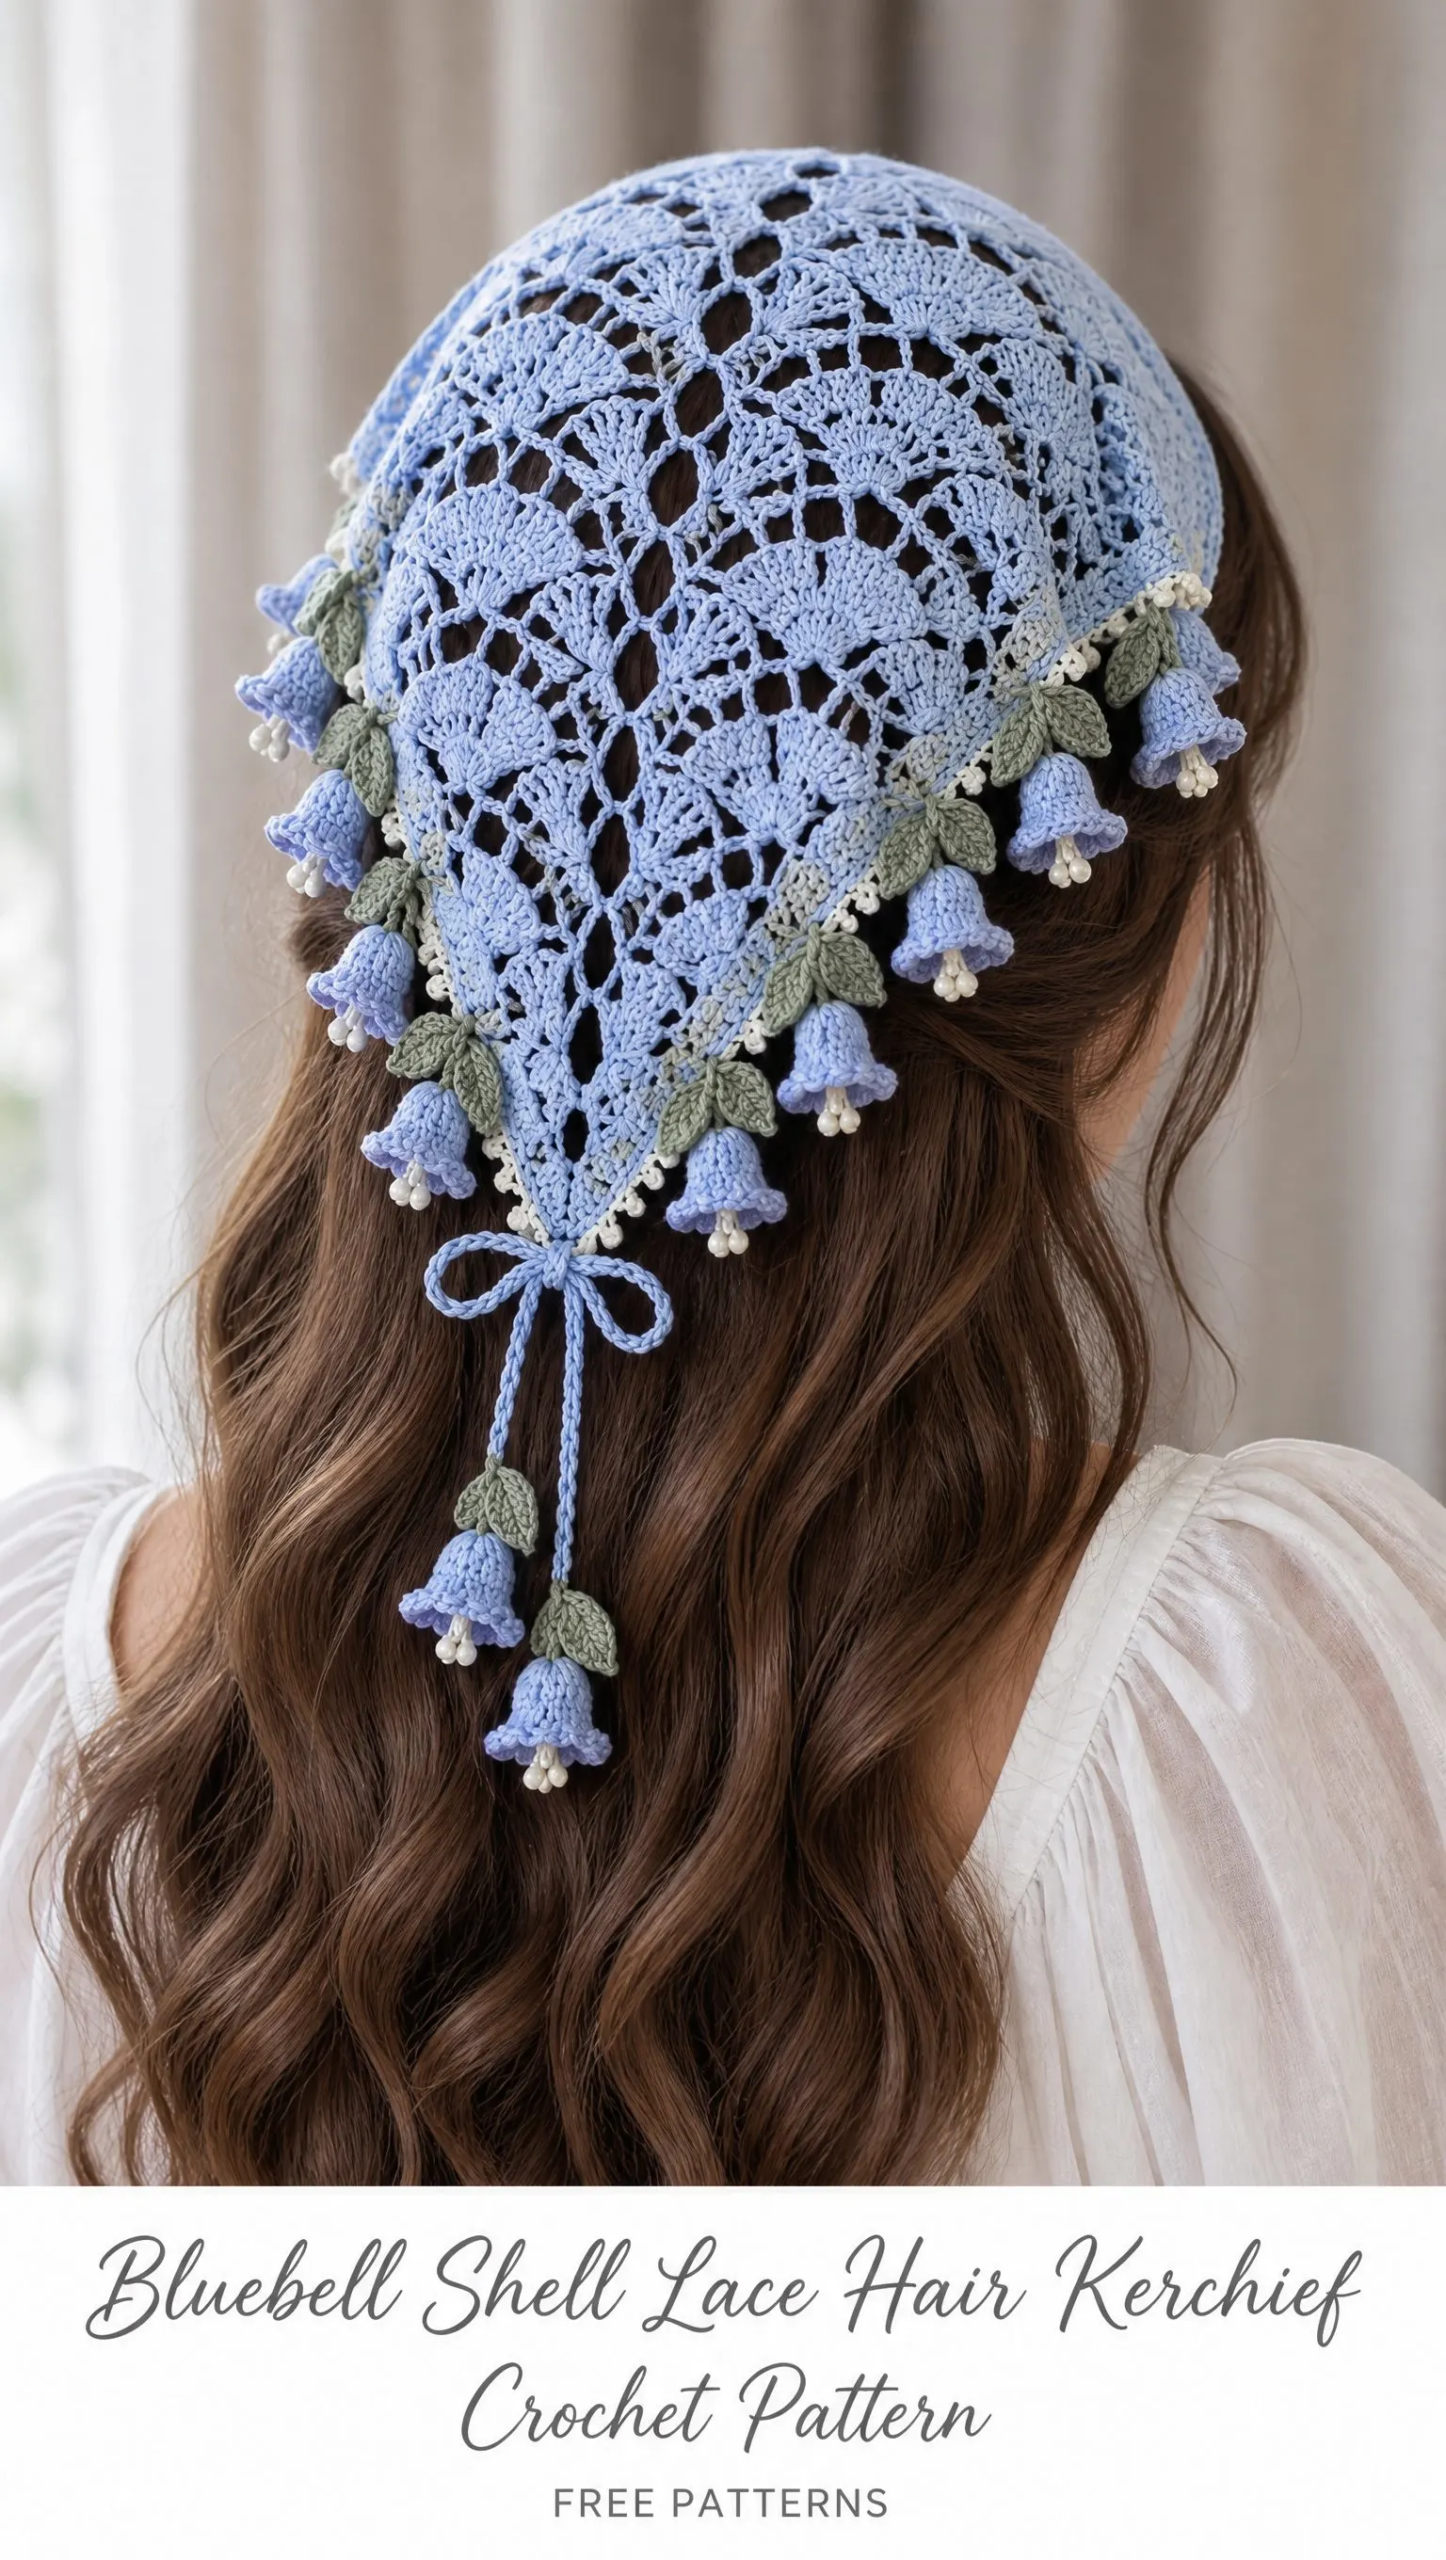
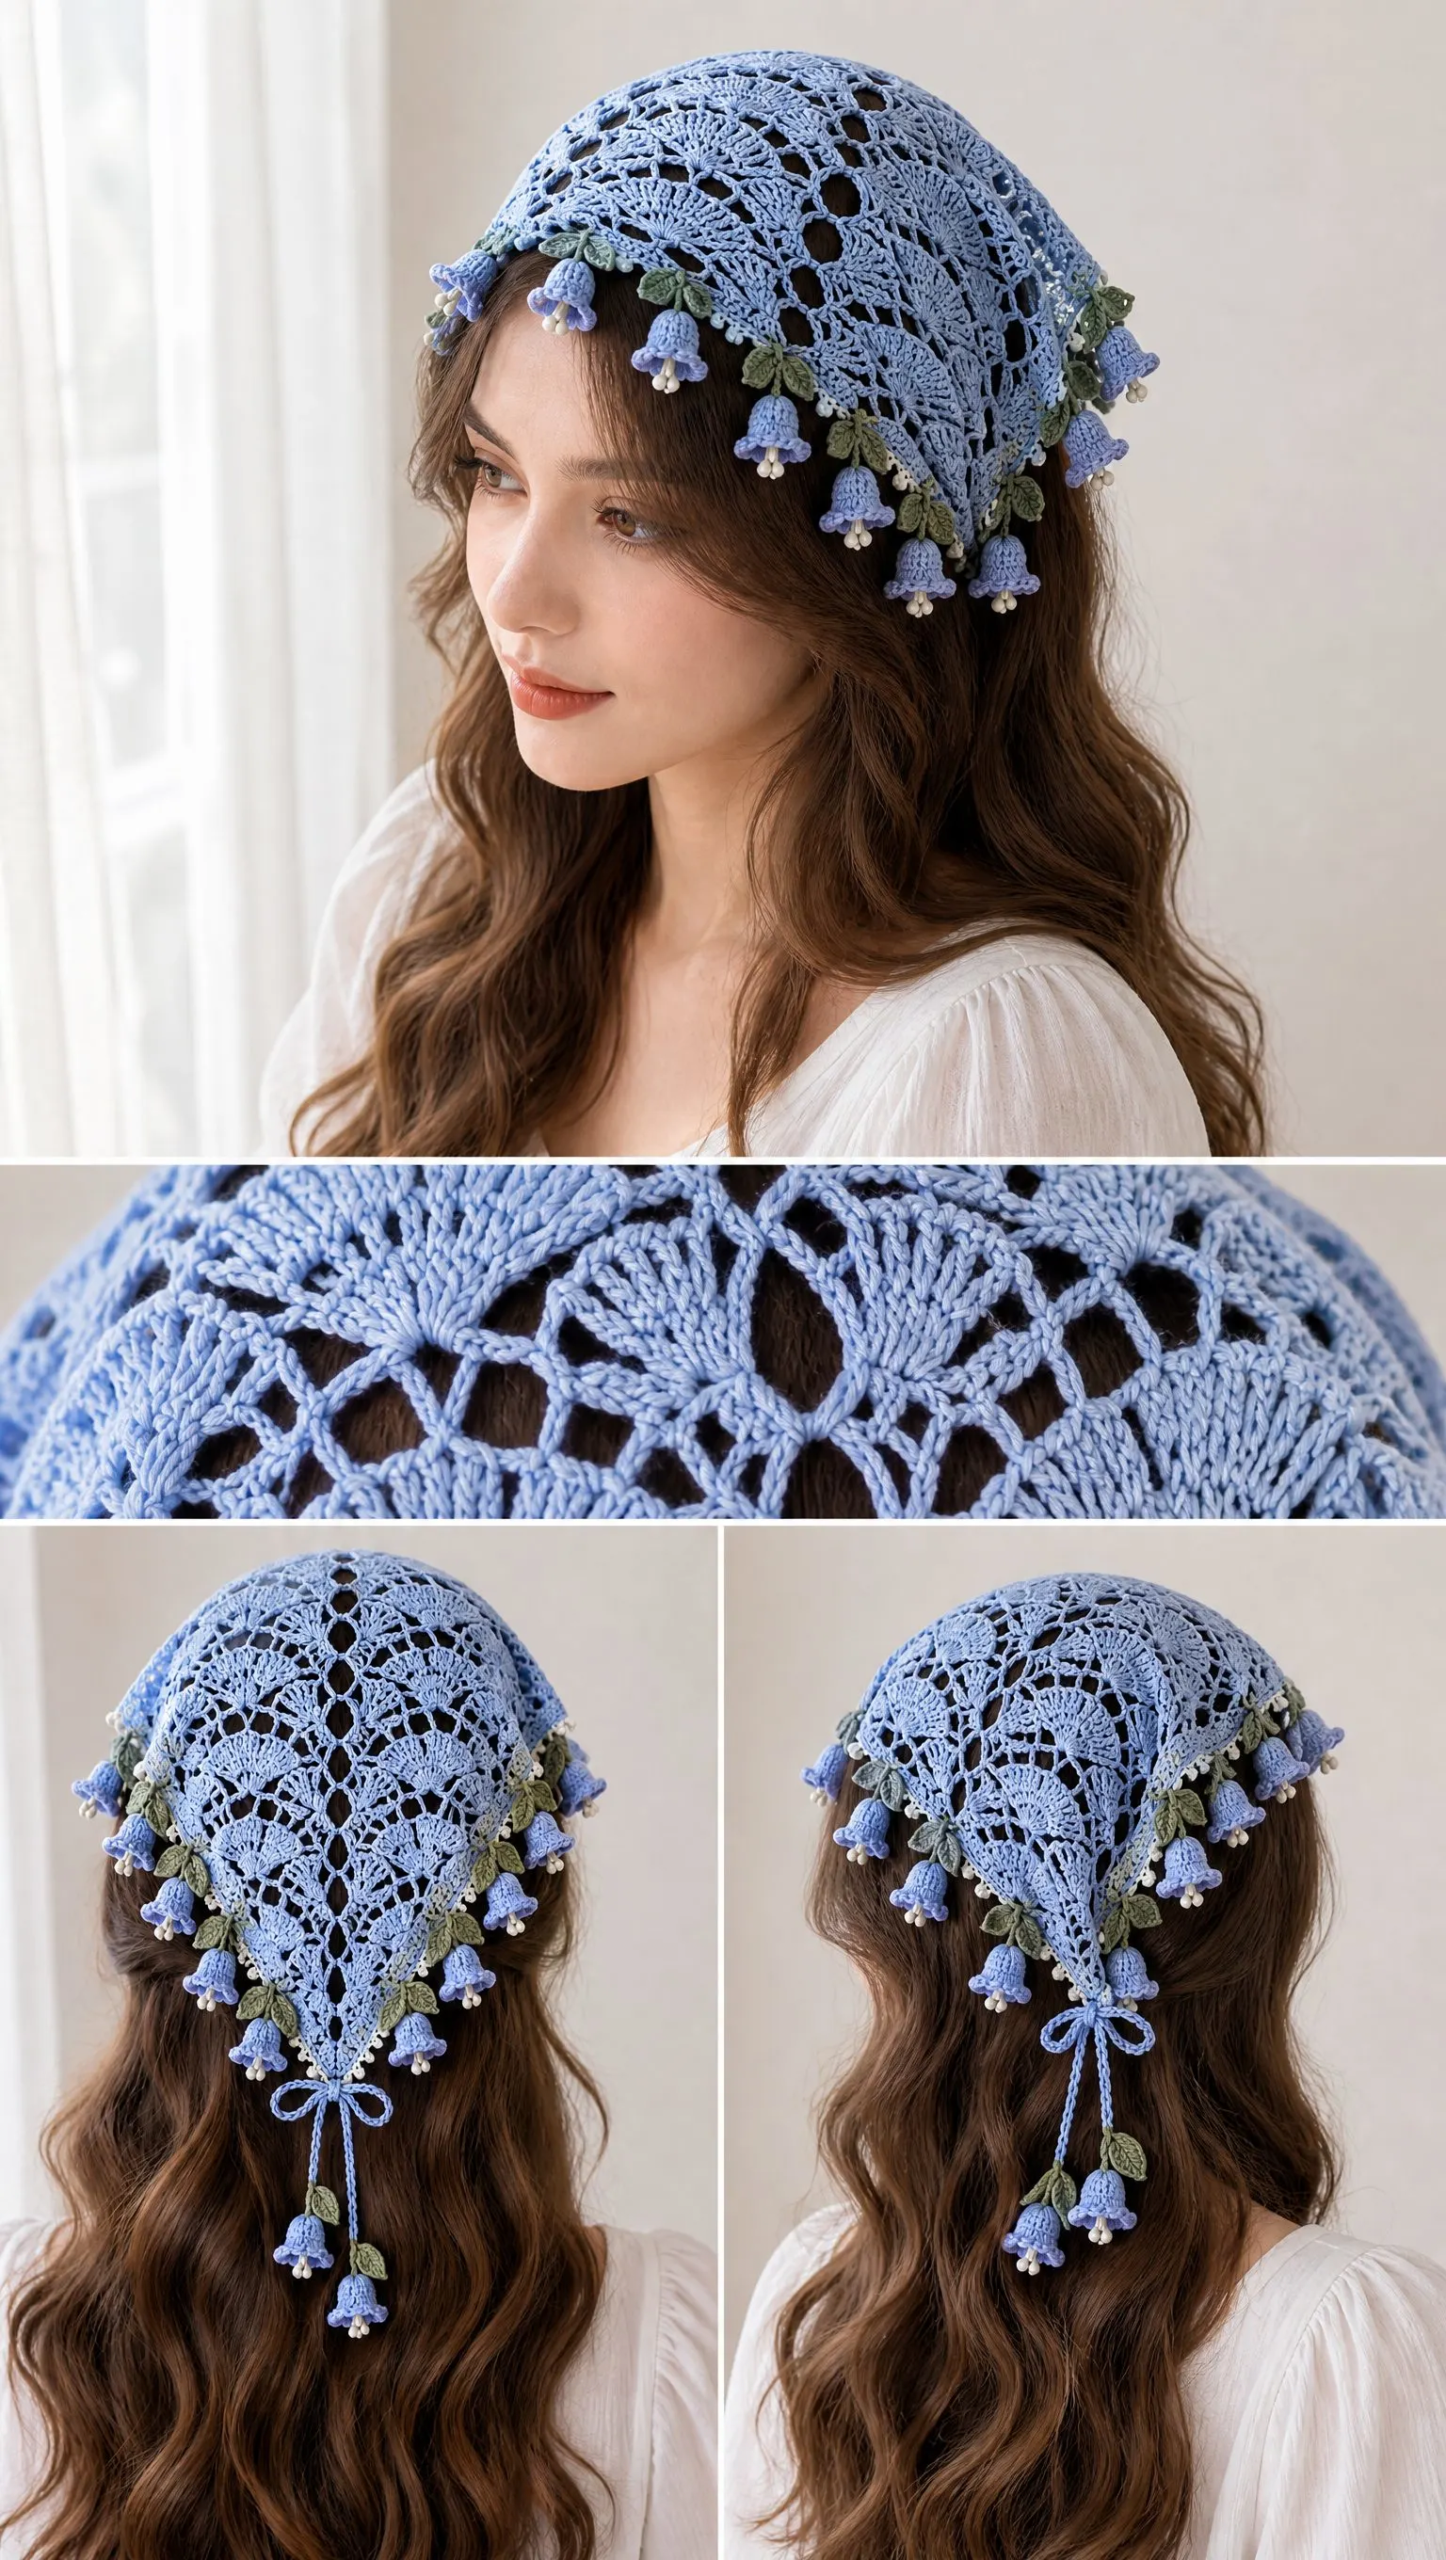
Now I have finally written it all out properly so you can make your own. This Bluebell Shell Lace Hair Kerchief combines delicate shell fans with a pretty teardrop lace spine down the center, finished with the sweetest three-dimensional bluebell flowers along the edges. It is the kind of project that looks far more complicated than it actually is.
If you love lace work and want something wearable and feminine, this kerchief will become a favorite in your pattern collection. The combination of powder blue lace with periwinkle flowers and eucalyptus green leaves creates something truly special.
Pattern Overview and Skill Level
This triangular kerchief is rated as an intermediate project. You should be comfortable with basic crochet stitches and have some experience reading patterns before diving in. The main body uses straightforward shell fans and chain arches, which are very rhythmic once you get going. The bluebell flowers are worked separately and sewn on at the end, so you can take your time with those.
The finished kerchief measures approximately 38 cm across the crown width and 48 cm from the crown to the center point depth. This fits most adults comfortably and drapes beautifully over the hair.
What makes this design special is the symmetrical teardrop lace spine running down the center. It gives the kerchief structure while keeping that lovely airy quality you want in lace work. The three-dimensional bluebell flowers along the diagonal edges add a whimsical touch that makes this piece feel like wearable art.
Materials You Will Need
Gathering your supplies before you start keeps everything flowing smoothly. Here is what the pattern calls for:
Yarn:
Hook:
Additional Tools:
Smooth cotton yarn is essential here. It gives you clear stitch definition so those shell fans really pop, and it provides the lightweight drape that makes lace kerchiefs so lovely to wear. Avoid fuzzy or textured yarns for this project.
Abbreviations and Stitch Definitions
Let me walk you through every abbreviation used in this pattern. Even if you know these already, a quick refresher never hurts.
ch = chain: Wrap yarn over hook, pull through loop on hook. This is your foundation stitch.
sc = single crochet: Insert hook into stitch, yarn over, pull up a loop (2 loops on hook), yarn over, pull through both loops. A short, tight stitch.
hdc = half double crochet: Yarn over, insert hook into stitch, yarn over, pull up a loop (3 loops on hook), yarn over, pull through all 3 loops. Slightly taller than single crochet.
dc = double crochet: Yarn over, insert hook into stitch, yarn over, pull up a loop (3 loops on hook), yarn over, pull through 2 loops, yarn over, pull through remaining 2 loops. A tall stitch that creates the shell fans.
sl st = slip stitch: Insert hook into stitch, yarn over, pull through both the stitch and the loop on your hook in one motion. Used for joining and moving across stitches.
sk = skip: Pass over the indicated number of stitches without working into them.
sp = space: The gap created by chain stitches in the previous row.
dc cluster = a group of double crochet stitches worked together into the same stitch or space.
Main Kerchief Pattern Instructions
This kerchief is worked from the top center outward, growing into a triangle shape as you go. The fabric combines shell fans, chain arches, and that beautiful symmetrical teardrop lace spine I mentioned earlier.
Row 1: Creating the Foundation
Chain 5. Join with a slip stitch to form a ring.
Chain 3 (this counts as your first double crochet), work 2 dc, ch 2, 3 dc into the ring. Chain 5 and turn.
You have just created the very top center of your kerchief. That ch 2 space in the middle will become the beginning of your center spine.
Row 2: Building the First Fan
Work 7 dc into the center chain space. Ch 2. Work 7 dc into the same space. Ch 3 and turn.
This creates your first substantial row with a nice fan of stitches on each side of the center.
Row 3: Establishing the Shell Pattern
Create shell fans by working 5 dc into each side chain space, separated by chain arches.
For the center spine: ch 1, skip spaces evenly to maintain the pointed triangular shape.
This row establishes the rhythm you will follow for the rest of the main body.
Rows 4 through 18: Repeat Pattern
Continue the shell fan pattern across each row:
Work the center line with linked teardrop openings using this sequence:
Continue until you reach your desired kerchief depth. The pattern calls for approximately 18 rows to achieve the 48 cm depth, but you can adjust based on your gauge or preference.
Tension tip: Keep your tension even throughout so those shell fans remain crisp and uniform. If you tend to crochet tightly, go up a hook size. If you crochet loosely, try a smaller hook. Your shells should fan out nicely without bunching or gaping.
Picot Border Instructions
Once your main triangle is complete, you will add a delicate picot border around all three edges. This gives the kerchief a finished look and adds a bit of texture.
Round 1: Foundation Edging
Work sc evenly around all three edges of the kerchief. Try to space them so your edge lies flat without puckering or ruffling. Work 3 sc into each corner point to help it turn smoothly.
Round 2: Picot Edging
Sc, ch 3, sl st into the first chain (this creates your picot). Skip 1 or 2 stitches as needed, then repeat the sc and picot sequence around the entire border.
The picots create those tiny decorative bumps you see along the edge. They look fancy but are actually quite simple once you get into the rhythm.
Bluebell Flower Motifs
This is where the magic happens. You will make approximately 10 to 14 flowers depending on how generously you want to decorate your kerchief. Each flower has three parts: the bell, the stamens, and the leaves.
Flower Bell
With periwinkle yarn, create a magic ring.
Round 1: Work 6 sc into the ring. Pull the ring closed.
Round 2: Ch 2, work 3 dc into each stitch around. This creates those lovely curled bell petals. (18 dc total)
Round 3: Add a soft curled rim by working slip stitches and small chain loops around the edge. This gives the flower its dimensional, bell-like shape.
Fasten off and leave a tail for sewing.
Stamens
Attach ivory yarn to the center of your flower.
Make 3 small chain strands (about 4 to 6 chains each), ending each with a tiny knot. You can create the knot by making a slip stitch into the first chain, then pulling tight. These represent the stamens peeking out from inside the bluebell.
Leaves
With eucalyptus green yarn:
Chain 7.
Work sc and hdc along the chain to form a narrow pointed leaf shape. Work down one side of the chain, then rotate and work back up the other side if desired for a fuller leaf.
Sew two leaves beneath each flower before attaching to the kerchief.
Flower Placement and Assembly
Attach your completed flowers along both diagonal edges of the kerchief. Space them evenly, starting from near the crown and working down toward the center point. You want them to cascade down the edges like real bluebells hanging from a stem.
Add flower-tipped ties at the lower corners for extra charm.
Cord Bow and Ties
The pattern includes decorative cord ties at the center point.
Make two cotton cords using a simple chain stitch foundation. Chain until you have the desired length for your ties, about 15 to 20 cm each works nicely.
Attach one cord at the center point of the kerchief. Tie the cords into a small blue bow.
Add one bluebell flower and leaf cluster to each dangling cord end. This finishing touch makes the kerchief look professionally designed.
Finishing Your Kerchief
Almost there! These final steps make all the difference in how polished your finished piece looks.
Weave in all ends securely using your tapestry needle. Take your time with this step, especially around the flowers where you have multiple yarn tails.
Block your kerchief by lightly steaming or wet blocking. Lay it flat on a blocking mat, spray lightly with water, and use blocking pins to stretch the shell fans gently into shape. Pin out each shell so the fans open up beautifully.
Allow to dry completely before wearing. Cotton holds water, so give it plenty of time.
Care Instructions for Your Finished Kerchief
Your beautiful lace kerchief deserves gentle care to keep it looking lovely for years.
Hand wash in cool water with mild soap. Do not wring or twist the fabric.
Lay flat to dry on a clean towel. You can reshape while damp if needed.
Store folded in a drawer or box to protect the lace openings and those precious floral details. Avoid hanging, which can stretch the delicate cotton over time.
Pattern Notes and Tips for Success
A few final thoughts to help you along:
Keep your tension even throughout the project. Inconsistent tension will show in lace work more than in other types of crochet. The shell fans should all look similar in size.
Use smooth cotton yarn, not mercerized cotton with a sheen unless you want a more formal look. The smooth fiber shows stitch definition beautifully and gives you that lightweight drape perfect for a hair kerchief.
If you are new to making three-dimensional flowers, practice a couple of bluebells with scrap yarn before using your periwinkle. It only takes a few minutes and helps you get the hang of shaping the bells.
Mark your center spine with a stitch marker if you find yourself losing track. That teardrop pattern needs to stay centered for the kerchief to be symmetrical.
I hope you love making this Bluebell Shell Lace Hair Kerchief as much as I enjoyed designing it all those years ago. If you give it a try, please save this pattern to your Pinterest boards so you can find it again easily. And I would absolutely love to see your finished kerchief, so drop a comment below or tag me when you share your photos!
Want a Quick & Easy Printable Version?
Get a clean, beautifully formatted PDF of this pattern — easy to follow step by step, ready to print or save on any device. No scrolling, no distractions, just the pattern.
Get the Printable PDF →You Might Also Like
- Sunset Peach and Coral Granny Square Blanket Free Crochet Pattern
- Sage Green Woodland Fairy Top Free Crochet Pattern
- Burnt Orange Autumn Granny Cardigan Free Crochet Pattern
- Blush Rose Curtain Tieback Crochet Pattern
