
Go dig through your stash right now. I know you have those small amounts of fine cotton yarn tucked away, the ones you have been saving for something special. This is that project.
Get the Ad-Free PDF Pattern
You can find the free pattern below, or you can purchase the ad-free printable PDF from my shop.
Get the Printable PDF →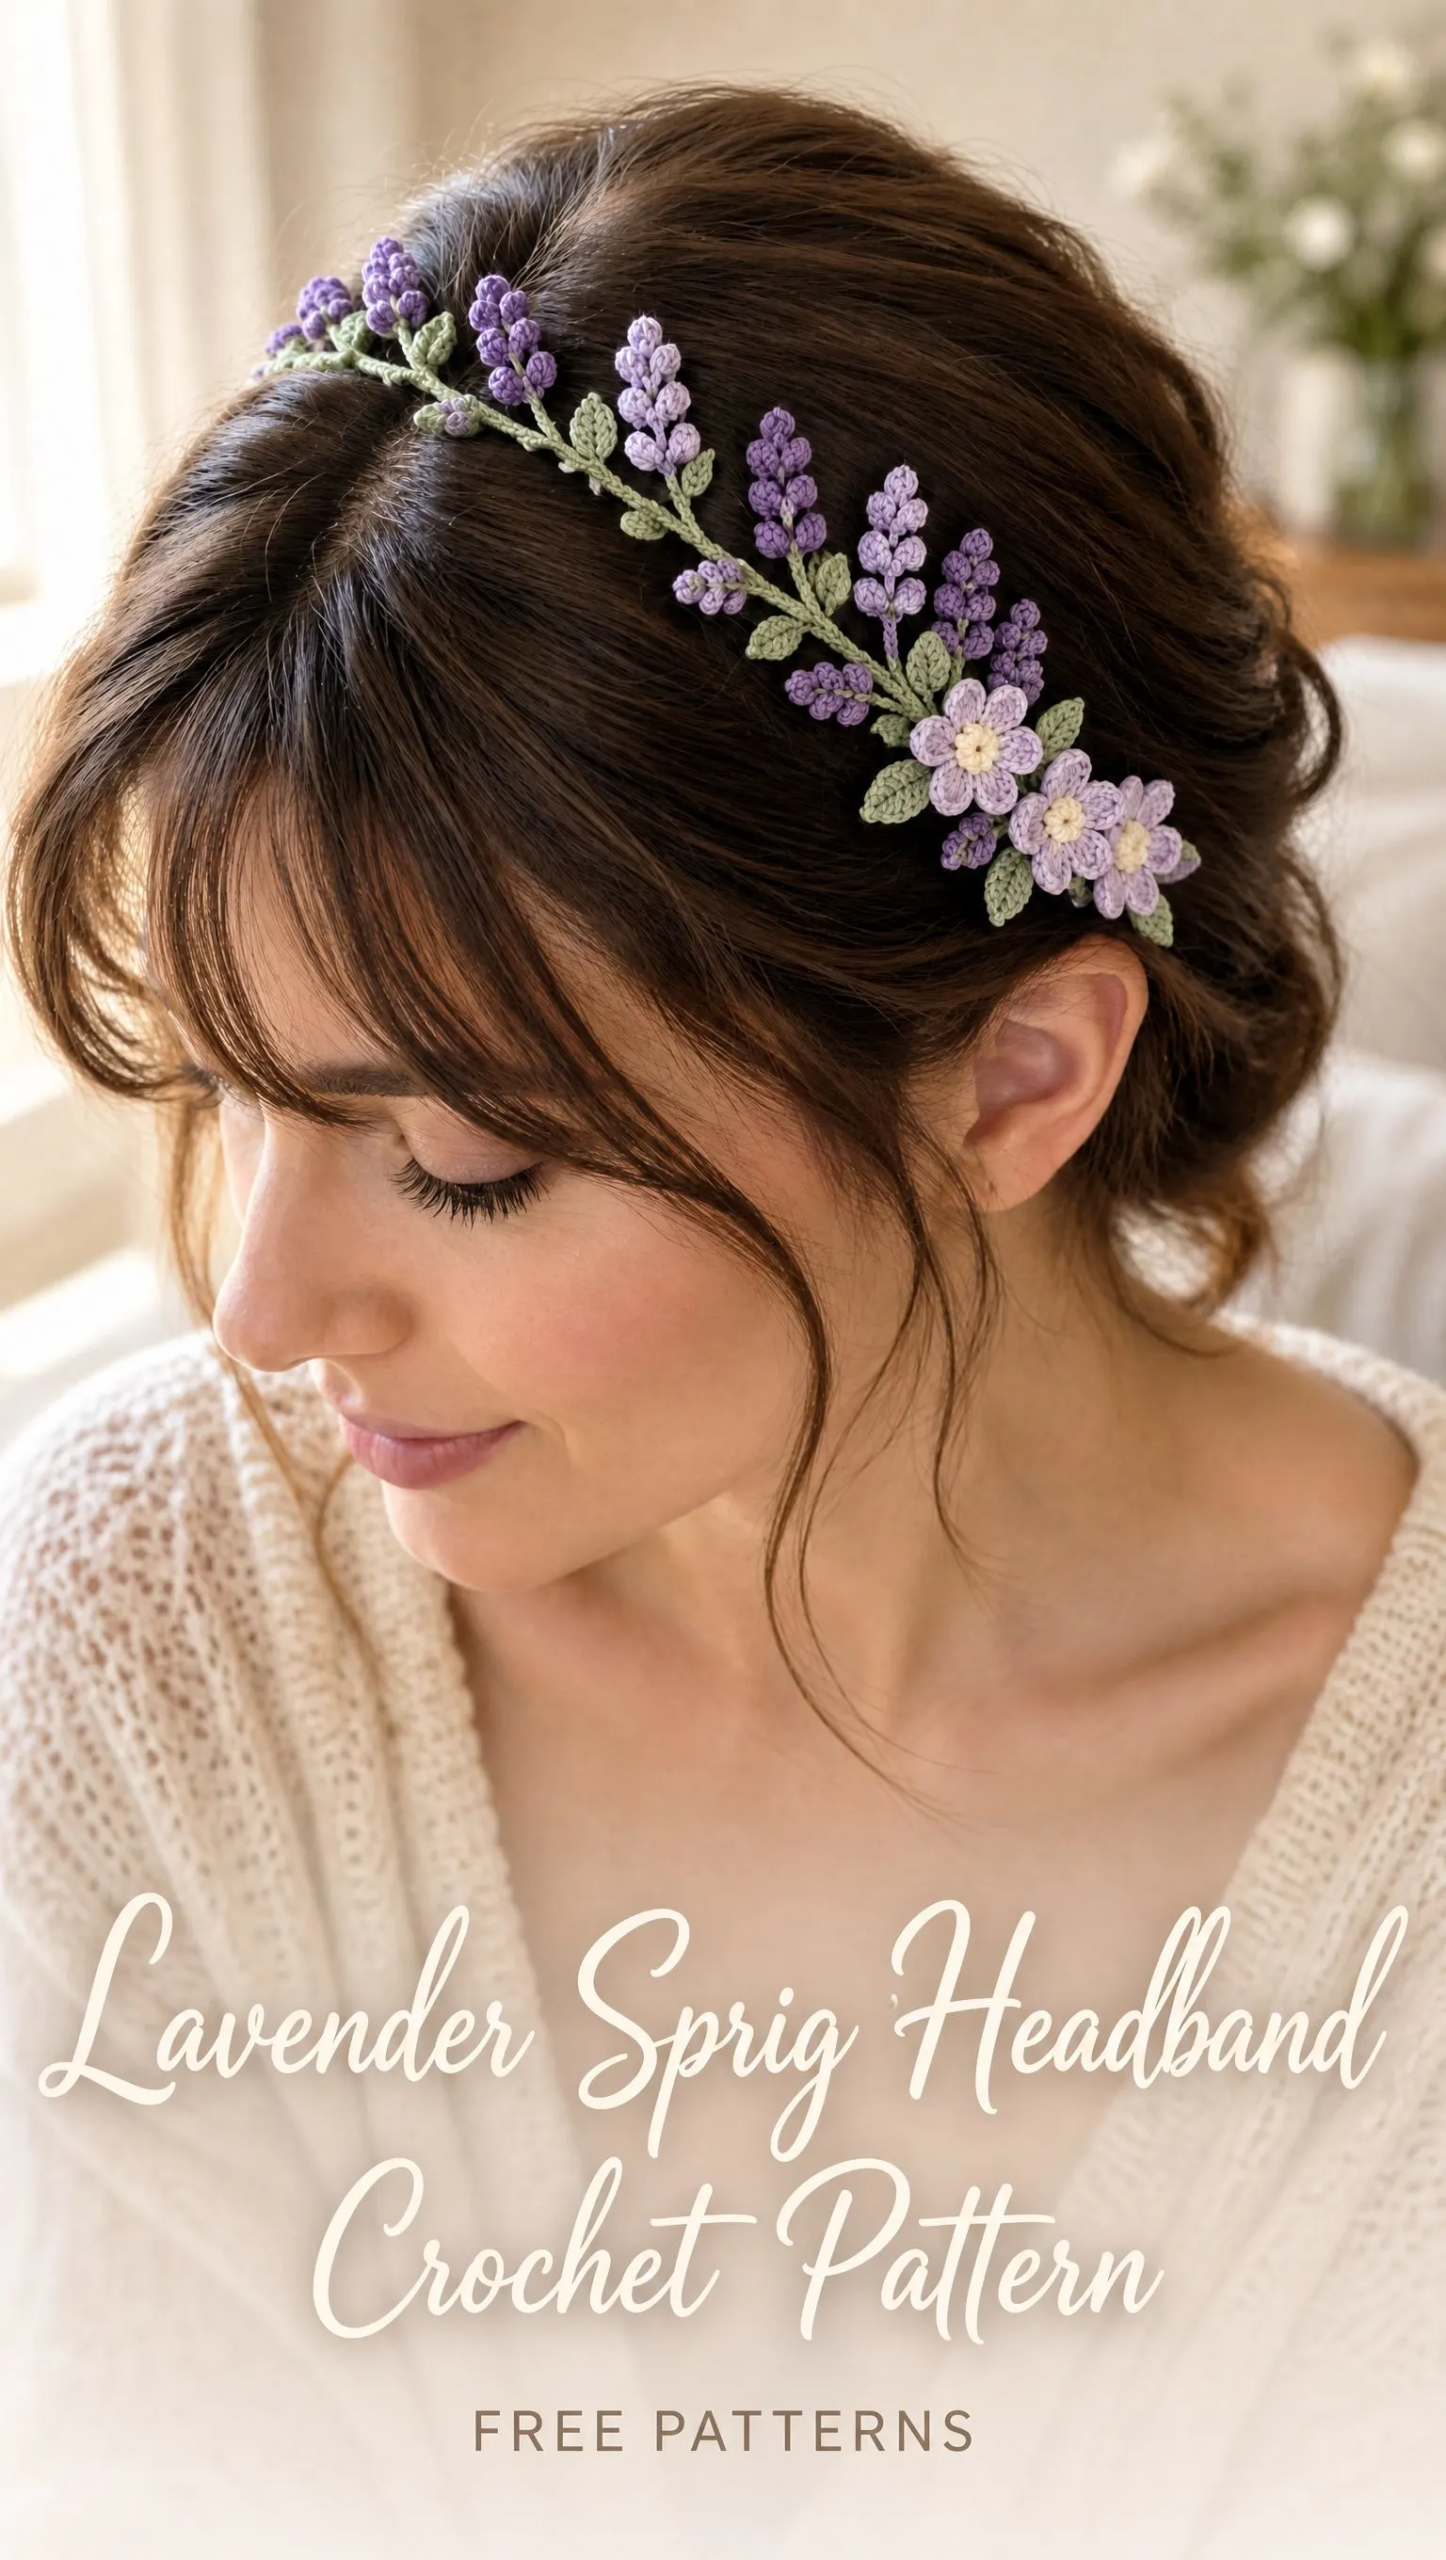
This lavender sprig headband is one of those patterns that looks incredibly intricate but breaks down into surprisingly manageable pieces. You are basically making a simple band, a chain stitch vine, some tiny leaves, puff stitch buds, and five petal flowers. Then you arrange them all together like a little botanical garden for your hair. The construction is modular, which means you can take your time with each element and assemble everything at the end.
I will be honest with you. This is not a quick weekend project, and the fine yarn with a tiny hook requires some patience. But if you have worked with fingering weight cotton before and feel comfortable with basic stitches plus puff stitches, you can absolutely do this. The result is a delicate, lightweight accessory that looks like it belongs in a spring wedding or a garden party.
Why This Botanical Headband is Worth the Effort
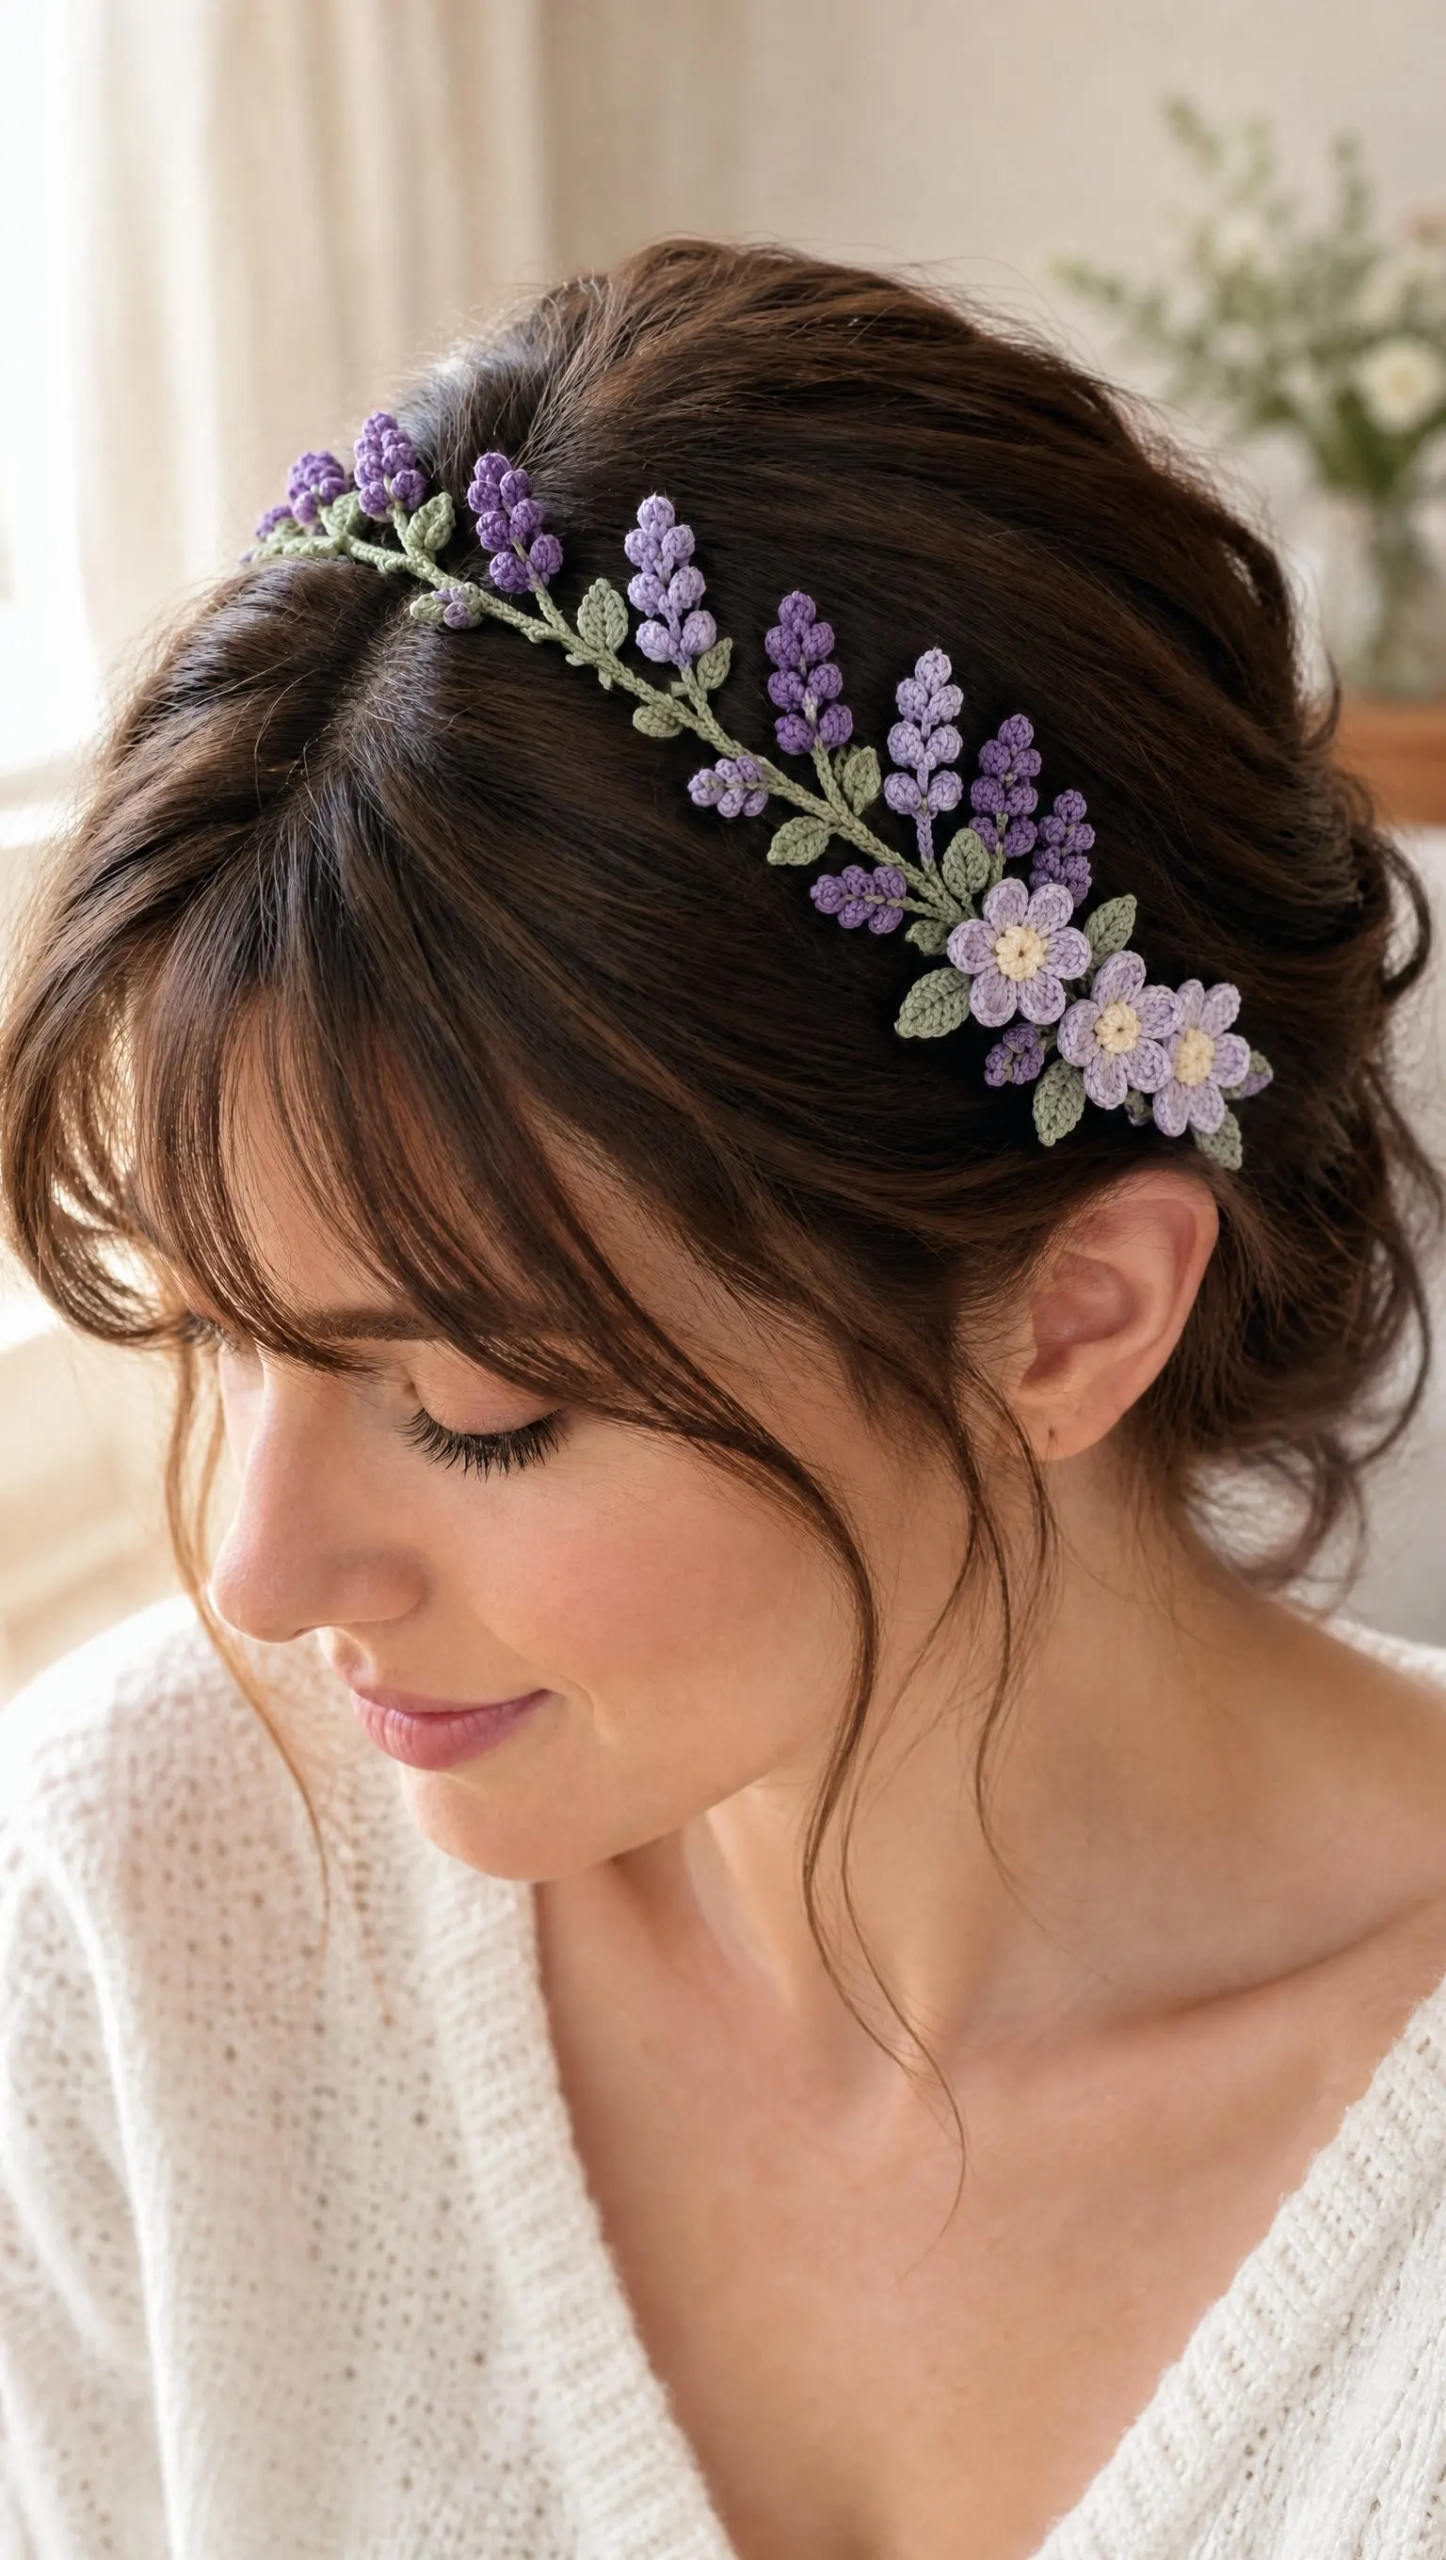
The asymmetric design sets this headband apart from typical crochet hair accessories. Instead of even embellishments all the way around, you create a cascading floral cluster that sweeps diagonally from the crown toward one ear. The effect is romantic and organic, like someone tucked a sprig of real lavender into your hair.
The color palette does a lot of heavy lifting here. You will use olive green for the vine base and leaves, multiple shades of lavender and violet for the puff stitch buds, pale lilac for the five petal flowers, ivory or cream for the flower centers, and mint green for accent leaves. This gradient of purples against the greens creates that realistic botanical look.
Finished measurements come out to approximately 52 to 56 cm in head circumference for an adult size. The band itself is slim at just 1.5 to 2 cm wide, while the floral cluster spans about 18 to 22 cm in length. The finished piece has a flexible stretch fit, so it sits comfortably without squeezing.
Materials You Will Need
Gather everything before you start. There is nothing worse than getting halfway through a project and realizing you are missing a color.
Yarn: Fine cotton crochet yarn in sport or fingering weight. You will need small amounts of each color:
Hook: 1.5 to 2.0 mm crochet hook. Yes, this is tiny. The small hook creates the delicate, crisp stitches that make this headband look so refined.
Notions:
Abbreviations and Stitch Definitions
Let me walk you through each stitch you will use. If any of these are new to you, practice them with scrap yarn before starting the actual project.
ch (chain): The foundation stitch. Yarn over, pull through the loop on your hook. This creates the base for most crochet work.
sc (single crochet): Insert hook into stitch, yarn over and pull up a loop (two loops on hook), yarn over and pull through both loops. This is your basic, short stitch.
sl st (slip stitch): Insert hook into stitch, yarn over and pull through both the stitch and the loop on your hook in one motion. Used for joining and creating flat, tight connections.
hdc (half double crochet): Yarn over, insert hook into stitch, yarn over and pull up a loop (three loops on hook), yarn over and pull through all three loops. Slightly taller than single crochet.
dc (double crochet): Yarn over, insert hook into stitch, yarn over and pull up a loop (three loops on hook), yarn over and pull through two loops, yarn over and pull through remaining two loops. A taller stitch that creates the flower petals.
puff st (puff stitch): This one creates those rounded lavender buds. Yarn over, insert hook, pull up a loop. Repeat this sequence five times in the same stitch so you have multiple loops on your hook. Yarn over and pull through all the loops at once. Chain one to close and secure it. The result is a puffy, rounded cluster.
rep (repeat): Do the indicated steps again.
Part 1: Crochet the Narrow Vine Headband
This is your foundation, the part that actually wraps around your head. It needs to be sturdy but slim.
Foundation Band
Chain 120. If you have a larger or smaller head, adjust this number. The chain should stretch comfortably around your head with a little overlap.
Row 1: Single crochet (sc) in the second chain from the hook and across the entire row. Turn your work.
Rows 2 through 5: Chain 1, single crochet across the entire row. After Row 5, fasten off.
You now have a flat rectangular strip. Fold this strip lengthwise so the long edges meet, then sew those edges together neatly. This creates a slim, flexible tube that sits more comfortably than a flat band would. Weave in and hide all your yarn ends inside the tube where they will not show.
Part 2: Olive Green Chain Stitch Vine
The vine is the backbone of your floral arrangement. Everything else attaches to it.
Attach your olive green yarn near one side of the headband. You will build the vine outward from this attachment point.
Creating the curved vine:
Tuck all your ends to the back side of the work and secure them. You do not want anything unraveling later.
Part 3: Mint Green Lance Leaves
These little leaves fill in the spaces and add that fresh garden feel. The instructions create a pointed, lance shaped leaf.
For each leaf:
Chain 7.
Now slip stitch back along the chain with varying stitches to create the leaf shape:
The varying stitch heights create a natural leaf shape, wider in the middle and tapered at both ends.
Make approximately 12 to 16 leaves. You can always make more if your arrangement needs them, so do not stress about the exact count.
Arrange leaves along both sides of the vine and sew them securely in place. Overlap them slightly for a natural, organic look.
Part 4: Lavender Puff Stitch Sprigs
Here is where the magic happens. These puff stitch buds look exactly like lavender blooms when you stack them up a stem.
For each sprig:
Stem: Using lavender yarn, chain 8 to 12 stitches depending on how tall you want the sprig. Slip stitch back along the chain to create a sturdy stem.
Puff Stitch Bud: In the stitch where you want a bud, work the puff stitch. Yarn over, insert hook, pull up a loop. Repeat this five times in the same stitch. Yarn over and pull through all the loops on your hook. Chain 1 to close and secure the puff.
Make stacked puff buds on each sprig:
Create 5 to 7 lavender sprigs with different heights. This variation creates that tapered, asymmetric appearance that makes the design look natural rather than manufactured. Some sprigs should be tall with many buds, others shorter with just two or three.
Color arrangement tip: Use deep violet yarn for the outer buds, medium lavender in the middle sections, and soft lilac near where the flowers will go. This gradient adds visual depth.
Part 5: Pale Lilac Five Petal Flowers
These three flowers anchor the arrangement and provide a focal point among all the vertical sprigs.
Make 3 flowers total.
Flower center (make 3):
Using ivory or cream yarn, create a magic ring. Work 5 single crochet (sc) into the ring. Join with a slip stitch to close. Pull the ring tight.
Petals:
Attach pale lilac yarn to your flower center.
For each petal: Chain 2, work 2 double crochet (dc), chain 2, slip stitch into the same stitch where you started the petal.
Repeat this petal sequence around the center for a total of five petals. Each petal attaches to one of the 5 sc stitches in your center.
Fasten off and sew the ivory centers securely to the petals if needed.
Attach the flowers near the right temple area of the headband. Position them where the floral cluster will end, near your ear.
Part 6: Assembly
This is where all your pieces come together. Take your time here because placement matters.
1. Position the floral cluster diagonally from upper left crown toward lower right ear. This creates the asymmetric sweep.
2. Place taller lavender sprigs toward the center of the cluster. These draw the eye and create height.
3. Place the three pale lilac flowers near the end of the arrangement, closest to your ear. They serve as the visual anchor.
4. Stitch all pieces firmly to the vine. Use matching thread or yarn and small, secure stitches.
5. Check the back side and weave in every loose end. You do not want scratchy yarn tails against your scalp.
6. Ensure no dangling ties remain. Everything should be neat and secure.
Finishing Tips for Professional Results
Blocking: Block lightly with steam to shape the leaves and flowers. Hold your steamer or iron a few inches away and let the moisture relax the fibers. Avoid heavy blocking because you want to preserve that puffy texture in your puff stitches.
Yarn choice matters: Cotton yarn gives you crisp, defined stitches and dimensional petals that hold their shape. Other fibers might work, but cotton delivers the best results for this delicate botanical look.
Weight consideration: Keep the floral section lightweight for comfortable wear. If your headband feels too heavy on one side, remove some elements or use smaller sprigs.
Care Instructions
Your finished headband needs gentle handling to stay beautiful.
Washing: Hand wash gently in cool water with mild soap. Do not wring or twist the piece.
Drying: Lay flat on a clean towel to dry. Reshape the flowers and leaves while damp.
Storage: Store flat or wrap around a soft object like a rolled towel. Do not crush those puff stitches.
Final Thoughts on This Lavender Sprig Headband Crochet Pattern
This lavender sprig headband crochet pattern takes time, but every single piece teaches you something. The puff stitches, the modular assembly, the color gradients. By the end, you have not just a beautiful accessory but a whole set of techniques you can apply to future projects.
I love how versatile the design is too. You could make it in different color families for different seasons. Imagine autumn tones with rust and gold, or winter whites and silvers. The construction stays the same, but the mood changes completely.
Whether you are making this for yourself, a bride, a flower girl, or a friend who just loves botanical accessories, the result is genuinely special. The kind of thing people notice and ask about.
Thank you so much for choosing this pattern. I really hope you enjoy the process as much as I did designing it. If you make one, I would absolutely love to see it. Tag me on Instagram or share in my Facebook group. Seeing your finished projects is honestly the best part of sharing patterns.
If this lavender sprig headband crochet pattern is going on your project list, go ahead and pin it to your Pinterest boards so you can find it when you are ready to start. And drop a comment below if you make one. I love hearing how projects turn out and seeing the color combinations you choose!
Want a Quick & Easy Printable Version?
Get a clean, beautifully formatted PDF of this pattern — easy to follow step by step, ready to print or save on any device. No scrolling, no distractions, just the pattern.
Get the Printable PDF →You Might Also Like
- Ocean Jellyfish Crochet Market Bag Free Pattern
- Sunset Ombre Butterfly Bloom Charm Free Crochet Pattern
- Sage Green Lace Baby Dress Free Crochet Pattern
- Baby Dragonfly Poncho Free Crochet Pattern
