
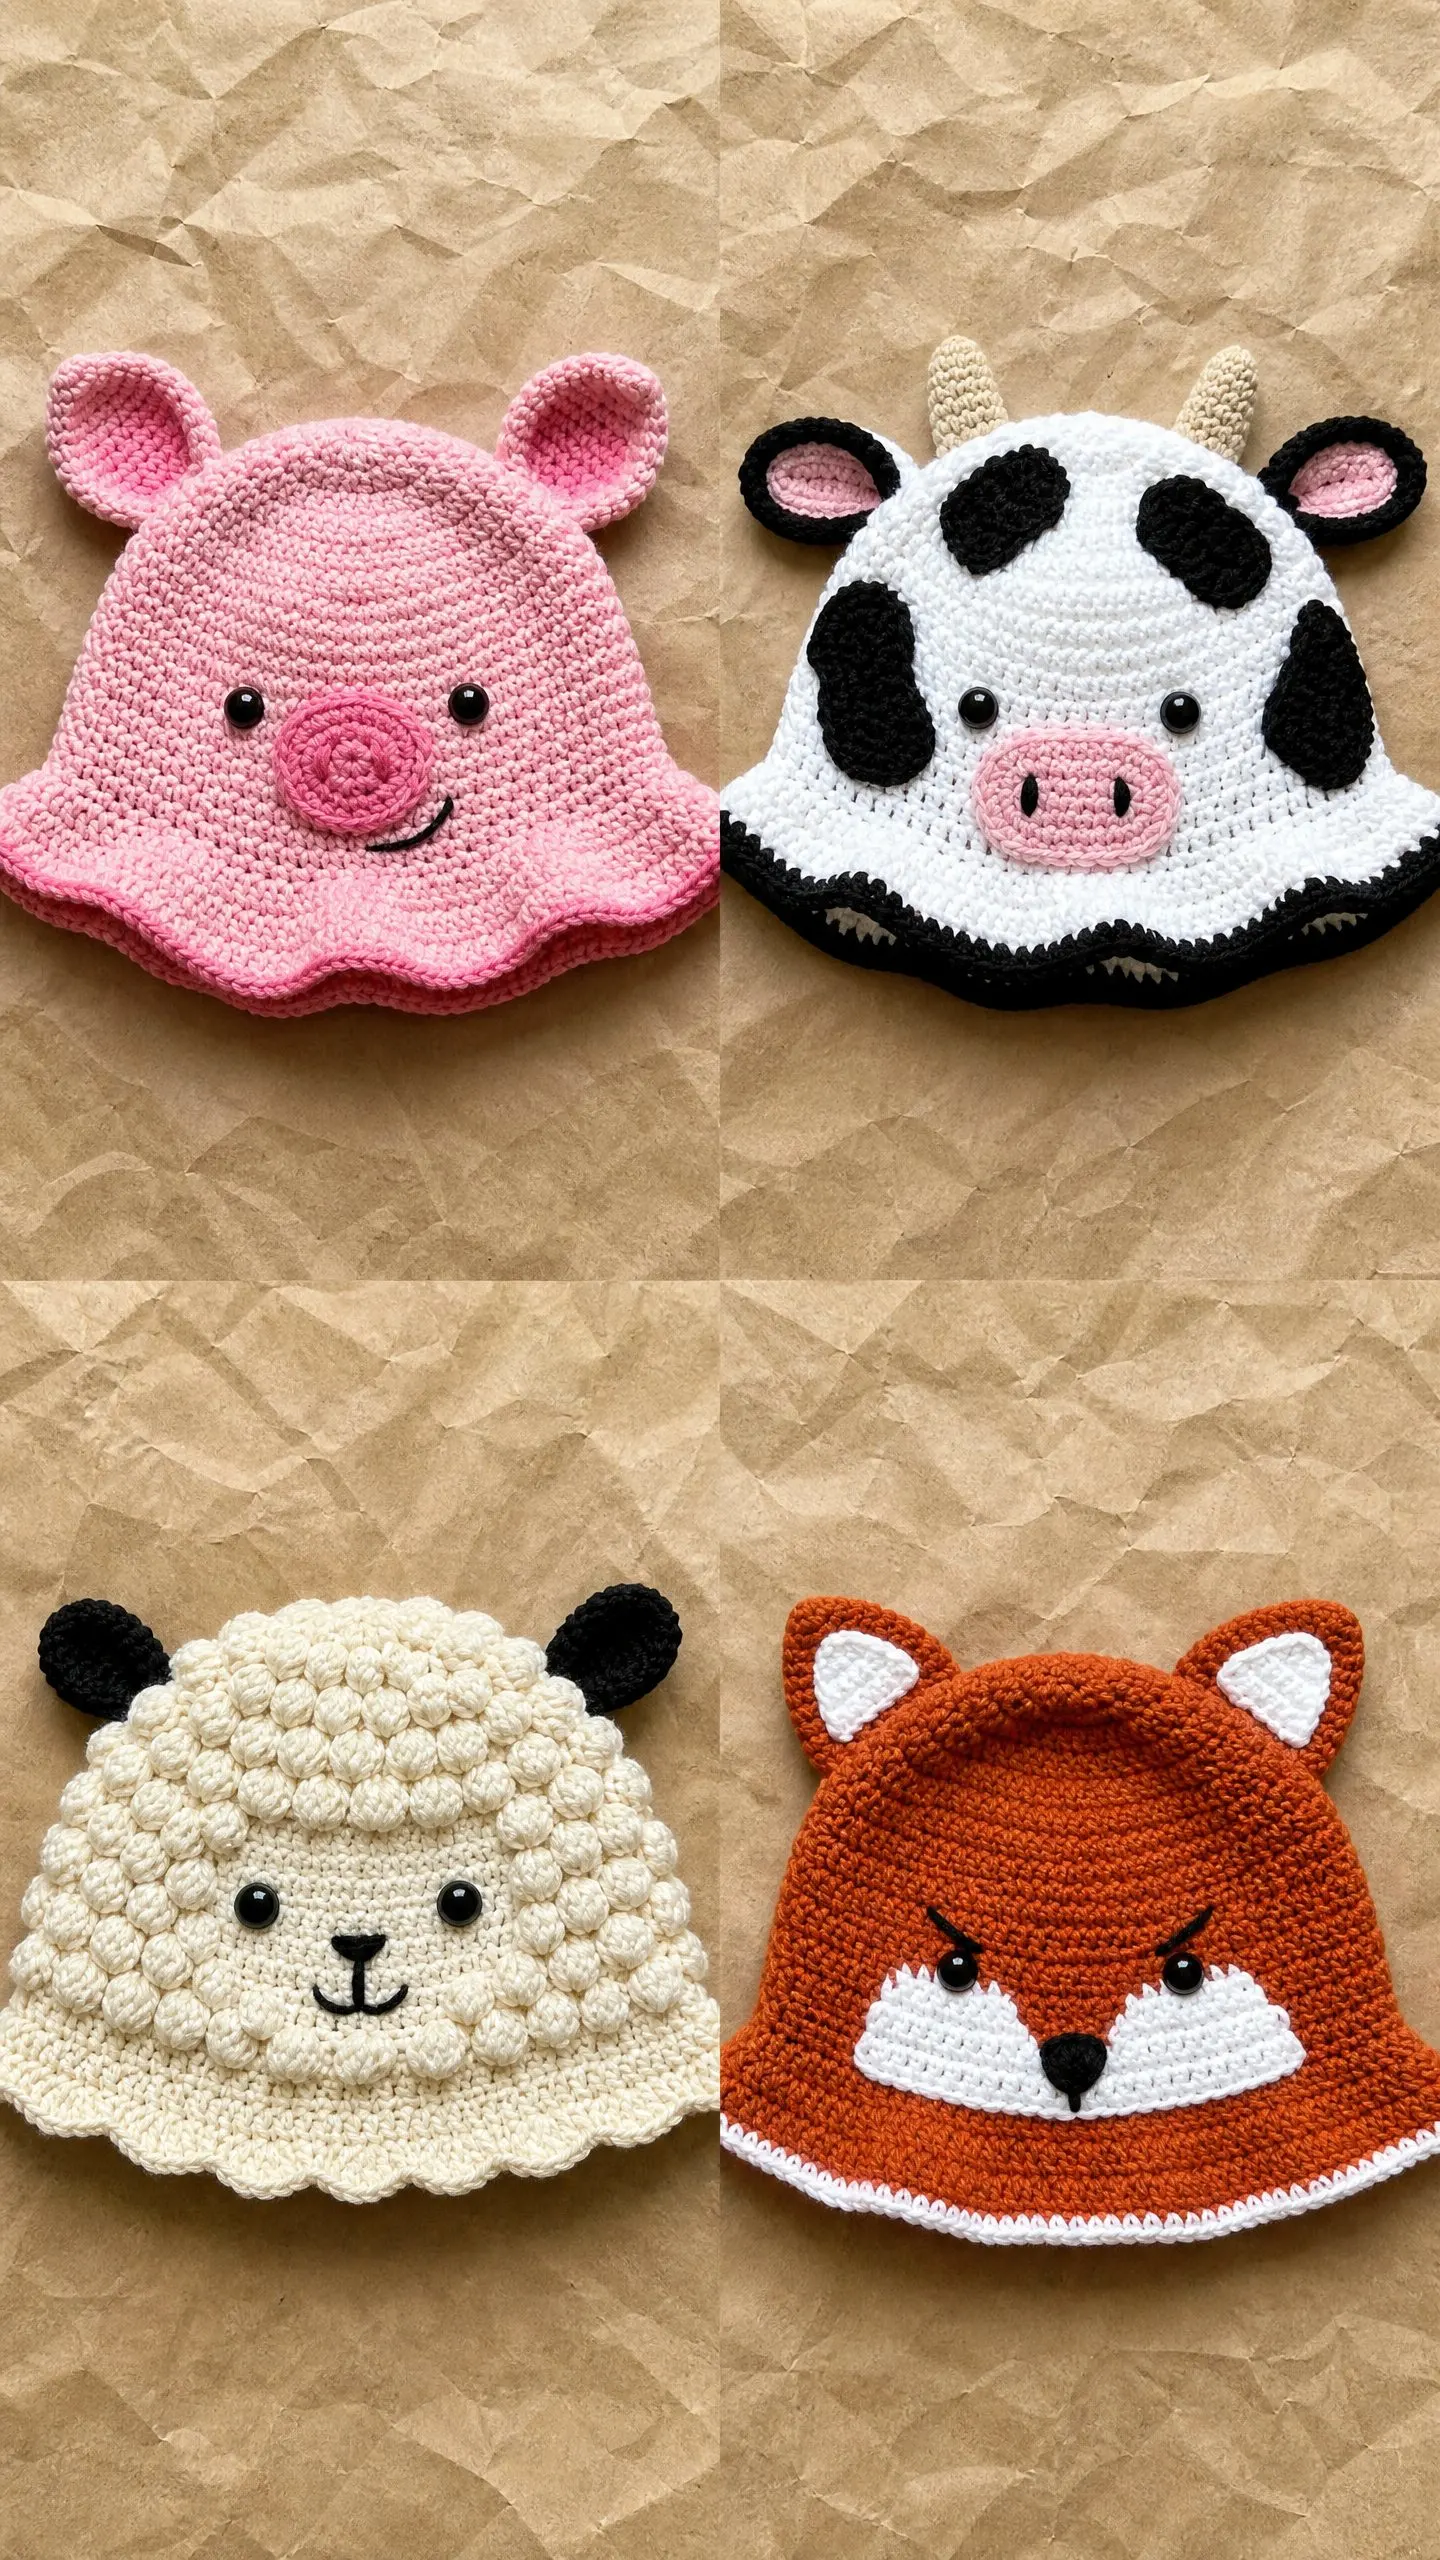
I’ve been looking for the perfect set of animal bucket hats for months now, and I finally found exactly what I wanted. This collection of four adorable farm animal designs hits every mark. A sweet pink pig with a ruffled brim, a spotted cow with tiny horns, a fluffy sheep with bobble stitch texture, and a clever little fox with white facial markings.
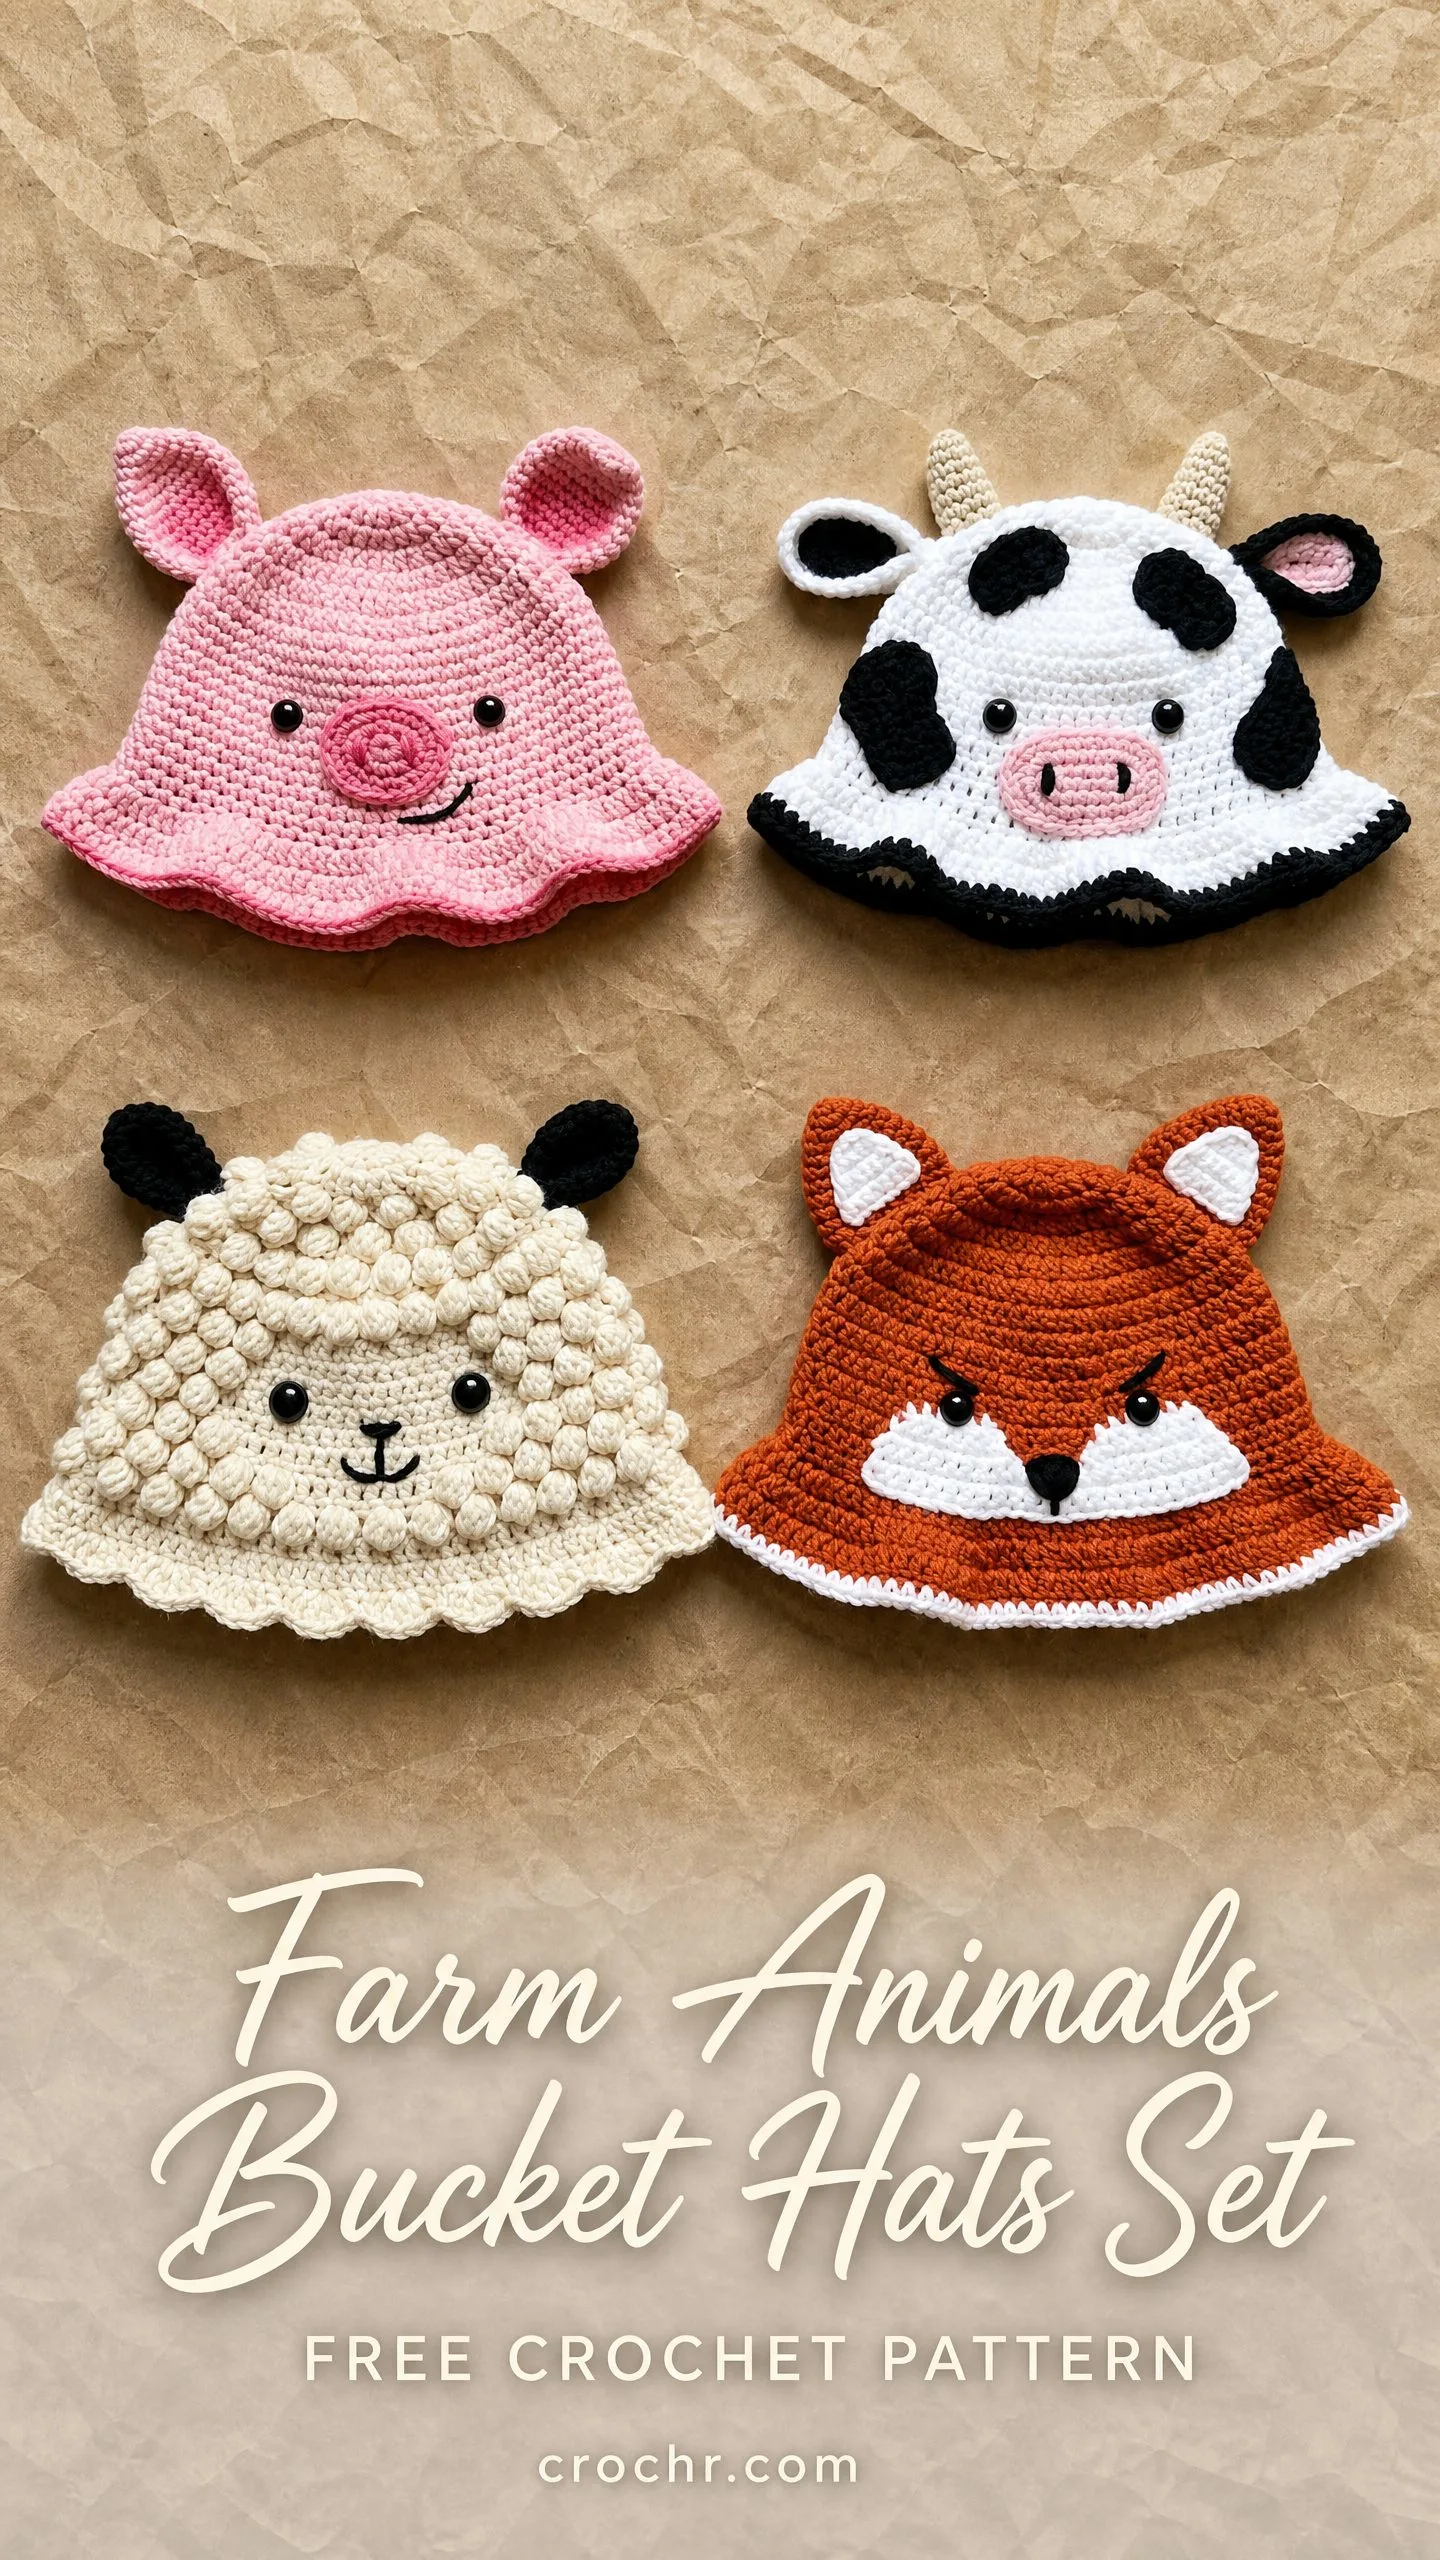
Each hat in this set works up from the top down using a magic ring, which means no seaming the crown closed later. The construction is straightforward once you get the rhythm going. If you’ve been wanting to try colorwork, bobble stitches, or simple appliqué techniques, this is your chance to practice all three across four different projects.
Whether you’re making these for your own little ones, gifting them to friends with kids, or stocking up for a craft fair, this pattern set gives you plenty of variety without reinventing the wheel each time. The base hat stays the same across all four animals. You just swap out the colors and embellishments to create completely different characters.
What You’ll Need to Make These Adorable Animal Hats
Before diving into the stitches, let’s gather everything you need. Having your materials ready makes the whole process smoother and more enjoyable.
Yarn Requirements
For the Pig Hat:
Light pink worsted weight yarn, approximately 200 yards or 183 meters. Medium pink worsted weight yarn, approximately 30 yards or 27 meters for the ruffle edging and snout accent.
For the Cow Hat:
White worsted weight yarn, approximately 150 yards or 137 meters. Black worsted weight yarn, approximately 80 yards or 73 meters. Light pink yarn, approximately 15 yards or 14 meters. Cream or tan yarn, approximately 20 yards or 18 meters.
For the Sheep Hat:
Cream or off-white worsted weight yarn, approximately 180 yards or 165 meters. Black worsted weight yarn, approximately 30 yards or 27 meters for ears and face details.
For the Fox Hat:
Rust or burnt-orange worsted weight yarn, approximately 160 yards or 146 meters. White worsted weight yarn, approximately 60 yards or 55 meters. Small amount of black for nose embroidery.
Recommended Yarn Brands
Any of these work beautifully for all four hats in their respective colors:
Lion Brand Pound of Love is a worsted weight, 100% premium acrylic with 1020 yards per 16 oz skein. It’s soft, machine washable, and has excellent stitch definition.
Paintbox Yarns Simply DK held double achieves worsted weight gauge and gives a slightly smoother texture with a good color range including those rust and cream tones.
Caron Simply Soft is worsted weight, 100% acrylic with 315 yards per 6 oz skein. It has excellent drape and feels wonderfully soft against baby and child skin.
A quick note on substitutions: any smooth worsted weight (category 4) yarn that achieves gauge works fine. Avoid fuzzy or textured yarns for the pig, cow, and fox hats since stitch definition matters for the facial features.
Tools and Notions
Understanding the Gauge
Getting your gauge right matters here since these are fitted hats. Work 18 single crochet stitches and 20 rounds to equal 4 inches or 10 cm in continuous rounds with your G-6 hook.
To check your gauge, work a magic ring and then complete rounds 1 through 8 of the crown instructions. After 8 rounds, your flat circle should measure approximately 3.5 inches or 9 cm in diameter. Block lightly and measure before proceeding.
If your circle is too small, your tension is too tight. Go up a hook size. If it’s too big, go down a hook size. A hat worked too loosely won’t hold its shape, and one worked too tightly won’t fit over the head.
Finished Sizes
Toddler (2 to 4 years): Approximately 18 to 19 inches or 46 to 48 cm head circumference. Hat height is approximately 6 inches or 15 cm including the brim.
Child (5 to 10 years): Approximately 20 to 21 inches or 51 to 53 cm head circumference. Hat height is approximately 6.5 inches or 16.5 cm including the brim.
The pattern is written for toddler size. Child size adjustments appear in parentheses where rounds differ. Where only one number appears, it applies to both sizes.
Abbreviations and Stitch Definitions
Let me walk you through every abbreviation you’ll encounter. Understanding these upfront prevents confusion later.
ch = chain. Wrap yarn over hook and pull through the loop on your hook.
sl st = slip stitch. Insert hook, yarn over, pull through both the stitch and the loop on hook in one motion.
sc = single crochet. Insert hook into stitch, yarn over, pull up a loop (2 loops on hook), yarn over, pull through both loops.
hdc = half double crochet. Yarn over, insert hook, yarn over, pull up a loop (3 loops on hook), yarn over, pull through all 3 loops.
dc = double crochet. Yarn over, insert hook, yarn over, pull up a loop, (yarn over, pull through 2 loops) twice.
inc = single crochet increase. Work 2 sc in the same stitch to add one stitch to your count.
dec = invisible decrease. Insert hook in front loop only of next stitch, insert hook in front loop only of following stitch, yarn over, pull through both loops, yarn over, pull through remaining 2 loops.
BLO = back loop only. Work into just the back loop of the stitch instead of both loops.
FLO = front loop only. Work into just the front loop of the stitch.
MR = magic ring. Create an adjustable loop to begin working in the round.
st(s) = stitch(es)
pm = place marker
rnd(s) = round(s)
bo5 = bobble stitch worked over 5 double crochets (explained in detail below)
Special Techniques You’ll Use
The Bobble Stitch (bo5)
This creates those adorable fluffy bumps on the sheep hat. Here’s how to work it:
Step 1: Yarn over, insert hook into designated stitch.
Step 2: Yarn over, pull up a loop (3 loops on hook).
Step 3: Yarn over, pull through first 2 loops (2 loops remain on hook).
Step 4: Repeat steps 1 through 3 four more times in the same stitch, so you have 6 loops total on hook.
Step 5: Yarn over, pull through all 6 loops on hook.
Step 6: Chain 1 to close and secure the bobble.
The chain 1 counts as part of the bobble stitch structure and does not count as a separate stitch. The bobble occupies one stitch position.
Ruffle Stitch
Used for the pig hat brim edging. Simply work 3 dc in each stitch around. This creates a dense decorative frill that looks absolutely precious.
Invisible Join
This gives you a seamless finish when closing rounds.
Step 1: Cut yarn leaving a 6-inch tail.
Step 2: Thread tail onto yarn needle.
Step 3: Insert needle from front to back through both loops of the first stitch of the round.
Step 4: Insert needle back down through the back loop only of the last stitch of the round.
Step 5: Pull gently to match tension of surrounding stitches. Weave in tail.
Color Change Technique
Used for the cow hat spots and fox hat face markings. Work the last stitch before the color change until 2 loops remain on hook. Drop current color to wrong side. Pick up new color and pull through remaining 2 loops to complete the stitch. Continue with new color. Carry unused color loosely along wrong side for spans of 3 stitches or fewer. For longer spans, cut and rejoin.
Important Pattern Notes Before You Begin
All hats are worked in continuous rounds (spiral) unless otherwise stated. Do not join rounds with a slip stitch and do not chain 1 to begin rounds unless explicitly instructed. Use a stitch marker in the first stitch of each round and move it up as you go.
The pattern works from the top of the hat down toward the brim. All embellishments like ears, snouts, and horns are made separately and sewn on after the hat body is complete.
Safety eyes should be inserted and secured before stuffing and closing any 3D elements such as the snout or ears. Right side is the outer-facing side throughout. The magic ring beginning sits at the top center of the hat.
Stitch counts appear at the end of each round in parentheses for easy reference.
Hat Base Pattern (Used for All Four Animals)
This base pattern applies to all four animal hats. Individual hat sections reference this base and add specific modifications.
Crown Section
Rnd 1: Starting with MR, work 6 sc into ring, pull ring closed. (6 sc)
Rnd 2: Inc in each st around. (12 sc)
Rnd 3: (Sc 1, inc) rep 6 times. (18 sc)
Rnd 4: (Sc 2, inc) rep 6 times. (24 sc)
Rnd 5: (Sc 3, inc) rep 6 times. (30 sc)
Rnd 6: (Sc 4, inc) rep 6 times. (36 sc)
Rnd 7: (Sc 5, inc) rep 6 times. (42 sc)
Rnd 8: (Sc 6, inc) rep 6 times. (48 sc)
Rnd 9: (Sc 7, inc) rep 6 times. (54 sc)
Rnd 10: (Sc 8, inc) rep 6 times. (60 sc)
Rnd 11: (Sc 9, inc) rep 6 times. (66 sc)
Rnd 12: (Sc 10, inc) rep 6 times. (72 sc)
Checkpoint: After round 12, the flat crown circle should measure approximately 6.5 inches or 16.5 cm in diameter.
For toddler size only: Stop increasing at round 12. Total crown stitches: 72 sc.
Child size only:
Rnd 13: (Sc 11, inc) rep 6 times. (78 sc)
Body Section (Side Walls)
Work even (one sc in each stitch with no increases or decreases) for the following number of rounds:
Toddler: Rounds 13 through 22 (10 rounds even). (72 sc each round)
Child: Rounds 14 through 24 (11 rounds even). (78 sc each round)
Checkpoint: After the body section, the hat should measure approximately 4 inches or 10 cm from crown center to the current working edge when laid flat.
Standard Brim Section
Toddler brim (worked on 72-st base):
Rnd 1 of brim: (Sc 11, inc) rep 6 times. (78 sc)
Rnd 2 of brim: (Sc 12, inc) rep 6 times. (84 sc)
Rnd 3 of brim: (Sc 13, inc) rep 6 times. (90 sc)
Rnd 4 of brim: Work even. (90 sc)
Rnd 5 of brim: Work even in BLO. (90 sc)
Child brim (worked on 78-st base):
Rnd 1 of brim: (Sc 12, inc) rep 6 times. (84 sc)
Rnd 2 of brim: (Sc 13, inc) rep 6 times. (90 sc)
Rnd 3 of brim: (Sc 14, inc) rep 6 times. (96 sc)
Rnd 4 of brim: Work even. (96 sc)
Rnd 5 of brim: Work even in BLO. (96 sc)
Working round 5 of the brim in BLO creates a subtle ridge that helps the brim hold its shape and lie flat.
Fasten off and weave in ends unless a specific hat edging is added.
Pig Hat Instructions
Work crown and body following the Hat Base Pattern above using your main color (light pink) throughout.
Pig Brim with Ruffle
The pig brim replaces the standard brim. Work as follows using light pink for the main brim and medium pink for the ruffle edging.
Rnd 1 of pig brim (light pink): (Sc 11, inc) rep 6 times. (78 sc)
Rnd 2 of pig brim (light pink): (Sc 12, inc) rep 6 times. (84 sc)
Rnd 3 of pig brim (light pink): (Sc 13, inc) rep 6 times. (90 sc)
Rnd 4 of pig brim (light pink): Work even. (90 sc)
At the end of round 4, join medium pink with a sl st to the first stitch of the round to close the round. Chain 1. Do not turn.
Rnd 5 of pig brim (medium pink, ruffle): Work 2 hdc in each stitch around. Join with sl st to first hdc. (180 hdc)
Fasten off. Weave in ends.
Pig Ears (make 2)
Outer ear (light pink):
Rnd 1: MR, 6 sc. (6 sc)
Rnd 2: Inc in each st. (12 sc)
Rnd 3: (Sc 1, inc) rep 6 times. (18 sc)
Rnd 4: Work even. (18 sc)
Do not fasten off. Fold the ear piece in half with wrong sides together so the round becomes a half-moon shape. Working through both layers simultaneously, sc across the open edge to seam. (9 sc through double layers)
Fasten off, leaving a 12-inch or 30 cm tail for sewing.
Inner ear (medium pink):
Rnd 1: MR, 6 sc. (6 sc)
Rnd 2: Inc in each st. (12 sc)
Rnd 3: Work even. (12 sc)
Fasten off, leaving a tail. Sew inner ear onto outer ear with yarn needle, centering it on the front face of the ear. Make 2 ears total.
Pig Snout
Using medium pink:
Rnd 1: MR, 6 sc. (6 sc)
Rnd 2: Inc in each st. (12 sc)
Rnd 3: (Sc 1, inc) rep 6 times. (18 sc)
Rnd 4: Work even. (18 sc)
Rnd 5: Work even. (18 sc)
Stuff snout lightly with polyester fiberfill. Close by working (dec) 9 times, drawing snout into a shallow dome. (9 sc remaining)
Pull yarn tail through remaining stitches and cinch closed. Leave a long tail for sewing.
Using black yarn or embroidery floss, embroider 2 small nostrils on the front face of the snout with a straight stitch or small oval satin stitch.
Pig Assembly
Position safety eyes on the hat body. Place eyes approximately 2 rounds below the bottom edge of the crown, spaced approximately 1.5 inches or 3.8 cm apart on either side of center front. Push shanks through fabric and secure washers on the inside.
Center the snout below and between the safety eyes, approximately 2 rounds below eye level. Pin in place and sew around the perimeter of the snout using the tail and a yarn needle.
Embroider a curved smile just below the snout using black yarn.
Position ears on either side of the crown top. The fold of each ear should sit approximately 2 rounds down from the magic ring center, near the 10-o-clock and 2-o-clock positions when viewing the hat from above. Sew securely through folded base of each ear.
Weave in all remaining ends.
Cow Hat Instructions
Work the crown following the Hat Base Pattern above using white as the primary yarn. Incorporate black spots using color change technique as you go.
Crown with Spots
Work rounds 1 through 6 entirely in white. (36 sc after round 6)
Spot placement begins in round 7. Work color changes as follows. Where black appears, change to black for those stitches, then change back to white.
Rnd 7 (white with spot A beginning): Sc 5 in white, sc 4 in black (spot A), sc 33 in white. (42 sc total; 4 black sts)
Rnd 8: Sc 4 in white, sc 6 in black (spot A), sc 32 in white. (42 sc total; 6 black sts)
Rnd 9: Sc 4 in white, sc 6 in black (spot A), sc 26 in white, sc 4 in black (spot B begins), sc 8 in white. (48 sc total; 10 black sts)
Rnd 10: Sc 5 in white, sc 4 in black (spot A closing), sc 22 in white, sc 6 in black (spot B), sc 9 in white. (54 sc total; 10 black sts)
Rnd 11: Work entire round in white except spot B. Sc 9 in white, sc 18 in white, sc 6 in black (spot B), sc 9 in white. (60 sc; 6 black sts)
Rnd 12: Work entirely in white. (66 sc)
Continue with child size round 13 if needed (all white). (72 sc toddler / 78 sc child after crown)
Spot shapes do not need to be mathematically precise. The irregular blob quality of cow spots is part of the charm.
Body with Spots
Work the body rounds continuing to add black spots. Work approximately 2 additional spot clusters, each covering 4 to 6 stitches wide by 2 to 3 rounds tall, placed at irregular intervals around the body.
Cow Brim
Work the standard brim from the Hat Base Pattern above using black for the brim:
Rnd 1 of cow brim (black): (Sc 11, inc) rep 6 times. (78 sc) [Child: (Sc 12, inc) x 6 = 84 sc]
Rnd 2 of cow brim (black): (Sc 12, inc) rep 6 times. (84 sc) [Child: (Sc 13, inc) x 6 = 90 sc]
Rnd 3 of cow brim (black): (Sc 13, inc) rep 6 times. (90 sc) [Child: (Sc 14, inc) x 6 = 96 sc]
Rnd 4 of cow brim (black): Work even. (90 sc) [Child: 96 sc]
Rnd 5 of cow brim (black): Work even in BLO. (90 sc) [Child: 96 sc]
Fasten off. Weave in ends.
Cow Ears (make 2)
Outer ear (white):
Rnd 1: MR, 6 sc. (6 sc)
Rnd 2: Inc in each st. (12 sc)
Rnd 3: (Sc 1, inc) rep 6 times. (18 sc)
Rnd 4: Work even. (18 sc)
Fold and seam as for pig ears. (9 sc through double layers) Fasten off with long tail.
Inner ear (light pink):
Rnd 1: MR, 6 sc. (6 sc)
Rnd 2: Inc in each st. (12 sc)
Rnd 3: Work even. (12 sc)
Fasten off with long tail. Sew inner ear onto outer ear, centering on front face. Make 2 ears total.
Cow Horns (make 2)
Using cream or tan:
Rnd 1: MR, 6 sc. (6 sc)
Rnd 2: Work even. (6 sc)
Rnd 3: (Sc 1, inc) rep 3 times. (9 sc)
Rnd 4: Work even. (9 sc)
Rnd 5: (Sc 2, inc) rep 3 times. (12 sc)
Rnd 6: Work even. (12 sc)
Stuff horn lightly with fiberfill. Fold opening flat and sc across through both layers to close. (6 sc) Fasten off with long tail. Make 2 horns.
Cow Snout
Using light pink:
Rnd 1: MR, 6 sc. (6 sc)
Rnd 2: Inc in each st. (12 sc)
Rnd 3: (Sc 1, inc) rep 6 times. (18 sc)
Rnd 4: Work even. (18 sc)
Rnd 5: Work even. (18 sc)
Stuff lightly. Close opening: (dec) 9 times. (9 sc) Cinch and fasten off with long tail.
Embroider 2 nostrils on snout face with black yarn.
Cow Assembly
Attach safety eyes to hat body, placing them approximately 2 rounds below the crown edge, spaced 1.5 inches or 3.8 cm apart. Sew snout below eyes, centered, 2 rounds below eye level. Embroider curved smile below snout.
Position horns at top of hat, 1 to 2 rounds from the magic ring, spaced about 2 inches or 5 cm apart. The flat closed end of each horn is sewn flush against the crown. Sew securely through multiple stitches.
Position ears on either side of the crown, between the horns and the eye level, at approximately the 9-o-clock and 3-o-clock positions. Sew securely.
Weave in all ends.
Sheep Hat Instructions
The sheep hat uses the bobble stitch for the crown to create a fluffy, textured woolly appearance. The brim is worked in standard single crochet.
When working bobble stitches in the round, push each completed bobble outward away from you as you work so they pop toward the outside of the hat.
Sheep Crown with Bobbles
Rnd 1: MR, 6 sc. (6 sc)
Rnd 2: Inc in each st. (12 sc)
Rnd 3: (Sc 1, bo5 in next st) rep 6 times. (6 sc, 6 bobbles = 12 st positions)
Rnd 4: (Inc in sc from prev rnd, sc in st above bobble) rep 6 times. (18 sts)
Rnd 5: (Bo5, sc 1, sc 1) rep 6 times. (18 st positions; 6 bobbles, 12 sc)
Rnd 6: (Sc in st above bobble, sc 2) rep 6 times, placing inc in one sc of each repeat: specifically (sc in bobble-top, sc 1, inc) rep 6 times. (24 sts)
Rnd 7: (Sc 1, bo5, sc 2) rep 6 times. (24 st positions; 6 bobbles, 18 sc)
Rnd 8: (Inc, sc in bobble-top, sc 2) rep 6 times. (30 sts)
Rnd 9: (Bo5, sc 4) rep 6 times. (30 st positions; 6 bobbles, 24 sc)
Rnd 10: (Sc in bobble-top, sc 1, inc, sc 2) rep 6 times. (36 sts)
Rnd 11: (Sc 1, bo5, sc 4) rep 6 times. (36 st positions; 6 bobbles, 30 sc)
Rnd 12: (Sc 1, sc in bobble-top, sc 2, inc, sc 1) rep 6 times. (42 sts)
Rnd 13: (Bo5, sc 6) rep 6 times. (42 st positions; 6 bobbles, 36 sc)
Rnd 14: (Sc in bobble-top, sc 3, inc, sc 2) rep 6 times. (48 sts)
Rnd 15: (Sc 2, bo5, sc 5) rep 6 times. (48 st positions; 6 bobbles, 42 sc)
Rnd 16: (Sc 2, sc in bobble-top, sc 2, inc, sc 1) rep 6 times. (54 sts)
Rnd 17: (Bo5, sc 8) rep 6 times. (54 st positions; 6 bobbles, 48 sc)
Rnd 18: (Sc in bobble-top, sc 4, inc, sc 3) rep 6 times. (60 sts)
Rnd 19: (Sc 3, bo5, sc 6) rep 6 times. (60 st positions; 6 bobbles, 54 sc)
Rnd 20: (Sc 3, sc in bobble-top, sc 3, inc, sc 2) rep 6 times. (66 sts)
Rnd 21: (Bo5, sc 10) rep 6 times. (66 st positions; 6 bobbles, 60 sc)
Rnd 22: (Sc in bobble-top, sc 5, inc, sc 4) rep 6 times. (72 sts)
Child size only:
Rnd 23: (Sc 4, bo5, sc 7) rep 6 times. (72 st positions)
Rnd 24: (Sc 4, sc in bobble-top, sc 4, inc, sc 2) rep 6 times. (78 sts)
Sheep Body
Switch to all single crochet (no bobbles) for the body section to create a smooth inner band.
Work even in sc for 10 (toddler) or 11 (child) rounds. (72 sc each round for toddler; 78 sc each round for child)
Sheep Brim
Work the standard brim from the Hat Base Pattern.
Tips for Success
Don’t be intimidated by the bobble stitches on the sheep hat. They look complicated but once you get into a rhythm, they become almost meditative. Take your time on the first few bobbles and it will click.
For the cow spots, remember that real cows have irregular markings. If your spots don’t look exactly like the pattern suggests, that’s perfectly fine. In fact, it makes each hat unique.
When attaching safety eyes, take a moment to step back and look at the placement before securing the washers. Once those washers are on, they’re nearly impossible to remove without damaging the fabric.
Block your finished hats lightly by stuffing them with a rolled towel and letting them sit overnight. This helps the brim lie flat and gives the whole hat a more polished look.
Time Investment
Each hat requires approximately 6 to 10 hours depending on the version. The sheep hat is the most time-intensive due to the bobble stitch crown. The cow hat requires additional time for color-change spot placement. Allow an additional 1 to 2 hours per hat for embellishments, finishing, and assembly.
A Final Note on Skill Level
These hats fall into the intermediate category. Crocheters should be comfortable working in continuous rounds, reading stitch counts, executing color changes, seaming small pieces, and attaching safety eyes. The sheep version requires comfort with bobble stitches. The fox version requires basic intarsia or tapestry color-change technique. These patterns are not appropriate for a complete beginner, but if you’ve made a few amigurumi or simple hats before, you’re ready to tackle them.
Thank you so much for choosing this pattern set for your next project. I genuinely hope these little animal hats bring joy to both you and whoever ends up wearing them. If you make one (or all four!), I would absolutely love to see your finished hats. Tag me on Instagram or share them in our Facebook group.
If this pattern caught your eye, go ahead and pin it to your crochet board on Pinterest so you can find it when you’re ready to start. And if you do make these adorable bucket hats, please drop a comment below. I love hearing which animal was your favorite to create!
You Might Also Like
- Sage Green Bow Handbag Free Crochet Pattern
- Navy Blue Chunky Round Purse Free Crochet Pattern
- Sunny Yellow Ruffle Romper Free Crochet Pattern
- Terracotta Earthy Granny Square Backpack Crochet Pattern
