
Go dig through your yarn stash right now. That skein of super soft bulky yarn you have been saving for something special? This is the project.
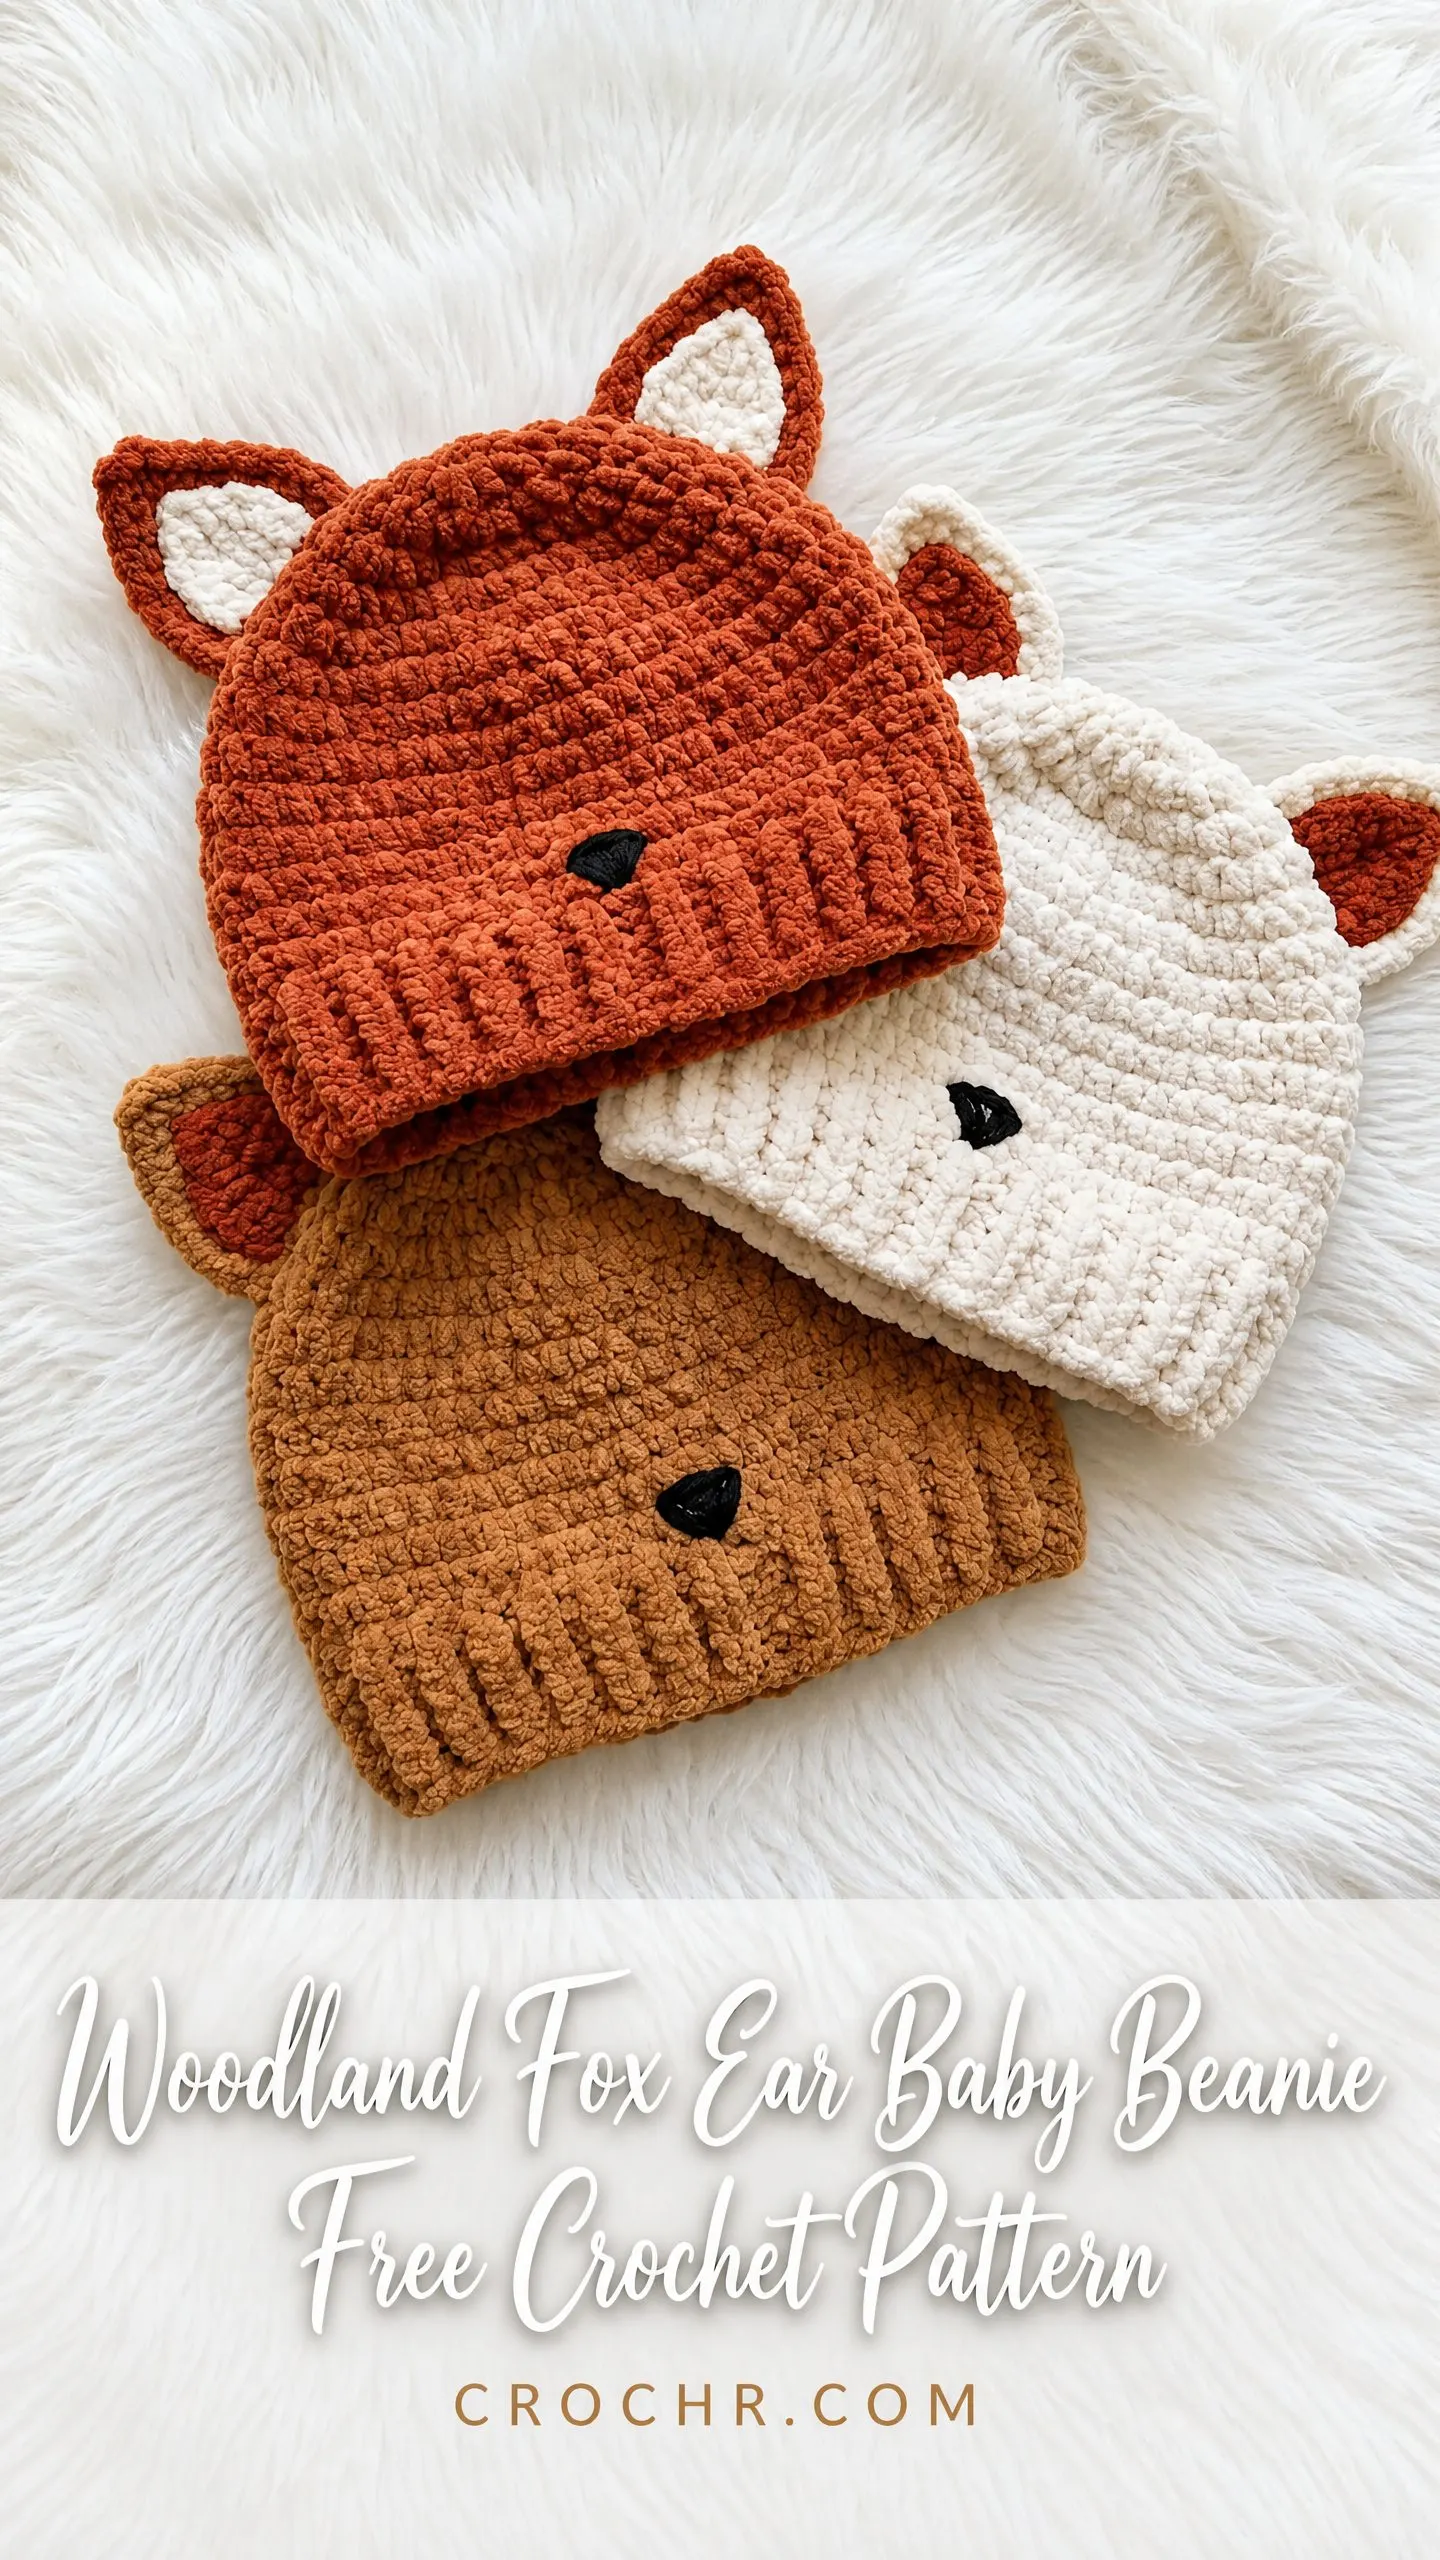
This adorable fox ear baby beanie works up in just a few hours and uses some really satisfying construction techniques. You will start with a magic ring at the crown, work your way down in continuous rounds of squishy half double crochet, then add a separately worked ribbed brim that creates those gorgeous horizontal ridges. The pointed ears get assembled with a contrasting liner that peeks out, giving you that classic fox look babies and parents absolutely love.
I will be honest with you about the skill level here. This pattern is labeled intermediate, and that is accurate. If you have made at least one hat before and feel comfortable working in continuous rounds without joining, you can absolutely handle this. The trickiest parts are the brim attachment and getting those ears symmetrical, but I will walk you through both step by step.
Why This Fox Beanie Pattern Works So Well
The genius of this design is in the yarn choice and stitch selection. That dense half double crochet fabric creates an incredibly soft, squishy texture that keeps little heads warm without being stiff. Combined with bulky weight yarn, specifically something like Bernat Blanket Yarn, you get a hat that looks professionally made and feels like a cloud.
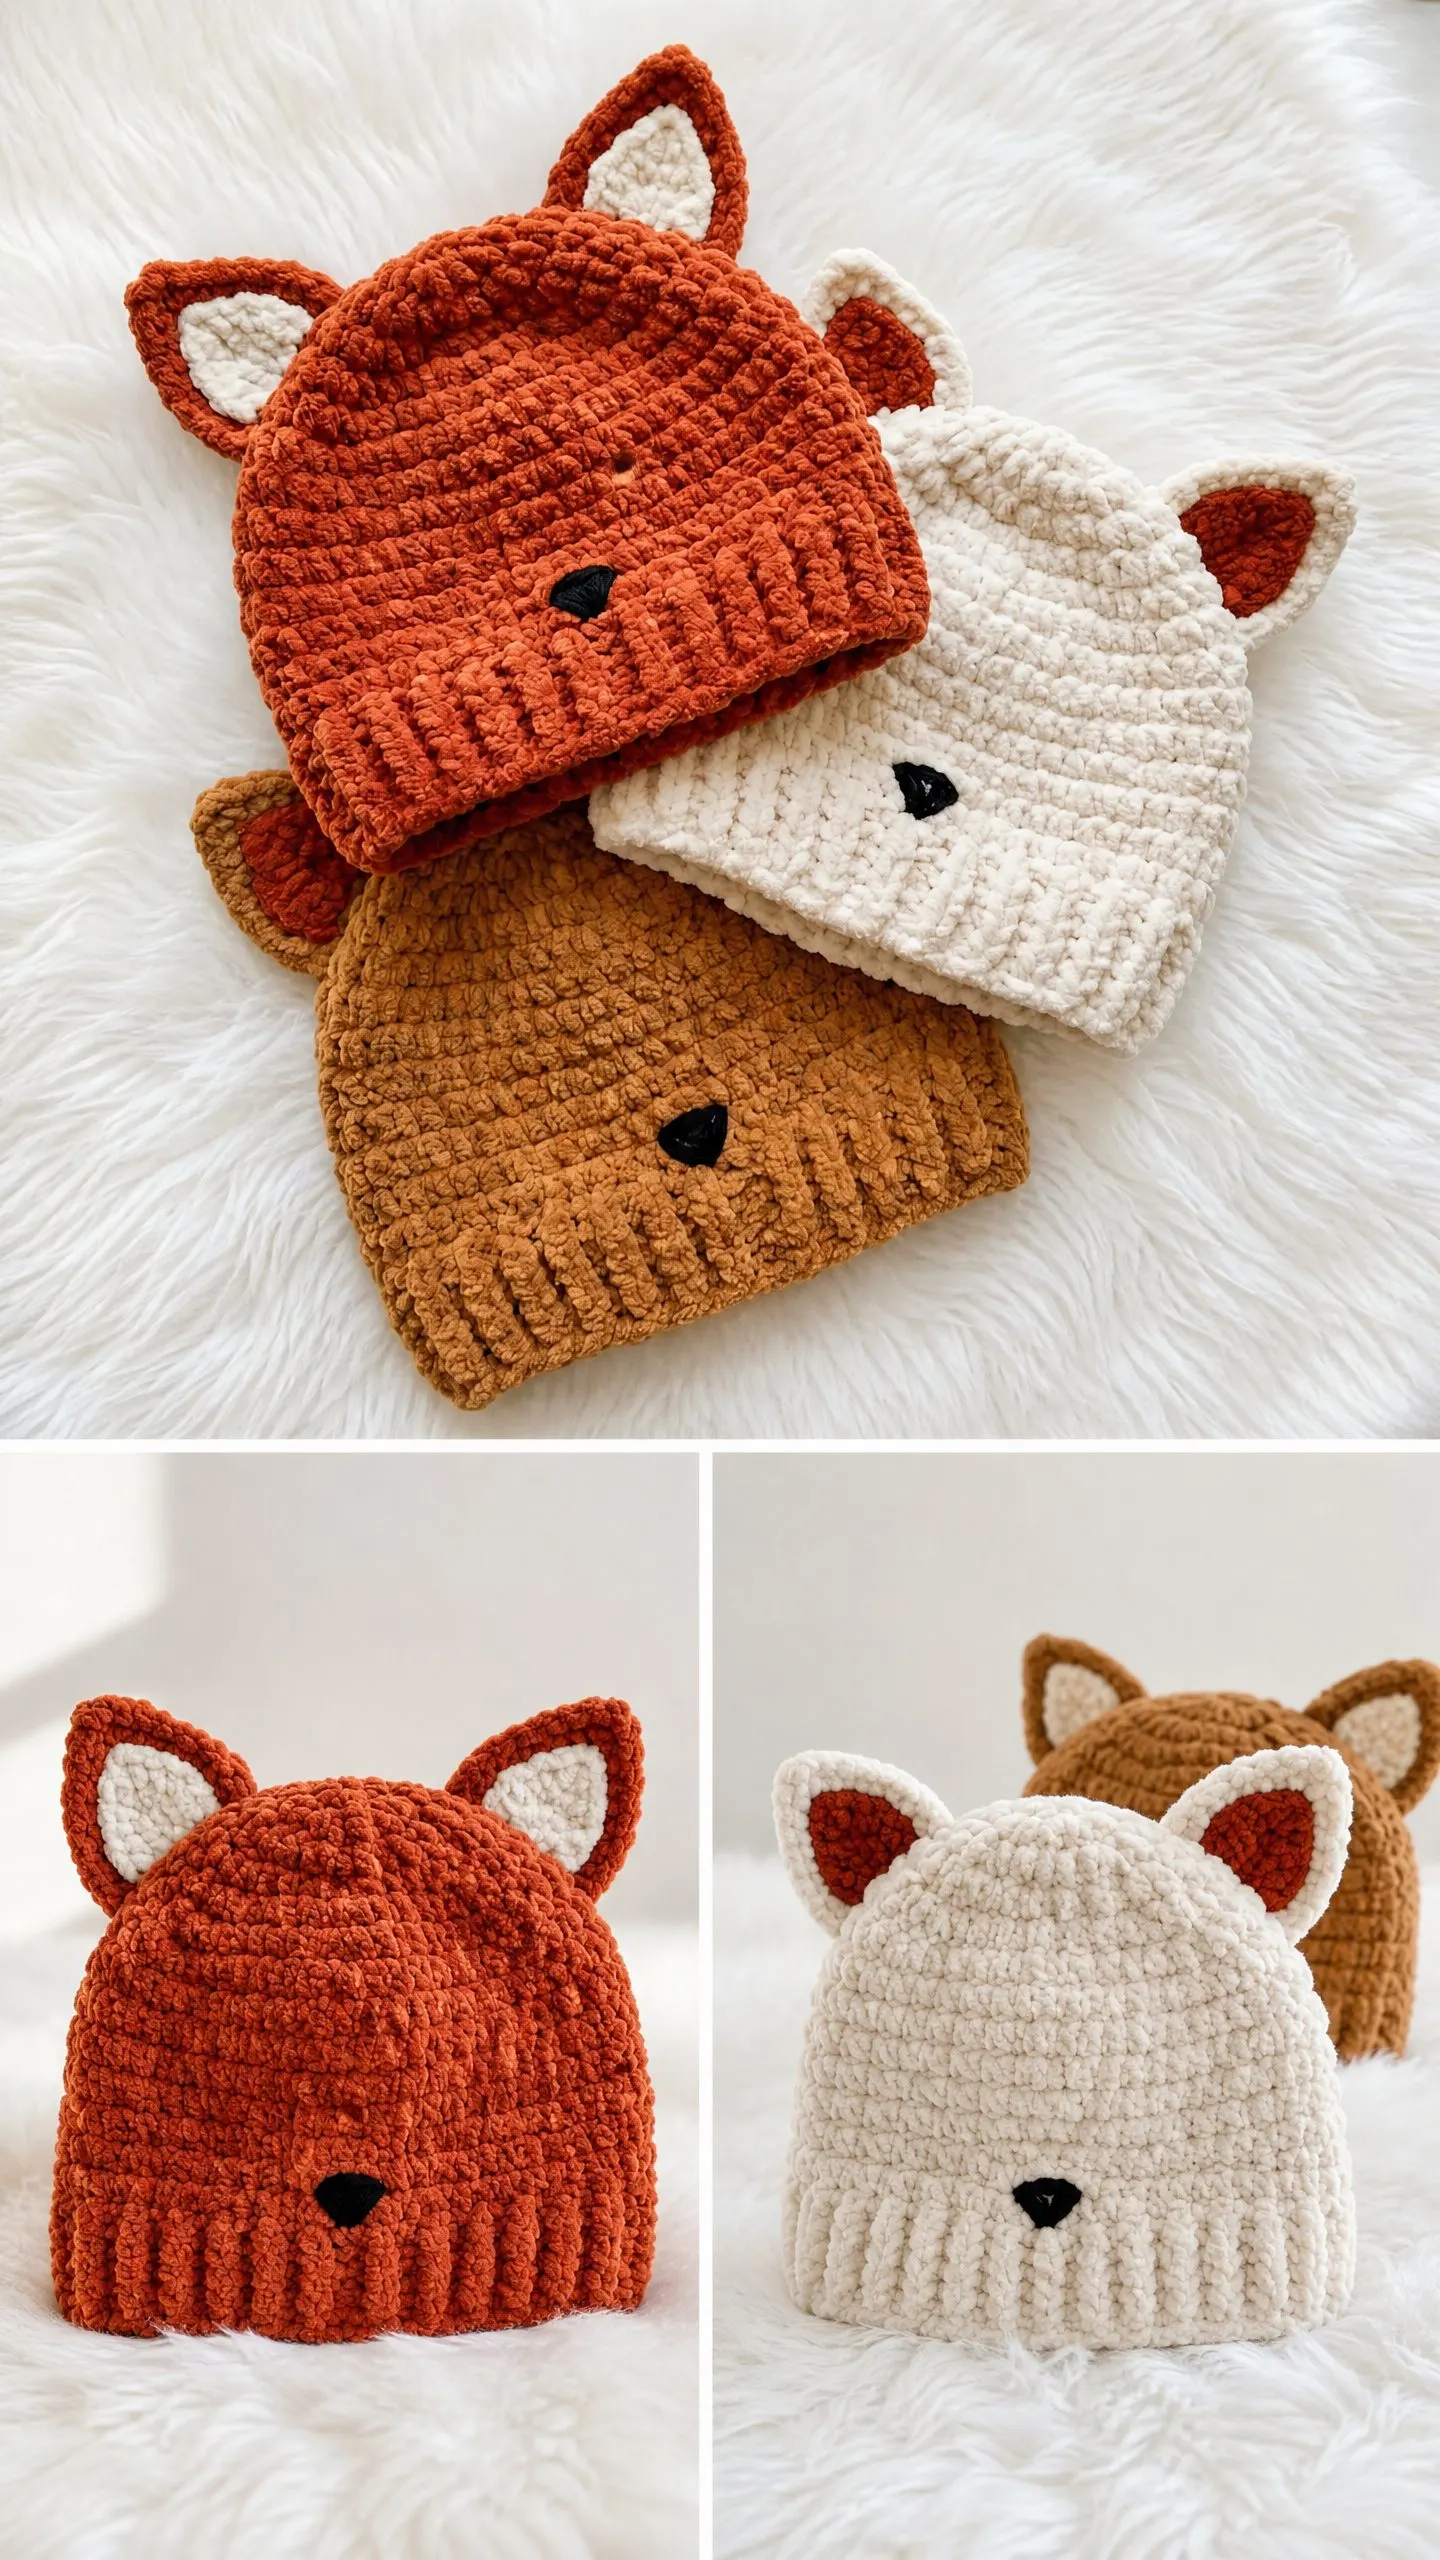
The three colorways shown give you plenty of options. Rust orange with cream ear liners is the classic fox look. Cream with rust liners creates a sweet arctic fox vibe. And that warm tan with rust accents? Absolutely perfect for fall photo sessions.
What I especially love is how the construction order makes sense. You work the brim flat so you get those crisp ribbed ridges, then attach everything together for a polished finish. No awkward picking up stitches from weird angles.
Materials You Will Need
Yarn:
Use bulky weight yarn, which is CYCA weight 6. Bernat Blanket Yarn in Pumpkin Spice or Terracotta with Almond or Cream works beautifully for this project.
Hooks:
Notions:
Gauge
Using the larger hook (K-10.5 / 6.5 mm) in half double crochet worked in the round:
10 stitches x 8 rounds = 4 inches / 10 cm square
Please check your gauge before starting. Make a swatch of at least 20 stitches and 16 rounds. If your stitches are too tight and your swatch is too small, go up one hook size. If your stitches are too loose and your swatch is too large, go down one hook size. Meeting gauge is essential for achieving the correct head circumference.
Finished Sizes
This pattern covers three baby sizes:
Newborn to 3 months: Head circumference approximately 13 to 14 inches (33 to 36 cm), hat height excluding ears approximately 5.5 inches (14 cm)
3 to 6 months: Head circumference approximately 14 to 16 inches (36 to 41 cm), hat height excluding ears approximately 6 inches (15.25 cm)
6 to 12 months: Head circumference approximately 16 to 17 inches (41 to 43 cm), hat height excluding ears approximately 6.5 inches (16.5 cm)
The pattern is written for 0 to 3 months with changes for larger sizes noted in parentheses as (3-6 mo, 6-12 mo).
Abbreviations and Stitch Definitions
Before we begin, let me explain every stitch you will use:
ch = chain. Wrap yarn over hook and pull through the loop on your hook.
sc = single crochet. Insert hook into stitch, yarn over and pull up a loop (2 loops on hook), yarn over and pull through both loops.
hdc = half double crochet. Yarn over, insert hook into stitch, yarn over and pull up a loop (3 loops on hook), yarn over and pull through all 3 loops.
sl st = slip stitch. Insert hook into stitch, yarn over and pull through both the stitch and the loop on your hook in one motion.
blo = back loop only. When you look at a stitch from above, you see two loops forming a V shape. The back loop is the one farthest from you. Working in only this loop creates a raised ridge.
hdc2tog = half double crochet two together, a decrease. Here is how to work it: Yarn over, insert hook into the next stitch, yarn over and pull up a loop (3 loops on hook). Without completing the stitch, yarn over, insert hook into the following stitch, yarn over and pull up a loop (5 loops on hook). Yarn over and pull through all 5 loops. You have decreased one stitch.
pm = place marker
st(s) = stitch(es)
RS = right side
WS = wrong side
MC = main color
CC = contrast color
How to Work a Magic Ring
This technique lets you start with a closed, tight center instead of a hole. Here is the process:
Make a loop with the yarn tail crossing over the working yarn. Insert your hook through the loop, yarn over with the working yarn, and pull up a loop. Chain as directed to begin working into the ring. After working all stitches into the ring, pull the yarn tail firmly to close the center hole completely.
Do not worry if this feels awkward at first. It gets easier with practice, and the result is worth it.
Pattern Instructions
Section 1: Hat Body (Worked Top Down in Continuous Rounds)
Using MC and larger hook (K-10.5 / 6.5 mm):
Start with a magic ring.
Round 1: Ch 2 (does not count as a stitch throughout), work 8 hdc into magic ring, pull ring closed tight. Do not join. Pm in first stitch. (8 hdc)
Round 2: Work 2 hdc in each stitch around. (16 hdc)
Round 3: (2 hdc in next st, hdc in next st) 8 times. (24 hdc)
Round 4: (2 hdc in next st, hdc in each of next 2 sts) 8 times. (32 hdc)
Round 5: (2 hdc in next st, hdc in each of next 3 sts) 8 times. (40 hdc)
For size 0 to 3 months only: Skip to Round 6.
For size 3 to 6 months: Work one additional round: (2 hdc in next st, hdc in each of next 4 sts) 8 times. (48 hdc) Then skip the second half of Round 6 below.
For size 6 to 12 months: Work two additional rounds. First extra round: (2 hdc in next st, hdc in each of next 4 sts) 8 times. (48 hdc) Second extra round: (2 hdc in next st, hdc in each of next 5 sts) 8 times. (56 hdc) Then skip Round 6 entirely.
Round 6 (size 0 to 3 months only): (2 hdc in next st, hdc in each of next 4 sts) 8 times. (48 hdc)
Stitch counts after all increase rounds:
Checkpoint: Lay your work flat. The crown should measure approximately 4.75 inches (12 cm) for smaller sizes or 5.5 inches (14 cm) for 6 to 12 months in diameter.
Even Body Rounds
Work hdc in every stitch around with no increases or decreases.
For 0 to 3 months: Work Rounds 7 through 14, 8 even rounds total. (48 hdc each round)
For 3 to 6 months: Work Rounds 7 through 15, 9 even rounds total. (48 hdc each round)
For 6 to 12 months: Work Rounds 7 through 16, 10 even rounds total. (56 hdc each round)
Checkpoint: The hat measured from magic ring to current working row should be approximately 3.5 inches (9 cm) for 0 to 3 months, 4 inches (10 cm) for 3 to 6 months, or 4.5 inches (11.5 cm) for 6 to 12 months.
Do not bind off. Set aside and continue to Section 2.
Section 2: Brim (Worked Flat, Then Seamed)
The brim is a separate flat piece. You will seam it into a tube and then attach it to the body.
Using MC and smaller hook (J-10 / 6.0 mm):
Foundation chain: Ch 9 (for all sizes).
Row 1 (RS): Sc in second ch from hook and each ch across, turn. (8 sc)
Row 2 (WS): Ch 1, sc in blo of each st across, turn. (8 sc)
Repeat Row 2 for the following total row counts:
After the final row, do not fasten off.
To seam the brim: Fold the brim strip with right sides together, aligning the first and last rows. Sl st or sc through both layers across the 8 stitches to seam. Fasten off and weave in ends. Turn right side out. You now have a ribbed tube.
Attach Brim to Body
Hold the hat body with the magic ring crown at the top and the open working edge at the bottom. Hold the brim tube with the seam at the back.
With MC and larger hook, working through the top long edge of the brim, join yarn. Insert hook into one brim top edge stitch and one corresponding hat body stitch simultaneously and sl st together around. Work 48 (48, 56) sl sts total to join brim to body. Fasten off and weave in ends.
Checkpoint: The finished hat with brim should measure approximately 5.5 inches (14 cm) for 0 to 3 months, 6 inches (15.25 cm) for 3 to 6 months, or 6.5 inches (16.5 cm) for 6 to 12 months from brim bottom to crown.
Section 3: Outer Ear (Make 2, in MC)
Using MC and larger hook:
Foundation chain: Ch 2.
Row 1 (RS): Work 3 sc in second ch from hook, turn. (3 sc)
Row 2 (WS): Ch 1, 2 sc in first st, sc in next st, 2 sc in last st, turn. (5 sc)
Row 3: Ch 1, 2 sc in first st, sc in each of next 3 sts, 2 sc in last st, turn. (7 sc)
Row 4: Ch 1, 2 sc in first st, sc in each of next 5 sts, 2 sc in last st, turn. (9 sc)
Row 5: Ch 1, sc in each st across, turn. (9 sc)
Row 6: Ch 1, sc in each st across, turn. (9 sc)
Do not fasten off. Set aside and make ear liner.
Section 4: Ear Liner (Make 2, in CC)
Using CC and larger hook:
Foundation chain: Ch 2.
Row 1 (RS): Work 3 sc in second ch from hook, turn. (3 sc)
Row 2 (WS): Ch 1, 2 sc in first st, sc in next st, 2 sc in last st, turn. (5 sc)
Row 3: Ch 1, 2 sc in first st, sc in each of next 3 sts, 2 sc in last st, turn. (7 sc)
Row 4: Ch 1, sc in each st across, turn. (7 sc)
Row 5: Ch 1, sc in each st across, turn. (7 sc)
Fasten off, leaving a long tail for sewing. The liner is narrower and shorter than the outer ear, creating a visible MC border.
Section 5: Assemble Ears
Hold one outer ear piece (MC) with RS facing you. Place one liner piece (CC) on top with RS facing you, centered so that one stitch of MC shows on each side and one row of MC shows at the bottom edge.
Pin liner to outer ear. Using MC yarn and yarn needle, or using the live loop from the outer ear, sl st the two pieces together along the outer edge of the outer ear piece, working through both layers. Work up one side, across the top, and down the other side. Leave the bottom edge open for attachment.
Do not stuff. The ear should be flat and pointed at the tip. Repeat for the second ear.
Section 6: Attach Ears to Hat
Lay the finished hat flat with RS up and the brim at the bottom. Locate the center front (where the nose will go) and center back. Place the ears symmetrically, approximately 1.5 inches (3.8 cm) to the left and right of the center top, with each ear base spanning approximately 5 to 6 stitches wide.
Pin each ear in place at the crown, with the open bottom edge flush against the hat surface. Angle each ear very slightly outward, approximately 5 to 10 degrees from vertical.
Using MC yarn and yarn needle, whipstitch the bottom edge of each ear securely to the hat through both layers. Pull firmly so ears stand upright. Weave in all ends inside the hat.
Section 7: Nose
Embroidered Option (Recommended):
Thread a yarn needle with black bulky yarn or 6 strands of black embroidery floss. Locate the center front of the hat, approximately 1 inch (2.5 cm) above the top of the brim ribbing.
Create a small inverted triangle shape, approximately 0.5 inch (1.3 cm) wide at the top and 0.4 inch (1 cm) tall. Fill it with satin stitches, which are parallel straight stitches placed side by side. Knot securely on the inside and weave in ends.
Crocheted Button Option:
Using black yarn and smaller hook, make a magic ring, ch 1, work 6 sc into ring, pull tight, sl st to join. (6 sc) Fasten off, leaving a long sewing tail. Sew the crocheted circle onto the hat in the same position described above.
Finishing and Care
Weave in all remaining yarn ends securely. Turn the hat inside out and wet block by misting lightly with water. Shape the hat on a balloon or hat form inflated to the correct head circumference. Ease the ears into upright pointed shapes and pin if needed. Allow to dry completely, at least 4 to 6 hours.
If using chenille style yarn like Bernat Blanket, steam blocking works better than wet blocking. Hover a steam iron 1 inch above the surface without touching to fluff the fibers.
Care instructions: Machine wash on gentle cycle in cold water inside a mesh laundry bag. Tumble dry on low heat or air dry flat. Do not iron directly on chenille or velvet style yarn. Do not bleach.
Tips for Success with This Crochet Baby Beanie Pattern
Keep that stitch marker moving round by round. In continuous rounds, it is incredibly easy to lose track of where each round begins, and counting back is no fun.
When attaching the brim to the body, take your time lining everything up. This join is visible, so neat slip stitches make a big difference in the finished look.
For the ears, pinning before sewing is not optional. Trust me on this. Symmetrical ear placement transforms a cute hat into a professional looking one.
Final Thoughts on This Adorable Fox Baby Hat
This woodland fox ear baby beanie is one of those projects that looks much more complicated than it actually is. The construction is logical, the stitches are satisfying, and the finished hat makes an incredible baby shower gift or photo prop.
I really hope you enjoy making this one. Thank you so much for choosing this pattern for your next project. If you make it, I would absolutely love to see your finished fox beanie. Tag me on Instagram or share it in my Facebook group so I can cheer you on.
Save this pattern to your Pinterest boards so you can find it easily when you are ready to cast on. And if you make this little fox hat, please drop a comment below. I love hearing which colorway you chose and seeing how your project turned out!
You Might Also Like
- Pastel Rainbow Cloud Dress Free Crochet Pattern
- Ocean Blue Granny Square Pocket Shawl Free Crochet Pattern
- Strawberry Granny Square Cardigan Set Free Crochet Pattern
- Blush Pink Strawberry Crochet Dress Free Crochet Pattern
