
You know that special skein you’ve been saving? The gorgeous coral cotton that’s too pretty to use on just anything? This is the project worthy of it. Dig into your stash and pull out your finest DK weight cotton because this dress deserves every yard of that beautiful yarn you’ve been hoarding.
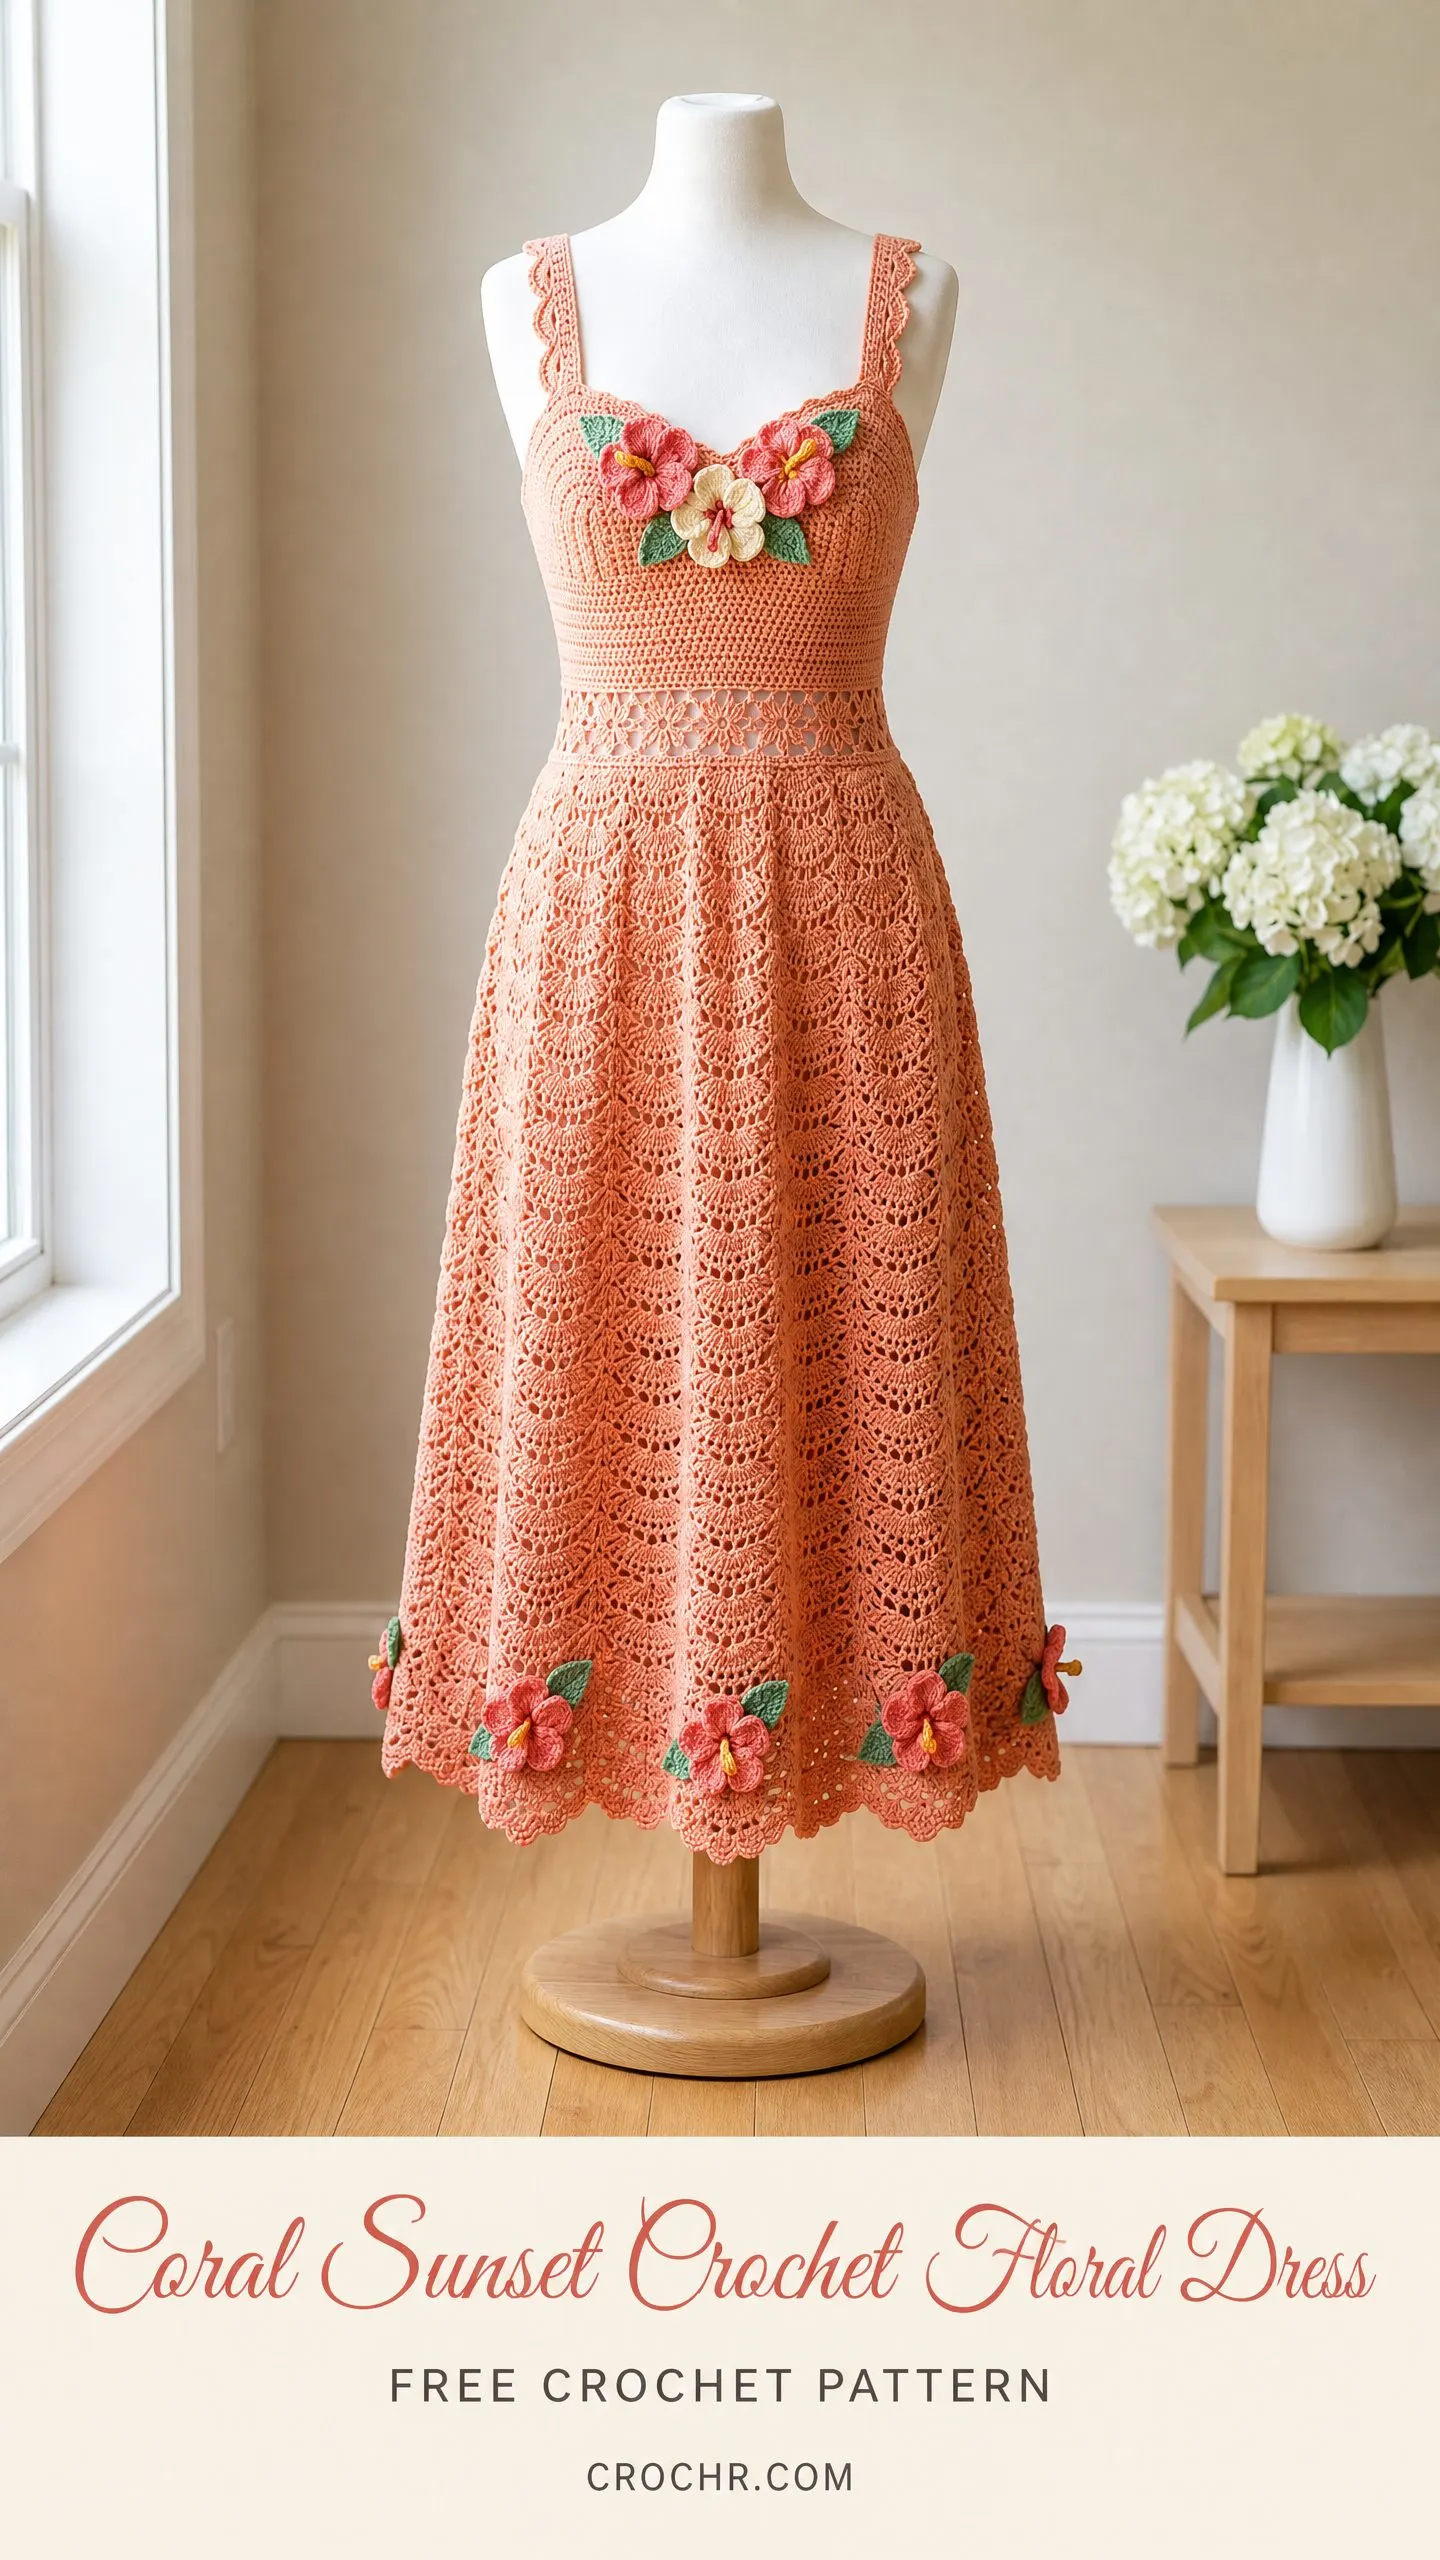
This Coral Sunset Crochet Floral Dress combines fitted bodice construction with an airy lace skirt and dimensional flower appliques. The construction is genuinely interesting. You’ll work from the top down, starting with flat panels for shaping, then joining to work in the round for a seamless bodice and flowing skirt.
Let me be honest with you about the difficulty. This is an advanced pattern requiring 60 to 90 hours of work. You’ll need experience with shaping, lace repeats, and applique construction. If you’ve tackled garments before and feel confident reading stitch counts, you’re ready for this beauty.
Why This Crochet Dress Pattern Stands Out
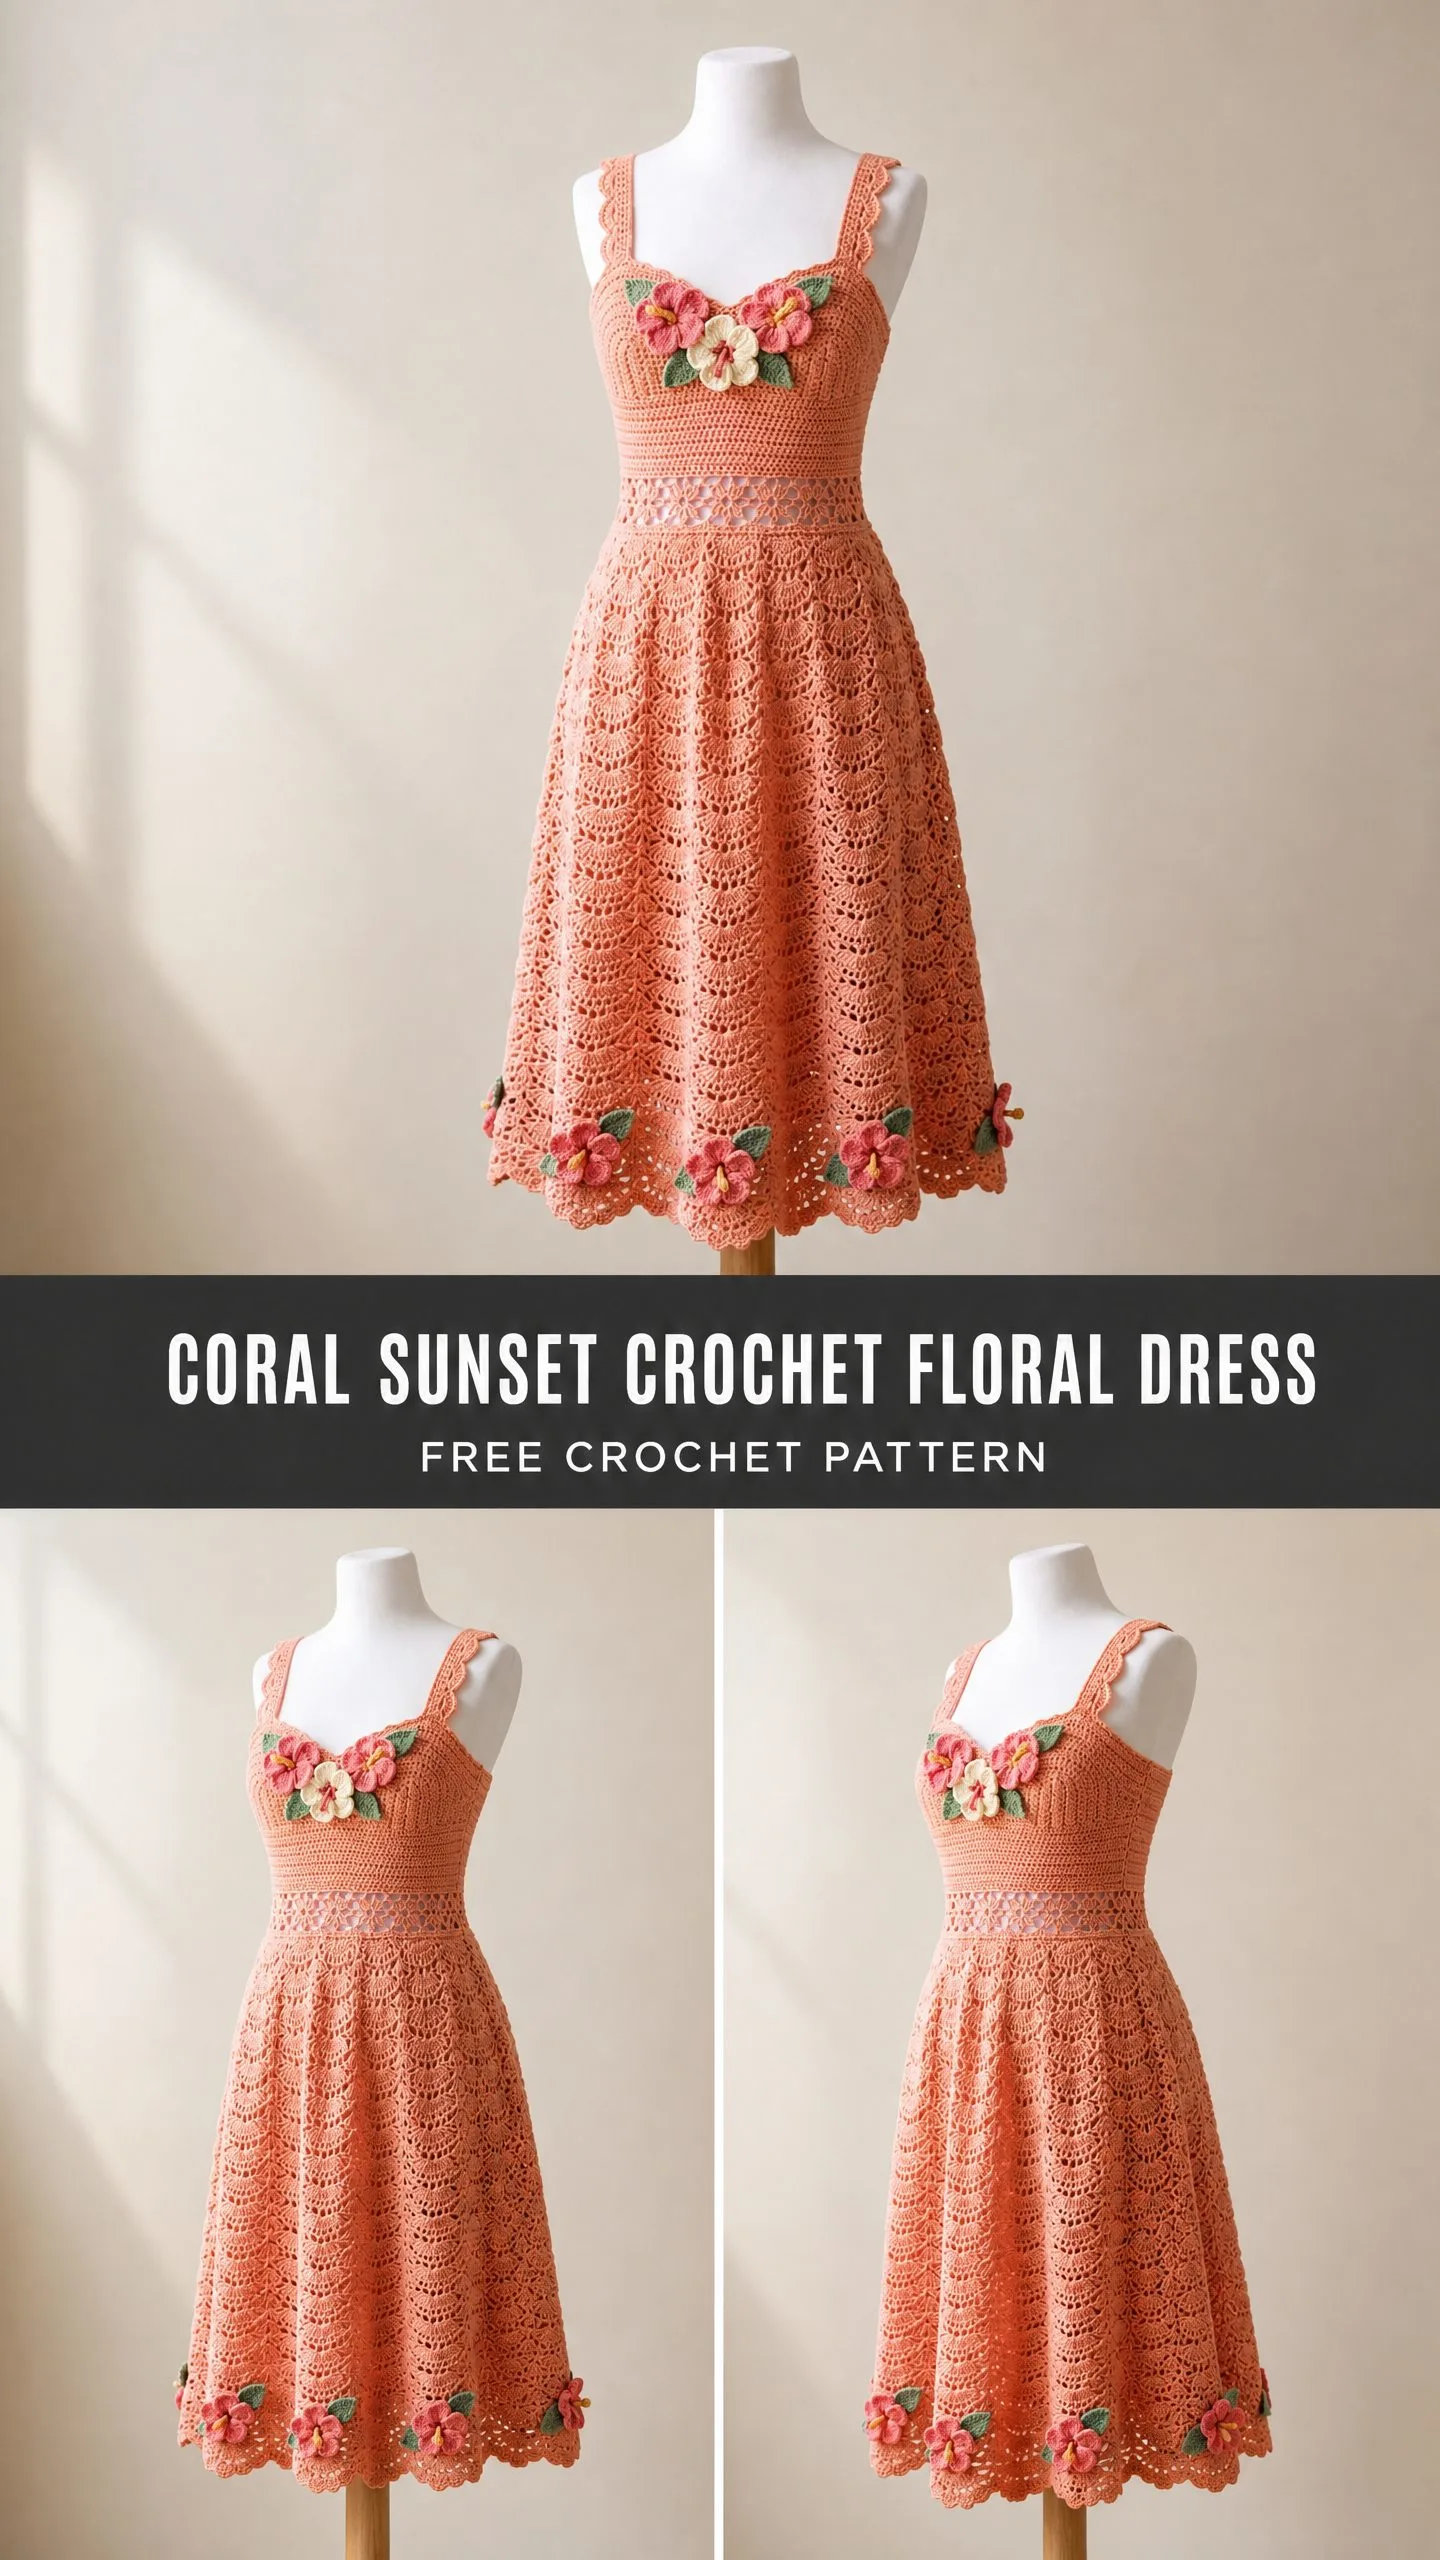
This midi length dress features everything I love about crochet garment making. The sweetheart inspired neckline creates flattering shaping at the bust. Wide straps provide comfortable support. An open work trellis band defines the waist elegantly. The full lace patterned skirt flows beautifully and moves with you. And those three dimensional flowers at the bust and hem? Absolute showstoppers.
The construction method is clever too. You’ll build the straps first, then create front and back bodice panels separately before joining them. This approach lets you check your fit as you go rather than hoping for the best at the end.
Finished Measurements
This pattern is written for size Medium, which fits US sizes 8 and 10. Here are your finished dimensions:
Bust: 36 inches or 91.5 centimeters
Waist: 28 inches or 71 centimeters
Hip at fullest skirt point: 54 inches or 137 centimeters
Total length from top of strap to hem: 42 inches or 106.5 centimeters
Bodice length from underarm to waist: 7 inches or 18 centimeters
Skirt length from waist to hem: 28 inches or 71 centimeters
Strap length: 7 inches or 18 centimeters
Size customization tips are included at the end of the pattern for those who need adjustments.
Materials You’ll Need
Yarn:
Hooks:
Notions:
Yarn Suggestions
Lion Brand 24/7 Cotton (100% mercerized cotton, 186 yards per 3.5 ounce ball). Try Candy Pink or Salmon. You’ll need approximately 9 balls of MC plus 1 ball each of CC1 and CC2 and small amounts of CC3 and CC4.
Paintbox Yarns Simply DK (100% acrylic, 137 yards per 1.76 ounce ball). Try Melon Sorbet. You’ll need approximately 12 balls of MC. Acrylic will give a lighter drape.
WeCrochet Dishie (100% cotton, 190 yards per 3.5 ounce ball). Try Coral. You’ll need approximately 9 balls of MC.
Choose a smooth DK weight yarn with good stitch definition so the lace repeats read clearly. Avoid fuzzy or halo yarns. Cotton or cotton blend yarns are strongly recommended for the drape shown.
Gauge
Getting gauge right is absolutely essential for a fitted garment like this dress. Even small deviations will significantly affect your finished dimensions.
With E-4 or 3.5 mm hook in single crochet: 20 stitches equals 4 inches or 10 centimeters. 22 rows equals 4 inches or 10 centimeters.
With F-5 or 3.75 mm hook in Lace Shell Pattern: One 10 stitch repeat equals 2 inches or 5 centimeters. 4 rows of lace pattern equals 2 inches or 5 centimeters.
Make a gauge swatch of at least 20 stitches by 20 rows. Wash it. Block it. Then measure. This step saves heartache later, I promise.
Abbreviations and Stitch Definitions
Let me walk you through every abbreviation you’ll encounter. Understanding these before you begin will make the pattern flow smoothly.
beg means beginning
BLO means back loop only, which is when you insert your hook under only the back loop of a stitch instead of both loops
ch means chain, the basic stitch that creates your foundation
ch-sp means chain space, the gap created by chains in the previous row
dc means double crochet, where you yarn over, insert hook, pull up a loop, yarn over and pull through two loops, yarn over and pull through remaining two loops
dec means decrease, making fewer stitches
FLO means front loop only
hdc means half double crochet, similar to double crochet but you pull through all three loops at once
inc means increase, which is working 2 single crochets in the same stitch
pm means place marker
rem means remaining
rep means repeat
rnd means round
RS means right side, the public facing side of your work
sc means single crochet, the basic stitch where you insert hook, pull up a loop, yarn over and pull through both loops
sc2tog means single crochet two together, a decrease where you insert hook in first stitch, pull up loop, insert in next stitch, pull up loop, yarn over and pull through all three loops
sk means skip
sl st means slip stitch, used for joining
sp means space
st(s) means stitch or stitches
t-ch means turning chain
tr means treble crochet
WS means wrong side
yo means yarn over
Special Stitches for This Crochet Dress Pattern
Shell Stitch
Work 5 double crochets all into the same stitch or space. This creates a fan of 5 double crochets sharing one base point. It’s the foundation of the lace pattern in the skirt.
V-Stitch
Work double crochet, chain 2, double crochet all into the same stitch or space. You’ll see this abbreviated as V-st throughout.
Picot
Chain 3, then slip stitch into the first chain you made. This creates a small decorative loop that adds beautiful detail to edges.
Lace Shell Pattern
This pattern is worked over a multiple of 10 stitches plus 2. When working flat:
Row 1 (WS): Ch 3 (counts as dc), turn. Dc in same st. Skip 4 sts. (Shell in next st, skip 4, V-st in next st, skip 4) across to last st. 2 dc in last st.
Row 2 (RS): Ch 1, turn. Sc in first dc. Ch 5. (Sc in center dc of shell, ch 5, sc into ch-2 sp of V-st, ch 5) across. Sc in top of t-ch.
Row 3 (WS): Ch 3, turn. 2 dc in first sc. (Sc in ch-5 sp, shell in next sc, sc in ch-5 sp, V-st in next sc) across, ending with sc in last ch-5 sp, 3 dc in last sc.
Row 4 (RS): Ch 1, turn. Sc in first dc. (Ch 5, sc in center dc of shell, ch 5, sc in ch-2 sp of V-st) across, ending ch 5, sc in top of t-ch.
Repeat Rows 1 through 4 for pattern.
Waist Trellis Band
This creates the lovely open work section at the waist. It’s worked in rounds over a multiple of 6 stitches:
Rnd A: Sl st to join, ch 5 (counts as dc plus ch 2). Skip 2 sts. (Dc in next st, ch 2, skip 2 sts) around. Sl st to top of beg ch-5 to join.
Rnd B: Sl st into ch-2 sp. Ch 1. (Sc in ch-2 sp, ch 3, sc in next ch-2 sp, ch 5) around, adjusting final ch as needed to join evenly. Sl st to beg sc.
Rnd C: Sl st into ch-3 sp. Ch 3 (counts as dc). 4 dc in same ch-3 sp (shell made). (Sc in ch-5 sp, shell in next ch-3 sp) around. Sc in last ch-5 sp. Sl st to top of beg ch-3.
The dress uses 3 rounds total at the waist.
3D Flower
Make 5 in CC1 and 2 in CC2.
Rnd 1: Magic ring. Ch 1. 6 sc into ring. Sl st to beg sc. Pull tail to close. (6 sc)
Rnd 2: Ch 1. (Sc, hdc, 3 dc, hdc, sc) in each sc around. Sl st to beg sc. (6 petals made)
Rnd 3: Working behind petals into BLO of Rnd 1 sts: sl st to first BLO. Ch 1. 2 sc in each BLO st around. (12 sc)
Rnd 4: (Sc, hdc, 5 dc, hdc, sc) in each sc around. Sl st to join. (6 larger petals behind first layer)
Fasten off, leaving a 12 inch or 30 centimeter tail for sewing. With CC4, embroider 4 to 6 straight stitches into the center of each flower as stamens.
Leaf
Make 10 in CC3.
Ch 10. Sc in 2nd ch from hook. Hdc in next ch. Dc in next 3 ch. Hdc in next ch. Sc in next ch. 3 sc in last ch (tip). Now working along opposite side of foundation chain: sc in next ch. Hdc in next ch. Dc in next 3 ch. Hdc in next ch. Sc in next ch. Sl st to first sc. Fasten off, leaving a 10 inch or 25 centimeter tail.
Step by Step Pattern Instructions
Section 1: Straps (Make 2)
Using your E-4 hook and MC:
Ch 21.
Row 1: Sc in 2nd ch from hook and in each ch across. Turn. (20 sc)
Row 2: Ch 1. Sc in each sc across. Turn. (20 sc)
Rows 3 through 6: Repeat Row 2. (20 sc at end of each row)
At the end of Row 6, do not fasten off on strap 1. Set aside with live loop on a stitch marker. Fasten off strap 2, leaving a 15 inch or 38 centimeter tail for seaming.
Each finished strap measures approximately 1.75 inches or 4.5 centimeters wide and 1 inch or 2.5 centimeters tall.
Edging for strap outer edges: With E-4 hook and MC, attach yarn at corner of one long side. Work sc evenly along long edge at a rate of 1 sc per row end. You will work 6 sc along each long side. Fasten off. Repeat for second long side of each strap.
Section 2: Bust Foundation and Bodice
Bust Front Panel:
With E-4 hook and MC, ch 93.
Row 1 (WS): Sc in 2nd ch from hook and in each ch across. Turn. (92 sc)
Row 2 (RS): Ch 1. Sc in first 26 sc. Sc2tog over next 2 sts. Sc in next 32 sc. Sc2tog over next 2 sts. Sc in last 26 sc. Turn. (90 sc)
Row 3: Ch 1. Sc across. Turn. (90 sc)
Row 4: Ch 1. Sc in first 25 sc. Sc2tog. Sc in next 32 sc. Sc2tog. Sc in last 25 sc. Turn. (88 sc)
Row 5: Ch 1. Sc across. Turn. (88 sc)
Row 6: Ch 1. Sc in first 24 sc. Sc2tog. Sc in next 32 sc. Sc2tog. Sc in last 24 sc. Turn. (86 sc)
Row 7: Ch 1. Sc across. Turn. (86 sc)
Rows 8 through 10: Ch 1. Sc across each row. Turn. (86 sc at end of Row 10)
Those gentle paired decreases at rows 2, 4, and 6 create the curved center dip of the sweetheart neckline. Beautiful, right?
Checkpoint: After Row 10, your panel should measure approximately 8.5 inches or 21.5 centimeters wide and 1.75 inches or 4.5 centimeters tall.
Attach straps to front panel: With RS facing, align strap 1 with the left outer edge of the front panel. Using mattress stitch or whip stitch and the MC tail, sew the 20 stitch bottom edge of strap 1 to the top of the left portion of the front panel, stitches 1 through 20 from the left edge. Repeat for strap 2 on the right portion, stitches 67 through 86 from the left. The center 46 stitches of the top edge remain open for the neckline.
Bust Back Panel:
With E-4 hook and MC, ch 93.
Row 1 (WS): Sc in 2nd ch from hook and in each ch across. Turn. (92 sc)
Rows 2 through 10: Ch 1. Sc across. Turn. (92 sc)
The back panel has no neckline shaping. It stays a straight rectangle.
Attach straps to back panel: Sew strap 1 to the left outer edge, stitches 1 through 20. Sew strap 2 to the right outer edge, stitches 73 through 92.
Side seams: With WS held together using mattress stitch and MC, seam the front panel to the back panel along both side edges. Leave the bottom edges open to continue working in the round.
Total stitch count at the bottom edge of the bodice tube: 86 (front) plus 92 (back) equals 178 stitches.
Section 3: Bodice Worked in the Round
With E-4 hook, join MC at one side seam at the bottom edge with a sl st. Ch 1. Work sc around the entire bottom opening, picking up 1 sc per stitch from both the front and back foundation chains. Place a marker at the join. (178 sc)
Rnd 1: Sc in each sc around. (178 sc)
Rnd 2: Sc in each sc around. (178 sc)
Rnd 3: (Sc in next 87 sc, sc2tog) twice. (176 sc)
Rnd 4: Sc in each sc around. (176 sc)
Rnd 5: (Sc in next 86 sc, sc2tog) twice. (174 sc)
Continue this decrease pattern, working one less sc before each sc2tog on decrease rounds, alternating with plain rounds:
Rnds 6-7: Continue pattern. (172 sc after Rnd 7)
Rnds 8-9: Continue pattern. (170 sc after Rnd 9)
Rnds 10-11: Continue pattern. (168 sc after Rnd 11)
Continue in this manner through Rnd 40, decreasing by 2 stitches every other round until you have 140 sc.
Checkpoint: After Rnd 40, your piece should measure approximately 7 inches or 18 centimeters from underarm to current point. Circumference should be approximately 28 inches or 71 centimeters. This is your waist.
Section 4: Waist Trellis Band
Switch to your F-5 hook now.
Adjustment Round: Sc2tog over first 2 sts. Sc in next 68 sts. Sc2tog. Sc in remaining 68 sts. Sl st to join. (138 sc)
Trellis Rnd A: Sl st in first st. Ch 5 (counts as dc plus ch 2). Skip 2 sts. (Dc in next st, ch 2, skip 2 sts) around. Sl st to 3rd ch of beg ch-5. (46 ch-2 sps)
Trellis Rnd B: Sl st into first ch-2 sp. Ch 1. (Sc in ch-2 sp, ch 3, sc in next ch-2 sp, ch 5) around. Sl st to first sc. (23 ch-3 sps, 23 ch-5 sps)
Trellis Rnd C: Sl st into first ch-3 sp. Ch 3 (counts as dc). 4 dc in same ch-3 sp. (Sc in ch-5 sp, 5 dc in next ch-3 sp) around. Sc in last ch-5 sp. Sl st to top of beg ch-3. (23 shells, 23 sc)
Restoration Round: Sc across the top of each shell and each sc as follows: (sc in next 5 dc, sc in next sc) around. (138 sc)
Increase Round: (Sc in next 68 sts, 2 sc in next st) twice. (140 sc)
Section 5: Skirt
Continue with F-5 hook and MC. You’ll work increase rounds first, then transition into the lace pattern.
Skirt Rnd 1: (Sc in next 6 sts, 2 sc in next st) 20 times. (160 sc)
Skirt Rnd 2: Sc in each sc around. (160 sc)
Skirt Rnd 3: (Sc in next 9 sts, 2 sc in next st) 16 times. (176 sc)
Skirt Rnd 4: Sc in each sc around. (176 sc)
Skirt Rnd 5: (Sc in next 10 sts, 2 sc in next st) 16 times. (192 sc)
Skirt Rnd 6: Sc in each sc around. (192 sc)
Skirt Rnd 7: (Sc in next 7 sts, 2 sc in next st) 24 times. (216 sc)
Skirt Rnd 8: Sc in each sc around. (216 sc)
Skirt Rnd 9: (Sc in next 8 sts, 2 sc in next st) 24 times. (240 sc)
Skirt Rnd 10: Sc in each sc around. (240 sc)
Checkpoint: After Skirt Rnd 10, circumference should be approximately 48 inches or 122 centimeters. Count your stitches to confirm 240 before beginning the lace.
Lace Shell Pattern in the Round
Now the fun really begins! You’ll work the lace pattern over 240 stitches, which gives you 24 repeats.
Lace Rnd 1: Join with sl st. Ch 5 (counts as dc plus ch 2). Dc in same st (first V-st made). Skip 4 sts. (Shell in next st, skip 4 sts, V-st in next st, skip 4 sts) 23 times. Shell in next st. Skip 4 sts. Sl st to 3rd ch of beg ch-5. (24 V-sts, 24 shells)
Lace Rnd 2: Sl st into ch-2 sp of first V-st. Ch 1. Sc in same ch-2 sp. Ch 5. (Sc in center dc of shell, ch 5, sc in ch-2 sp of next V-st, ch 5) 23 times. Sc in center dc of last shell. Ch 5. Sl st to beg sc. (48 ch-5 sps, 48 sc)
Lace Rnd 3: Sl st into first ch-5 sp. Ch 3 (counts as dc). 4 dc in same ch-5 sp. (Sc in next sc, V-st in next sc, sc in next sc, shell in next ch-5 sp) around. Sl st to top of beg ch-3. (24 shells, 24 V-sts, 48 sc)
Lace Rnd 4: Sl st to center dc of first shell. Ch 1. Sc in same st. Ch 5. (Sc in ch-2 sp of V-st, ch 5, sc in center dc of next shell, ch 5) around. Sl st to beg sc. (48 ch-5 sps, 48 sc)
Repeat Lace Rnds 1 through 4 for the skirt body. Work a total of 14 complete repeats (56 rounds of lace pattern), adding increases as follows:
After lace repeat 6: On the next Rnd 1, work (V-st, ch 1, V-st) instead of a single V-st at every 8th V-st position. This grows your count to 260 stitches and 26 repeats.
After lace repeat 10: Repeat the increase method, growing to 280 stitches and 28 repeats.
After lace repeat 13: Repeat once more, growing to 300 stitches and 30 repeats.
Work the final lace repeat over 300 stitches.
Checkpoint: After all 56 lace rounds, the skirt should measure approximately 28 inches or 71 centimeters from waist to bottom.
Scallop Hem Edging
Hem Rnd: With F-5 hook and MC, join in any ch-2 sp of V-st. Ch 1. (Sc in V-st sp, ch 3, picot, ch 3, sc in center dc of next shell, ch 3, picot, ch 3) around. Sl st to beg sc. Fasten off.
Section 6: Neckline and Strap Edging
With E-4 hook and MC, attach yarn at the right back corner of the back neckline opening.
Work sc evenly across the back neckline top edge (52 sts), around each strap, and across the front neckline edges. Total perimeter is approximately 138 sc.
Rnd 2: (Sc in each sc to corner, work 3 sc in corner st) around all neckline and strap edges. Sl st to join.
Rnd 3: (Sc in each sc to 1 st before corner, sc2tog over corner and next st) around to keep straps flat. Sl st to join.
Picot Rnd: (Sc in next 2 sts, picot) around. Sl st to join. Fasten off.
Section 7: Flower and Leaf Appliques
Make all flowers and leaves using the special stitch instructions. Position 3 flowers at the center bust with leaves tucked behind. Place remaining flowers evenly around the hem with leaves. Use rust proof pins to position, then sew securely with yarn tails.
Blocking Your Finished Dress
Blocking is essential for this crochet dress pattern. Soak your finished piece in lukewarm water for 15 to 20 minutes. Gently squeeze out excess water without wringing. Lay flat on blocking mats and pin the lace skirt open to show the pattern clearly. Allow to dry completely before removing pins.
Tips for Success
Work the bodice snugly. The lace skirt will add visual weight, so a firm bodice provides good support.
Count your stitches after every increase and decrease round. It’s much easier to fix a mistake right away than to discover it 20 rounds later.
Try on the bodice portion before beginning the waist band. This is your last chance to add or remove rows for length adjustment.
The flowers and leaves transform this from pretty to stunning. Take your time with them.
I really hope you enjoy making this beautiful Coral Sunset Crochet Floral Dress. It’s a labor of love, but the result is absolutely worth every stitch. If you found this crochet tutorial helpful, please save it to your Pinterest boards so you can find it easily when you’re ready to start. And when you finish your dress, I would absolutely love to see it! Drop a comment below or tag me on social media with your photos. Happy crocheting!
You Might Also Like
- Sunset Gradient Granny Tote Bag Free Crochet Pattern
- Sunset Ombre Butterfly Bloom Charm Free Crochet Pattern
- Ocean Blue Pineapple Crochet Crop Top Free Pattern
- Dusty Rose Gradient Crochet Mini Dress Free Pattern
