Last summer, I attended my best friend’s garden party and realized halfway through getting ready that I had absolutely nothing to carry my phone and lipstick in. Every bag I owned was either too casual, too bulky, or clashing with my outfit. I ended up stuffing everything into my cardigan pockets like some kind of elegant kangaroo. On the drive home, I knew exactly what my next project would be. This sage green bow handbag is the result of that slightly embarrassing moment, and honestly, I think it might be my favorite thing I have ever crocheted.
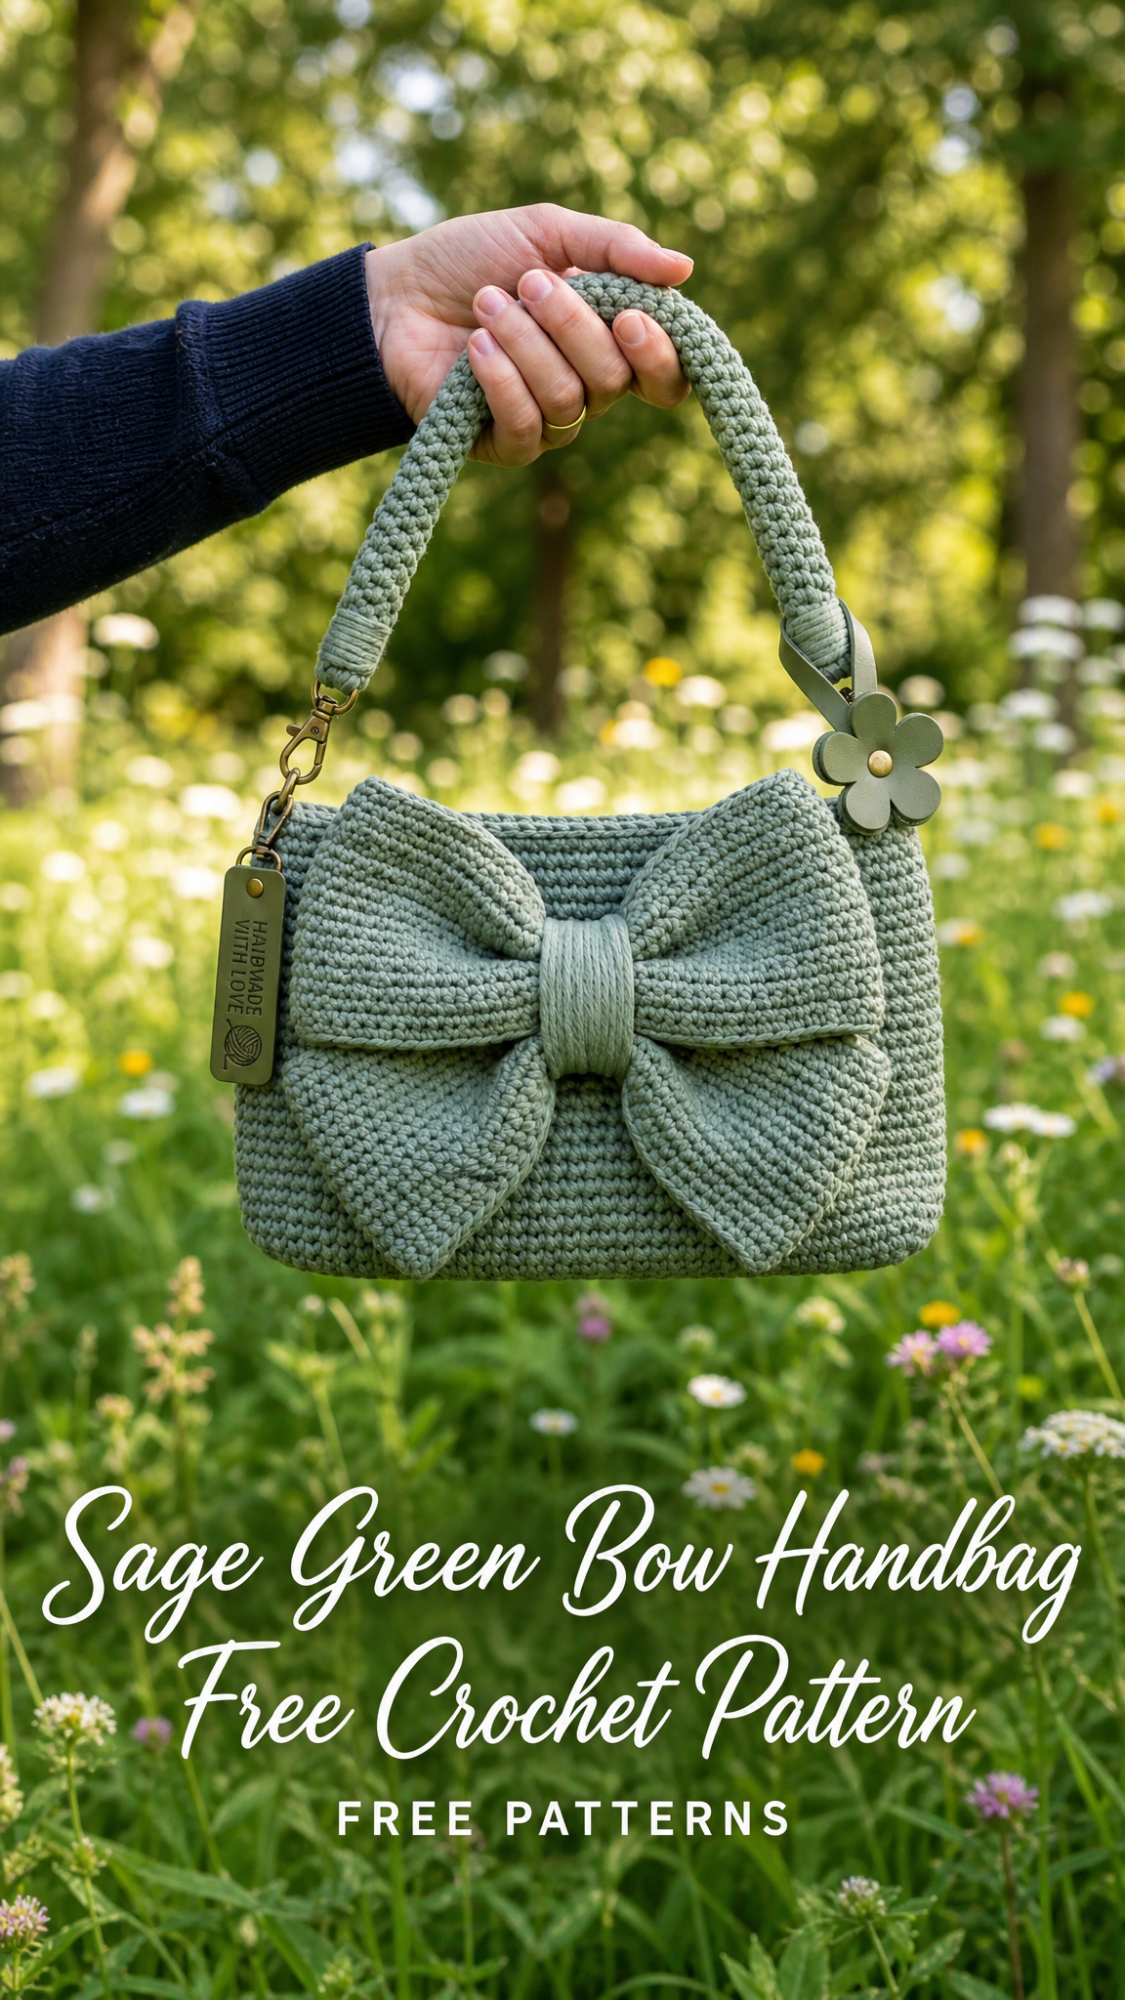
This stunning little handbag combines elegant simplicity with a show-stopping oversized bow that makes it look like something straight out of a boutique window. The best part? It works up using basic stitches that any confident beginner can handle. If you can single crochet in rows and rounds, you can absolutely make this bag.
Why You Will Love This Crochet Bow Handbag Pattern
This crochet handbag pattern hits all the right notes. The construction is straightforward, the finished piece looks incredibly polished, and the sage green color works with practically everything in your closet.
The bag body uses single crochet (sc) throughout, which creates that dense, sturdy fabric you can see in the close-up image. This tight stitch work means your belongings stay secure and the bag holds its shape beautifully over time.
What really sets this design apart is the dimensional bow. It looks complicated, but I promise it is just a simple rectangle gathered in the middle. The magic is in the proportions and placement.
The detachable handle with gold hardware gives you options. Carry it as a handbag for brunch, or swap the strap for a longer chain to wear it crossbody for hands-free convenience.
Skill Level
Confident Beginner to Intermediate
You should be comfortable with:
If you have made a simple amigurumi or a basic bag before, you are ready for this project.
Finished Dimensions
Materials Needed
Yarn:
Hook:
Notions:
Gauge
18 stitches x 20 rows = 4 inches (10 cm) in single crochet
Please take time to check your gauge. A tighter gauge creates a sturdier bag that holds its shape. If your gauge is loose, go down a hook size.
Abbreviations and Stitch Definitions
Before we dive into the pattern, let me explain each stitch and term you will encounter.
ch = chain: Wrap yarn over hook, pull through loop on hook. This creates the foundation for your work.
sl st = slip stitch: Insert hook into stitch, yarn over, pull through both the stitch and the loop on your hook in one motion. Used for joining rounds.
sc = single crochet: Insert hook into stitch, yarn over and pull up a loop (2 loops on hook), yarn over and pull through both loops. This is your main stitch for the entire bag.
sc2tog = single crochet two together (decrease): Insert hook into first stitch, yarn over and pull up a loop, insert hook into next stitch, yarn over and pull up a loop (3 loops on hook), yarn over and pull through all 3 loops. This decreases your stitch count by one.
inc = increase: Work 2 single crochet stitches into the same stitch. This adds one stitch to your count.
BLO = back loop only: Instead of inserting your hook under both loops of the stitch, insert it only under the back loop (the loop farthest from you).
st(s) = stitch(es)
RS = right side (the outside of your work)
WS = wrong side (the inside of your work)
Pattern Notes
Step by Step Crochet Pattern Instructions
Part 1: Bag Base
The base is worked flat in rows.
Ch 37.
Row 1: Sc in 2nd ch from hook and in each ch across, turn. (36 sc)
Rows 2-14: Ch 1, sc in each st across, turn. (36 sc)
After Row 14, you should have a rectangle approximately 8 inches x 3 inches. Do not fasten off.
Part 2: Bag Body
Now we will work around the entire edge of the base to build up the sides. This is worked in continuous rounds.
Round 1: Ch 1, sc evenly around all four sides of the base. Work 36 sc along the long edge, 14 sc along the short edge, 36 sc along the second long edge, and 14 sc along the final short edge. Place marker at beginning of round. (100 sc)
Do not join. Continue working in a spiral.
Rounds 2-24: Sc in each st around. (100 sc)
Move your stitch marker up each round so you can track your progress.
After Round 24, your bag body should measure approximately 5-6 inches tall from the base.
Shaping the Top Edge:
Round 25: *Sc in next 23 sts, sc2tog* around. (96 sc)
Round 26: Sc in each st around. (96 sc)
Round 27: Sc in BLO in each st around. (96 sc)
Working in the back loop only on Round 27 creates a subtle ridge that gives the top edge a finished look.
Round 28: Sc in each st around. Sl st to first sc to join. (96 sc)
Fasten off and weave in ends.
Part 3: D-Ring Tabs (Make 2)
These small tabs hold the D-rings that connect your handle to the bag.
Ch 7.
Row 1: Sc in 2nd ch from hook and in each ch across, turn. (6 sc)
Rows 2-12: Ch 1, sc in each st across, turn. (6 sc)
Fasten off, leaving a long tail for sewing.
Fold each tab in half, thread it through a D-ring, and sew the ends together to secure the ring inside the loop.
Part 4: Attaching D-Ring Tabs
Position one D-ring tab on each side of the bag, centered on the side panels (the short ends of your bag). The tabs should sit about half an inch below the top edge.
Using your tapestry needle and matching yarn, whip stitch the tabs securely to the bag body. I recommend going over your stitches twice for durability since these will bear the weight of the bag.
Part 5: The Bow Rectangle
This is the main piece that becomes your beautiful oversized bow.
Ch 41.
Row 1: Sc in 2nd ch from hook and in each ch across, turn. (40 sc)
Rows 2-50: Ch 1, sc in each st across, turn. (40 sc)
After Row 50, you should have a rectangle approximately 9 inches x 10 inches. This might seem large, but trust me, it creates the perfect dramatic bow.
Fasten off and weave in ends.
Part 6: Bow Center Wrap
This small piece cinches the middle of your bow and covers the gathering.
Ch 9.
Row 1: Sc in 2nd ch from hook and in each ch across, turn. (8 sc)
Rows 2-18: Ch 1, sc in each st across, turn. (8 sc)
Fasten off, leaving a long tail for sewing.
Part 7: Assembling the Bow
Lay your bow rectangle flat with the right side facing down.
Fold both short ends toward the center so they meet (or slightly overlap) in the middle. You are essentially folding the rectangle into thirds.
Pinch the center firmly to create the gathered bow shape. The fabric will naturally puff out on each side, creating those lovely bow loops.
Take your bow center wrap piece and wrap it tightly around the pinched center of the bow. The wrap should go around 2-3 times for a secure, polished look.
Using your tapestry needle and the long tail, sew the wrap closed at the back of the bow. Make sure to catch the gathered fabric underneath to keep everything secure.
Fluff and adjust the bow loops until you are happy with the shape.
Part 8: Attaching the Bow to the Bag
Position the bow on the front center of your bag, about one inch below the top edge.
Using matching yarn and your tapestry needle, sew through the back of the bow center wrap and into the bag body. Work in small, discreet stitches that will not show on the right side.
I recommend sewing around the entire center wrap area, plus a few tacking stitches on the inner edges of each bow loop to keep everything in place.
Part 9: The Handle
The handle is worked flat and then attached to the D-rings using the swivel clasps.
Ch 13.
Row 1: Sc in 2nd ch from hook and in each ch across, turn. (12 sc)
Rows 2-85: Ch 1, sc in each st across, turn. (12 sc)
After Row 85, your handle should measure approximately 12-13 inches long. Adjust the length to your preference by adding or removing rows.
Fasten off, leaving a long tail.
Fold both short ends of the handle over the straight bar of a swivel clasp (about 1 inch folded over) and sew securely in place. Repeat for the other end.
Clip the swivel clasps onto your D-rings, and your handle is attached.
Part 10: Adding Hardware Embellishments (Optional)
The bag in the photos features beautiful leather strap connectors with flower embellishments. These are optional but add a professional, boutique-quality touch.
If you are using leather or faux leather connectors:
1. Thread the connector through the D-ring alongside the swivel clasp
2. Secure according to the connector’s design (usually snaps or screws)
You can also add bag tags or charms to the D-rings or swivel clasps for extra personality.
Finishing Your Crochet Handbag
Blocking: For the best results, lightly steam block your finished bag. Hold your steamer or iron (on steam setting) a few inches above the fabric and let the steam relax the stitches. Shape the bag while damp and allow to dry completely.
Lining (Optional): Adding a fabric lining protects your belongings and gives the bag extra structure. Cut your lining fabric slightly smaller than your bag interior, hem the edges, and hand stitch it inside along the top edge.
Caring for Your Bag: Spot clean with mild soap and cool water. Lay flat to dry. Reshape while damp if needed.
Tips for Success
Keep your tension consistent. Uneven tension will show in the finished fabric, especially with single crochet. If you notice your work getting tighter or looser, take a break and come back refreshed.
Count your stitches. I cannot stress this enough. A bag that is supposed to be rectangular will look wonky if you accidentally increase or decrease without meaning to.
Use stitch markers generously. Mark the beginning of your rounds, mark the corners of your base, mark anything that helps you stay oriented.
Do not skip the gauge swatch. I know, I know. But bags need structure, and your gauge determines whether your bag is floppy or firm.
Customization Ideas
This crochet bag pattern is wonderfully versatile. Here are some ways to make it your own:
Why This Bag Makes an Amazing Gift
Handmade accessories carry so much meaning, and this crochet handbag is the kind of gift that makes someone gasp. The oversized bow is eye-catching without being over the top, and the sage green color complements almost every skin tone and wardrobe.
Consider making this for:
The recipient will absolutely treasure something this beautiful that you made with your own hands.
I really hope you love making this sage green bow handbag as much as I loved designing it. Every time I carry mine, I get compliments and questions about where I bought it. The look on people’s faces when I say I made it myself is priceless.
If you found this crochet pattern helpful, I would love it if you saved it to your Pinterest boards so you can find it easily when you are ready to start. And please, please leave a comment below if you make your own version. Seeing your creations brings me so much joy, and I cannot wait to see what colors you choose for your bow bag!
