I call this one the "Violet Wanderer," and it has quite the story behind it. About three years ago, I sketched this design in a beat-up notebook during a long flight delay. I wanted something that looked polished enough for everyday errands but felt handmade and personal. The notebook sat in my craft room for ages until last spring when my niece asked me to make her a "grown-up bag" for her first job. I pulled out that old sketch, grabbed some gorgeous lavender yarn, and finally brought the Violet Wanderer to life. She uses it every single day now, and I knew I had to write this pattern down properly so you could make one too.
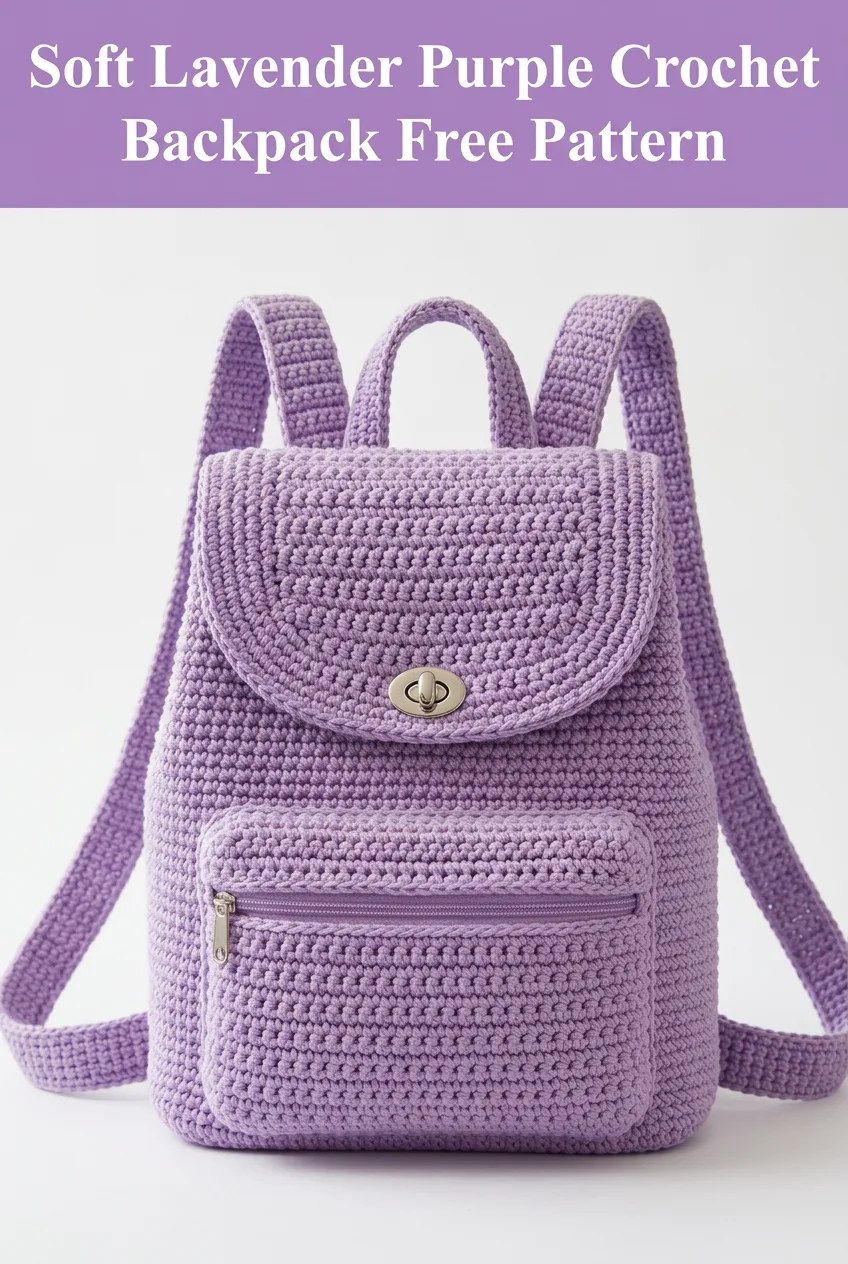
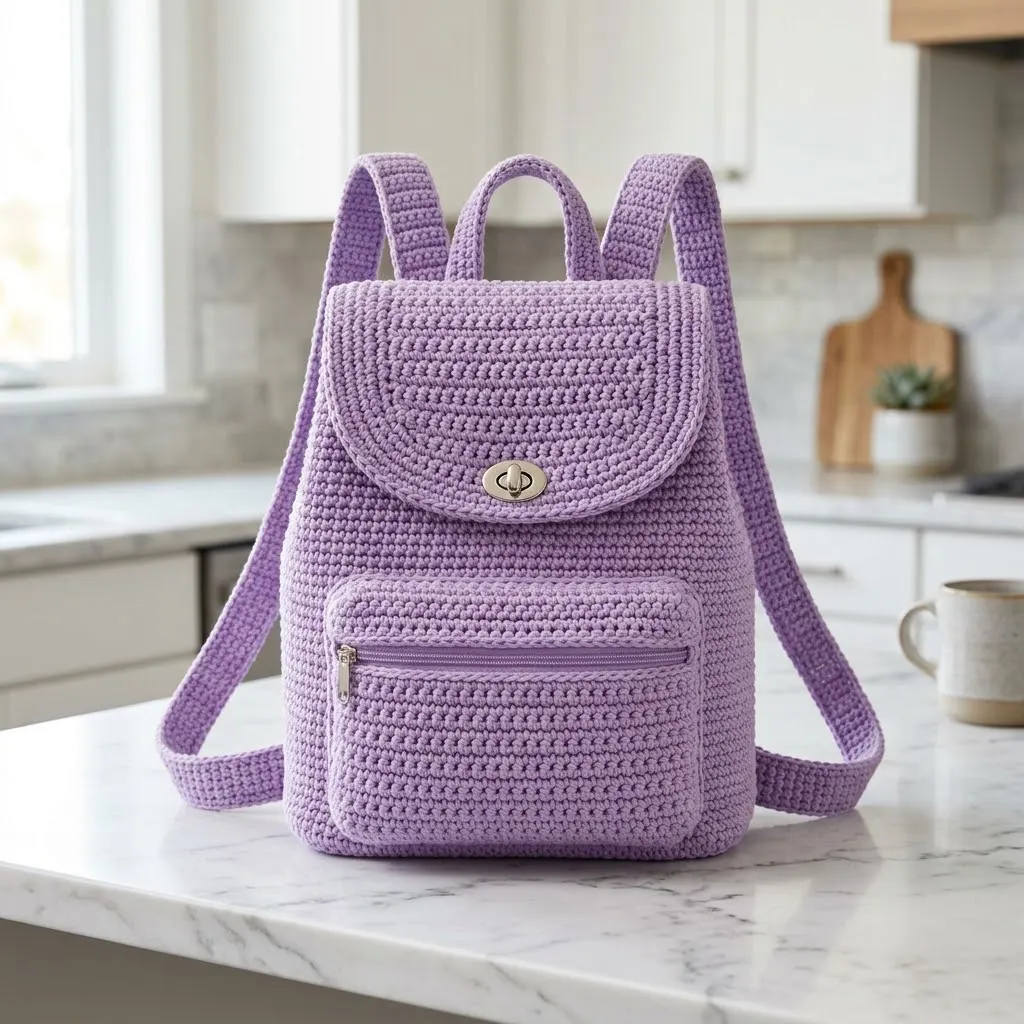
This crochet backpack pattern combines clean lines with practical features. You get a roomy main compartment, a front zippered pocket, a stylish flap with a twist lock closure, adjustable straps, and a top handle. The whole thing works up in single crochet stitches, so if you can make basic stitches, you can absolutely make this bag.
Why This Crochet Backpack Pattern Works So Well
Let me tell you what makes this design special. The structure comes from working in tight single crochet with a smaller hook than you might normally use. This creates a dense fabric that holds its shape beautifully and keeps your belongings secure inside.
The construction might look complicated, but I promise it breaks down into simple flat pieces and tubes. You will make the body as one big rectangle, fold it, seam the sides, and add a separate bottom panel. The pocket, flap, straps, and handle are all worked separately and attached at the end.
Skill level: Intermediate. You need to be comfortable with basic stitches, seaming, and working from written instructions. The techniques themselves are straightforward, but the assembly requires patience and attention to detail.
Materials You Will Need
Yarn:
Hook:
Notions:
Gauge
18 stitches and 20 rows equals 4 inches in single crochet worked flat.
Check your gauge before starting. A bag that is too loose will stretch and sag under weight. If your gauge is off, try going down a hook size.
Abbreviations and Stitch Definitions
Ch (chain): Yarn over, pull through loop on hook. This creates the foundation for your work.
Sc (single crochet): Insert hook into stitch, yarn over and pull up a loop (two loops on hook), yarn over and pull through both loops. For example, "sc in next 10 sts" means you will repeat this stitch 10 times across the next 10 stitches.
Inc (increase): Work 2 single crochet stitches into the same stitch. This adds one stitch to your count.
Sl st (slip stitch): Insert hook, yarn over, pull through stitch and loop on hook in one motion. Used for joining and creating invisible seams.
Sk (skip): Pass over the indicated stitch without working into it.
St(s) (stitch/stitches): The individual loops you work into.
Crochet Backpack Pattern Instructions
Part 1: Main Body Panel
The body is worked as one large rectangle that will be folded and seamed.
Foundation: Ch 55.
Row 1: Sc in 2nd ch from hook and in each ch across. (54 sts)
Row 2: Ch 1, turn. Sc in each st across. (54 sts)
Rows 3 through 90: Repeat Row 2. (54 sts each row)
You should have a rectangle measuring approximately 12 inches wide by 18 inches tall. Fasten off and weave in ends.
*Quick tip: Place a stitch marker at the beginning of every 10th row. This helps you keep count without constantly recounting from the beginning.*
Part 2: Bottom Panel
The bottom gives your backpack structure and a flat base.
Foundation: Ch 23.
Row 1: Sc in 2nd ch from hook and in each ch across. (22 sts)
Row 2: Ch 1, turn. Sc in each st across. (22 sts)
Rows 3 through 50: Repeat Row 2. (22 sts each row)
This creates a rectangle approximately 5 inches wide by 10 inches long. Fasten off.
Part 3: Front Pocket
This is the zippered pocket on the front of your bag.
Foundation: Ch 41.
Row 1: Sc in 2nd ch from hook and in each ch across. (40 sts)
Row 2: Ch 1, turn. Sc in each st across. (40 sts)
Rows 3 through 30: Repeat Row 2. (40 sts each row)
This piece measures approximately 9 inches wide by 6 inches tall. Fasten off.
Pocket Back Panel:
Make a second piece identical to the front pocket piece. These two pieces will sandwich your zipper.
Part 4: Flap
The flap has a rounded bottom edge for that polished look.
Foundation: Ch 49.
Row 1: Sc in 2nd ch from hook and in each ch across. (48 sts)
Rows 2 through 20: Ch 1, turn. Sc in each st across. (48 sts)
Now you will shape the curved bottom edge.
Row 21: Ch 1, turn. Sk first st, sc in next 46 sts, sk last st. (46 sts)
Row 22: Ch 1, turn. Sk first st, sc in next 44 sts, sk last st. (44 sts)
Row 23: Ch 1, turn. Sk first st, sc in next 42 sts, sk last st. (42 sts)
Row 24: Ch 1, turn. Sk first st, sc in next 40 sts, sk last st. (40 sts)
Row 25: Ch 1, turn. Sk first st, sc in next 38 sts, sk last st. (38 sts)
Row 26: Ch 1, turn. Sk first st, sc in next 36 sts, sk last st. (36 sts)
Row 27: Ch 1, turn. Sk first st, sc in next 34 sts, sk last st. (34 sts)
Row 28: Ch 1, turn. Sk first st, sc in next 32 sts, sk last st. (32 sts)
Fasten off, leaving a long tail for seaming.
Border for flap: Join yarn at the top corner. Sc evenly around the entire flap edge, working approximately 3 sc per 2 row ends along the sides. Sl st to first sc to join. Fasten off.
Part 5: Shoulder Straps (Make 2)
Each strap is worked as a long narrow strip.
Foundation: Ch 9.
Row 1: Sc in 2nd ch from hook and in each ch across. (8 sts)
Rows 2 through 140: Ch 1, turn. Sc in each st across. (8 sts each row)
This creates a strap approximately 1.75 inches wide and 28 inches long. Adjust length as desired for the wearer.
Fasten off, leaving a very long tail for attaching to the bag.
Part 6: Top Handle
Foundation: Ch 9.
Row 1: Sc in 2nd ch from hook and in each ch across. (8 sts)
Rows 2 through 30: Ch 1, turn. Sc in each st across. (8 sts each row)
This creates a handle approximately 1.75 inches wide and 6 inches long. Fasten off with a long tail.
Assembly Instructions
This is where your backpack comes together. Take your time with each step.
Step 1: Form the Main Body
Fold your large body panel in half widthwise so the short edges meet at the top. The fold becomes the bottom front of your bag temporarily.
Using a tapestry needle and matching yarn, whip stitch the two side seams closed from the fold up to the open top edge.
Step 2: Attach the Bottom Panel
Turn the body inside out. Pin the bottom panel rectangle to the bottom opening of the bag, matching corners and centering carefully.
Whip stitch all four edges of the bottom panel to the bag body. This gives you that structured rectangular base.
Turn right side out.
Step 3: Install the Zipper in the Pocket
Place your two pocket pieces wrong sides together with the zipper sandwiched between them at the top edge. The zipper teeth should peek out between the pieces.
Using a sewing needle and thread, hand stitch the pocket pieces to the zipper tape on both sides. Take small stitches and keep them even.
*Feeling nervous about zippers? You can skip this step entirely and make the pocket without a zipper. Simply seam the two pocket pieces together along the top edge instead, leaving a 4-inch opening in the center.*
Step 4: Attach the Pocket to the Bag
Position the completed pocket on the front of your bag, centered horizontally and about 2 inches up from the bottom seam.
Pin in place. Whip stitch the bottom edge and both side edges of the pocket to the bag front. Leave the top edge (where the zipper is) unattached so the pocket opens properly.
Step 5: Attach the Flap
Position the straight top edge of the flap along the back top edge of the bag, centered.
Whip stitch securely in place. The curved portion should hang down over the front of the bag.
Step 6: Install the Twist Lock Closure
Mark the center of your flap about 1 inch up from the curved bottom edge. Install the decorative portion of the twist lock here according to the hardware manufacturer instructions. You may need to cut a small slit in the crochet fabric and secure with stitches.
Close the flap and mark where the twist portion needs to go on the bag front. Install the twist mechanism there.
Step 7: Attach the Handle
Position the top handle on the back of the bag, just below where the flap attaches. The two short ends should be about 3 inches apart.
Whip stitch both ends securely in place, going over your stitches multiple times for strength.
Step 8: Attach the Shoulder Straps
Attach the top of each strap to the back top corners of the bag, just beside the handle.
Attach the bottom of each strap to the back bottom corners of the bag, near where the bottom panel meets the side seams.
Stitch very securely. These straps will bear weight, so reinforce each attachment point by going over your stitches several times.
Finishing Your Crochet Backpack
Weave in all remaining ends thoroughly. For a bag that will see daily use, I recommend weaving each end through at least 2 inches of stitches in multiple directions.
Block your backpack by stuffing it with tissue paper or a towel and allowing it to sit overnight. This helps the fabric settle into its final shape.
Optional lining: For extra durability and a polished interior, cut fabric to fit the inside of your bag and hand stitch it in place along the top edge.
Tips for Success With This Pattern
Yarn choice matters. Cotton and cotton blends hold their shape best for bags. Acrylic will work but may stretch over time with heavy use. If using acrylic, consider adding a stiffener or lining.
Check your tension. If you crochet loosely, your bag will be floppy. Go down a hook size if needed to achieve a firm, dense fabric.
Reinforce attachment points. Anywhere that bears weight, like strap attachments and the handle, deserves extra stitches. Do not skimp here.
Customize the size. Want a bigger bag? Add more chains to your foundation and more rows to your pieces. Keep the proportions roughly the same and adjust your strap length accordingly.
Making This Backpack Your Own
The beauty of this crochet backpack pattern is how easily you can personalize it. Try a variegated yarn for visual interest. Add stripes by changing colors every few rows. Embroider initials or a simple design on the flap. Use contrasting yarn for the straps and handle.
You could also add interior pockets by stitching small crocheted rectangles inside the bag before seaming it closed. A phone pocket or pen holder adds practical value.
Thank you so much for choosing this pattern for your next crochet project. I truly hope your Violet Wanderer turns out beautifully and serves you well on all your adventures. If you make one, I would absolutely love to see it. Tag me on Instagram or share a photo in our Facebook group.
If this crochet backpack tutorial is calling your name but the timing is not quite right, go ahead and pin it to your favorite Pinterest board so you can find it when you are ready. And please drop a comment below if you make this bag. I read every single one, and your photos and feedback make my whole day.
