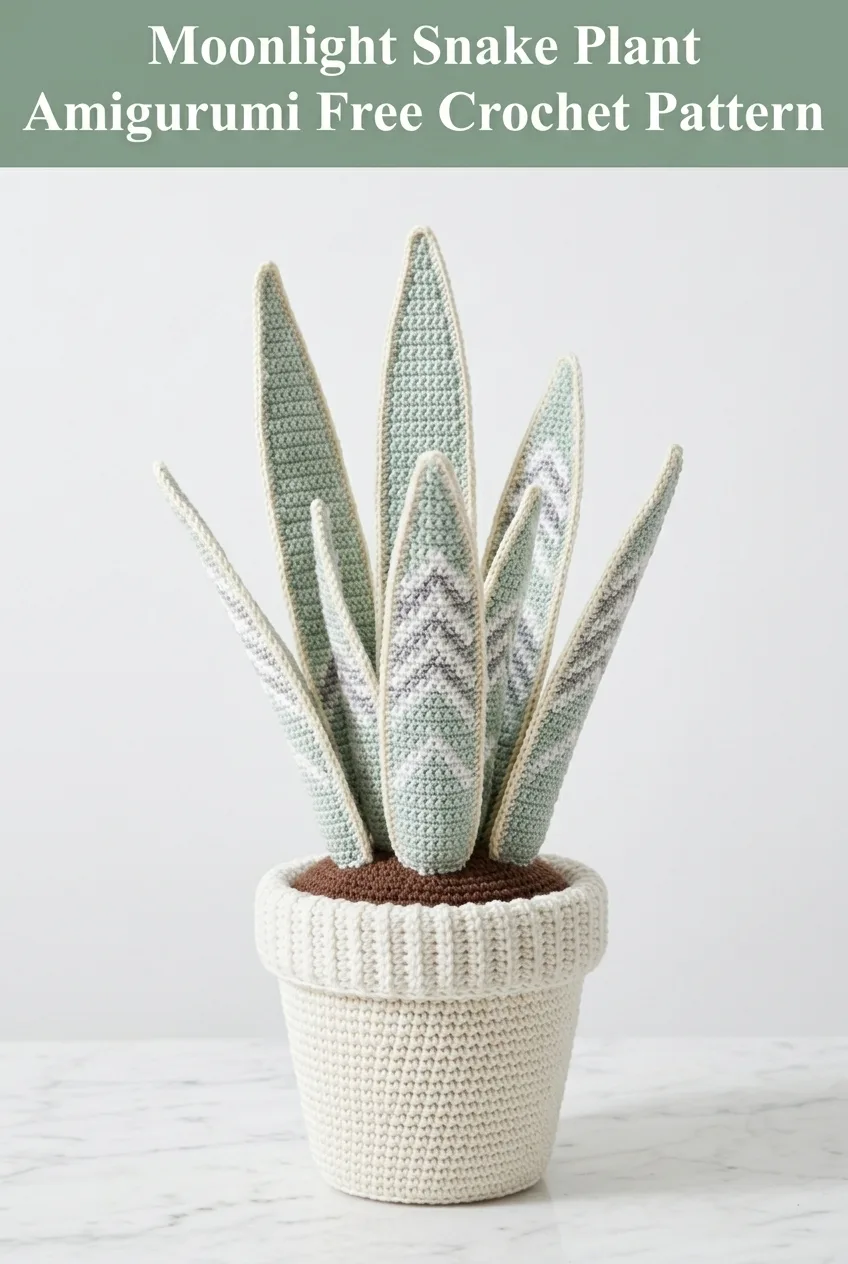
If you have been searching for the perfect handmade gift for the plant lover who cannot seem to keep anything green alive, this crochet snake plant is exactly what you need. This amigurumi pattern uses basic single crochet and simple color changes to create stunning variegated leaves that look remarkably realistic. The finished plant works up in a weekend, sits beautifully in a standard terracotta pot, and never needs watering. It makes an incredible housewarming gift, dorm room decoration, or office desk companion for anyone who wants greenery without the guilt of another wilted houseplant.
Why You Will Love This Crochet Snake Plant Pattern
This crochet snake plant captures the elegant pointed leaves and subtle color variations of the real Sansevieria moonshine variety. The soft sage greens, dusty grays, and cream edging create that distinctive banded pattern snake plants are known for. Each leaf is worked flat in rows, then joined together and lightly stuffed to give it dimension and structure.
What makes this pattern special is how achievable it looks compared to the impressive finished result. You are essentially making flat leaf shapes with some strategic color work, then assembling them into a pot. No complicated shaping. No confusing decreases in the round. Just straightforward rows that build into something genuinely beautiful.
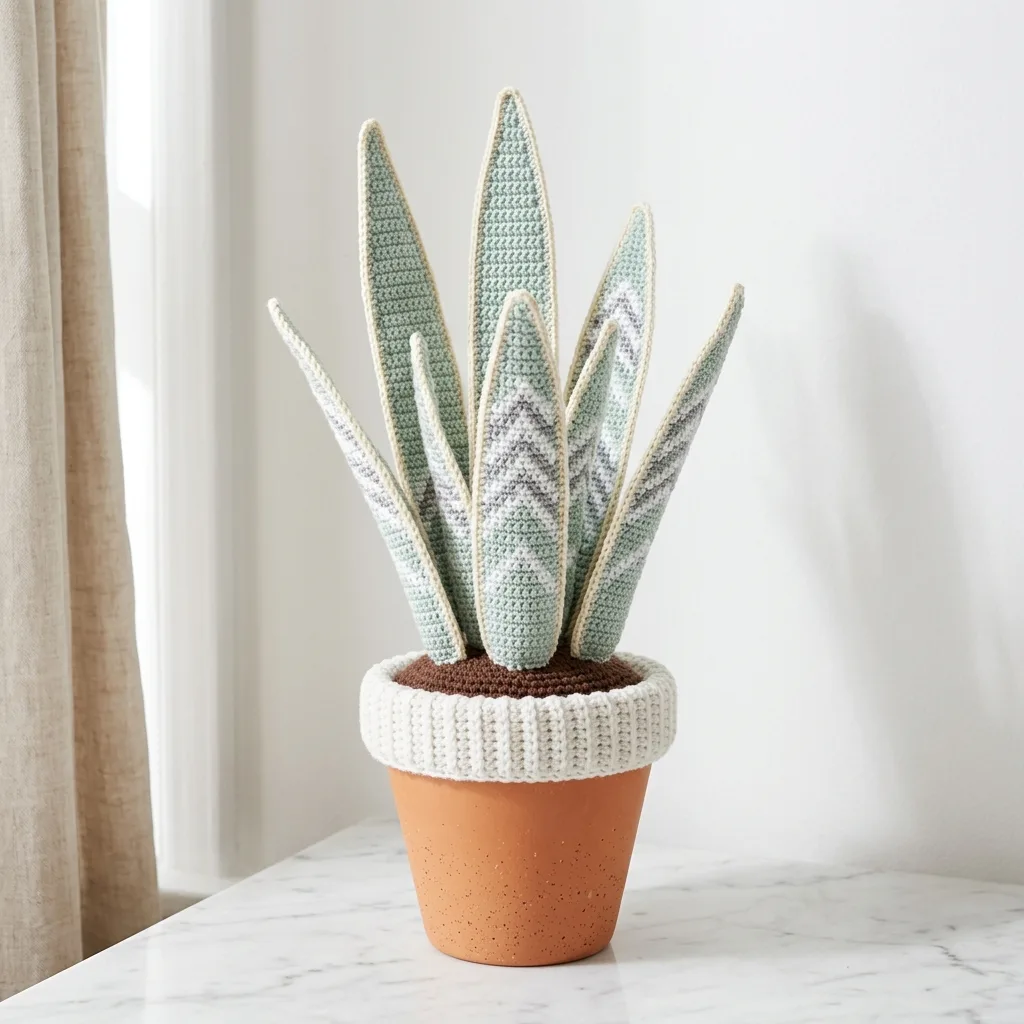
The finished plant stands approximately 12 to 14 inches tall from the pot rim to the tallest leaf tip. You can adjust the size by making more or fewer leaves, or by varying the leaf lengths to create a more natural arrangement.
Skill Level
Confident Beginner to Intermediate
If you can work single crochet confidently, change colors, and follow a basic increase and decrease pattern, you can absolutely make this plant. The colorwork might look intimidating, but I promise it is just changing yarn at specific points. No carrying colors across rows. No complicated charts.
Materials Needed
Yarn:
– Sage green, approximately 150 yards, for the main leaf body
– Light gray or silver, approximately 80 yards, for the chevron banding
– Cream or off-white, approximately 60 yards, for the leaf edges
– Brown, approximately 30 yards, for the soil top
– Cream or natural, approximately 40 yards, for the pot rim cover
I recommend a cotton or cotton blend yarn for this project. Cotton holds its shape well and gives the leaves a lovely matte finish that looks more realistic. Acrylic works too, but cotton has a nicer drape for the leaf shapes.
Hook:
Additional Supplies:
Gauge
Gauge is not critical for this decorative project. However, working at approximately 18 single crochet stitches and 20 rows equals 4 inches in single crochet will give you leaves in proportion to a standard small terracotta pot.
Abbreviations and Stitch Definitions
ch = chain. Wrap yarn over hook, pull through loop on hook. This creates your foundation.
sc = single crochet. Insert hook into stitch, yarn over, pull up a loop (two loops on hook), yarn over, pull through both loops.
inc = increase. Work two single crochet stitches into the same stitch. This adds one stitch to your row.
dec = decrease (invisible decrease preferred). Insert hook through front loops only of next two stitches, yarn over, pull through both front loops, yarn over, pull through both loops on hook.
sl st = slip stitch. Insert hook, yarn over, pull through stitch and loop on hook in one motion.
RS = right side (the side facing you as you work, typically the front of your finished piece)
WS = wrong side
Pattern Notes Before You Begin
Each leaf is made of two identical flat pieces that get joined together with the cream edging. The colorwork creates a chevron or zigzag pattern by changing colors at specific stitch counts within each row. Do not stress about making the color changes perfect. Real snake plant leaves have imperfect, organic banding, so slight variations actually look more natural.
When changing colors, work the last yarn over of your final stitch in the old color with the new color. This keeps your color transitions clean.
Cut your floral wire or pipe cleaners about 2 inches shorter than your finished leaf length. This prevents the wire from poking through the tip.
Crochet Snake Plant Pattern Instructions
Large Leaf Panel (Make 6 total, 3 pairs for 3 large leaves)
Foundation: With sage green, ch 7.
Row 1: Sc in 2nd ch from hook and in each ch across. (6 sts)
Row 2: Ch 1, turn. Inc in first st, sc in each st to last st, inc in last st. (8 sts)
Row 3: Ch 1, turn. Inc in first st, sc in each st to last st, inc in last st. (10 sts)
Rows 4 through 6: Ch 1, turn. Sc in each st across. (10 sts)
Row 7: Ch 1, turn. Sc in first 3 sts, change to light gray, sc in next 4 sts, change to sage green, sc in last 3 sts. (10 sts)
Row 8: Ch 1, turn. Sc in first 2 sts, change to light gray, sc in next 6 sts, change to sage green, sc in last 2 sts. (10 sts)
Row 9: Ch 1, turn. Sc in first 1 st, change to light gray, sc in next 8 sts, change to sage green, sc in last 1 st. (10 sts)
Row 10: Ch 1, turn. Change to light gray, sc in first 4 sts, change to cream, sc in next 2 sts, change to light gray, sc in last 4 sts. (10 sts)
Row 11: Ch 1, turn. Sc in first 3 sts, change to cream, sc in next 4 sts, change to light gray, sc in last 3 sts. (10 sts)
Row 12: Ch 1, turn. Change to sage green, sc in first 2 sts, change to cream, sc in next 6 sts, change to sage green, sc in last 2 sts. (10 sts)
Rows 13 through 16: Repeat the chevron color pattern from Rows 7 through 10, shifting colors to create continuous zigzag effect. (10 sts each row)
Rows 17 through 30: Continue working chevron pattern, maintaining 10 stitches per row.
Row 31: Ch 1, turn. Dec, sc to last 2 sts, dec. (8 sts)
Rows 32 through 34: Continue chevron pattern. (8 sts)
Row 35: Ch 1, turn. Dec, sc to last 2 sts, dec. (6 sts)
Rows 36 through 38: Continue pattern. (6 sts)
Row 39: Ch 1, turn. Dec, sc in next 2 sts, dec. (4 sts)
Row 40: Ch 1, turn. Dec twice. (2 sts)
Row 41: Ch 1, turn. Dec. (1 st)
Fasten off, leaving a long tail for seaming.
Medium Leaf Panel (Make 4 total, 2 pairs for 2 medium leaves)
Work same as large leaf, but begin decreases at Row 25 instead of Row 31. Final leaf will be approximately 8 to 9 inches long.
Small Leaf Panel (Make 4 total, 2 pairs for 2 small leaves)
Foundation: With sage green, ch 5.
Row 1: Sc in 2nd ch from hook and across. (4 sts)
Row 2: Ch 1, turn. Inc, sc in next 2 sts, inc. (6 sts)
Rows 3 through 5: Sc across, working simplified chevron with 2 stitch color sections. (6 sts)
Continue for approximately 20 rows, then decrease to a point same as large leaf. Final small leaves will be approximately 5 to 6 inches long.
Joining and Edging Each Leaf
Hold two matching leaf panels together with wrong sides facing. With cream yarn, work single crochet evenly around entire outer edge, joining the two panels as you go. Work 3 sc into the tip point to turn the corner smoothly. Before closing completely, insert one piece of floral wire and small amount of fiberfill. The leaf should feel slightly padded but still flexible. Complete the edging round with a slip stitch to first sc. Fasten off and weave in ends.
Pot Rim Cover
Foundation: With cream yarn and larger hook, ch 40. Join with sl st to form ring, being careful not to twist.
Rounds 1 through 6: Ch 1, sc in back loop only of each st around. Join with sl st. (40 sts)
This creates a ribbed texture. Fasten off, leaving long tail. The cover should stretch to fit snugly around the rim of your terracotta pot.
Soil Top Cover
Foundation: With brown yarn, make a magic ring.
Round 1: 6 sc into ring. (6 sts)
Round 2: Inc in each st around. (12 sts)
Round 3: *Sc, inc* repeat around. (18 sts)
Round 4: *Sc in next 2 sts, inc* repeat around. (24 sts)
Continue increasing 6 stitches per round until the circle fits inside your pot rim, covering the foam. This will likely be around 30 to 36 stitches depending on pot size.
Assembly Instructions
Step 1: Fit the styrofoam disc or floral foam snugly into your terracotta pot. It should sit about half an inch below the rim.
Step 2: Stretch the cream pot rim cover over the top edge of the terracotta pot. Tuck the bottom edge inside if needed, or leave it sitting on the rim naturally.
Step 3: Arrange your finished leaves by inserting the wire ends into the foam. Start with the largest leaves in the back and center, then add medium leaves around them, and finish with small leaves at the front and sides. Bend the wires gently to angle the leaves outward naturally like a real plant.
Step 4: Once satisfied with the arrangement, place the brown soil cover on top of the foam, tucking the edges around the leaf bases.
Step 5: Adjust any leaves as needed. Bend them gently to create natural curves.
Customization Ideas
Want a fuller plant? Make two or three extra small leaves to fill in gaps. Prefer a taller statement piece? Add another 10 rows to your large leaves before beginning decreases. You can also experiment with different green shades, add yellow edges for a different snake plant variety, or skip the chevron pattern entirely for a simpler solid leaf look.
Troubleshooting Tips
If your leaves feel too floppy, try using a smaller hook to create a tighter fabric, or add a second piece of wire. If the color changes look messy, remember to always complete your last yarn over with the new color. And if your pot cover is too loose, work fewer foundation chains or try a smaller hook.
Final Thoughts on This Snake Plant Amigurumi Pattern
This crochet snake plant brings together simple techniques into something truly impressive. The combination of basic single crochet, beginner colorwork, and thoughtful assembly creates a finished piece that looks far more complicated than it actually is. Whether you are making this for your own shelf or gifting it to someone special, this plant will bring joy without any of the maintenance stress real houseplants demand.
Thank you so much for choosing this pattern. I genuinely hope you enjoy making your moonlight snake plant as much as I enjoyed designing it. If you make one, I would absolutely love to see it. Tag me on Instagram or share a photo on Facebook so I can admire your beautiful work.
If this crochet snake plant tutorial caught your eye, go ahead and save it to your Pinterest boards so you can find it when you are ready to start. And please drop a comment below if you give it a try. I love hearing how your projects turn out and seeing what color combinations you choose.
