I don’t know about you, but I have a weakness for home decor that makes people do a double take. These candy-shaped bolster pillows? They stop guests mid-conversation every single time. All the whimsy of a playful accent piece with none of the complicated construction you might expect.
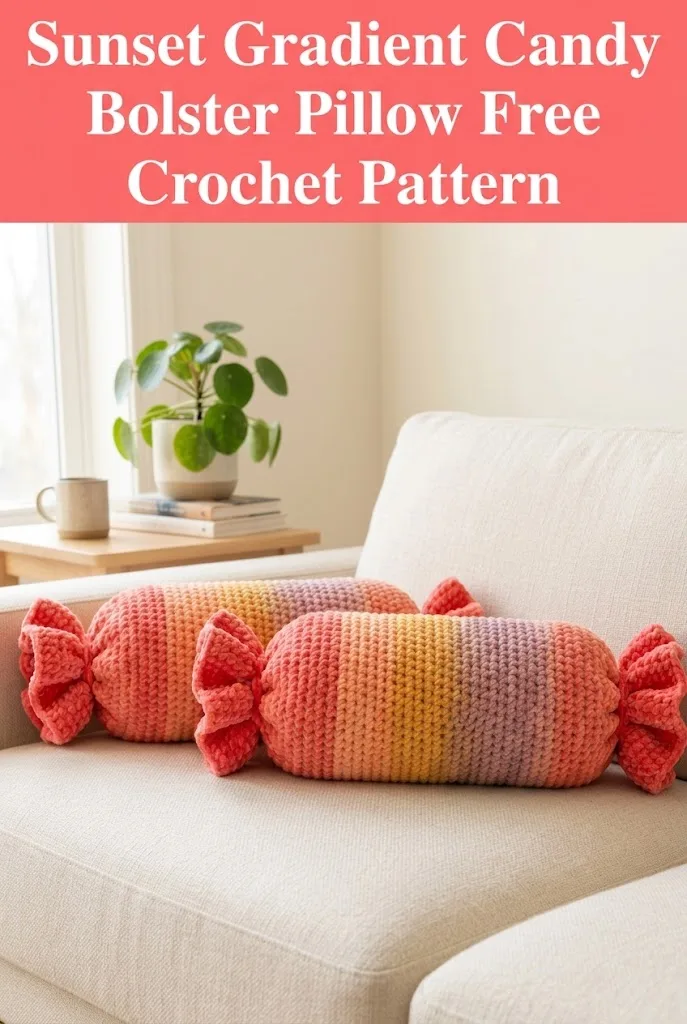
When I first pictured these pillows, I knew I wanted that dreamy gradient effect you see in a sunset. Coral melting into gold melting into dusty mauve. The wrapped candy shape just begged to happen, and honestly, the whole thing works up faster than you’d think looking at the finished result.
Whether you make the smaller version for a chair or the larger one for your sofa, these bolsters bring instant personality to any room. Let me walk you through exactly how to create your own.
About This Crochet Pattern
This crochet candy bolster pillow pattern creates an adorable wrapped candy shape complete with gathered "wrapper" ends that fan out like the real thing. The body uses simple single crochet worked in the round, which means no seaming the main tube. The gathered ends are made separately and attached, giving you that signature candy wrapper look.
Skill Level: Confident beginner to intermediate
If you can single crochet in the round and you’re comfortable with basic increases and decreases, you can absolutely make this pillow. The gradient effect looks impressive but requires zero colorwork skills. You’ll simply change yarn colors as you go.
Finished Dimensions:
Materials Needed
Yarn:
– Small: 150 yards total across 3 to 4 colors
– Large: 280 yards total across 3 to 4 colors
– Small: 80 yards
– Large: 120 yards
The pillows shown use a beautiful sunset palette: warm coral, peachy orange, golden yellow, and dusty mauve. You can recreate this exact look or choose your own color story.
Hook:
Adjust your hook size if needed to achieve a tight, sturdy fabric. You don’t want stuffing poking through.
Notions:
Stitches and Abbreviations Used
Let me break down every stitch you’ll need for this crochet tutorial. Even if you’re newer to crochet, these are all foundational techniques.
Ch = Chain: Wrap yarn over hook, pull through the loop on your hook. This creates the foundation links you’ll work into.
Sl st = Slip stitch: Insert hook, yarn over, pull through both the stitch and the loop on your hook in one motion. Used for joining rounds.
Sc = Single crochet: Insert hook into stitch, yarn over and pull up a loop (2 loops on hook), yarn over and pull through both loops. This is your main stitch for the entire project.
Inc = Increase: Work 2 single crochets into the same stitch. This adds one stitch to your count.
Dec = Decrease (invisible decrease preferred): Insert hook through front loops only of the next 2 stitches, yarn over and pull through both, yarn over and pull through remaining 2 loops. This removes one stitch from your count.
Magic ring = An adjustable starting loop that closes completely with no hole in the center. If you prefer, you can chain 2 and work your starting stitches into the second chain from hook instead.
Gauge
14 single crochet stitches and 16 rows = 4 inches in single crochet worked in continuous rounds.
Gauge matters here because it affects your final pillow size. Too loose and your pillow will be floppy with visible stuffing. Too tight and you’ll struggle to stuff it fully. Aim for a dense but workable fabric.
Pattern Notes Before You Begin
Step-by-Step Crochet Pattern Instructions

Main Body (Large Pillow)
Starting with your first gradient color (coral):
Round 1: Create a magic ring. Work 6 sc into the ring. Pull tight to close. (6 sts)
Round 2: Inc in each st around. (12 sts)
Round 3: *Sc 1, inc* repeat around. (18 sts)
Round 4: *Sc 2, inc* repeat around. (24 sts)
Round 5: *Sc 3, inc* repeat around. (30 sts)
Round 6: *Sc 4, inc* repeat around. (36 sts)
Round 7: *Sc 5, inc* repeat around. (42 sts)
Round 8: *Sc 6, inc* repeat around. (48 sts)
Round 9: *Sc 7, inc* repeat around. (54 sts)
Round 10: *Sc 8, inc* repeat around. (60 sts)
You’ve now completed the rounded end of your candy body. Don’t worry if it looks like a flat circle right now. It’ll take shape as you continue.
Rounds 11 through 25: Sc in each st around. (60 sts each round)
This section creates the first color block. After round 25, switch to your second gradient color (peachy orange).
Rounds 26 through 40: Continue working sc in each st around with your second color. (60 sts each round)
Switch to your third gradient color (golden yellow).
Rounds 41 through 55: Sc in each st around. (60 sts each round)
Switch to your fourth gradient color (dusty mauve).
Rounds 56 through 70: Sc in each st around. (60 sts each round)
Now you’ll begin decreasing to close the opposite end:
Pause here and stuff your pillow body. Pack the fiberfill firmly and evenly. You’ll continue adding stuffing as you decrease.
Round 71: *Sc 8, dec* repeat around. (54 sts)
Round 72: *Sc 7, dec* repeat around. (48 sts)
Round 73: *Sc 6, dec* repeat around. (42 sts)
Round 74: *Sc 5, dec* repeat around. (36 sts)
Add more stuffing now. Really pack it in.
Round 75: *Sc 4, dec* repeat around. (30 sts)
Round 76: *Sc 3, dec* repeat around. (24 sts)
Round 77: *Sc 2, dec* repeat around. (18 sts)
Round 78: *Sc 1, dec* repeat around. (12 sts)
Round 79: Dec around. (6 sts)
Fasten off and leave a long tail. Thread through remaining stitches, pull tight, and weave in securely.
Main Body (Small Pillow)
Follow the same construction method but with these adjustments:
Candy Wrapper Ends (Make 2 Per Pillow)
The wrapper ends give this pillow its signature candy look. You’ll make two identical pieces and attach them to gather the body ends.
Using your accent color (coral):
Row 1: Ch 36. Sc in 2nd ch from hook and in each ch across. Ch 1, turn. (35 sts)
Rows 2 through 20: Sc in each st across. Ch 1, turn. (35 sts)
You now have a rectangular piece.
Creating the ruffle effect:
Fold your rectangle in half lengthwise, wrong sides together. Using a tapestry needle and matching yarn, whip stitch the short ends together to create a tube.
Now gather one long edge tightly. Thread your tapestry needle with a long strand of yarn. Weave in and out along one edge of the tube, pulling firmly to gather. This creates the cinched wrapper look. Secure with several stitches.
The other edge remains open and ruffly, fanning out like a candy wrapper.
Assembly
1. Position one wrapper end at each end of your stuffed body.
2. Place the gathered (cinched) edge of the wrapper against the body end.
3. Using your tapestry needle and matching yarn, whip stitch around the circumference to attach securely.
4. The ungathered edge will naturally fan outward, creating that adorable wrapper effect.
5. Repeat for the opposite end.
Weave in all remaining ends. Give your pillow a gentle squeeze to distribute the stuffing evenly.
Tips for the Best Results
Gradient placement: You can customize how much of each color shows. Want more coral and less mauve? Simply work more rounds in your first color and fewer in your last. The gradient is completely adjustable.
Making it your own: Try a rainbow gradient, an ocean ombre (navy to aqua to white), or seasonal colors. Halloween candy pillows in orange and black? Yes please.
Stuffing secrets: For the plumpest candy shape, use more stuffing than you think you need. The body should feel quite firm. Understuffed pillows look sad and lumpy.
Care instructions: Spot clean only or use a removable pillow form if you want washability. Stuffed crochet items can be tricky to dry completely.
Why This Pattern Works for Beginners
If you’re nervous about trying this candy bolster pillow pattern, let me reassure you. The entire main body uses only single crochet. That’s it. You’re just working in circles, counting your stitches, and changing colors when the time comes.
The wrapper ends are simple rectangles. If you can crochet a dishcloth, you can make the wrapper pieces.
The gathering technique might be new, but it’s genuinely just a running stitch pulled tight. No special tools or magic required.
Final Thoughts on This Crochet Candy Pillow
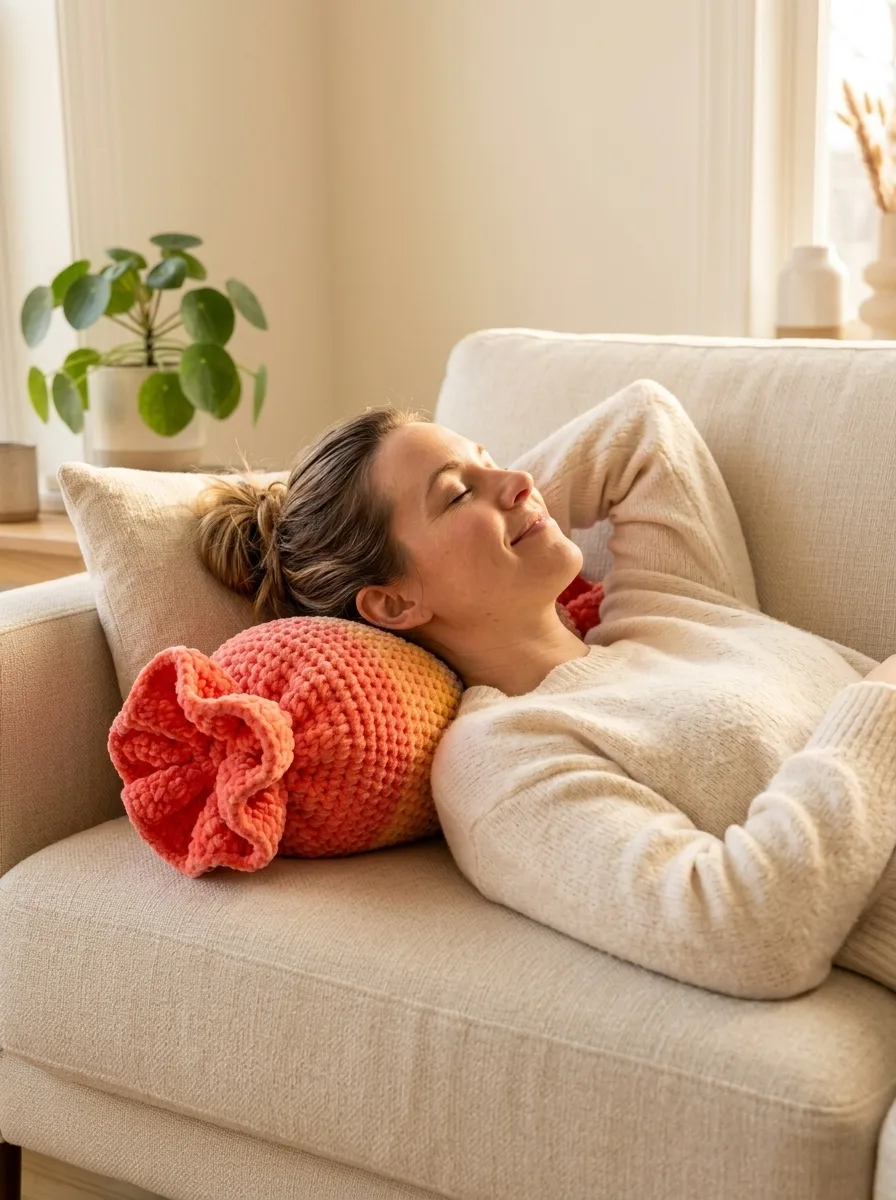
I genuinely smile every time I walk past these pillows on my couch. They’re playful without being childish, colorful without being overwhelming, and they spark joy in a way that a plain throw pillow simply cannot.
The construction is satisfying because you see real progress with every round. And when you place that finished candy on your sofa? Pure delight.
I hope this crochet pattern brings some sweetness to your home. You deserve pillows that make you happy.
Thank you so much for making it to the end of this pattern. I truly appreciate you being here and trusting me with your crafting time. If you make these candy bolster pillows, I would absolutely love to see them. Tag me on Instagram or share in my Facebook group. Your versions always inspire me.
If you loved this pattern, consider pinning it to your Pinterest boards so you can find it again when you’re ready to start. And please drop a comment below if you give it a try. I read every single one and your feedback means the world to me. Happy crocheting, friend.
