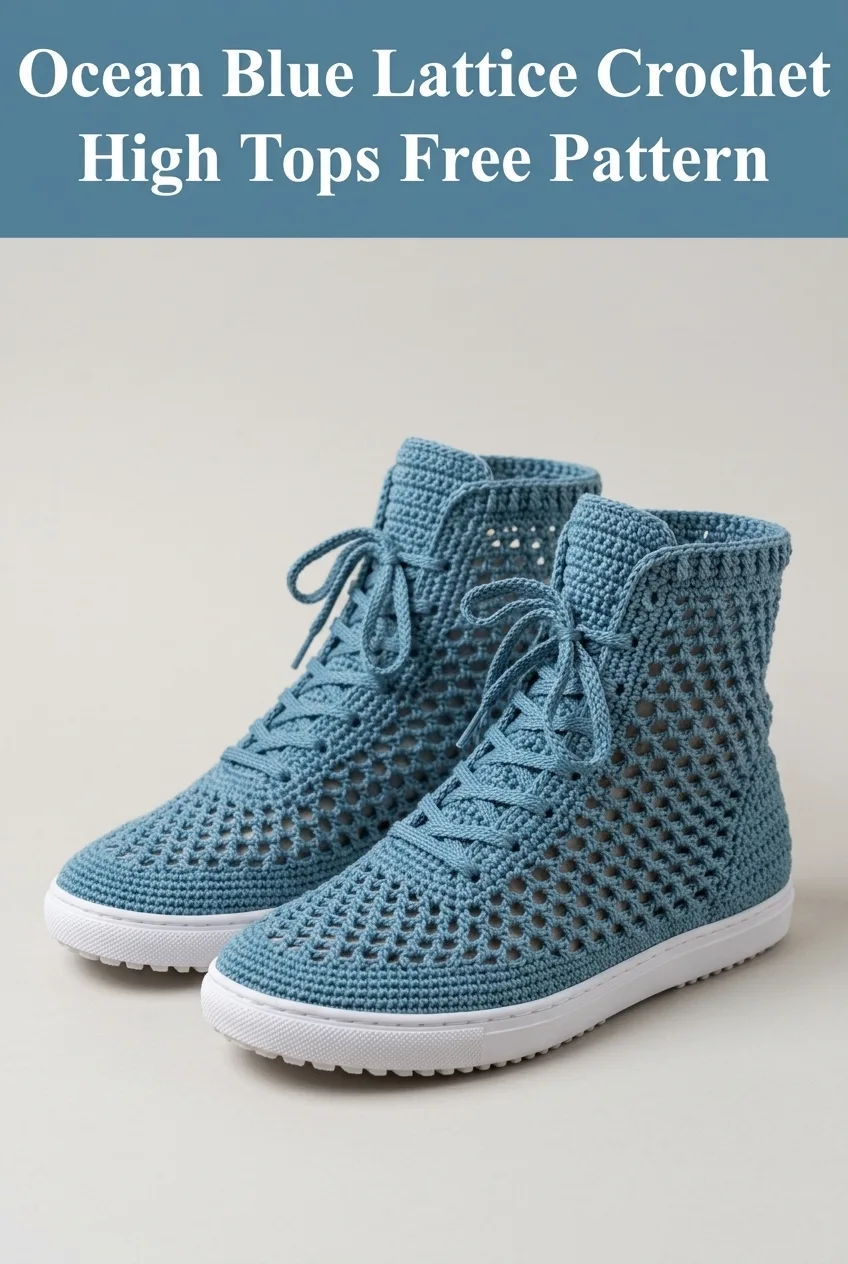
I have been dreaming about designing a wearable crochet sneaker for months now. My goals were ambitious. I wanted something that looked modern and stylish, worked up with an open stitch pattern for breathability, and could actually be worn outside the house. The lattice mesh design took me a few tries to perfect, but once I got the tension right, everything clicked into place. These high tops fit snugly around the ankle, lace up like real sneakers, and attach to a rubber sole for actual everyday wear. I am SO thrilled with how these turned out!
Why You Will Love This Crochet High Tops Pattern
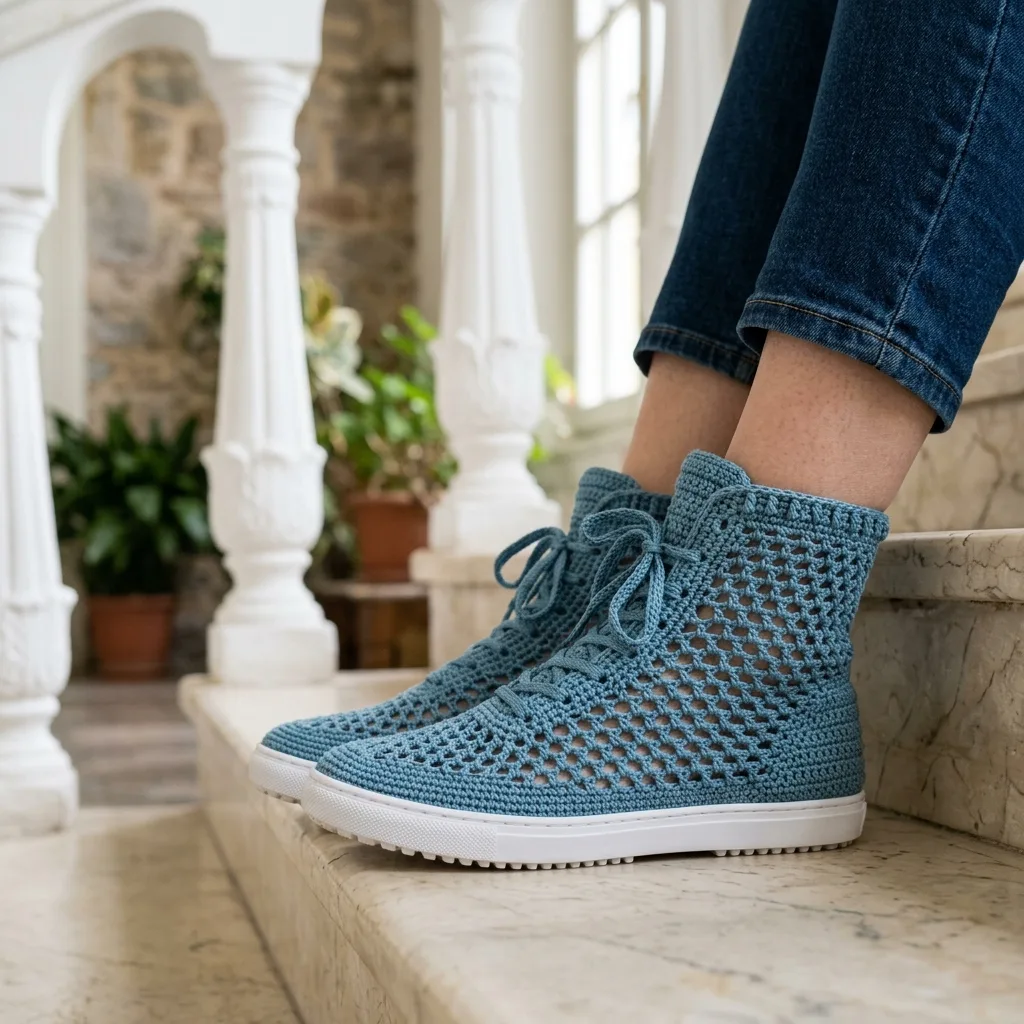
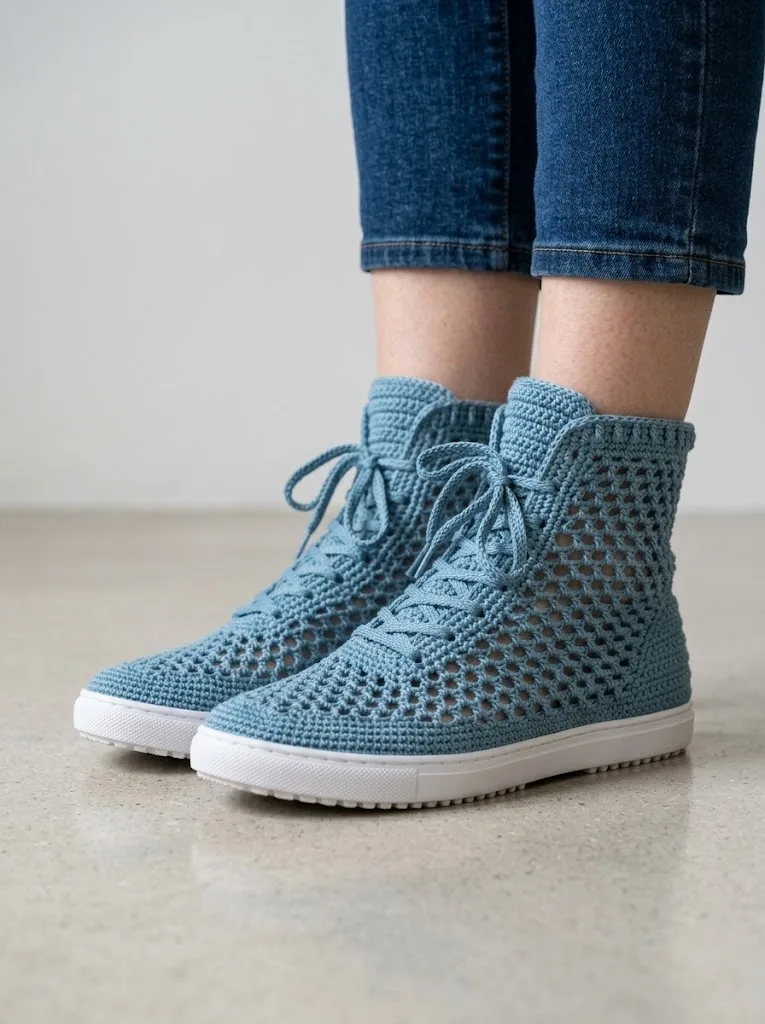
These crocheted sneakers are not your grandmother’s slippers. They are a legitimate fashion statement that combines handmade craftsmanship with modern streetwear style. The open lattice stitch creates a breathable mesh that is perfect for warmer weather, while the high top construction gives ankle support and a trendy silhouette.
The dusty blue color shown here gives off serious coastal vibes, but you could make these in any shade you love. Black for an edgy look. Cream for something neutral. Bright coral for a pop of color. The possibilities are endless.
What makes this pattern special:
Skill Level
This pattern is intermediate level. You should be comfortable working in the round and maintaining consistent tension. The lattice stitch looks complex but is actually just a combination of chain spaces and double crochet stitches worked in a specific sequence.
If you have never crocheted footwear before, do not panic. I will walk you through every step, including how to attach your work to the sole.
Materials Needed
Yarn:
Hook:
Additional Supplies:
Gauge
18 stitches and 10 rows = 4 inches in double crochet using 3.5mm hook
Gauge matters here. If your gauge is too loose, your shoes will stretch out and feel sloppy. Too tight, and they will not fit over your foot. Take time to check this before starting.
Size Information
This pattern is written for Women’s US Size 8 (EU 39, UK 6).
To adjust sizing:
Abbreviations and Stitch Definitions
Before we dive into the pattern, let me explain each stitch you will need.
Ch = Chain. Wrap yarn over hook and pull through the loop on your hook. This creates one chain stitch.
Sl st = Slip stitch. Insert hook into stitch, yarn over, pull through both the stitch and the loop on your hook in one motion. Used for joining rounds.
Sc = Single crochet. Insert hook into stitch, yarn over and pull up a loop (2 loops on hook), yarn over and pull through both loops.
Dc = Double crochet. Yarn over, insert hook into stitch, yarn over and pull up a loop (3 loops on hook), yarn over and pull through 2 loops (2 loops remaining), yarn over and pull through remaining 2 loops.
Ch-sp = Chain space. The gap created by chain stitches in the previous row. You work into this space, not into individual chains.
Sk = Skip. Pass over the indicated number of stitches without working into them.
Understanding the Lattice Stitch Pattern
The beautiful open mesh you see in these high tops is created using a lattice stitch pattern. This technique alternates chain spaces with double crochet stitches to create a grid-like appearance with diamond-shaped openings.
Here is how it works:
Lattice Pattern (worked in rows):
The chain spaces create the holes, and the double crochets form the structure. Once you get into a rhythm, this stitch pattern works up quickly.
Pattern Instructions
Preparing Your Sole
Before crocheting, you need to prepare your rubber sole for attachment.
1. Using an awl or leather punch, create holes around the entire perimeter of the sole
2. Space holes approximately half an inch apart
3. Keep holes about a quarter inch from the edge
4. You should have roughly 50 to 60 holes per sole, depending on size
Part 1: The Sole Foundation
Using your 3.0mm hook, you will create a crocheted base that attaches directly to the rubber sole.
Round 1: Working through the pre-punched holes, sc in each hole around the entire sole. Place a stitch marker at the toe and another at the heel. Join with sl st to first sc. (approximately 54 sc)
Round 2: Ch 1, sc in each st around, working 2 sc in the corner stitches at toe and heel for shaping. Join with sl st. (58 sc)
Round 3: Ch 1, sc in each st around. Join with sl st. (58 sc)
This creates a sturdy foundation that will hold the upper securely to the sole.
Part 2: The Toe Box
The toe section is worked in tighter stitches for durability before transitioning to the lattice pattern.
Switch to your 3.5mm hook.
Round 4: Ch 1, working in front loops only, sc in each st around. Join with sl st. (58 sc)
Round 5: Ch 1, sc in each of the first 20 sts (toe area), place marker, sc in remaining sts. Join with sl st. (58 sc)
Round 6: Ch 1, sc in each st to 2 sts before marker, sc2tog, sc2tog, sc in remaining sts. Join with sl st. (56 sc)
Round 7: Repeat Round 6. (54 sc)
Round 8: Ch 1, sc in each st around. Join with sl st. (54 sc)
Part 3: Beginning the Lattice Upper
Now we transition into the beautiful open mesh pattern that gives these sneakers their distinctive look.
Round 9 (Setup Round): Ch 4 (counts as dc + ch 1), sk next st, *dc in next st, ch 1, sk 1*, repeat around. Join with sl st to 3rd ch of beginning ch-4. (27 dc, 27 ch-1 spaces)
Round 10: Ch 4, dc in first ch-sp, *ch 1, dc in next ch-sp*, repeat around. Join with sl st to 3rd ch. (27 dc, 27 ch-1 spaces)
Rounds 11 through 18: Repeat Round 10.
At this point, you should see the lattice pattern forming beautifully. The mesh should sit about 2 to 3 inches above the sole.
Part 4: Creating the Tongue Opening
To create the lace-up front, we now work in rows instead of rounds.
Row 19: Ch 4, dc in first ch-sp, *ch 1, dc in next ch-sp*, repeat across 20 ch-spaces. Turn, leaving remaining stitches unworked. (20 dc)
Row 20: Ch 4, dc in first ch-sp, *ch 1, dc in next ch-sp*, repeat to end. Turn. (20 dc)
Rows 21 through 26: Repeat Row 20.
Part 5: The Ankle Cuff
The cuff folds over for that classic high top look.
Row 27: Ch 1, sc in each dc and ch-sp across. Turn. (39 sc)
Row 28: Ch 1, sc in each st across. Turn. (39 sc)
Rows 29 through 34: Repeat Row 28.
Fasten off and weave in ends.
Part 6: The Tongue
Rejoin yarn at the center front of the opening.
Row 1: Ch 1, sc evenly across the front opening, picking up approximately 14 sts. Turn. (14 sc)
Rows 2 through 12: Ch 1, sc in each st across. Turn. (14 sc)
Row 13: Ch 1, sc2tog, sc to last 2 sts, sc2tog. Turn. (12 sc)
Row 14: Repeat Row 13. (10 sc)
Fasten off and weave in ends.
Part 7: Creating the Laces
Make two laces per shoe (four total).
Ch 120. Sl st in 2nd ch from hook and in each ch across. Fasten off.
Alternatively, create a simple i-cord or twisted cord for more substantial laces.
Finishing Your Crochet High Tops
Weaving the Laces
Thread your laces through the ch-1 spaces along the front opening, just like you would lace regular sneakers. Start from the bottom and work your way up, creating an X pattern.
Blocking (Optional but Recommended)
Wet block your finished shoes by dampening them and stuffing with tissue paper. Allow to dry completely. This helps the stitches settle into place and gives a more polished finish.
Adding Durability
For extra durability, consider:
Care Instructions
Hand wash only in cool water with mild detergent. Do not machine wash or dry. Reshape while damp and allow to air dry completely. The rubber soles can be wiped clean with a damp cloth.
Troubleshooting Common Issues
Shoes are too loose: Your gauge may be off. Try going down a hook size and remaking the upper.
Lattice holes are uneven: Focus on consistent tension. Each chain should be the same tightness.
Difficulty attaching to sole: Make sure your pre-punched holes are evenly spaced. Working through rubber can be tough on your hands, so take breaks.
Cuff does not fold nicely: Add a few more rows of single crochet to give it enough fabric to fold over cleanly.
Making These Your Own
Once you master the basic pattern, consider these variations:
Final Thoughts on This Crochet High Tops Pattern
Creating wearable crochet footwear feels incredibly rewarding. Every time I slip these on, I cannot help but smile knowing I made them with my own hands. The lattice stitch gives them that modern, breathable feel while the high top construction keeps them secure on your feet.
This crochet sneaker pattern does require patience and attention to detail, but the end result is absolutely worth it. You will have a unique pair of shoes that no one else owns. Take your time with the sole attachment, keep your tension consistent through the lattice sections, and trust the process.
I hope this step by step crochet tutorial helps you create your own gorgeous high tops. Whether you make them in ocean blue like mine or choose your own favorite shade, these shoes are sure to turn heads.
Thank you so much for choosing this pattern for your next project. It means the world to me that you are here. If you make these high tops, I would absolutely love to see them! Tag me on Instagram or share a photo in my Facebook group. Seeing your creations is genuinely the best part of my day.
If you loved this pattern, save it to your Pinterest boards so you can find it easily when you are ready to start. And please drop a comment below if you give these a try. I read every single one and would love to hear how yours turn out!
