I have been dreaming about creating the perfect layering piece for months now. Something dramatic, something edgy, something that would work over a tank top or a fitted dress without adding bulk. When I started sketching this fishnet bell sleeve shrug, I knew exactly what I wanted. An open mesh construction that would show off whatever you wear underneath, statement bell sleeves that flare beautifully, and a cropped silhouette that sits right at the bust line. I am SO pleased with how it turned out! The construction is simpler than it looks, and the finished piece has that effortlessly cool vibe I was going for.
About This Black Fishnet Crochet Bell Sleeve Shrug Pattern
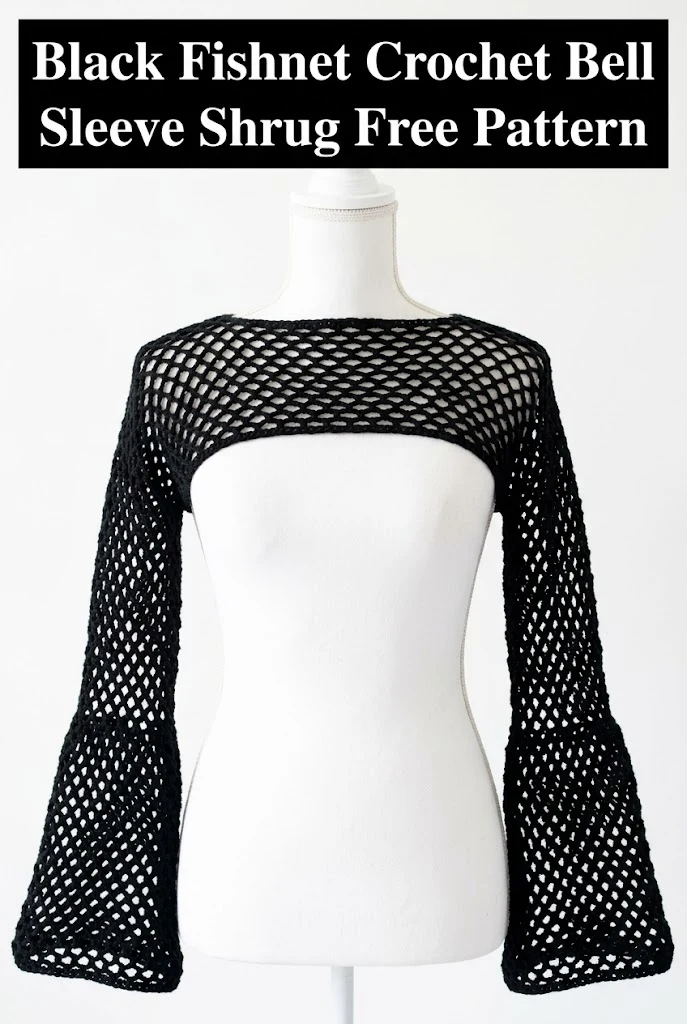
This crochet shrug pattern creates a stunning layering piece with an open fishnet mesh design and dramatic bell sleeves. The entire garment is worked in a simple grid pattern using chain spaces and double crochet stitches. If you can chain and double crochet, you can absolutely make this.
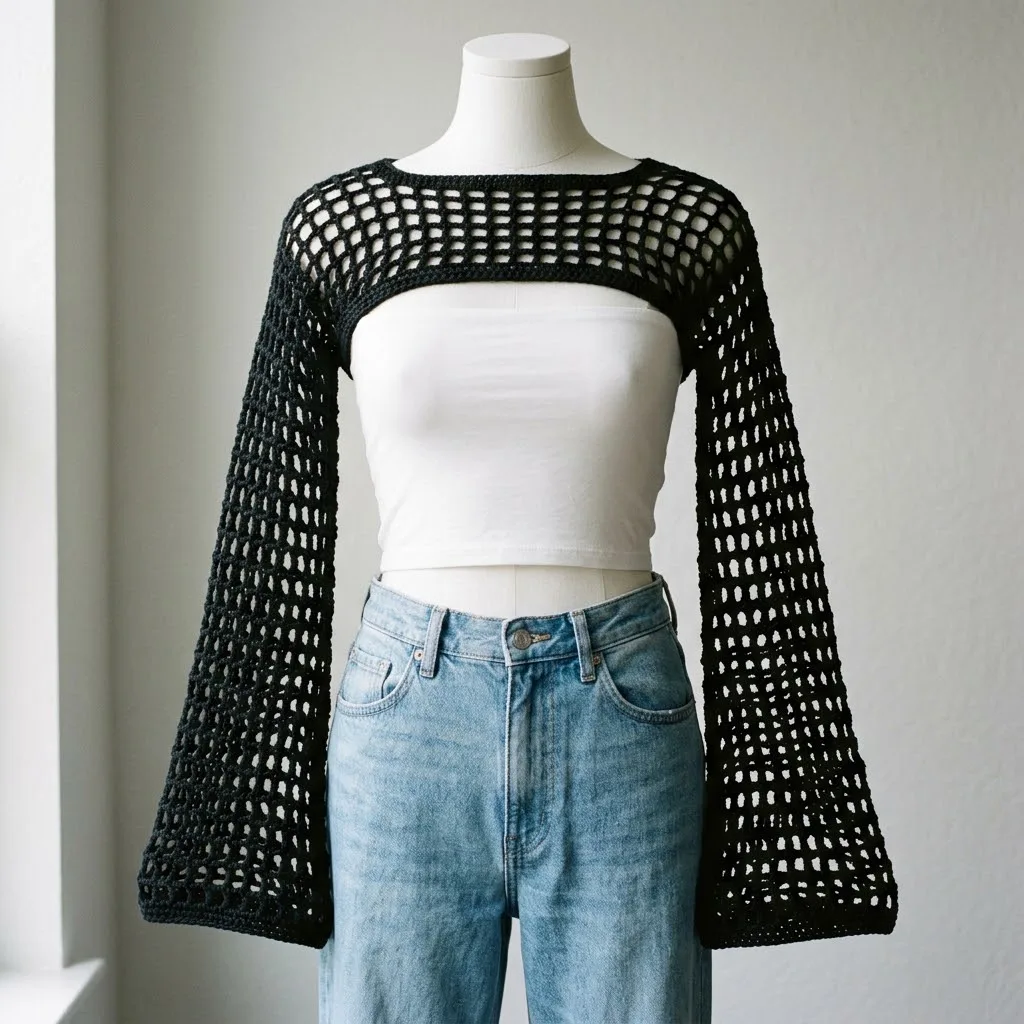
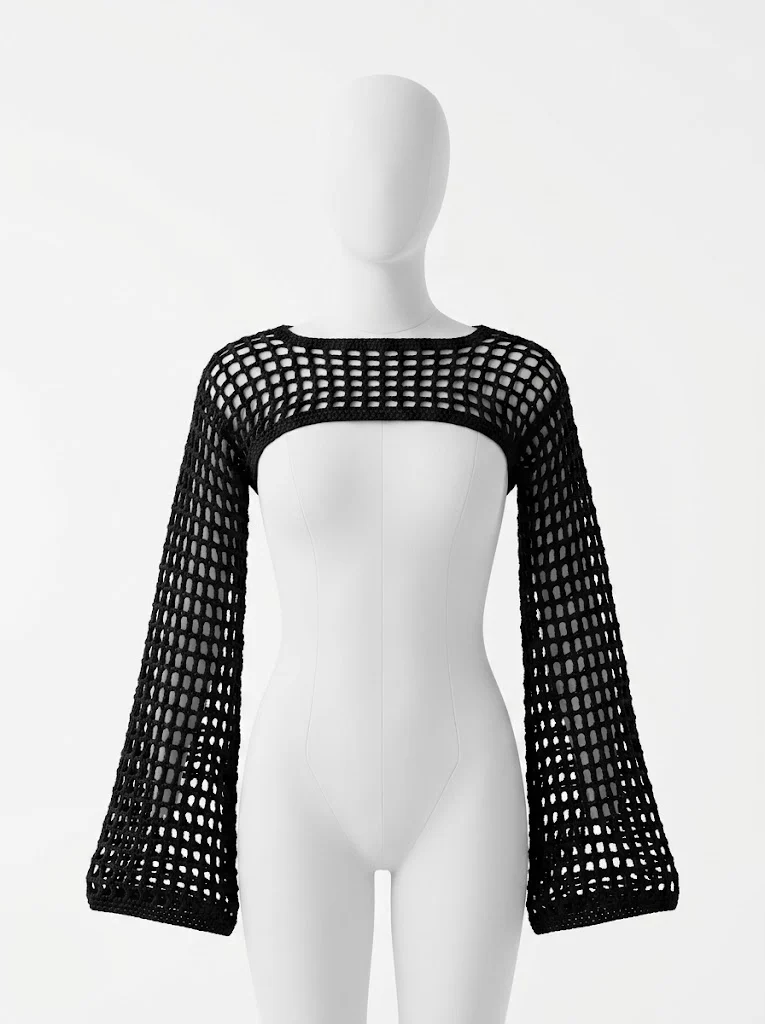
The shrug features a boat neckline that sits elegantly across the shoulders, a cropped body that ends just below the bust, and long bell sleeves that flare dramatically from elbow to wrist. It is designed to be worn over a fitted top, tank, or dress as a statement layer.
Skill Level: Intermediate beginner. You should be comfortable with basic stitches and working in the round.
Finished Measurements:
Materials Needed for Your Crochet Shrug
Gathering your supplies before you start makes the whole process smoother. Here is everything you will need:
Yarn:
Hook:
Notions:
Gauge Information
Gauge matters for garments! Take time to check yours before starting.
Gauge: 4 mesh squares = 4 inches; 4 rows = 4 inches in mesh pattern
To make a gauge swatch, chain 21. Work the mesh pattern (instructions below) for 12 rows. Your swatch should measure approximately 5 inches square. If your swatch is too small, go up a hook size. If it is too large, go down a hook size.
Stitches and Abbreviations Used
Let me walk you through every stitch and abbreviation you will encounter. Even if you know these already, a quick refresher never hurts.
Ch = Chain. Wrap yarn over hook and pull through the loop on your hook. This creates one chain stitch.
Sl st = Slip stitch. Insert hook into stitch, yarn over, pull through both the stitch and the loop on your hook in one motion. Used for joining rounds.
Sc = Single crochet. Insert hook into stitch, yarn over and pull up a loop (2 loops on hook), yarn over and pull through both loops.
Dc = Double crochet. Yarn over, insert hook into stitch, yarn over and pull up a loop (3 loops on hook), yarn over and pull through 2 loops (2 loops remain), yarn over and pull through remaining 2 loops.
Ch-sp = Chain space. The gap created by chain stitches in the previous row. You will work into this space, not into individual chains.
Sk = Skip. Pass over the indicated stitch or space without working into it.
Special Techniques
Mesh Pattern: This entire shrug uses a simple mesh created by alternating double crochet stitches with chain spaces. The pattern creates those signature fishnet squares you see in the photos.
Working in Joined Rounds: The body is worked in rounds, joining at the end of each round with a slip stitch. The sleeves are also worked in joined rounds.
Increasing for Bell Shape: The sleeve gradually widens by adding chain spaces at regular intervals to create the dramatic flare.
Pattern Notes Before You Begin
A few things to keep in mind as you work:
Crochet Pattern Instructions
Yoke and Body
Foundation Row:
Ch 89 loosely. Join with sl st to first ch to form a ring, being careful not to twist the chain. (89 ch)
Round 1: Ch 4 (counts as dc + ch 1), sk 1 ch, dc in next ch, *ch 1, sk 1 ch, dc in next ch; repeat from * around, ch 1, sl st to 3rd ch of beginning ch-4 to join. (44 dc, 44 ch-1 spaces)
Round 2: Sl st into first ch-sp, ch 4 (counts as dc + ch 1), dc in next ch-sp, *ch 1, dc in next ch-sp; repeat from * around, ch 1, sl st to 3rd ch of beginning ch-4 to join. (44 dc, 44 ch-1 spaces)
Rounds 3-6: Repeat Round 2. (44 dc, 44 ch-1 spaces)
At this point, you should have a tube of mesh that sits across your shoulders and upper chest. Try it on to check the fit across the bust. The boat neckline should sit at your collarbone.
Dividing for Armholes
This is where we split the work to create the armhole openings. Take your time here and use stitch markers to help you stay oriented.
Round 7 (Dividing Round):
Sl st into first ch-sp, ch 4, dc in next ch-sp, *ch 1, dc in next ch-sp; repeat from * 8 more times (10 dc made for front).
Ch 5 for underarm, sk 12 ch-sp for sleeve opening.
Dc in next ch-sp, *ch 1, dc in next ch-sp; repeat from * 8 more times (10 dc made for back).
Ch 5 for underarm, sk 12 ch-sp for sleeve opening.
Sl st to 3rd ch of beginning ch-4 to join.
You now have the front and back panels connected by chain spaces at each underarm, with openings left for the sleeves.
Round 8: Sl st into first ch-sp, ch 4, dc in next ch-sp, *ch 1, dc in next ch-sp; repeat from * across front. Ch 1, dc in first ch of underarm ch-5, ch 1, dc in 3rd ch of underarm ch-5, ch 1, dc in 5th ch of underarm ch-5. *Ch 1, dc in next ch-sp; repeat from * across back. Ch 1, work into underarm chain as before, sl st to join. (28 dc, 28 ch-1 spaces approximately)
Round 9: Work even in mesh pattern around entire body. (28 dc, 28 ch-1 spaces)
Fasten off and weave in ends. The body is complete!
Bell Sleeves (Make 2)
The sleeves are worked directly into the armhole openings, starting at the shoulder and working down to the wrist. This is where the magic happens with the bell shape.
Round 1: Join yarn with sl st to any ch-sp at the armhole opening. Ch 4 (counts as dc + ch 1), dc in next ch-sp, *ch 1, dc in next ch-sp; repeat from * around armhole, ch 1, sl st to 3rd ch of beginning ch-4 to join. (12 dc, 12 ch-1 spaces)
Rounds 2-8: Work even in mesh pattern. (12 dc, 12 ch-1 spaces)
Round 9 (First Increase Round): Ch 4, dc in same ch-sp (increase made), *ch 1, dc in next ch-sp; repeat from * 4 more times, ch 1, dc in same ch-sp as last dc (second increase), *ch 1, dc in next ch-sp; repeat from * around, sl st to join. (14 dc, 14 ch-1 spaces)
Rounds 10-12: Work even in mesh pattern. (14 dc, 14 ch-1 spaces)
Round 13 (Second Increase Round): Work increases evenly spaced as in Round 9, adding 2 increases total. (16 dc, 16 ch-1 spaces)
Rounds 14-16: Work even. (16 dc, 16 ch-1 spaces)
Round 17 (Third Increase Round): Work increases evenly spaced, adding 2 increases total. (18 dc, 18 ch-1 spaces)
Rounds 18-20: Work even. (18 dc, 18 ch-1 spaces)
Round 21 (Fourth Increase Round): Work increases evenly spaced, adding 2 increases total. (20 dc, 20 ch-1 spaces)
Rounds 22-24: Work even. (20 dc, 20 ch-1 spaces)
Round 25 (Fifth Increase Round): Work increases evenly spaced, adding 2 increases total. (22 dc, 22 ch-1 spaces)
Rounds 26-28: Work even. (22 dc, 22 ch-1 spaces)
Border Round: Ch 1, sc in each dc and each ch-sp around. Sl st to first sc to join. (44 sc)
Fasten off. Repeat for second sleeve.
Finishing the Neckline
Neckline Border:
Join yarn at center back of neckline with sl st to any ch-sp.
Round 1: Ch 1, sc in each dc and each ch-sp around neckline. Sl st to first sc to join. (88 sc approximately)
Round 2: Ch 1, sc in each sc around. Sl st to join.
Fasten off and weave in all ends.
Bottom Edge (Optional)
If you prefer a more finished look at the bottom edge:
Join yarn at center back with sl st to any ch-sp.
Round 1: Ch 1, sc in each dc and each ch-sp around. Sl st to join.
Fasten off and weave in ends.
Customization Tips for Your Shrug
For a Longer Body: Add additional rounds after the armhole division before fastening off.
For Shorter or Longer Sleeves: Adjust the number of rounds between increase rounds. Fewer rounds between increases creates a more dramatic flare faster.
For a Tighter Neckline: Use a smaller hook for the neckline border rounds, or add an additional round of single crochet.
For Different Sizes: Add or subtract mesh squares from your foundation chain in multiples of 2. Each additional mesh square adds approximately 1 inch to the circumference.
Styling Your Finished Shrug
This fishnet bell sleeve shrug is incredibly versatile. Here are some of my favorite ways to wear it:
Pair it with a fitted tank top and high-waisted jeans for an effortlessly cool daytime look. Layer it over a slip dress for evening events. Wear it with a bandeau top for festival season. Throw it over a simple bodysuit for a night out.
The black colorway goes with everything, but imagine this in cream over a black dress, or in a deep burgundy for fall.
Troubleshooting Common Issues
My mesh squares look uneven: Check your tension. Try to keep your chains loose and your double crochets consistent. Blocking will also help even things out.
The sleeves are too tight at the upper arm: Add an extra increase round early in the sleeve, around Round 3 or 4.
The neckline is too wide: Work an additional round of single crochet at the neckline, or use a smaller hook for the border.
My shrug is curling: This can happen with tight tension. A light steam blocking usually solves this.
Care Instructions
Lay flat to dry after hand washing in cool water with mild detergent. Cotton will relax slightly after washing, so keep that in mind. Steam blocking works beautifully on this piece and really opens up the mesh pattern.
I hope you love making this black fishnet crochet bell sleeve shrug as much as I loved designing it! There is something so satisfying about watching those mesh squares build up and seeing the dramatic bell sleeves take shape. If this pattern spoke to you, save it to your Pinterest boards so you can find it easily when you are ready to cast on. And please, leave a comment below if you make one! I would absolutely love to see your finished shrug and hear which color you chose.
