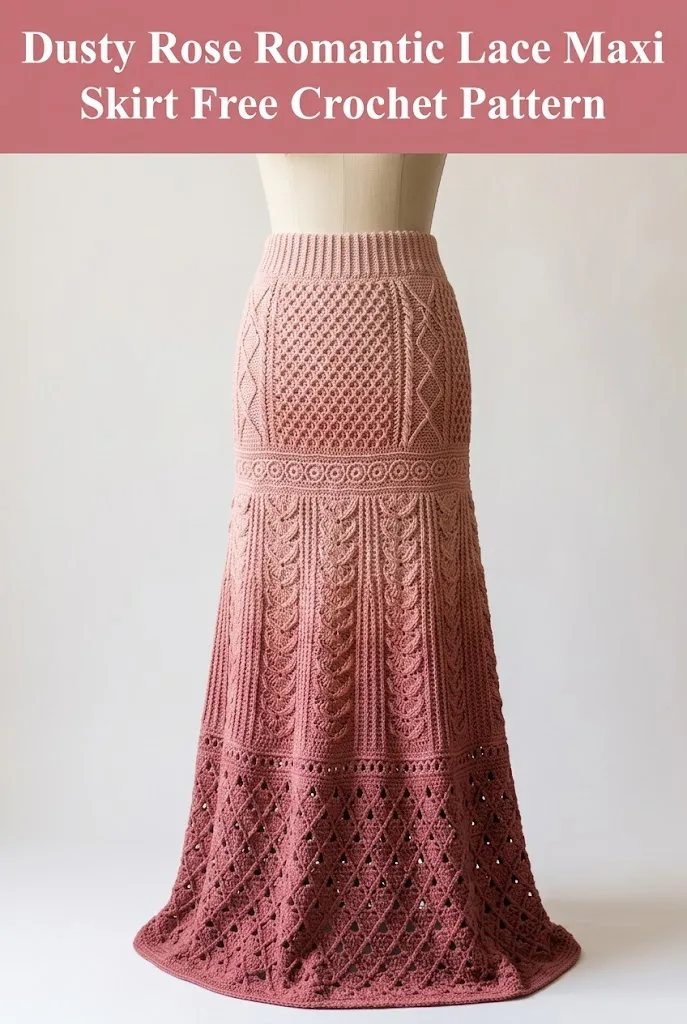
This GORGEOUS crochet maxi skirt is one of those projects that looks like you spent months perfecting it, but the construction is WAY more approachable than it appears! I am SO excited to share this pattern with you because it combines multiple stunning stitch patterns into one show-stopping piece that will have everyone asking where you bought it. The romantic ombré effect from dusty rose to deep wine creates instant drama, and the whole skirt works up in sections so you never get bored. Whether you are making this for a special occasion or just want to feel like a bohemian goddess on a random Tuesday, this crochet maxi skirt pattern delivers serious impact.
Why You Will Love This Crochet Maxi Skirt Pattern
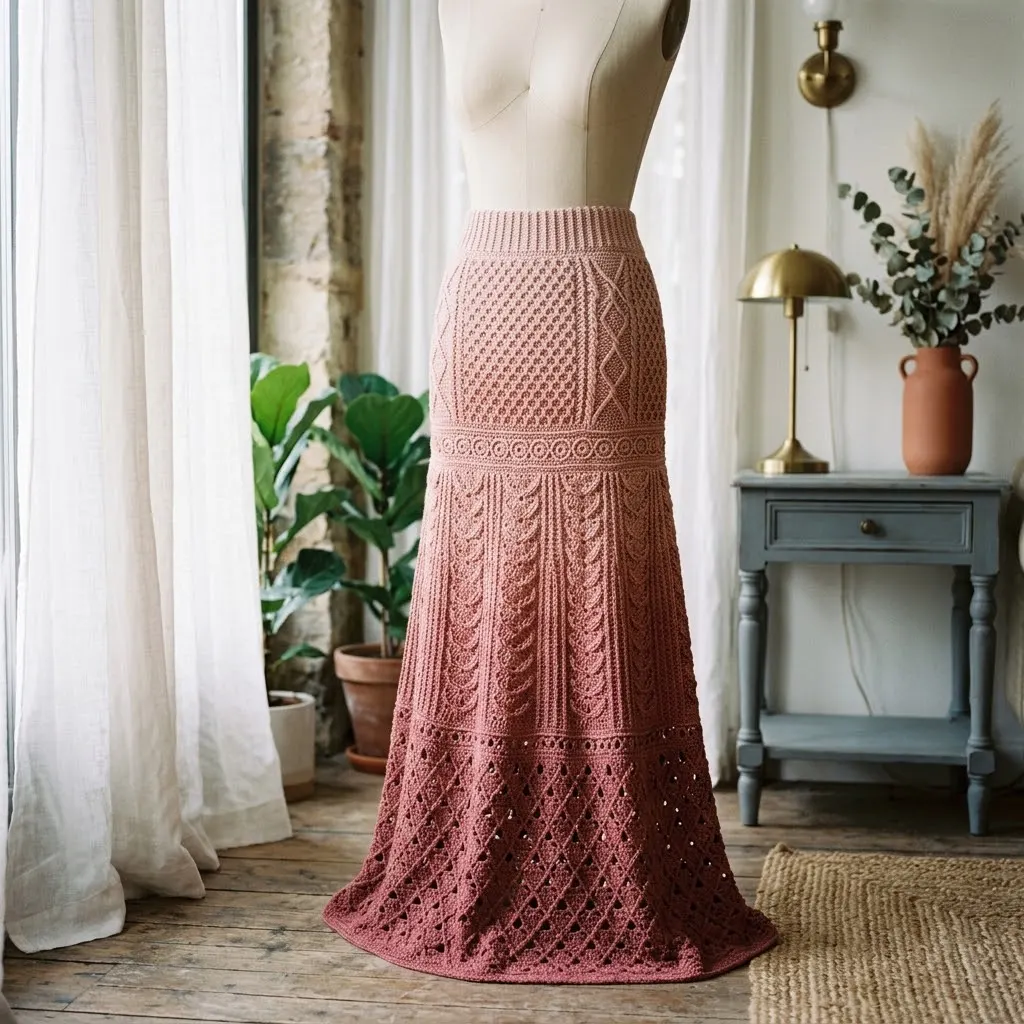
This romantic lace maxi skirt brings together everything I adore about crochet garment making. The fitted waistband flows into intricate textured panels, then opens up into a breathtaking lace hem. Each section uses different techniques, which keeps the project interesting from start to finish.
The ombré colorway is achieved by working with gradient cake yarn or by switching between coordinating solid colors. Either approach creates that seamless flow from soft dusty rose at the waist to rich wine at the hem.
What makes this crochet pattern special is how the construction flatters almost every body type. The ribbed waistband cinches naturally, the hip section offers gentle structure, and the flared lace hem adds movement and romance.
Skill Level
Intermediate to Advanced
This maxi skirt crochet pattern requires comfort with multiple stitch techniques, reading your work, and basic garment construction. If you have made a few accessories and maybe one simple garment, you are ready to tackle this. I will walk you through each section step by step.
Finished Measurements
The pattern below is written for Size Small with adjustments noted for customization.
Materials Needed
Yarn
Yarn substitution tip: Look for yarns with good drape and minimal memory. Stiff acrylic will not flow the same way. Bamboo, cotton, or bamboo cotton blends work beautifully for this romantic lace maxi skirt.
Hook
Always check your gauge and adjust hook size as needed.
Notions
Gauge
Main body gauge with 4.0mm hook:
18 stitches and 10 rows = 4 inches in double crochet
Ribbed waistband gauge with 3.5mm hook:
20 stitches and 18 rows = 4 inches in back loop single crochet
Take the time to make a gauge swatch. This is a garment, and fit matters. If your gauge is off, your skirt will be too tight or too loose.
Abbreviations and Stitch Definitions
Let me walk you through every stitch we will use. Even if you know these, a quick refresher never hurts.
Pattern Notes
Read these before starting. They will save you confusion later.
1. Construction: This skirt is worked in four distinct sections, all joined together. The waistband is worked flat in rows, then seamed. The hip panel, mid panel, and lace hem are all worked in joined rounds.
2. Color changes: If using solid colors, change colors at the beginning of a new section. If using gradient yarn, the color change happens naturally.
3. Stitch markers: Place markers every 25 stitches when working in the round. This helps you catch mistakes early.
4. Stretchy bind off: The waistband needs to stretch over your hips. Keep your tension relaxed when seaming.
5. Blocking: Block each section lightly before joining. Block the completed skirt for best drape.
The Pattern
Section 1: Ribbed Waistband
The waistband is worked flat in rows, then seamed to create a stretchy tube.
Using 3.5mm hook, ch 21.
Row 1: Sc in 2nd ch from hook and in each ch across. (20 sc)
Row 2: Ch 1, turn. Sc in BLO of each st across. (20 sc)
Rows 3 through 130: Repeat Row 2.
Adjust the total rows for your waist measurement. Each 10 rows equals approximately 2 inches. For a 28 inch waist, work 130 rows. For a 30 inch waist, work 140 rows.
Joining the waistband: Fold the strip so Row 1 meets Row 130. Using a tapestry needle and whip stitch, seam the short ends together through both loops. Turn right side out.
Picking up stitches for the hip panel: With 4.0mm hook and RS facing, join yarn at the seam. Work evenly around the long edge of the waistband.
Setup Round: Ch 1, work 130 sc evenly spaced around the lower edge of the waistband, sl st to first sc to join. (130 sc)
Place marker at join. This is now the center back.
Section 2: Textured Hip Panel
This section creates the beautiful diamond and honeycomb texture visible in the upper portion of the skirt.
Round 1: Ch 3 (counts as dc throughout), dc in each st around, sl st to top of ch-3 to join. (130 dc)
Round 2: Ch 3, FPdc around next st, *dc in next st, FPdc around next st*, repeat from * to * around, sl st to join. (65 dc, 65 FPdc)
Round 3: Ch 3, BPdc around next st (the FPdc from below), *dc in next st, BPdc around next st*, repeat from * to * around, sl st to join. (130 sts)
Rounds 4 through 7: Repeat Rounds 2 and 3 alternately, maintaining the raised rib pattern.
Honeycomb Section:
Round 8: Ch 3, dc in next 4 sts, *ch 1, sk 1, dc in next 5 sts*, repeat from * to * around, adjusting last repeat as needed to end evenly, sl st to join.
Round 9: Ch 3, dc in next 3 sts, *ch 1, sk 1, dc in ch-1 sp, ch 1, sk 1, dc in next 3 sts*, repeat from * to * around, sl st to join.
Rounds 10 through 15: Continue the honeycomb pattern, shifting the chain spaces by one stitch each round to create the diagonal diamond effect.
Round 16: Ch 3, dc in each st and ch-1 sp around. (130 dc)
Rounds 17 through 24: Repeat the post stitch ribbing pattern from Rounds 2 and 3.
Increase Round (Round 25): Ch 3, dc in next 4 sts, 2 dc in next st, *dc in next 5 sts, 2 dc in next st*, repeat from * to * around, sl st to join. (approximately 152 dc)
Section 3: Mid Panel with Fan Motifs
This section creates the gorgeous vertical columns and scalloped texture.
Round 1: Ch 3, dc in each st around, sl st to join. (152 dc)
Round 2 (Fan Setup): Ch 3, dc in next 6 sts, *sk 2 sts, 5 dc in next st (fan made), sk 2 sts, dc in next 7 sts*, repeat from * to * around, adjusting as needed, sl st to join.
Rounds 3 through 8: Continue building on the fan pattern. Work dc columns between fans. On each round, work the center dc of each fan with an additional increase to maintain the flare.
Round 9: Ch 1, sc in each st around, working 3 sc in the center dc of each fan. Sl st to join. Count your stitches. You should have approximately 170 to 180 sts.
Rounds 10 through 20: Repeat the fan and column pattern, gradually increasing stitch count to approximately 200 sts by Round 20.
Border Round: Ch 4, sk 1 st, *dc in next st, ch 1, sk 1 st*, repeat from * to * around, sl st to 3rd ch of ch-4 to join.
Section 4: Open Diamond Lace Hem
This is the dramatic finale of your romantic lace maxi skirt crochet pattern.
Round 1: Ch 5 (counts as dc plus ch-2), sk next ch-1 sp, *dc in next dc, ch 2, sk next ch-1 sp*, repeat from * to * around, sl st to 3rd ch of ch-5 to join.
Round 2: Sl st into ch-2 sp, ch 3, 2 dc in same sp, ch 3, *3 dc in next ch-2 sp, ch 3*, repeat from * to * around, sl st to join.
Round 3: Sl st to center dc of 3-dc group, ch 3, 4 dc in next ch-3 sp, *dc in center dc of next 3-dc group, 4 dc in next ch-3 sp*, repeat from * to * around, sl st to join.
Rounds 4 through 12: Continue the open diamond lattice pattern. Work 3 dc clusters separated by ch-3 spaces, shifting the position each round to create the diagonal lattice effect visible in the finished piece.
Round 13 (Increase Round): Work pattern as established, but add an extra chain in each ch-3 space (making ch-4 spaces) to increase the flare.
Rounds 14 through 22: Continue lattice pattern with ch-4 spaces.
Final Border:
Round 23: Ch 1, *sc in each dc, 4 sc in each ch-4 sp*, repeat from * to * around, sl st to join.
Round 24: Ch 1, sc in first st, *ch 3, sk 2 sts, sc in next st*, repeat from * to * around, sl st to join.
Round 25: Sl st into ch-3 sp, ch 1, *5 dc in ch-3 sp (shell), sc in next ch-3 sp*, repeat from * to * around, sl st to join.
Fasten off. Weave in all ends.
Finishing Your Romantic Lace Maxi Skirt
Blocking
Fill a basin with cool water and a drop of wool wash or gentle detergent. Submerge your skirt and let it soak for 15 minutes. Do not agitate or wring. Gently press out excess water and roll in a clean towel.
Lay flat on blocking mats. Pin the lace hem open so each shell and lattice point is visible. Allow to dry completely, which may take 24 to 48 hours.
Optional Elastic Waistband
For extra security, you can thread 1 inch elastic through the waistband tube. Cut elastic to your comfortable waist measurement minus 1 inch. Use a safety pin to thread through, overlap ends, and stitch securely.
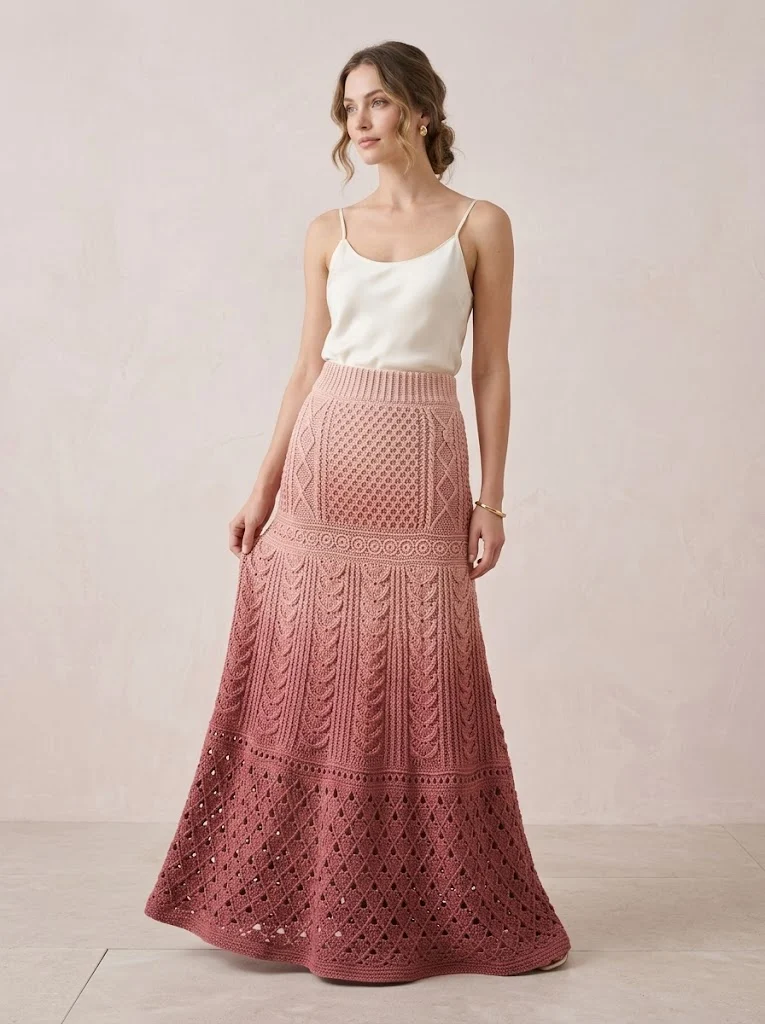
Styling Your Crochet Maxi Skirt
This romantic lace maxi skirt pairs beautifully with a simple fitted tank or cropped sweater. The ombré colorway means you can pull accent colors from either the dusty rose tones or the deeper wine shades.
For a bohemian look, add layered necklaces and sandals. For something more polished, try a tucked blouse and heeled boots.
Customization Ideas
Make it shorter: Stop after Section 3 for a midi length, or after Section 2 for a pencil skirt.
Change the color story: Try cream to sage, or light gray to charcoal for a more neutral palette.
Add a liner: Sew a simple slip from jersey fabric for modesty under the lace hem.
Troubleshooting Common Questions
My waistband is too tight. Add more rows to Section 1 before seaming. Each additional row adds length to the circumference.
The lace hem is curling. This usually means your tension is too tight. Try going up a hook size for Section 4.
My stitch count keeps changing. Place markers every 20 to 25 stitches and count at the end of each round. Catching mistakes early is much easier than frogging entire sections.
I really hope you love making this dusty rose romantic lace maxi skirt as much as I loved designing it. If you give this crochet pattern a try, please save it to your Pinterest boards so you can find it whenever inspiration strikes. And I would absolutely love to see your finished skirt, so drop a comment below or tag me on social media when you complete yours!
