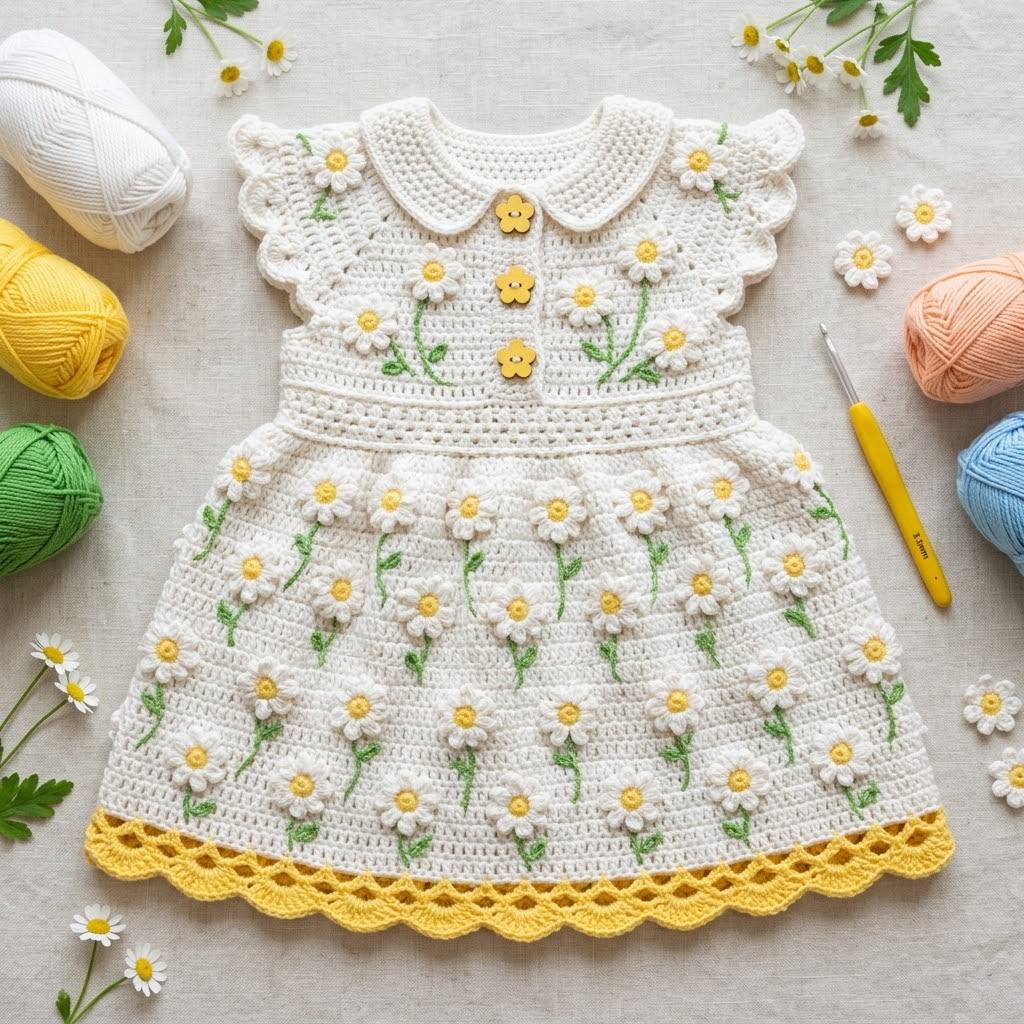
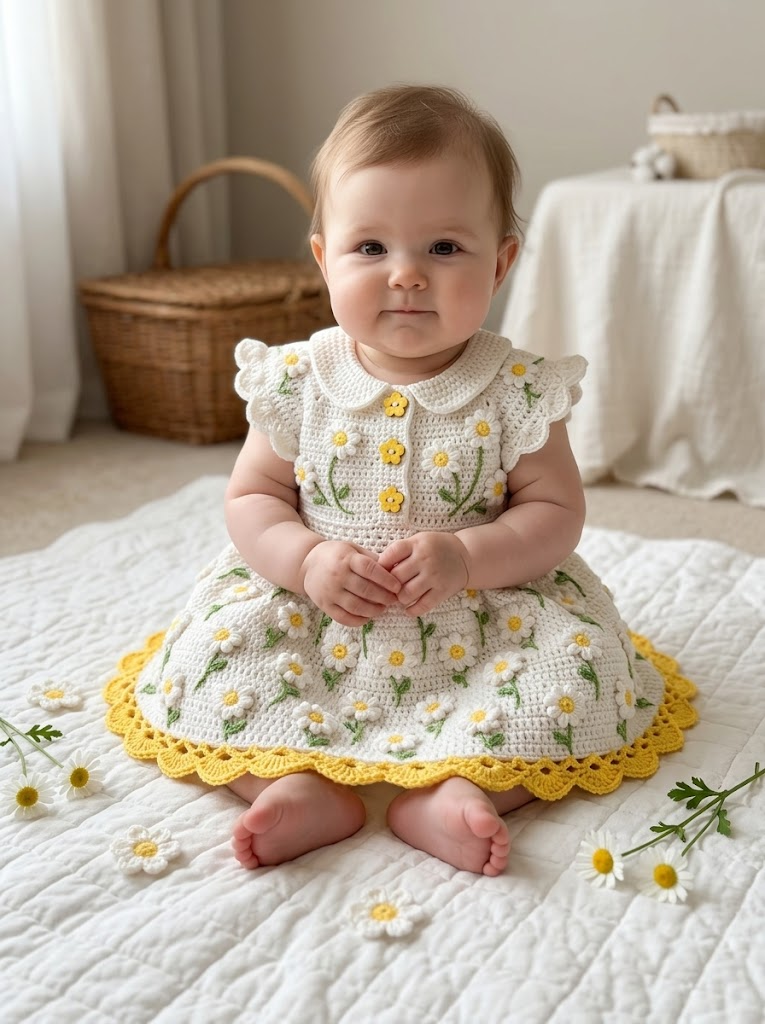
There is something magical about a baby dress covered in cheerful daisies. This Sunny Daisy Baby Dress crochet pattern combines a classic silhouette with sweet floral details that will make everyone smile. The cream base keeps it timeless while those bright yellow centers and green embroidered stems add just the right pop of whimsy.
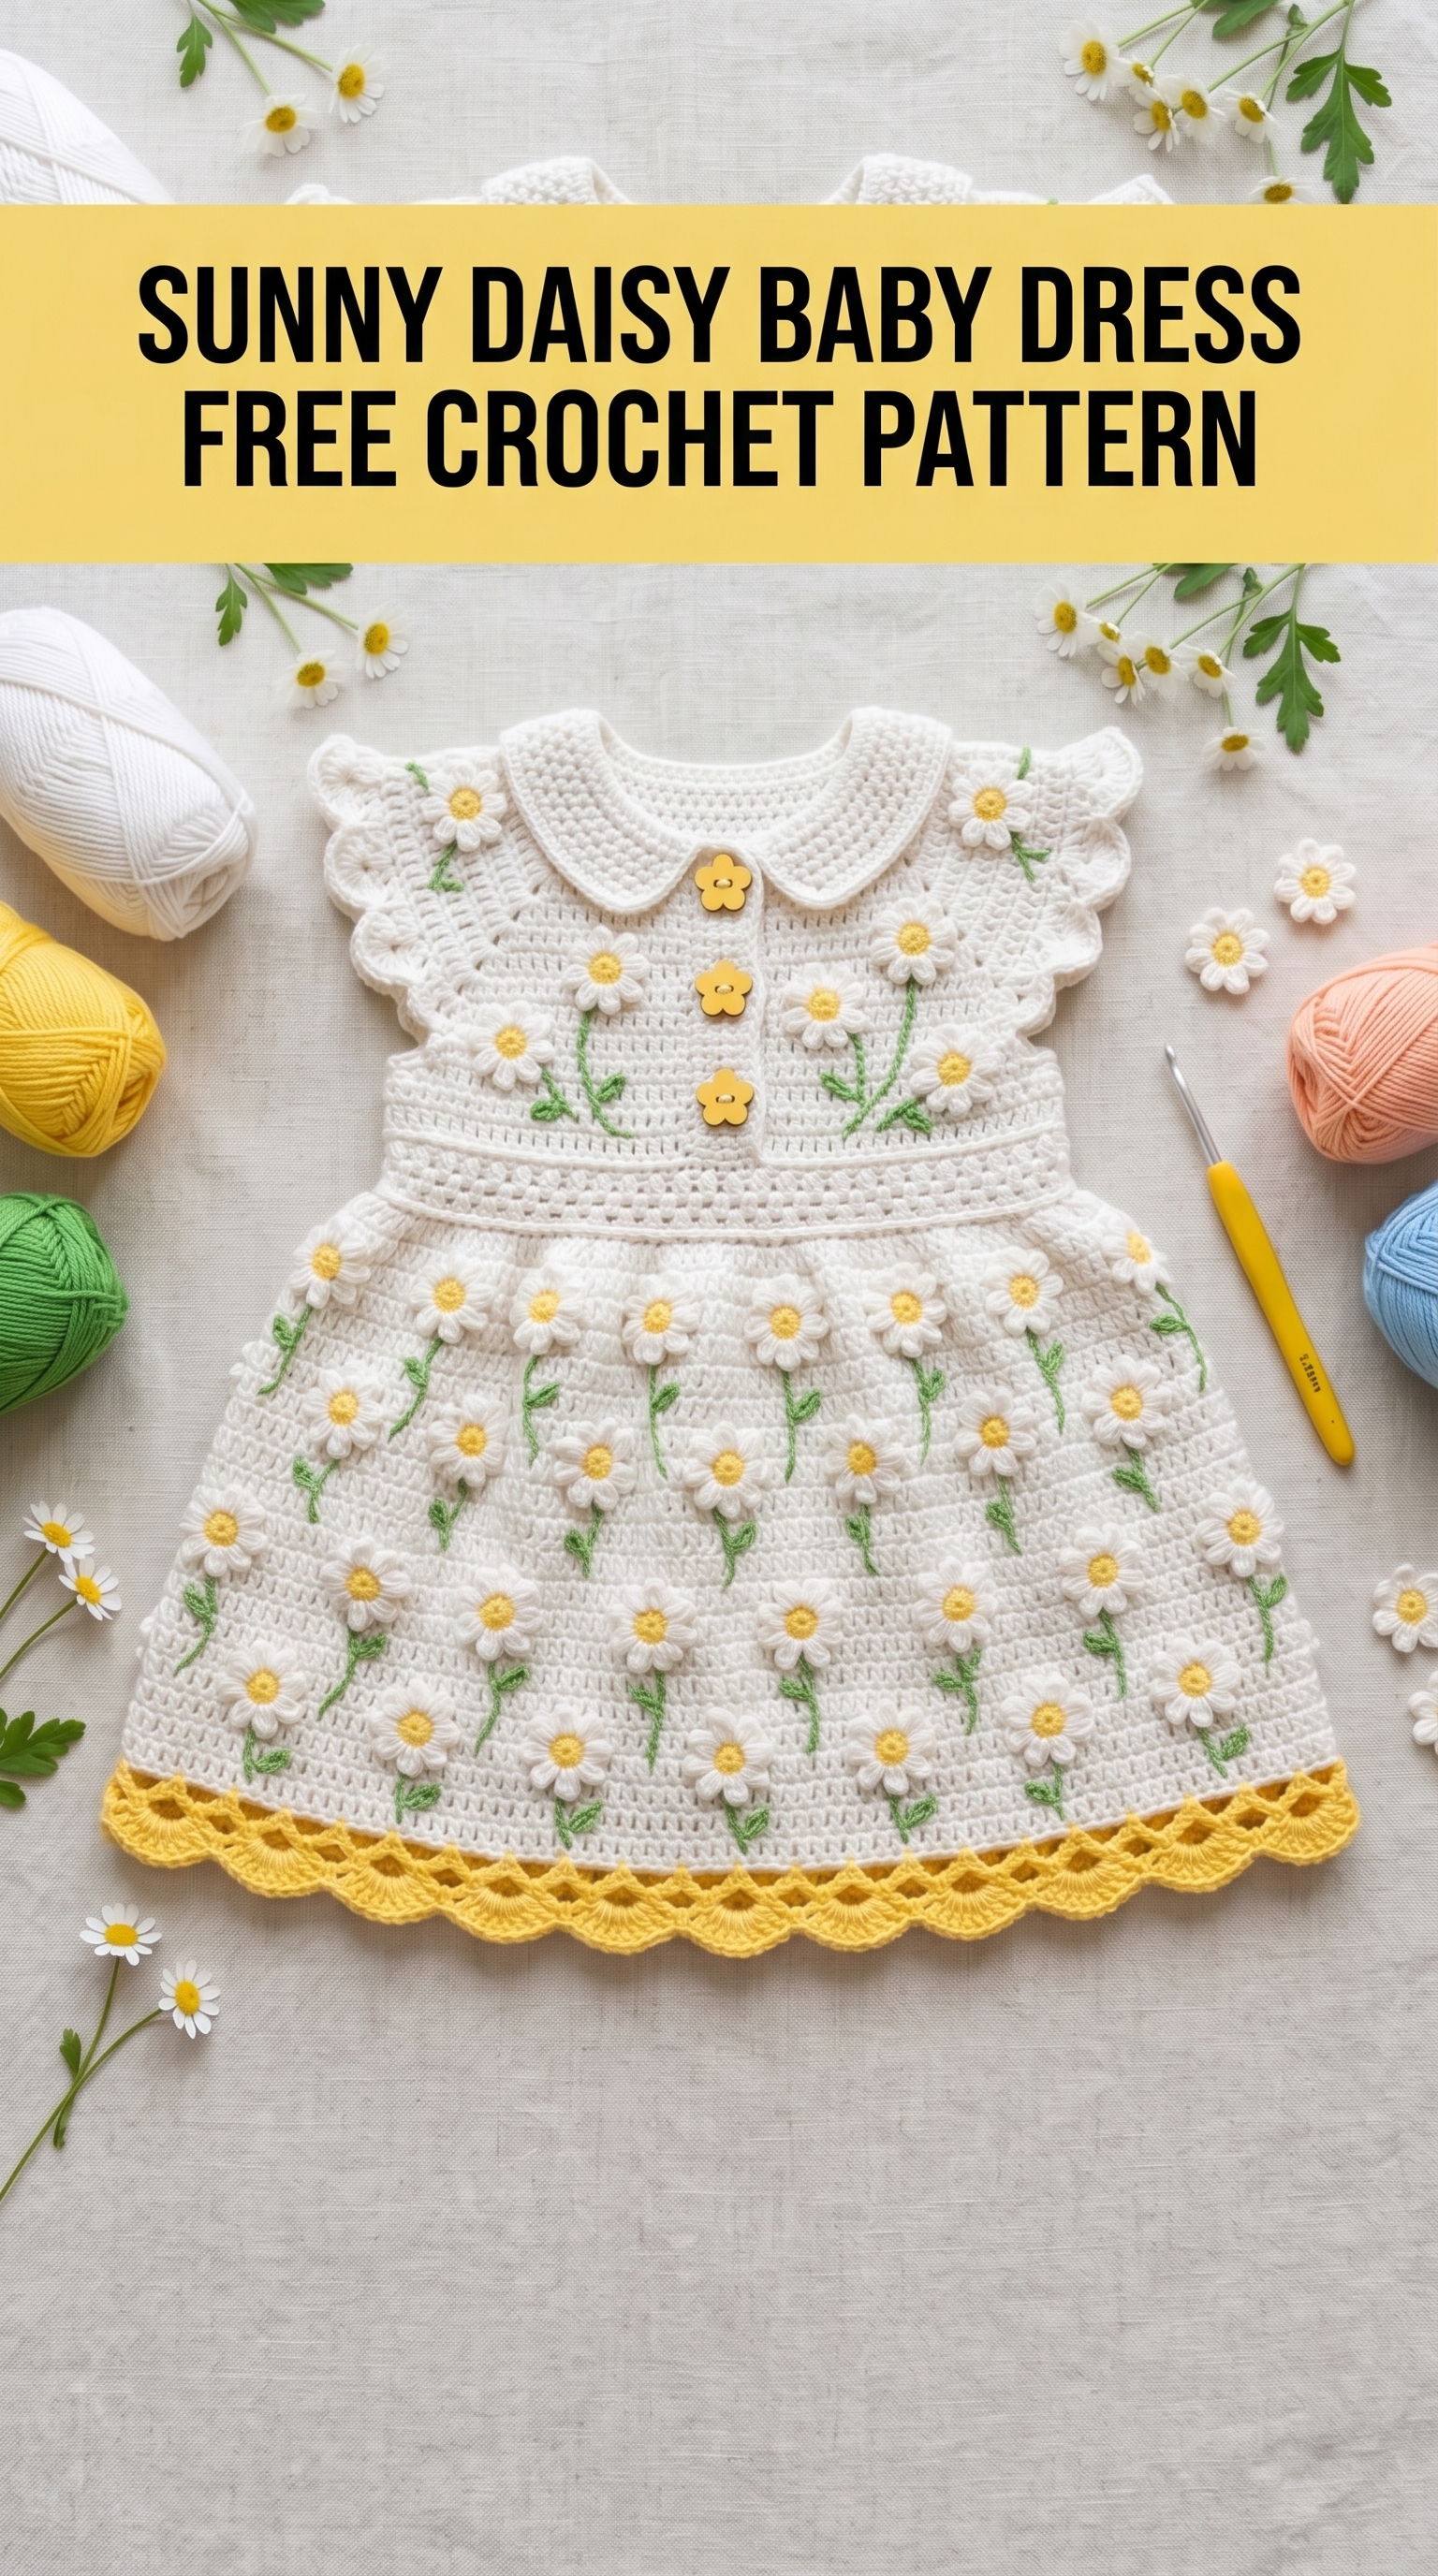
I designed this dress for confident beginners and intermediate crocheters alike. If you can work basic stitches in the round and follow a simple repeat, you can absolutely make this. The daisy appliqués look impressive but they are actually quite simple once you get the hang of them. Let me walk you through every single step.
Why You Will Love This Crochet Pattern
This baby dress works up faster than you might expect. The body uses straightforward stitches in rows and rounds. The daisies are made separately and sewn on, which means you can customize placement however you like. No complicated colorwork or confusing charts here.
The Peter Pan collar adds vintage charm. Those sweet cap sleeves with scalloped edges frame tiny shoulders beautifully. And that yellow scalloped hem at the bottom ties everything together perfectly.
This crochet tutorial gives you a complete roadmap from the first chain to the final stem embroidery. Nothing left to guess.
Finished Measurements
This pattern is written for size 6 to 12 months. Adjust hook size or add repeats for larger sizes.
Materials Needed
Gather these supplies before you begin. Having everything ready makes the process so much smoother.
Yarn:
Hook:
Notions:
Gauge
Gauge matters for garments. Please check yours before starting the body.
18 stitches and 20 rows = 4 inches in single crochet with 3.5mm hook.
If your gauge is off, adjust your hook size. Too many stitches per inch means go up a hook size. Too few means go down.
Abbreviations and Stitch Definitions
Let me define every stitch before we dive in. Refer back here anytime you need a refresher.
Pattern Notes Before You Begin
Read these tips first. They will save you confusion later.
1. The bodice is worked flat in rows, then joined for the skirt which is worked in the round.
2. Sleeves are added after the bodice is complete. They are worked directly onto the armhole edges.
3. Daisies are made separately and sewn on. Make them as you go or batch them at the end. Your choice.
4. Stems and leaves are embroidered using simple chain stitch embroidery. I will explain this step by step.
5. Turning chains count as a stitch unless noted otherwise.
6. The back has a button placket. This makes dressing baby so much easier.
Step by Step Crochet Pattern
Part 1: Back Bodice Panel
With MC and 3.5mm hook, ch 42.
Row 1 (RS): Sc in 2nd ch from hook, sc in each ch across. (41 sts)
Row 2: Ch 1, turn, sc in each st across. (41 sts)
Rows 3 through 18: Repeat Row 2. You should have 18 rows total of sc fabric.
Shape Armholes:
Row 19: Ch 1, turn, sl st in first 4 sts, ch 1, sc in same st as last sl st, sc in next 32 sts, leave remaining 4 sts unworked. (33 sts)
Row 20: Ch 1, turn, sc dec over first 2 sts, sc across to last 2 sts, sc dec. (31 sts)
Row 21: Repeat Row 20. (29 sts)
Rows 22 through 26: Ch 1, turn, sc in each st across. (29 sts)
Shape Right Back Neck:
Row 27: Ch 1, turn, sc in first 8 sts, leave remaining sts unworked. (8 sts)
Row 28: Ch 1, turn, sc dec, sc across. (7 sts)
Row 29: Ch 1, turn, sc across to last 2 sts, sc dec. (6 sts)
Fasten off. This is your right shoulder.
Shape Left Back Neck:
Skip center 13 sts on Row 26. Join MC with sl st in next st.
Row 27: Ch 1, sc in same st and next 7 sts. (8 sts)
Row 28: Ch 1, turn, sc across to last 2 sts, sc dec. (7 sts)
Row 29: Ch 1, turn, sc dec, sc across. (6 sts)
Fasten off.
Part 2: Front Bodice Panel
Work exactly as Back Bodice through Row 22.
Shape Front Neck:
Row 23: Ch 1, turn, sc in first 10 sts, leave remaining sts unworked. (10 sts)
Row 24: Ch 1, turn, sc dec, sc across. (9 sts)
Row 25: Ch 1, turn, sc across to last 2 sts, sc dec. (8 sts)
Row 26: Repeat Row 24. (7 sts)
Row 27: Repeat Row 25. (6 sts)
Rows 28 and 29: Ch 1, turn, sc across. (6 sts)
Fasten off.
Skip center 9 sts on Row 22. Join MC and work opposite side to match, reversing shaping.
Part 3: Joining Bodice and Working the Skirt
With RS facing, use mattress stitch or whip stitch to seam shoulders together. Seam side seams from bottom of bodice up to armhole shaping.
Join for Skirt:
Turn bodice so bottom edge faces you. Join MC at center back with sl st.
Round 1: Ch 1, sc evenly around entire bottom edge of bodice, placing approximately 82 sc total. Join with sl st to first sc. Place marker. (82 sts)
Round 2: Ch 3 (counts as dc), dc in each st around. Join with sl st to top of ch 3. (82 sts)
Rounds 3 through 6: Repeat Round 2.
Round 7 (Increase Round): Ch 3, dc in same st, *dc in next 3 sts, 2 dc in next st*. Repeat from * around, adjusting at end if needed. Join. (approximately 102 sts)
Rounds 8 through 12: Ch 3, dc in each st around. Join.
Round 13 (Increase Round): Ch 3, dc in same st, *dc in next 4 sts, 2 dc in next st*. Repeat from * around. Join. (approximately 122 sts)
Rounds 14 through 20: Ch 3, dc in each st around. Join.
Do not fasten off. Continue to hem border.
Part 4: Yellow Scalloped Hem Border
Change to Color A (yellow).
Round 1: Ch 1, sc in each st around. Join. (122 sts)
Round 2 (Scallop Round): Ch 1, sc in first st, *sk 2 sts, 5 dc in next st (shell made), sk 2 sts, sc in next st*. Repeat from * around. Join with sl st to first sc.
Round 3: Ch 3, 2 dc in same st, *sc in center dc of shell, 5 dc in next sc*. Repeat from * around, ending with 2 dc in first st. Join to top of ch 3.
Fasten off and weave in ends.
Part 5: Cap Sleeves
Join MC at center bottom of armhole with RS facing.
Round 1: Ch 1, sc evenly around armhole opening, approximately 36 sts. Join.
Round 2: Ch 3, dc in each st around. Join.
Round 3: Ch 3, dc in each st around. Join.
Round 4 (Scallop Edge): Ch 1, sc in first st, *sk 1 st, 3 dc in next st, sk 1 st, sc in next st*. Repeat from * around. Join.
Fasten off. Repeat for second sleeve.
Part 6: Peter Pan Collar
With MC, ch 58.
Row 1: Sc in 2nd ch from hook, sc across. (57 sts)
Row 2: Ch 1, turn, sc in first 2 sts, *2 sc in next st, sc in next 2 sts*. Repeat across. (approximately 75 sts)
Row 3: Ch 1, turn, sc in each st across.
Row 4: Ch 1, turn, 2 sc in first st, sc across to last st, 2 sc in last st. (77 sts)
Rows 5 and 6: Repeat Rows 3 and 4. (79 sts)
Row 7 (Scallop Edge): Ch 1, turn, sc in first st, *sk 1 st, 3 dc in next st, sk 1 st, sc in next st*. Repeat across.
Fasten off. Attach collar to neckline, centering at front with edges meeting at back opening.
Part 7: Daisy Appliqués (Make 25 to 30)
These sweet flowers are what make this dress unforgettable. Work them in batches while watching your favorite show.
With Color A (yellow) and 3.0mm hook, make a magic ring.
Round 1: Ch 1, 6 sc into ring. Pull ring closed. Join with sl st. (6 sts)
Change to Color C (white).
Round 2 (Petals): *Ch 3, sl st in 2nd ch from hook, sc in next ch, sl st in same st as join*. Repeat from * 5 more times. (6 petals)
Fasten off, leaving a long tail for sewing.
You should have a small daisy with a yellow center and 6 white petals. Adjust petal length by adding or subtracting chains if desired.
Part 8: Attaching Daisies and Embroidering Stems
Lay dress flat. Arrange daisies on skirt in staggered rows. I placed approximately 5 daisies per row across 5 rows. Pin or place as desired.
To attach: Thread yarn needle with daisy tail. Sew through center of daisy and dress fabric several times. Tack down 2 or 3 petals lightly so flower sits flat but keeps dimension. Weave in end on WS.
Embroidered Stems:
Thread needle with Color B (green). Using chain stitch embroidery, create a stem extending down from each daisy approximately 1 to 1.5 inches.
Chain stitch embroidery: Bring needle up from back, form a small loop, insert needle back near where you came up, bring needle out through the loop about 1/4 inch down. Pull gently. Repeat to create a chain line.
Leaves: At the base of some stems, work 2 small straight stitches in a V shape to suggest leaves.
Attach 3 to 4 daisies on the collar. Add a few to each sleeve edge for cohesion.
Part 9: Button Placket and Finishing
Back Button Band:
With MC, join yarn at top right back edge. Work 1 row of sc evenly down the back opening. Fasten off.
Repeat on left side, creating 3 evenly spaced buttonholes on Row 1: work to buttonhole position, ch 2, sk 2 sts, continue.
Sew buttons to correspond with buttonholes.
Weave in all remaining ends. Block gently if desired by laying flat and steaming lightly. Do not press daisies flat.
Helpful Tips for Success
Final Thoughts
This Sunny Daisy Baby Dress crochet pattern has become one of my absolute favorites to make for baby showers and special gifts. There is something about those cheerful little flowers against the creamy background that just feels like sunshine and happiness.
I hope this step by step crochet tutorial gave you everything you need to create your own version. Take your time with the daisies. Enjoy the process. And remember that handmade always carries extra love.
Thank you so much for choosing this pattern and trusting me to guide you through it. I genuinely appreciate you being here.
I would absolutely love to see your finished dress. Tag me on Instagram or share in my Facebook group so I can cheer you on. Seeing your creations makes my whole day brighter.
Happy crocheting, friend. You have got this.
