
I found this pattern tucked away in my design notes from a trip to the Florida coast three summers ago. I had sketched the basic concept while watching the tide roll in, captivated by the way sunlight bounced off coral formations just beneath the surface. The diagonal shell stitch reminded me of fish scales, the turquoise trim echoed the water, and that little starfish applique was the finishing touch that made me smile every time I looked at it.
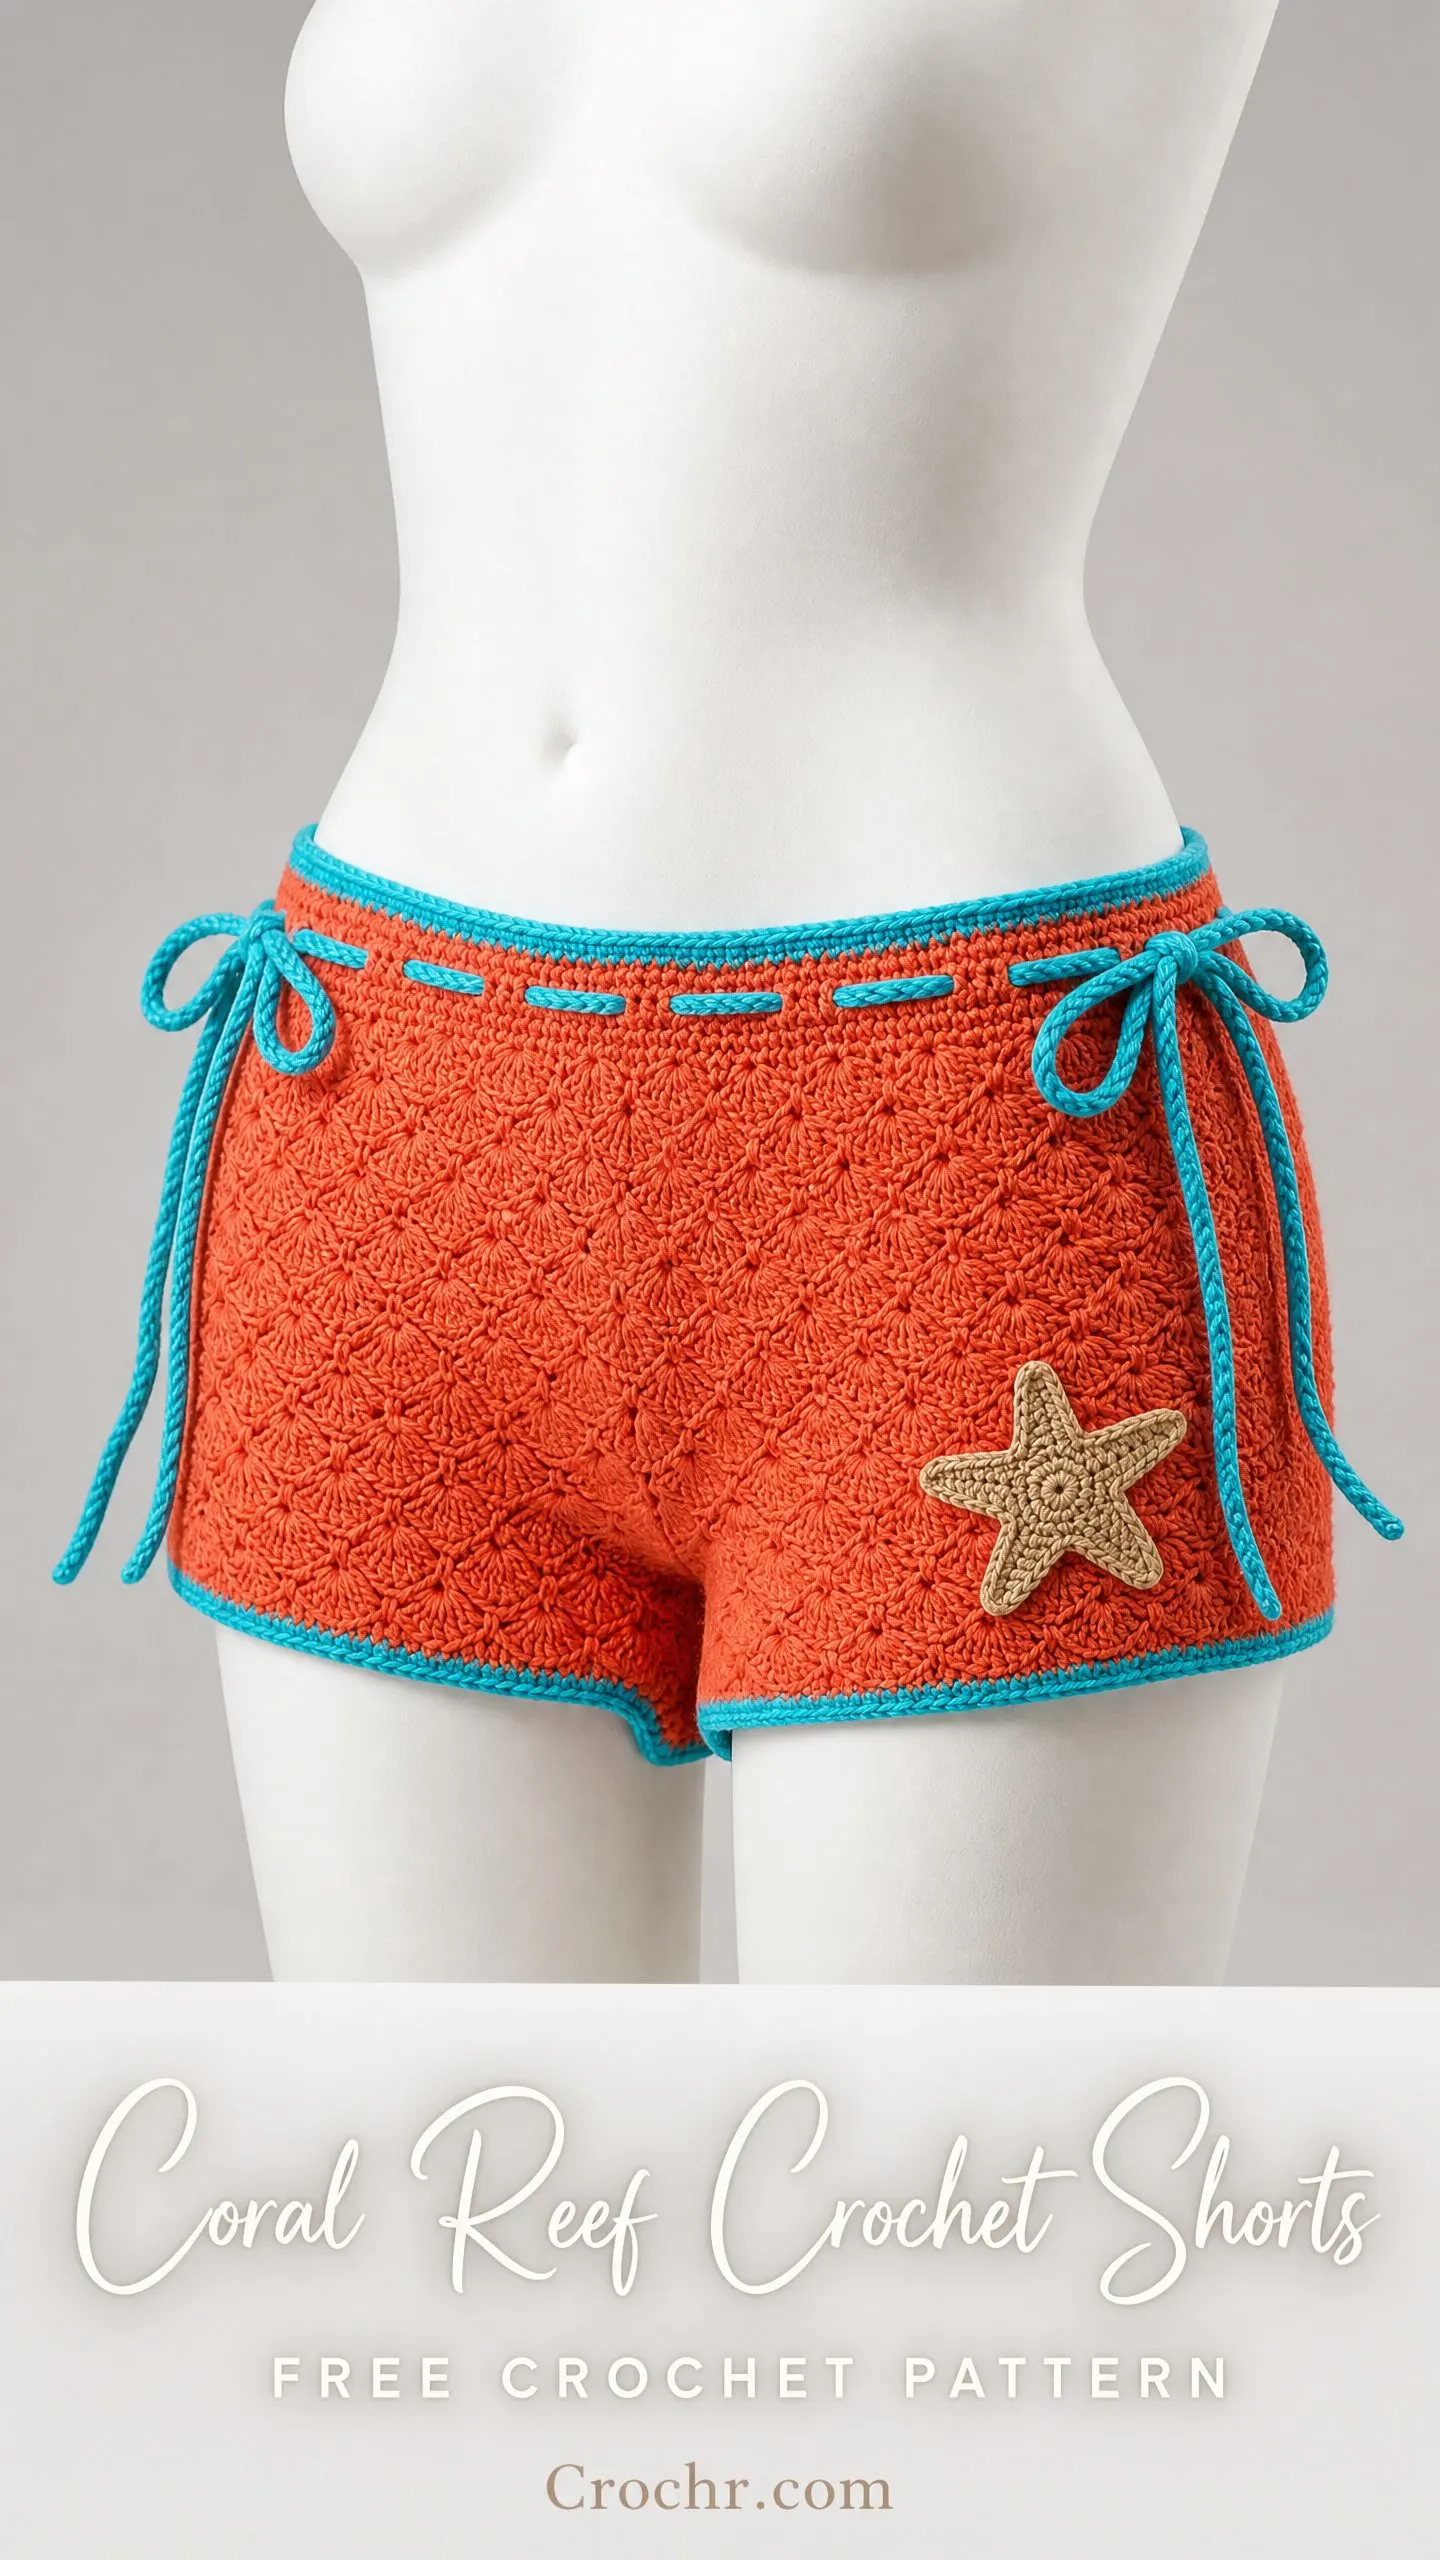
I named these the Coral Reef Shorts because they truly capture that underwater feeling. They sat unfinished in my project bag for almost two years before I finally committed to writing out every stitch. Now they are one of my absolute favorite summer makes, and I am so excited to finally share the full pattern with you.
Whether you are planning beach days, poolside lounging, or just want a fun cover-up for warm weather adventures, these shorts deliver serious style with a cozy handmade touch.
About This Crochet Pattern
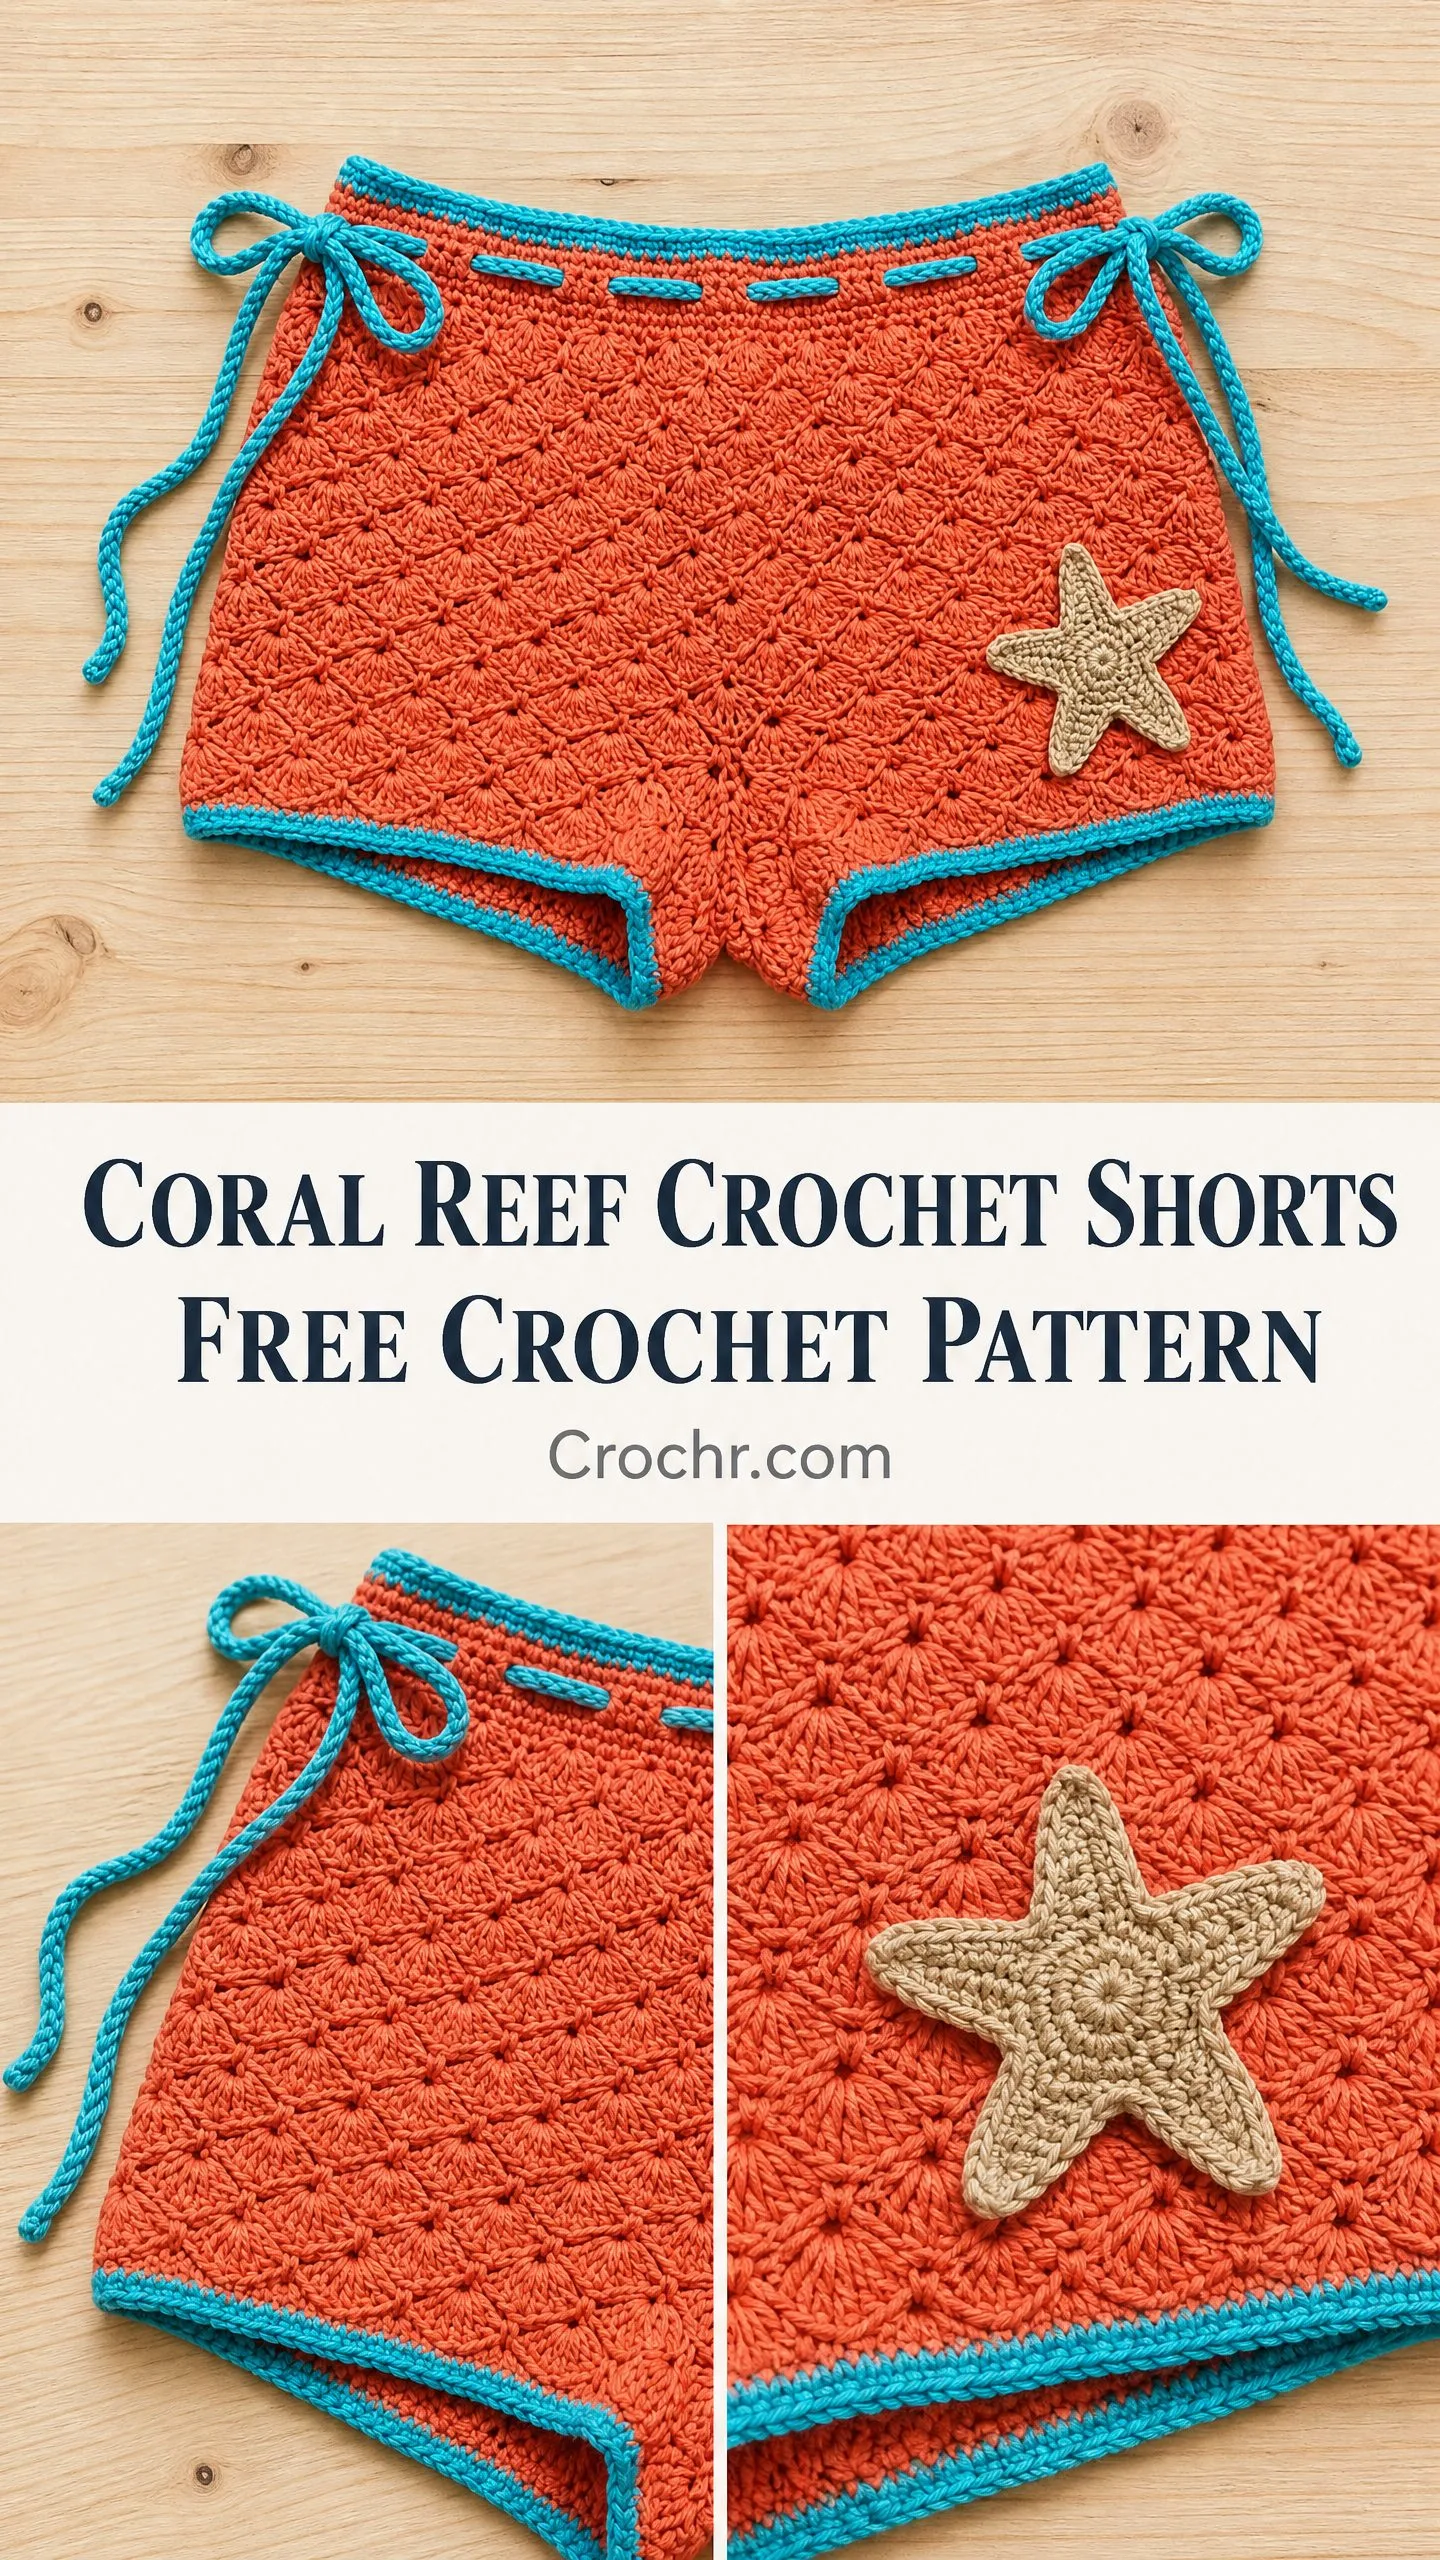
These beach-ready crochet shorts feature a stunning diagonal shell stitch that creates a diamond-like texture across the entire body. The construction is straightforward once you understand it. You work two identical flat panels, one for the front and one for the back, then seam them together at the sides and crotch. The magic happens with the adjustable turquoise drawstring cords that thread through a waistband casing and tie into adorable bows at each hip.
The skill level is intermediate, meaning you should be comfortable with shell stitches and basic seaming. If you have completed at least two or three crochet projects and can read stitch counts confidently, you will manage this pattern beautifully with a little patience. The trickiest parts are working the diagonal shell pattern and constructing the waistband casing, but I will walk you through every single step.
Time estimate: Plan for 10 to 16 hours total for the body panels, seaming, edging, cord, and starfish applique combined. If you block carefully, add another 2 hours for that process.
Finished Measurements
This pattern is written for a size Medium with the following finished dimensions:
Size customization tips are included at the end of the pattern so you can adjust for Small or Large sizing.
Materials You Will Need
Yarn:
Hooks:
Notions:
Yarn Suggestions
Lion Brand Pound of Love (worsted weight, 100% acrylic, 1020 yards per 16 oz skein): Use 1 skein in Coral (Color A) and partial skeins in Turquoise (Color B) and Camel (Color C). This yarn has excellent stitch definition and washes well, making it ideal for beachwear.
Paintbox Yarns Simply DK used doubled (DK weight doubled behaves as worsted, 100% acrylic, 140 yards per 50 g ball): Use 3 balls in Coral, 1 ball in Turquoise, and a partial ball in Camel. Doubling provides the body and drape appropriate for these shorts.
We Are Knitters The Wool (worsted weight, 100% Peruvian wool, 153 yards per 100 g ball): Use 3 balls in Coral, 1 ball in Turquoise, and a partial ball in Ecru. Note that wool requires hand washing and may have limited stretch compared to acrylic blends.
Substitution note: Any smooth worsted weight yarn with low halo will display the diagonal shell stitch clearly. Avoid fuzzy or bouclé yarns. Yarns with at least 20 percent nylon or acrylic content will hold their shape better after repeated wear. Always swatch to verify gauge before beginning.
Gauge
16 stitches and 10 rows = 4 inches (10 cm) in the diagonal shell stitch pattern using Color A and a J-10 / 6.0 mm hook, blocked.
To make a gauge swatch: Chain 26. Work rows of the diagonal shell stitch pattern for at least 12 rows. Block the swatch. Measure the center 4 inches in both directions. Adjust hook size as needed. Use one hook size larger if gauge is too tight. Use one hook size smaller if gauge is too loose.
Gauge is critical for fit. Please do not skip the swatch.
Abbreviations
Special Stitches for the Coral Reef Crochet Shorts
Shell Stitch
Work 5 double crochet (dc) stitches all into the same stitch or space. This creates a fan-shaped cluster.
Diagonal Shell Stitch Pattern
This pattern is worked flat over a multiple of 6 stitches plus 2.
Setup row (RS): Ch 1, sc in first st, skip 2 sts, shell in next st, skip 2 sts, sc in next st. Repeat from "skip 2 sts" across, ending sc in last st. Turn.
Row 1 (WS): Ch 3 (counts as first dc here and throughout), 2 dc in first sc (half shell at beginning of row), skip 2 dc, sc in next dc (center dc of shell), skip 2 dc, shell in next sc. Repeat "skip 2 dc, sc in center dc, skip 2 dc, shell in next sc" across, ending skip 2 dc, sc in center dc of last shell, skip 2 dc, 3 dc in last sc (half shell at end of row). Turn.
Row 2 (RS): Ch 1, sc in first dc, skip 2 dc, shell in next sc, skip 2 dc, sc in next dc (center dc of shell). Repeat "skip 2 dc, shell in next sc, skip 2 dc, sc in center dc of shell" across, ending shell in last sc, skip 2 dc, sc in top of t-ch. Turn.
Repeat Rows 1 and 2 for pattern.
Understanding the diagonal effect: Because each shell is worked into the sc from two rows below, and each sc is worked into the center of the shell from two rows below, the shells advance diagonally across the fabric with every two-row repeat. This creates the defining diamond texture of these shorts.
Starfish Applique
Worked in Color C using the I-9 / 5.5 mm hook.
Magic ring.
Round 1: Ch 1, 10 sc into ring, sl st to first sc to join. (10 sc)
Round 2: Ch 1, 2 sc in each st around, sl st to join. (20 sc)
Arms (make 5): For each arm, sl st into next st. Ch 10. Starting in second ch from hook: sc, hdc, dc, dc, hdc, sc, sc, sc. Sl st back into the base stitch at the center disk. This completes one arm. Repeat for all 5 arms, spacing them evenly around the 20-stitch disk (skip 3 sts between arm bases).
Fasten off. Leave a 12-inch tail for sewing to the shorts.
Twisted Cord
Cut 6 strands of Color B each measuring 3.5 yards (3.2 m). Hold all 6 strands together. Anchor one end to a door handle or have a helper hold it. Twist the strands clockwise until they are tightly twisted and begin to kink back on themselves when tension is released slightly. Fold the twisted length in half and allow it to twist back on itself, holding the two ends together. Knot both ends to secure. This produces one cord approximately 48 to 54 inches (122 to 137 cm) long after twisting. Make 2 cords total.
Alternatively, you may use a purchased twisted cord or braided rope in turquoise, 0.25 inch (6 mm) diameter.
Pattern Notes Before You Begin
The shorts are worked as two flat rectangular panels (front and back) that are identical. Each panel is shaped with decreases at the bottom corners to create curved leg openings. The panels are seamed at the sides with a small gap left at the top of each side seam to allow the drawstring cord to exit.
The waistband casing is created by folding over the top edge and slip-stitching down from the wrong side, then threading the cord through.
The right side of the diagonal shell stitch is the row that begins with ch 1 and sc.
The crotch seam is worked after the two panels are complete. The bottom edges of both panels are seamed together for approximately 3 inches (7.5 cm) at the center to form the crotch.
Color B is used only for edging, the waistband, and the drawstring cord. The body is entirely Color A.
Step by Step Crochet Tutorial: Front Panel
Foundation: Using Color A and J-10 hook, ch 74.
Row 1 (RS, setup row): Sc in second ch from hook (ch skipped does not count as st), skip 2 ch, shell (5 dc) in next ch, skip 2 ch, sc in next ch. Repeat from "skip 2 ch" across, ending sc in last ch. Turn. (73 sts)
Row 2 (WS): Ch 3, 2 dc in first sc (half shell, 3 dc total at beg), skip 2 dc, sc in center (3rd) dc of shell, skip 2 dc, shell in next sc. Repeat across, ending skip 2 dc, sc in center dc of last shell, skip 2 dc, 3 dc in last sc (half shell). Turn. (73 sts)
Row 3 (RS): Ch 1, sc in first dc (top of first half shell), skip 2 dc, shell in next sc, skip 2 dc, sc in center dc of next full shell. Repeat across, ending shell in last sc, skip 2 dc, sc in top of t-ch. Turn. (73 sts)
Repeat Rows 2 and 3 for pattern.
Continue in diagonal shell stitch pattern (alternating Rows 2 and 3) until panel measures 9 inches (23 cm) from foundation, ending after a RS row. You should have worked approximately 22 to 24 rows total.
CHECKPOINT 1: The piece should measure approximately 9 inches (23 cm) tall and 18 to 18.5 inches (46 to 47 cm) wide.
Leg Shaping for Front Panel
The bottom corners are decreased to create the rounded leg openings.
Decrease Row A (RS): Ch 1, sl st across first 6 sts, sc in next sc of pattern, continue in diagonal shell pattern across until 6 sts remain, sc in next sc, leave remaining 6 sts unworked. Turn. (61 sts)
Decrease Row B (WS): Ch 3, 2 dc in first sc (half shell), continue in pattern across, ending 3 dc in last sc (half shell). Turn. (61 sts)
Decrease Row C (RS): Ch 1, sl st across first 6 sts, sc in next sc, continue in diagonal shell pattern across until 6 sts remain, sc in next sc, leave remaining 6 sts unworked. Turn. (49 sts)
Decrease Row D (WS): Ch 3, 2 dc in first sc (half shell), continue in pattern across, ending 3 dc in last sc (half shell). Turn. (49 sts)
Work 2 more rows in pattern without decreasing. (49 sts)
Fasten off Color A. Weave in ends on WS.
Back Panel
Work the back panel exactly as the front panel, following all instructions above from the foundation through the leg shaping.
CHECKPOINT 2: Both panels should be identical. Lay them flat and verify dimensions match: approximately 18 to 18.5 inches (46 to 47 cm) wide and approximately 10.5 inches (27 cm) tall including leg shaping.
Seaming the Panels Together
Place the front and back panels with wrong sides together (RS facing outward on both sides).
With Color B and yarn needle, use a whipstitch or slip stitch seam along each side edge. Begin seaming from the bottom leg opening corner and work upward toward the waistband edge.
Important: Leave the top 2.5 inches (6 cm) of each side seam OPEN. This accommodates the drawstring cords and side bow closure. Mark this point with a stitch marker before seaming.
For the crotch seam, align the center bottom edges of front and back panels with Color B and yarn needle. Seam together for 3 inches (7.5 cm) at the center. The remaining unjoined portions form the two leg openings.
CHECKPOINT 3: The shorts should now be three-dimensional. The waist opening circumference should measure approximately 28 to 32 inches (71 to 81 cm).
Waistband Construction
The waistband creates a folded casing through which the drawstring cord is threaded.
With RS facing, join Color B at the top of one side seam opening.
Round 1: Ch 1, sc evenly around the entire top edge of the shorts. When you reach the side opening gaps, work 3 sc down the front side of the opening and 3 sc up the back side of the opening. Sl st to first sc to join. Do not turn. (approximately 146 sc)
Round 2: Ch 1, sc in each sc around. Sl st to join. (146 sc)
Round 3: Ch 1, sc in each sc around. Sl st to join. (146 sc)
Round 4 (turning ridge): Ch 1, working in back loops only, sc in each sc around. Sl st to join. (146 sc)
Rounds 5 through 7: Ch 1, sc in each sc around. Sl st to join. (146 sc each round)
Fasten off, leaving a 36-inch tail for sewing the casing down.
Fold the waistband to the inside along the turning ridge (Round 4). Using the long tail and yarn needle, whipstitch the last round to the inside of the shorts, catching the WS of Round 1. Leave both side openings unstitched so the cord can pass through. The casing should be approximately 1.5 inches (4 cm) wide.
Cord dashed stitch detail: Using Color B threaded on a yarn needle, work a line of running stitches (in and out every 0.5 inch) across the front of the waistband casing on the outside, approximately in the center of the casing height. This creates the decorative dashed horizontal line.
Leg Opening Edging
With RS facing, join Color B at the bottom center of one leg opening.
Round 1: Ch 1, sc evenly around the entire leg opening, placing 3 sc at each corner point and decreasing (sc2tog) at any inward curves if needed. Sl st to first sc to join. (approximately 60 to 66 sc)
Round 2: Ch 1, sc in each sc around. Sl st to join. Fasten off.
Repeat for the second leg opening.
Inserting the Drawstring Cords
Thread one twisted cord through the waistband casing starting at the left side opening, going all the way around the inside, and exiting through the left side opening again. Both ends should exit from the same opening.
Thread the second twisted cord through the casing starting at the right side opening, traveling around, and exiting through the right side opening.
Pull both ends at each side and tie into a bow. Adjust to desired waist size. Trim cord ends if needed and knot them to prevent fraying.
Attaching the Starfish Applique
Block the starfish lightly by pinning the five arms flat and spraying with water. Allow to dry.
Position the starfish on the front right hip of the shorts, approximately 3 inches (7.5 cm) up from the bottom right leg opening and 3 inches (7.5 cm) in from the right side seam. Using the long tail and yarn needle, sew the starfish to the shorts by stitching around the outer edge of the center disk and through the base of each arm.
Size Customization Tips
To size down to Small: Begin with ch 62 (61 working stitches). The waist will measure approximately 24 to 28 inches. Reduce leg shaping by working only one set of 6-stitch decreases per side.
To size up to Large: Begin with ch 86 (85 working stitches). The waist will measure approximately 32 to 36 inches. Work an additional set of leg shaping decrease rows.
To add length: Work additional rows before beginning the leg shaping. Each two-row repeat adds approximately 0.8 inches of length.
All adjustments to the foundation chain must maintain the multiple of 6 plus 1.
Finishing and Blocking Your Crochet Shorts
Weave in all remaining ends securely on the WS, working tails at least 2 inches in two directions.
Wet blocking (recommended for cotton or wool blends): Submerge the finished shorts in cool water. Gently squeeze out excess water without wringing. Roll in a clean towel and press. Lay flat on a blocking mat, pin to correct dimensions, and allow to dry completely.
Steam blocking (suitable for acrylic): Lay the shorts flat and hold a steam iron 0.5 inches above the surface. Do not press directly onto the fabric.
After blocking, the diagonal shell pattern will open up slightly and the stitches will relax into that beautiful diamond texture.
Care Instructions
Hand wash in cool water with gentle detergent. Do not wring. Press in a towel and lay flat to dry. Do not machine dry as heat will distort the shell stitch texture. If using acrylic yarn, machine wash on gentle cycle in a mesh laundry bag and lay flat to dry. Store flat or loosely folded.
I hope you love making these Coral Reef Crochet Shorts as much as I loved designing them. They really do capture that carefree beach vibe, and every time I wear mine, someone asks where I got them. The look on their face when I say "I made them" is absolutely priceless.
If you found this crochet pattern helpful, please save it to your Pinterest boards so you can find it when you are ready to start. And I would absolutely love to see your finished shorts! Drop a comment below if you make them, or tag me on Instagram or Facebook with your photos. Nothing makes my day quite like seeing your beautiful creations come to life.
You Might Also Like
- Sunset Ombre Granny Square Tote Free Crochet Pattern
- Modern Monstera Crochet Plant for Home Office Desk
- Ocean Breeze Coastal Square Poncho Free Crochet Pattern
- Creamy White Boho Peplum Sleeve Top Free Crochet Pattern
