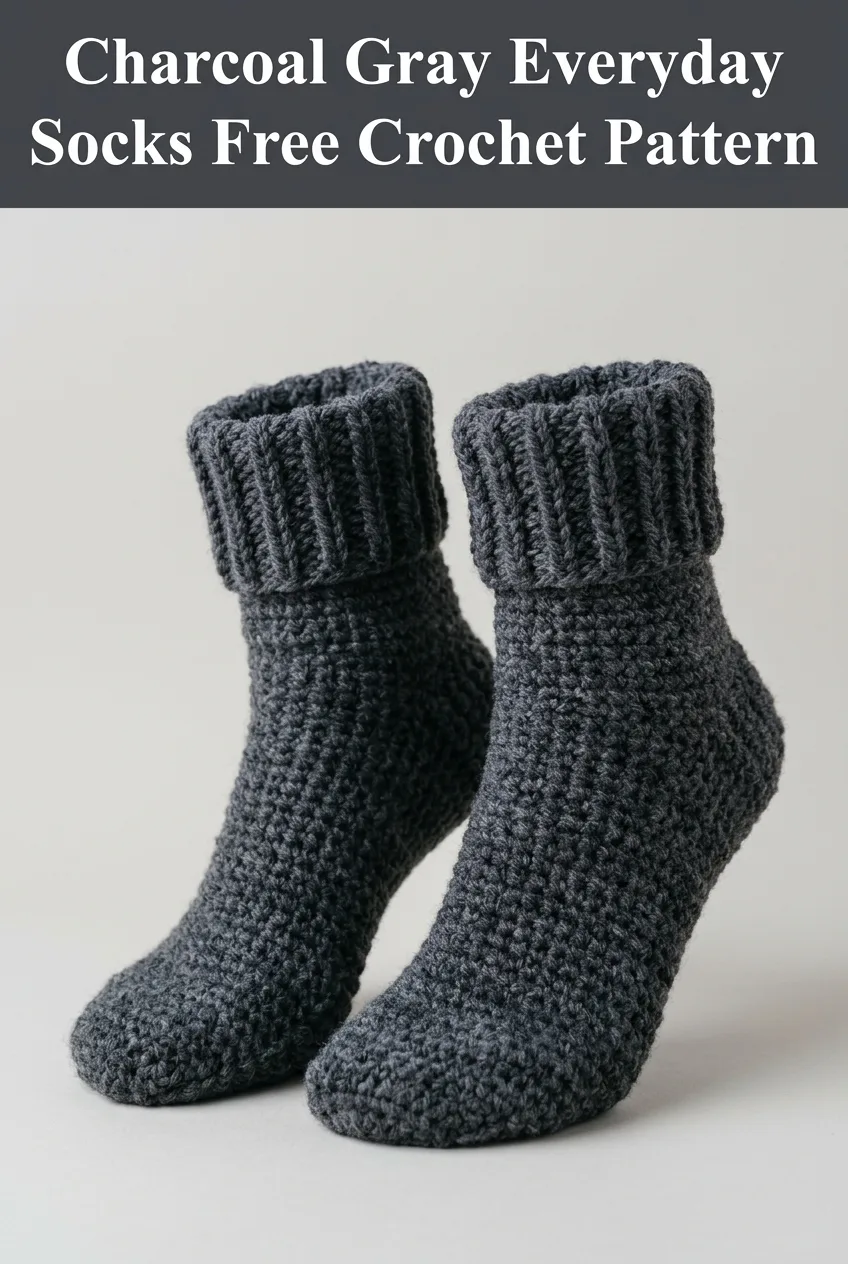
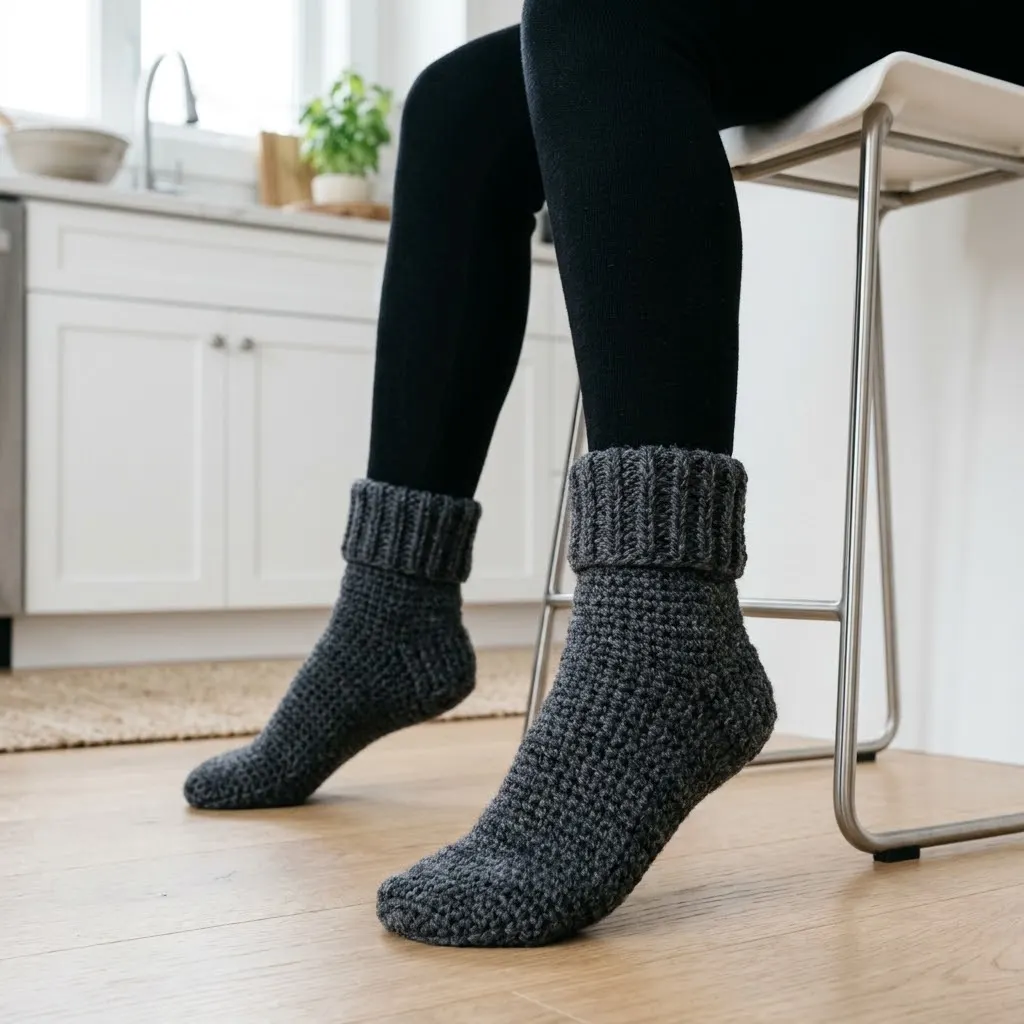
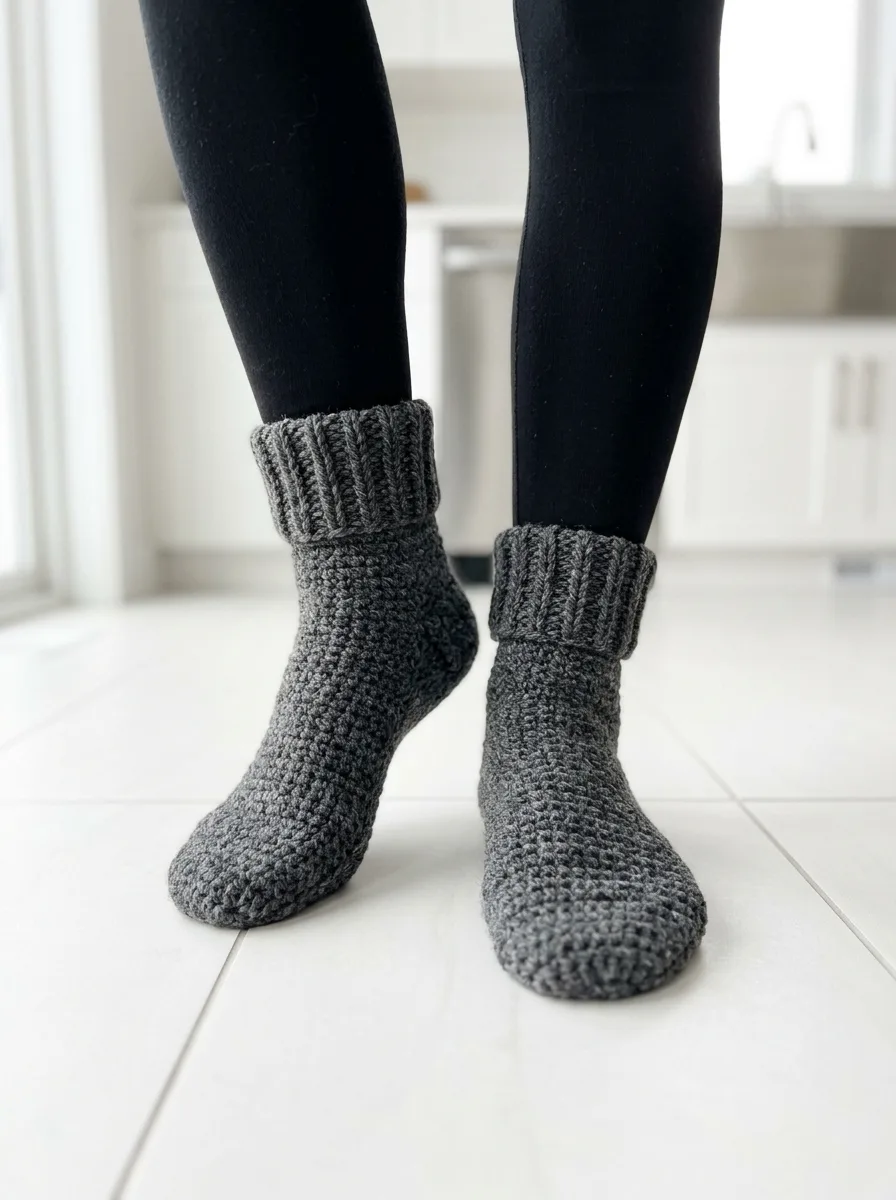
I call these my "Kitchen Floor Socks" because that is exactly where they were born. Last winter, I stood barefoot on cold tile one too many times and decided enough was enough. I grabbed a skein of charcoal gray yarn from my stash, sat down with my hook, and worked out this pattern over a weekend. These socks have lived on my feet almost daily since then. The folded ribbed cuff, the snug heel, the simple textured body. Every detail came from wanting something that actually felt good to wear around the house. Now I am sharing the Charcoal Gray Everyday Socks pattern with you, and I hope they keep your feet just as warm as mine.
Why You Will Love This Crochet Sock Pattern
Crochet socks sometimes get a bad reputation for being fussy or complicated. But these everyday socks use straightforward construction and stitches you probably already know. The body is worked in a simple single crochet texture that creates a dense, cozy fabric. The ribbed cuff uses basic post stitches to give that classic stretchy look. And the heel shaping is easier than it appears, I promise.
These socks work up relatively quickly for a wearable project. You can finish a pair in a weekend if you have some dedicated crochet time. They make wonderful gifts, especially for anyone who appreciates handmade comfort. The neutral charcoal gray color goes with everything, but you could easily substitute any solid or variegated yarn you love.
Skill level: Intermediate. If you have made hats or worked in the round before, you can absolutely handle these socks.
Materials Needed for Your Crochet Socks
Getting your supplies ready before you start makes the whole process smoother. Here is what you will need:
Yarn:
Hook:
Notions:
Gauge:
14 single crochet stitches and 16 rows = 4 inches in single crochet
Gauge matters for fit. Take time to check yours before starting.
Finished Measurements
This crochet pattern is written for a women’s medium size (fits US shoe sizes 7 to 9).
Sizing tips: For a smaller sock, use a smaller hook or reduce the starting chain. For a larger sock, use a bigger hook or add stitches in multiples of 2.
Abbreviations and Stitch Definitions
Let me walk you through every stitch abbreviation you will encounter. Even if you know these already, a quick refresher never hurts.
ch = chain. Wrap yarn over hook and pull through the loop on your hook. This creates one chain stitch.
sl st = slip stitch. Insert hook into stitch, yarn over, pull through both the stitch and the loop on your hook in one motion. Used for joining and moving yarn without adding height.
sc = single crochet. Insert hook into stitch, yarn over and pull up a loop (2 loops on hook), yarn over and pull through both loops. This is your main stitch for the sock body.
sc2tog = single crochet two together. A decrease stitch. Insert hook into first stitch, pull up a loop, insert hook into next stitch, pull up a loop (3 loops on hook), yarn over and pull through all 3 loops. You just turned 2 stitches into 1.
FPdc = front post double crochet. Yarn over, insert hook from front to back to front around the post (vertical part) of the stitch below, yarn over and pull up a loop, complete as a regular double crochet. Creates a raised ridge on the front.
BPdc = back post double crochet. Yarn over, insert hook from back to front to back around the post of the stitch below, yarn over and pull up a loop, complete as a regular double crochet. Creates a raised ridge on the back.
dc = double crochet. Yarn over, insert hook into stitch, yarn over and pull up a loop (3 loops), yarn over and pull through 2 loops (2 loops remain), yarn over and pull through remaining 2 loops.
Step by Step Crochet Sock Pattern
This sock is constructed toe up. You will start at the toe, work up through the foot, shape the heel, continue up the leg, and finish with the ribbed cuff. Make two identical socks.
Toe Section
The toe is worked flat in rows, then joined to work in the round.
Row 1: Ch 7. Sc in 2nd ch from hook and in each ch across. (6 sc)
Row 2: Ch 1, turn. 2 sc in first st, sc in next 4 sts, 2 sc in last st. (8 sc)
Row 3: Ch 1, turn. 2 sc in first st, sc in next 6 sts, 2 sc in last st. (10 sc)
Row 4: Ch 1, turn. 2 sc in first st, sc in next 8 sts, 2 sc in last st. (12 sc)
Row 5: Ch 1, turn. 2 sc in first st, sc in next 10 sts, 2 sc in last st. (14 sc)
Row 6: Ch 1, turn. Sc in each st across. (14 sc)
Rows 7 to 10: Repeat Row 6. (14 sc each row)
Now you will join to work in the round. Fold the toe piece in half with right sides facing out. You will be working around the entire edge.
Joining Round: Ch 1, sc evenly around the entire toe opening, working approximately 28 sc total around the perimeter. Place a stitch marker in the first sc to mark the beginning of your round. Sl st to first sc to join. (28 sc)
*Do not turn from this point forward. You will work in continuous rounds with the right side always facing you.*
Foot Section
The foot is worked in continuous spiral rounds. Move your stitch marker up each round to keep track.
Rounds 1 to 30: Sc in each st around. (28 sc)
Continue until the foot measures approximately 7 inches from the tip of the toe, or about 2.5 inches less than your desired total foot length. The heel will add the remaining length.
*Helpful tip:* Try the sock on as you go. The foot should reach just below your ankle bone before you start the heel shaping.
Heel Section
The heel is worked flat in short rows, then you will resume working in the round for the leg.
You will work across only 14 stitches for the heel. The remaining 14 stitches are held for the instep.
Heel Flap:
Row 1: Sc in next 14 sts. Turn. Leave remaining 14 sts unworked. (14 sc)
Row 2: Ch 1, sc in each st across. Turn. (14 sc)
Rows 3 to 14: Repeat Row 2. (14 sc each row)
You now have a rectangular heel flap.
Heel Turn:
Row 1: Ch 1, sc in first 8 sts, sc2tog, sc in next st. Turn. Leave remaining sts unworked. (10 sts worked)
Row 2: Ch 1, skip first st, sc in next 4 sts, sc2tog, sc in next st. Turn. (6 sts)
Row 3: Ch 1, skip first st, sc in next 2 sts, sc2tog, sc in next st. Turn. (4 sts)
Row 4: Ch 1, sc in each st across. Do not turn. (4 sc)
Gusset Pickup:
Now you will pick up stitches along the sides of the heel flap and rejoin the instep stitches.
Working along the side of the heel flap, pick up and sc 8 sts evenly along the edge. Sc in the 14 held instep stitches. Pick up and sc 8 sts along the other side of the heel flap. Sc in the 4 heel stitches. Place marker. (34 sc)
Gusset Decreases:
Round 1: Sc in first 2 sts, sc2tog, sc to 4 sts before instep, sc2tog, sc in next 2 sts, sc across instep, sc in next 2 sts, sc2tog, sc to last 4 sts, sc2tog, sc in last 2 sts. (30 sc)
Round 2: Sc in each st around. (30 sc)
Round 3: Repeat decrease placement from Round 1. (26 sc)
Round 4: Sc in each st around. (26 sc)
Continue decreasing every other round until you have 28 sc remaining. If you need a snugger ankle, decrease to 26 sc.
Leg Section
Rounds 1 to 16: Sc in each st around. (28 sc)
Continue until the leg measures approximately 4 inches from the top of the heel, or your desired height before the cuff.
Ribbed Cuff
The cuff creates that beautiful folded look you see in the photos. Switch to your smaller hook if you want tighter ribbing.
Setup Round: Ch 2 (counts as first dc), dc in each st around. Sl st to top of ch 2 to join. (28 dc)
Ribbing Rounds:
Round 1: Ch 2, *FPdc around next st, BPdc around next st* repeat around. Sl st to top of ch 2 to join.
Rounds 2 to 12: Repeat Round 1.
The ribbing should measure approximately 4 inches. When folded in half, it creates the cozy cuff shown in the photos.
Finishing: Fasten off. Weave in all ends securely with your yarn needle.
Finishing Your Crochet Socks
After fastening off, weave in your yarn tails carefully. For socks, I recommend weaving in ends along the same color path for at least 2 inches, then doubling back. This prevents ends from working loose with wear and washing.
Blocking is optional but recommended. Soak your finished socks in lukewarm water for 15 minutes. Gently squeeze out excess water (do not wring). Lay flat on a towel and shape to measurements. Let dry completely.
Care instructions: Hand wash in cool water or machine wash on gentle cycle. Lay flat to dry. Avoid the dryer to prevent shrinkage and extend the life of your handmade socks.
Tips for Crochet Sock Success
Yarn choice matters. A wool blend provides warmth, breathability, and natural elasticity. Superwash wool is easier to care for. Avoid 100% cotton for socks as it lacks stretch and can feel stiff.
Check your gauge. Socks need to fit. If your gauge is off, your socks will be too big or too small. Take 10 minutes to make a gauge swatch. It saves hours of frustration.
Use stitch markers liberally. Mark the beginning of your round, the center of your heel, and any decrease points. You will thank yourself later.
Try them on as you go. This is the beauty of toe up construction. You can check the fit at every stage and make adjustments before you have committed too much yarn.
Make both socks at once if second sock syndrome is real for you. Work a few rounds on one, then switch to the other. This keeps you motivated and ensures both socks match.
Why This Crochet Tutorial Works for Beginners and Beyond
If you have never made crochet socks before, this pattern is an excellent starting point. The toe up construction means no complicated Kitchener stitch to close the toe. The heel shaping uses basic decreases you have likely done in other projects. And the ribbed cuff is just alternating post stitches, which is a technique worth learning for sweaters, hats, and more.
For more experienced crocheters, this pattern offers a reliable template you can customize. Add stripes. Try a different cuff length. Experiment with textured stitches in the leg section. Once you understand the construction, the possibilities open up.
I really hope you enjoy making these Charcoal Gray Everyday Socks as much as I enjoyed designing them. They have become a staple in my home, and I think they will in yours too.
Thank you so much for choosing this pattern. If you make these socks, I would absolutely love to see them. Tag me on Instagram or share a photo in my Facebook group. Seeing your finished projects is honestly the best part of sharing patterns.
If this pattern is calling your name, go ahead and save it to your Pinterest boards so you can find it when you are ready to cast on. And if you do make a pair, please leave a comment below and let me know how they turned out. I read every single one and love hearing from you. Happy crocheting!
