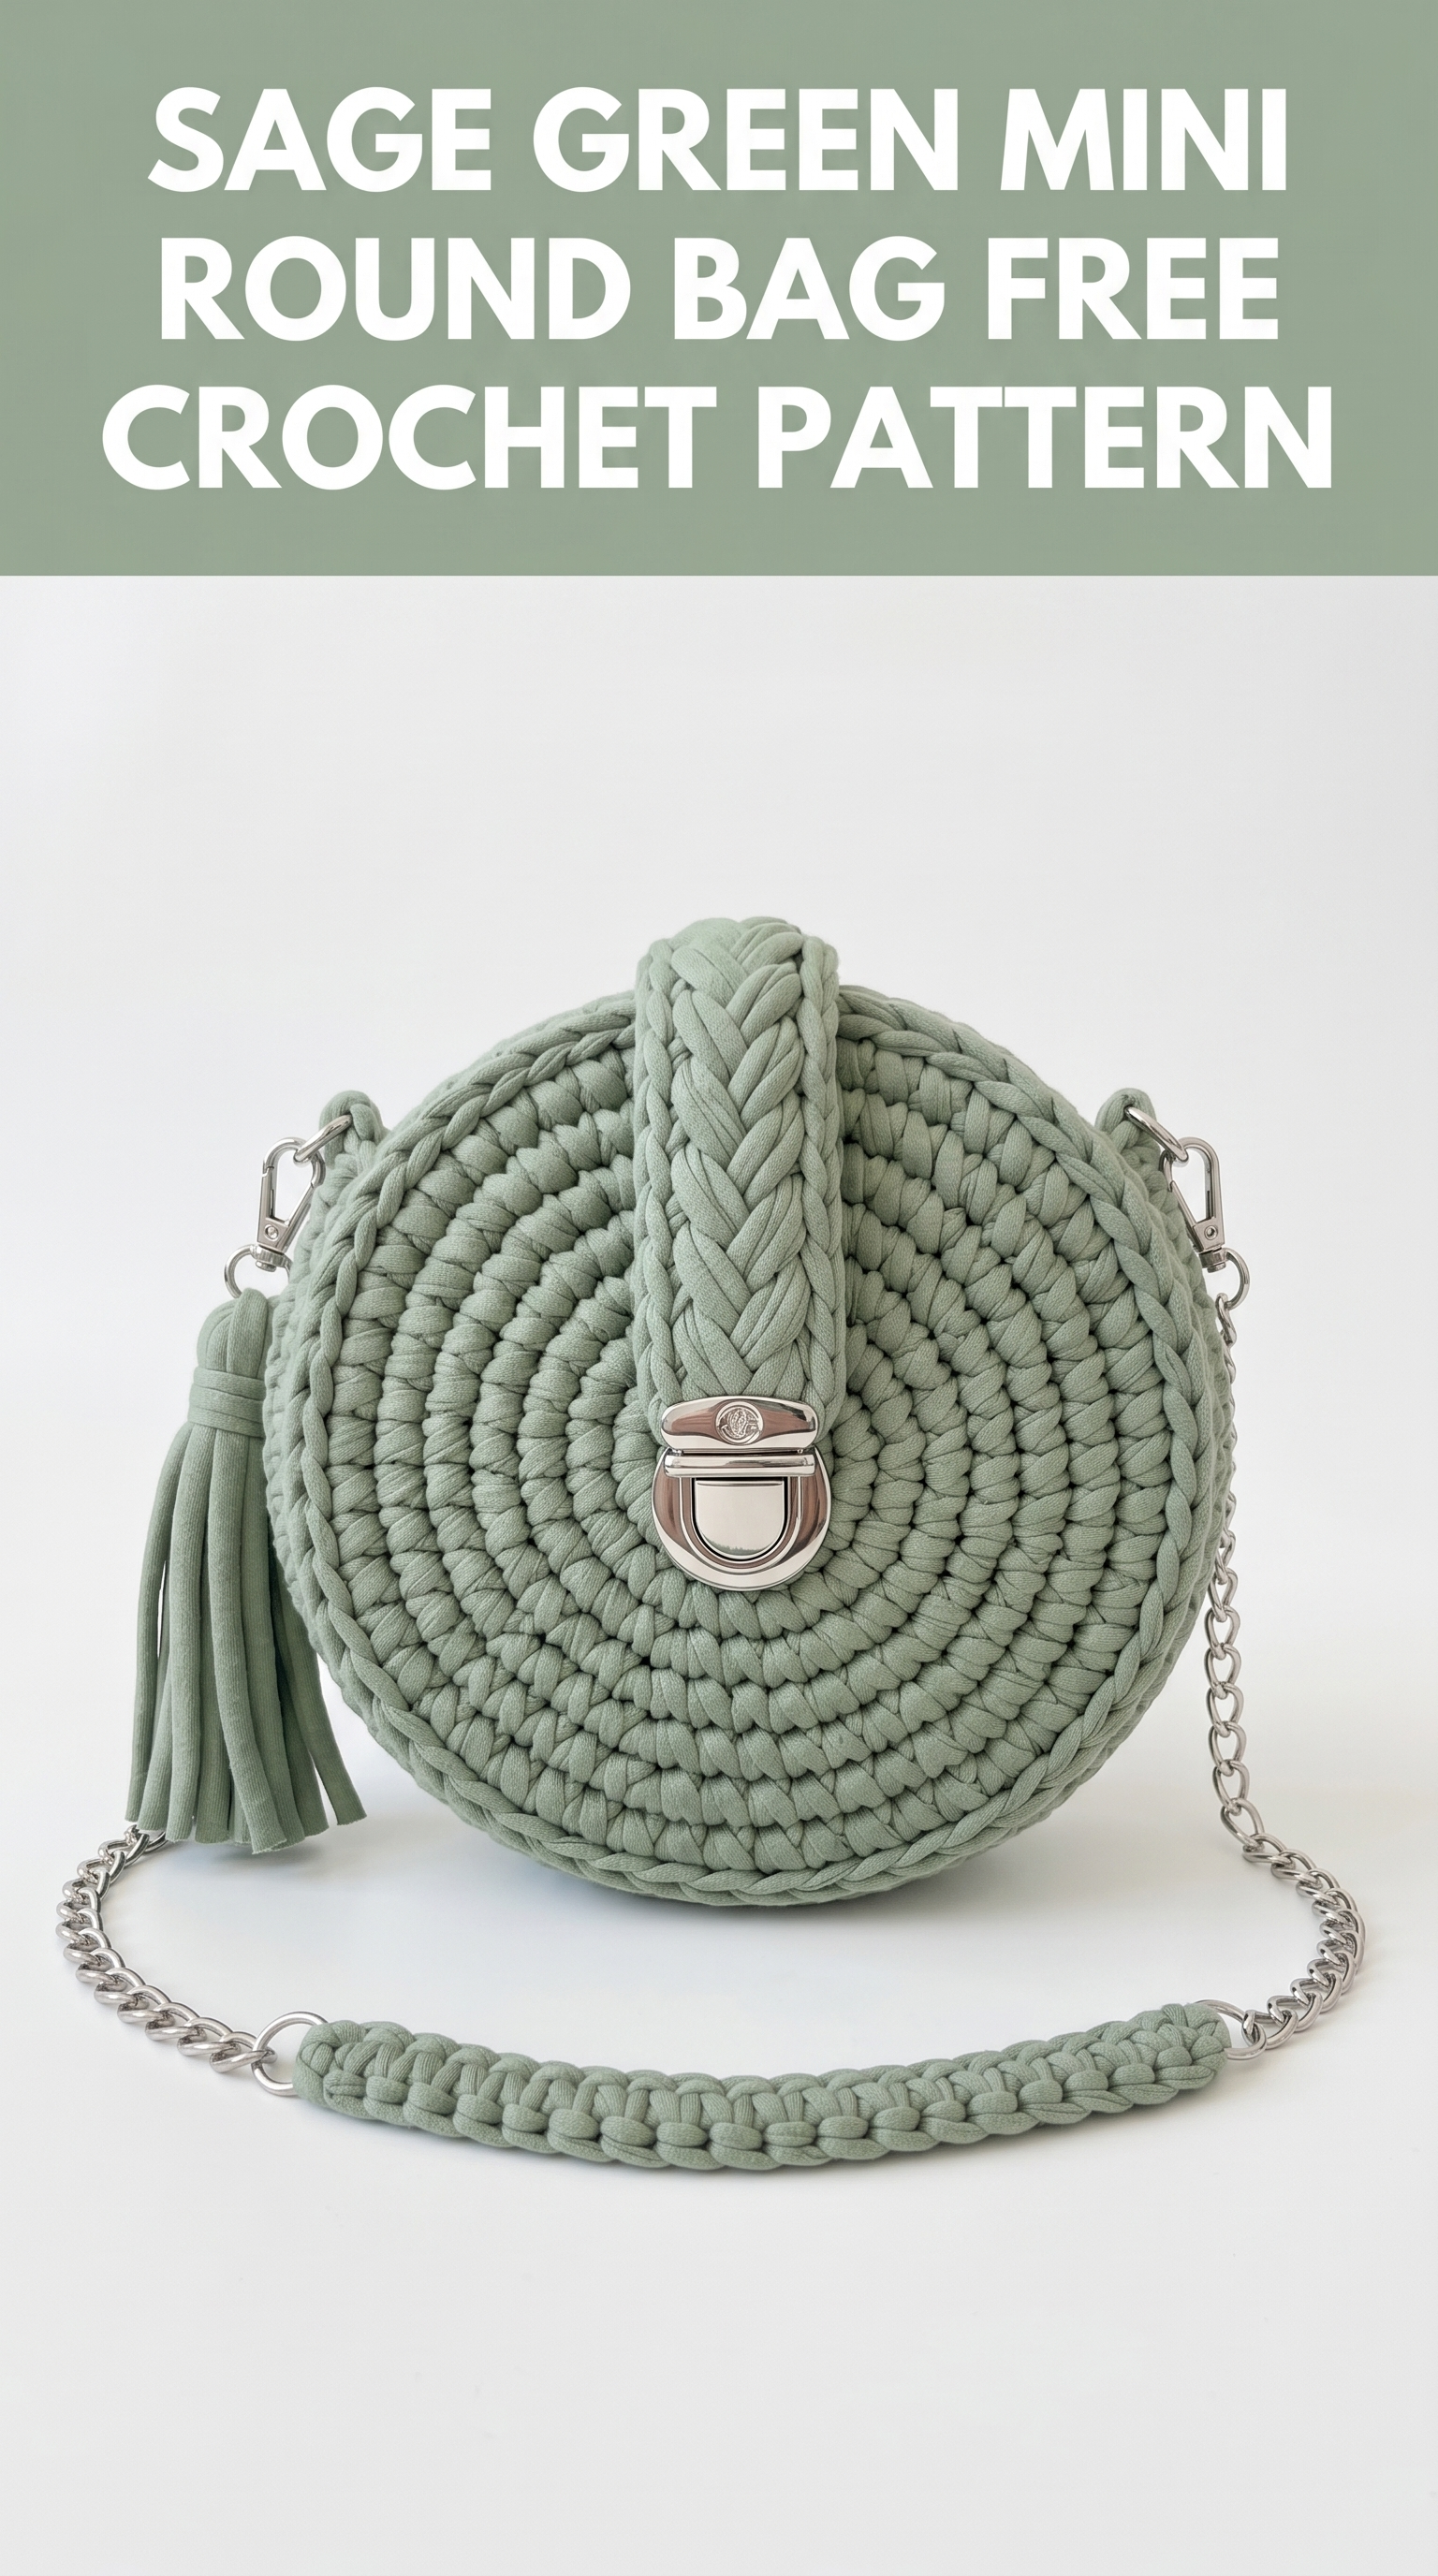
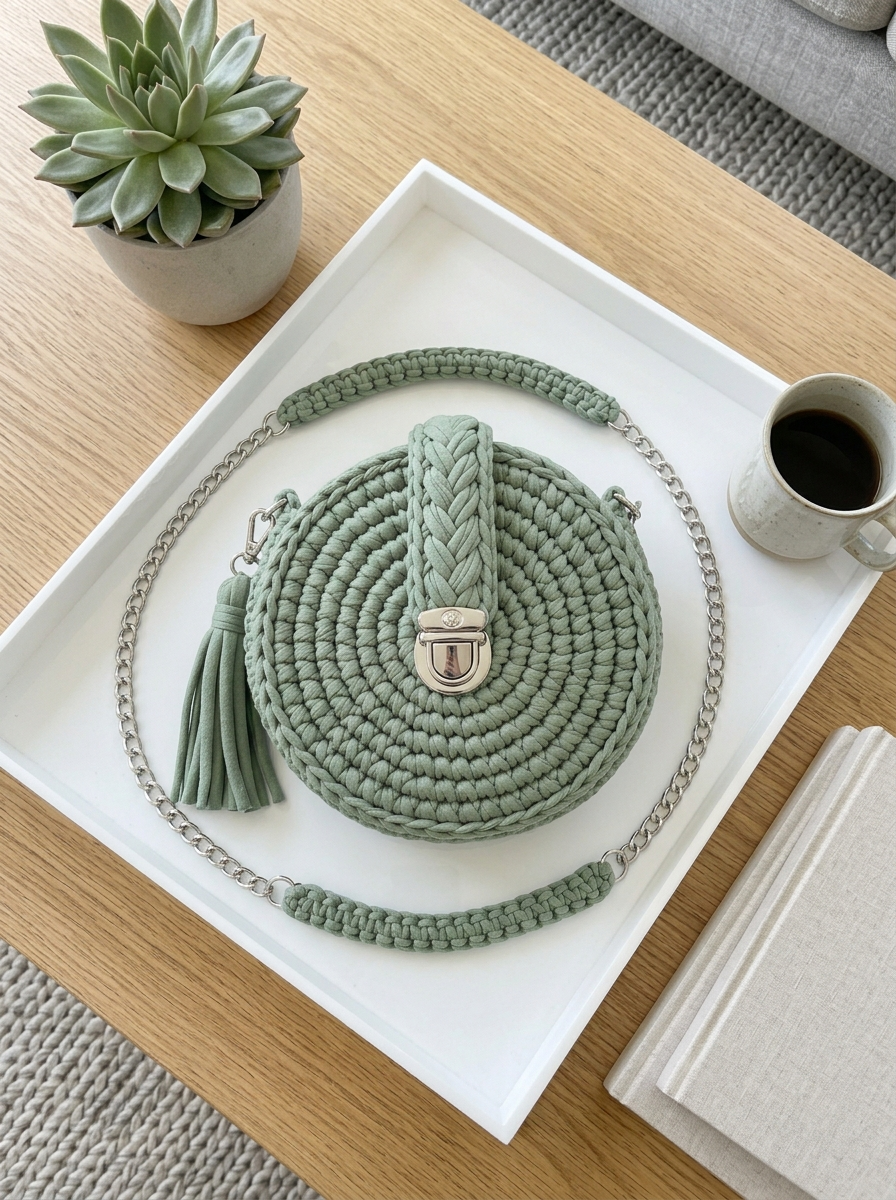
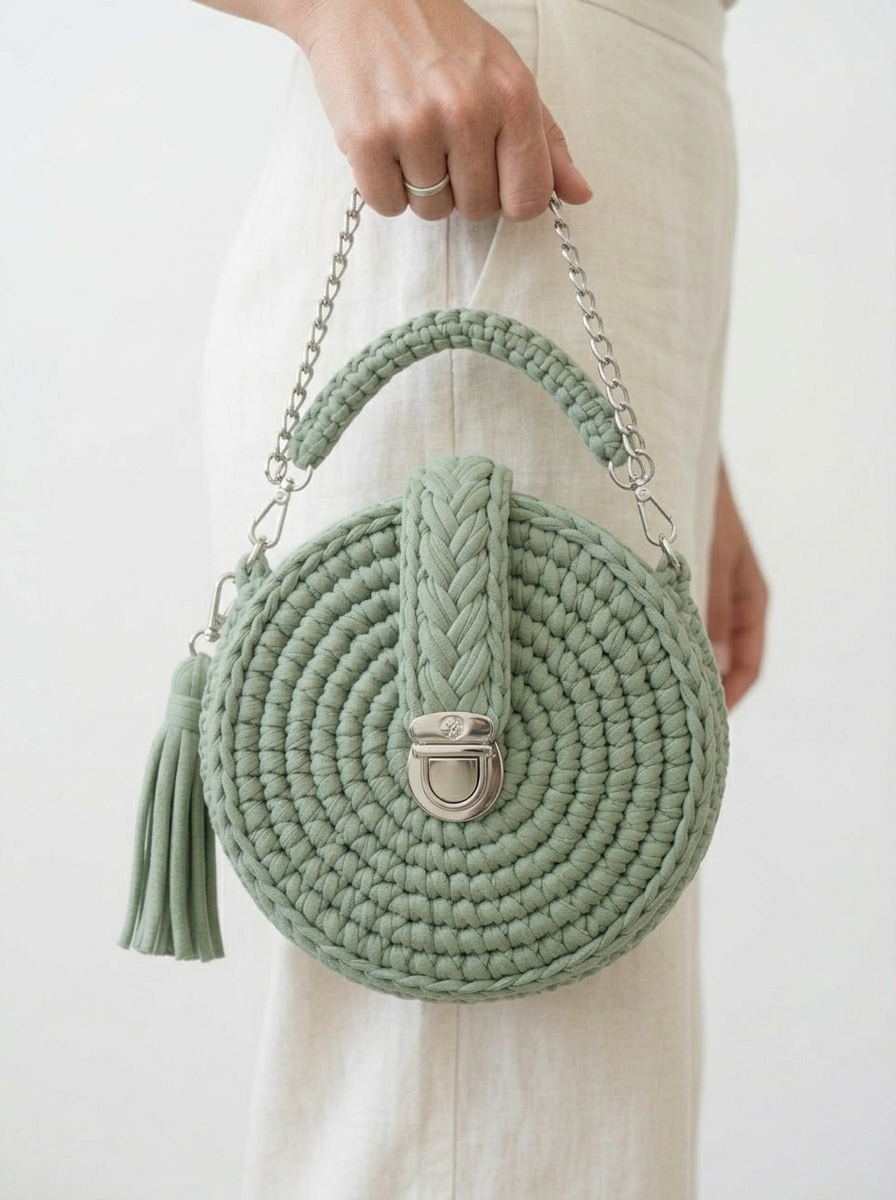
This little sage green mini round bag has been living in my head rent-free since I finished it. The circular shape, the braided flap detail, that satisfying silver hardware. It looks like something you would find in a boutique, but you can absolutely make it yourself.
I designed this crochet pattern for confident beginners and anyone who wants a quick project with impressive results. If you can work in the round and know your basic stitches, you have got this. The whole bag comes together in an evening or two, and the construction is simpler than it looks.
Let me walk you through everything you need to recreate this mini round crossbody bag from scratch.
Why This Crochet Bag Pattern Works So Well
Round bags have a timeless appeal. They are compact enough to carry essentials without the bulk, and the circular shape creates visual interest that rectangular bags just cannot match.
This particular design uses t-shirt yarn (also called ribbon yarn or spaghetti yarn), which gives you that chunky, substantial look without complicated stitchwork. The yarn does most of the heavy lifting. You work simple stitches, and the thick yarn creates that gorgeous textured spiral effect you see on the finished bag.
The braided closure tab adds a touch of handcrafted elegance. It looks intricate, but I promise it is just a basic three-strand braid sewn into place. The push-lock clasp gives it that professional, store-bought finish.
Materials You Will Need
Gather these supplies before you start. Having everything ready makes the process so much smoother.
Yarn:
Hook:
Hardware:
Tools:
Finished Dimensions:
Skill Level and Stitches Used
Skill Level: Confident Beginner to Intermediate
This crochet tutorial assumes you know how to work in a continuous spiral and can count stitches accurately. If you have made a basic coaster or a flat circle before, you are ready for this.
Abbreviations and Definitions
ch – chain: Wrap yarn over hook, pull through loop on hook. This creates a foundation or adds height.
sl st – slip stitch: Insert hook, yarn over, pull through stitch and loop on hook in one motion. Used to join or move yarn position.
sc – single crochet: Insert hook into stitch, yarn over, pull up a loop (2 loops on hook), yarn over, pull through both loops. Creates a short, dense stitch.
inc – increase: Work 2 single crochet stitches into the same stitch. This adds one stitch to your count.
hdc – half double crochet: Yarn over, insert hook, yarn over and pull up a loop (3 loops on hook), yarn over, pull through all 3 loops. Slightly taller than single crochet.
Gauge Check (Do Not Skip This)
With t-shirt yarn on a 9mm hook working in single crochet:
4 stitches and 4 rows = approximately 5cm (2 inches)
Your gauge may vary depending on your yarn and tension. A slightly tighter gauge is better for bags. You want a dense fabric that will not stretch or show gaps when you put items inside.
Work a quick flat circle of 2-3 rounds. If your circle ruffles, go down a hook size. If it cups dramatically, go up a hook size.
Pattern Notes Before You Begin
Step by Step Crochet Pattern
Front Panel (Make 1)
Round 1: Create a magic ring. Work 6 sc into the ring. Pull tail to close. Place stitch marker in first sc. (6 sts)
Round 2: Inc in each st around. (12 sts)
Round 3: *Sc in next st, inc in next st* repeat around. (18 sts)
Round 4: *Sc in next 2 sts, inc in next st* repeat around. (24 sts)
Round 5: *Sc in next 3 sts, inc in next st* repeat around. (30 sts)
Round 6: *Sc in next 4 sts, inc in next st* repeat around. (36 sts)
Round 7: *Sc in next 5 sts, inc in next st* repeat around. (42 sts)
Round 8: *Sc in next 6 sts, inc in next st* repeat around. (48 sts)
Round 9: *Sc in next 7 sts, inc in next st* repeat around. (54 sts)
Fasten off and leave a long tail for seaming. Your circle should measure approximately 18cm (7 inches) across.
Back Panel (Make 1)
Repeat Rounds 1-9 exactly as for the Front Panel. (54 sts)
Do not fasten off. You will continue directly into the side panel.
Side Panel (Bag Depth)
This creates the gusset that gives your bag dimension. You will work around the edge of the back panel to create height.
Round 10: Sc in each st around, working into the back loop only (blo). This creates a defined edge where the base meets the sides. (54 sts)
Round 11: Sc in each st around, working through both loops as normal. (54 sts)
Round 12: Sc in each st around. (54 sts)
Sl st to next st. Fasten off, leaving a very long tail for joining panels.
Joining Front and Back Panels
This is where your bag takes shape. Take your time here.
1. Place the front panel against the side panel, wrong sides together. The right side of your work should face outward.
2. Using your tapestry needle and the long tail from the side panel, whip stitch the front panel to the side panel edge.
3. Work through both layers, inserting your needle under the front loop of the front panel and the back loop of the side panel edge.
4. Continue around approximately three-quarters of the circle, leaving a gap at the top center for the opening.
5. The opening should span roughly 15-18 stitches across the top.
6. Weave in ends securely on the inside.
Troubleshooting: If the panels do not line up perfectly, ease the fabric gently. T-shirt yarn is forgiving and will stretch slightly to accommodate.
Braided Closure Flap
This decorative element sits on the back panel and holds the push-lock clasp.
Step 1: Cut three strands of t-shirt yarn, each approximately 35cm (14 inches) long.
Step 2: Tie the three strands together at one end with a loose knot.
Step 3: Create a simple three-strand braid. Braid tightly for approximately 10-12cm (4-5 inches).
Step 4: Tie off the bottom end with another knot.
Step 5: Trim the top knot off, leaving raw ends.
Step 6: Position the braid vertically on the back panel, centered above the bag opening. The top of the braid should sit about 2cm from the top edge of the bag.
Step 7: Using matching yarn and your tapestry needle, stitch the braid securely to the back panel. Focus on the top portion and along the sides. Leave the bottom 3-4cm loose to flip over the opening.
Attaching the Push-Lock Clasp
The push-lock has two parts: the decorative front piece and the backing plate.
1. Position the front piece on the loose end of your braid, centered.
2. Mark where the prongs need to poke through.
3. Use your hook or a small awl to create holes in the yarn.
4. Push the prongs through and secure with the backing plate.
5. On the front panel, mark where the clasp catch needs to sit.
6. Create holes and attach the catch plate the same way.
7. Test the closure. Adjust if needed.
Pro tip: A small dab of fabric glue behind the clasp plates adds extra security.
Strap Tabs (Make 2)
These small tabs hold the D-rings that connect your chain strap.
Row 1: Ch 5. Sc in 2nd ch from hook and in each ch across. (4 sts)
Rows 2-4: Ch 1, turn. Sc in each st across. (4 sts)
Fasten off, leaving a long tail.
Fold each tab around a D-ring and stitch the short ends together. Position one tab on each side of the bag opening, at the seam where front meets back. Stitch securely in place.
Crocheted Chain Cover (Optional but Recommended)
This is that lovely wrapped detail you see on the strap in the photo. It adds comfort and polish.
Row 1: Ch 4. Sc in 2nd ch from hook and in each ch across. (3 sts)
Rows 2-60 (or until desired length): Ch 1, turn. Sc in each st across. (3 sts)
This creates a long, narrow strip. You will wrap it around portions of your chain, securing with a few hidden stitches at the beginning and end.
Work as many strips as you like. The sample shows coverage on the shoulder portion of the strap only.
Tassel (Optional)
Cut 15-20 strands of t-shirt yarn, each approximately 15cm long. Bundle them together at the center. Fold in half so all the ends hang down.
Cut another strand and wrap it tightly around the folded top, about 2cm down from the fold. Tie off securely and tuck the ends inside.
Attach the tassel to one of the D-rings with a loop of yarn or a small jump ring.
Final Assembly
1. Attach lobster clasps or swivel hooks to each end of your chain.
2. Clip the chain to the D-rings on your bag.
3. Adjust the chain length if needed by removing links.
4. Give your bag a gentle steam or press with a damp cloth to even out the stitches (optional).
Customization Ideas
This sage green mini round bag pattern is wonderfully adaptable.
Common Questions
Can I use different yarn?
Yes, but the look will change. Cotton yarn in worsted weight will create a smaller, lighter bag. Macrame cord works beautifully for a similar aesthetic. Adjust your hook size accordingly.
My circle is not flat. What went wrong?
If it cups, you need more increases or a larger hook. If it ruffles, you have too many increases or need a smaller hook. Rip back and try again. It happens to all of us.
Where can I buy the hardware?
Etsy has wonderful bag hardware sellers. Amazon also stocks push-lock clasps and chain straps. Search for purse hardware or bag making supplies.
Wrapping Up Your Mini Round Bag Crochet Pattern
You did it. Or you are about to do it. Either way, I am genuinely excited for you.
This mini round crossbody bag crochet pattern combines simple techniques with modern style. It is the kind of project that makes you feel like a real maker. When someone asks where you got your bag, you get to say those magic words: I made it.
Thank you for trusting me with your crafting time. It means more than you know.
When you finish your bag, I would absolutely love to see it. Tag me on Instagram or share your photo in my Facebook group. Your version might look completely different from mine, and that is the beauty of handmade.
Happy crocheting, friend. You have got this.
