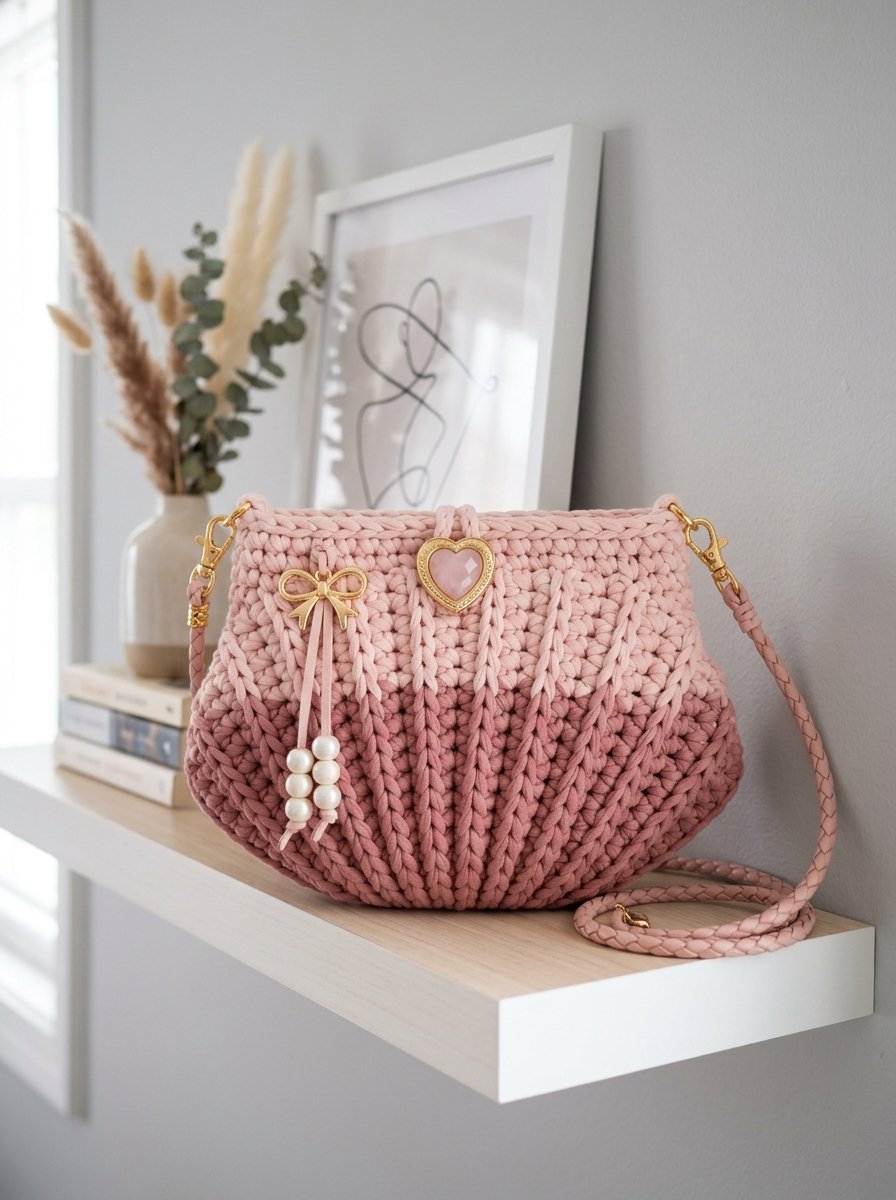
There is something so satisfying about carrying a bag you made with your own hands. This blush pink feminine shell bag is one of those projects that looks far more complicated than it actually is. The gorgeous ombre effect, the elegant shell shape, and those sweet decorative charms combine to create a bag that genuinely looks designer. But I promise you can absolutely make this, even if you have only made a few projects before.

This crochet pattern uses basic stitches worked in continuous rounds with a clever shaping technique that creates that beautiful curved silhouette. If you can single crochet and work in the round, you have all the skills you need. I will walk you through every single step.
Why This Crochet Tutorial Works for Confident Beginners
Let me be honest with you. This is not a first project. But if you have completed a beanie or a simple market bag, you are ready for this shell bag crochet pattern. The construction is straightforward once you understand the flow.
We start at the bottom center and work outward in rounds. The shaping happens through strategic increases that create those lovely vertical ridges you can see running up the sides. Then we transition to the body and work even rounds until we reach the opening. The whole thing comes together faster than you might expect.
What makes this beginner friendly:
Materials You Will Need
Yarn:
T-shirt yarn is that chunky, stretchy ribbon yarn that creates beautiful defined stitches. You can find it under names like Zpagetti, Hoooked, or simply fabric yarn. The weight is comparable to super bulky (Category 6).
Hook:
Notions:
Gauge:
8 single crochet stitches and 8 rows equals approximately 10cm (4 inches) in t-shirt yarn with 8mm hook.
Your gauge matters here because it affects the final bag size. If your stitches are too loose, your bag will be floppy. Too tight and it will be stiff and small. Aim for a fabric that holds its shape but still has a little give.
Stitch Abbreviations and Definitions
Let me explain every stitch before we begin so you can refer back here anytime.
ch – Chain: Wrap yarn over hook, pull through loop. This is your foundation stitch.
sl st – Slip stitch: Insert hook, yarn over, pull through stitch AND loop on hook in one motion. Used for joining and invisible movement.
sc – Single crochet: Insert hook into stitch, yarn over and pull up a loop (2 loops on hook), yarn over and pull through both loops. This is the main stitch for the entire bag.
inc – Increase: Work 2 single crochet stitches into the same stitch. This adds one stitch to your count.
sc2tog – Single crochet two together (decrease): Insert hook into first stitch and pull up a loop, insert hook into next stitch and pull up a loop (3 loops on hook), yarn over and pull through all 3 loops. This removes one stitch from your count.
BLO – Back loop only: Instead of inserting your hook under both loops of the V at the top of a stitch, insert under only the back loop (the one furthest from you). This creates a ridge texture.
Step by Step Crochet Pattern for the Shell Bag
Base (Worked Flat in Rows)
The base is an elongated oval that forms the bottom of your bag. We work this flat, then transition to rounds for the body.
With Color A:
Row 1: Ch 15. Starting in 2nd ch from hook, sc in each ch across. (14 sts)
Row 2: Ch 1, turn. Sc in each st across. (14 sts)
Rows 3-6: Repeat Row 2. (14 sts each row)
You should now have a small rectangle approximately 15cm long and 8cm wide.
Transition to Rounds
Now we work around the entire edge of this rectangle to begin building the sides. Place a stitch marker at the start of your round and move it up as you go.
Round 1: Do not turn. Work 1 sc into the side of each row down the short edge (6 sc), work 3 sc into the corner stitch, work 14 sc across the bottom chain edge, work 3 sc into the next corner, work 6 sc up the remaining short edge, work 3 sc into the corner, work 14 sc across the top edge, work 3 sc into the final corner. Join with sl st to first sc OR continue in spiral. (52 sts)
I prefer working in a continuous spiral for t-shirt yarn because it avoids that visible seam line. Just keep that stitch marker moving so you know where each round begins.
Round 2: Sc in each st around. At the corners (where you worked 3 sc), work an inc in the center stitch of each 3-stitch group. (56 sts)
Round 3: Sc in each st around, working inc in each corner center stitch. (60 sts)
Round 4: Sc in each st around, working inc in each corner center stitch. (64 sts)
Your base should now be a nice oval shape with slightly raised edges beginning to form the bag sides.
Body Shaping
This is where the magic happens. We create those beautiful vertical ridges by working in the back loop only on specific rounds.
Round 5: Working in BLO, sc in each st around. (64 sts)
This creates that defined ridge line where the base meets the sides. You will see it pop immediately.
Rounds 6-8: Sc in each st around (working through both loops as normal). (64 sts each round)
Round 9: Working in BLO, sc in each st around. (64 sts)
Another ridge line appears. This creates that horizontal banding effect.
Rounds 10-12: Sc in each st around. (64 sts each round)
Color Transition
Time to introduce Color B for that ombre effect. The transition happens gradually over two rounds.
Round 13: With Color B, working in BLO, sc in each st around. (64 sts)
Rounds 14-16: Sc in each st around. (64 sts each round)
Round 17: Working in BLO, sc in each st around. (64 sts)
Rounds 18-20: Sc in each st around. (64 sts each round)
Round 21: Working in BLO, sc in each st around. (64 sts)
Rounds 22-24: Sc in each st around. (64 sts each round)
Top Shaping and Closure
Round 25: *Sc in next 6 sts, sc2tog* repeat around. (56 sts)
Round 26: Sc in each st around. (56 sts)
Round 27: *Sc in next 5 sts, sc2tog* repeat around. (48 sts)
Round 28: Sc in each st around. (48 sts)
Round 29: Sl st in each st around. Fasten off and weave in ends.
The slip stitch round creates a neat finished edge at the top opening.
Hardware Tab Attachments (Make 2)
These small tabs hold the D-rings that your strap clips onto.
With Color B:
Row 1: Ch 6. Starting in 2nd ch from hook, sc in each ch across. (5 sts)
Rows 2-4: Ch 1, turn. Sc in each st across. (5 sts)
Fasten off, leaving a long tail for sewing.
Fold the tab in half with the D-ring inside the loop. Use the tail to whip stitch the tab securely to the inside top edge of the bag, approximately 3cm from the center on each side.
Finishing Your Shell Bag
Weave in all ends using your tapestry needle. With t-shirt yarn, I recommend weaving through several stitches on the wrong side and then back in the opposite direction for security.
Attach the strap hardware. Clip your lobster clasps onto the D-rings. Thread your braided strap through the lobster clasps at each end.
Add decorative charms. This step is completely optional but really elevates the design. Using thin cord or matching thread, attach your heart charm, bow charm, and pearl dangles to the center front of the bag. You can loop them through a stitch in the top section and secure with a simple knot hidden behind the charm.
Helpful Tips for Success
Tension matters with t-shirt yarn. This yarn has a lot of stretch, so try to keep your stitches consistent. Do not pull too tight or your bag will curl and feel stiff.
Working in BLO can feel weird at first. Take it slow on those rounds. The ridge appears on the right side of your work, which is the outside of the bag.
If your bag seems floppy, you can add a fabric lining for structure. Cut a piece of cotton fabric slightly smaller than your bag interior, fold the top edge under, and hand stitch around the inside top edge.
Lost your place? Count your stitches at the end of every round until you feel confident. Every standard round should have the same count as the previous one unless increases or decreases are specified.
The ombre effect works best when your two colors are in the same color family but clearly different values. The darker shade on the bottom and lighter on top creates visual interest and makes the bag feel more designed.
Approximate Finished Measurements
These measurements can vary based on your gauge and how firmly you work. The bag has a lovely rounded shell silhouette that is roomy enough for your phone, wallet, keys, and small essentials.
Why You Will Love Making This Bag
This shell bag crochet pattern hits that sweet spot of being impressive without being overwhelming. The color gradient draws people in. The decorative charms add personality. And the structured shape holds up beautifully with everyday use.
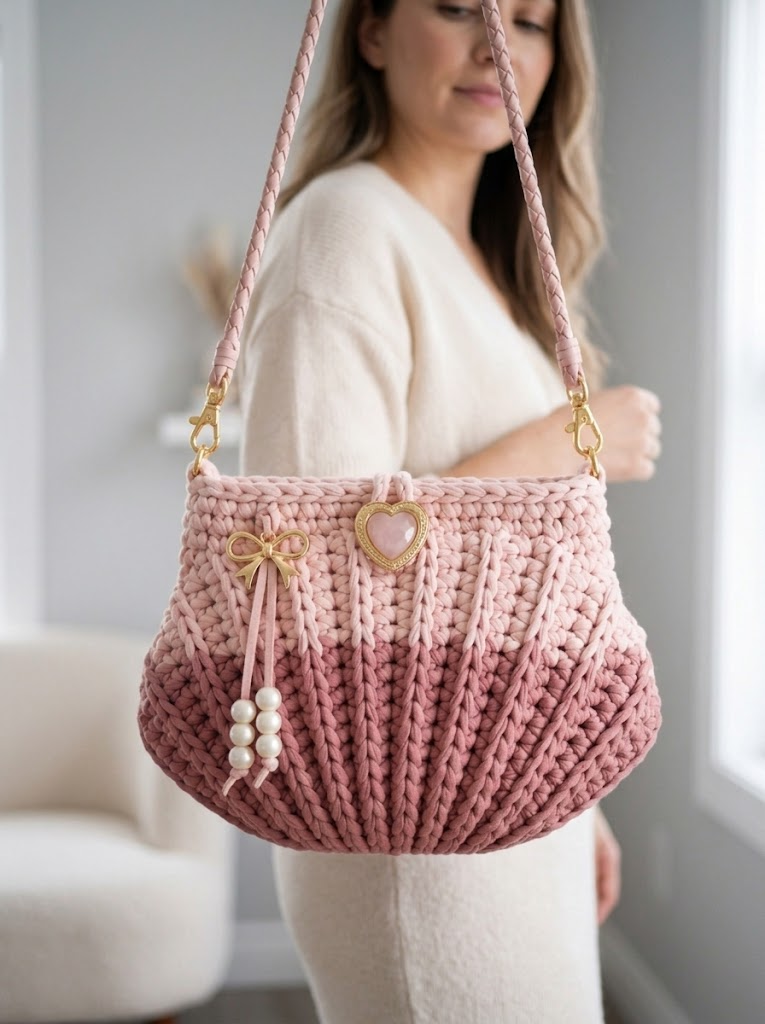
I designed this with real life in mind. It is not so big that it becomes a catchall for junk, but not so tiny that you cannot fit the basics. The crossbody strap keeps your hands free. And honestly, it just feels good to carry something handmade.
Thank You for Being Here
I genuinely appreciate you choosing to make this project. There is something wonderful about the crochet community and how we share techniques and inspiration so generously. When you finish your bag, I would absolutely love to see it. Tag me on Instagram or share in my Facebook group. Seeing your versions is the best part of writing these patterns.
Happy hooking, friend. You have got this.
