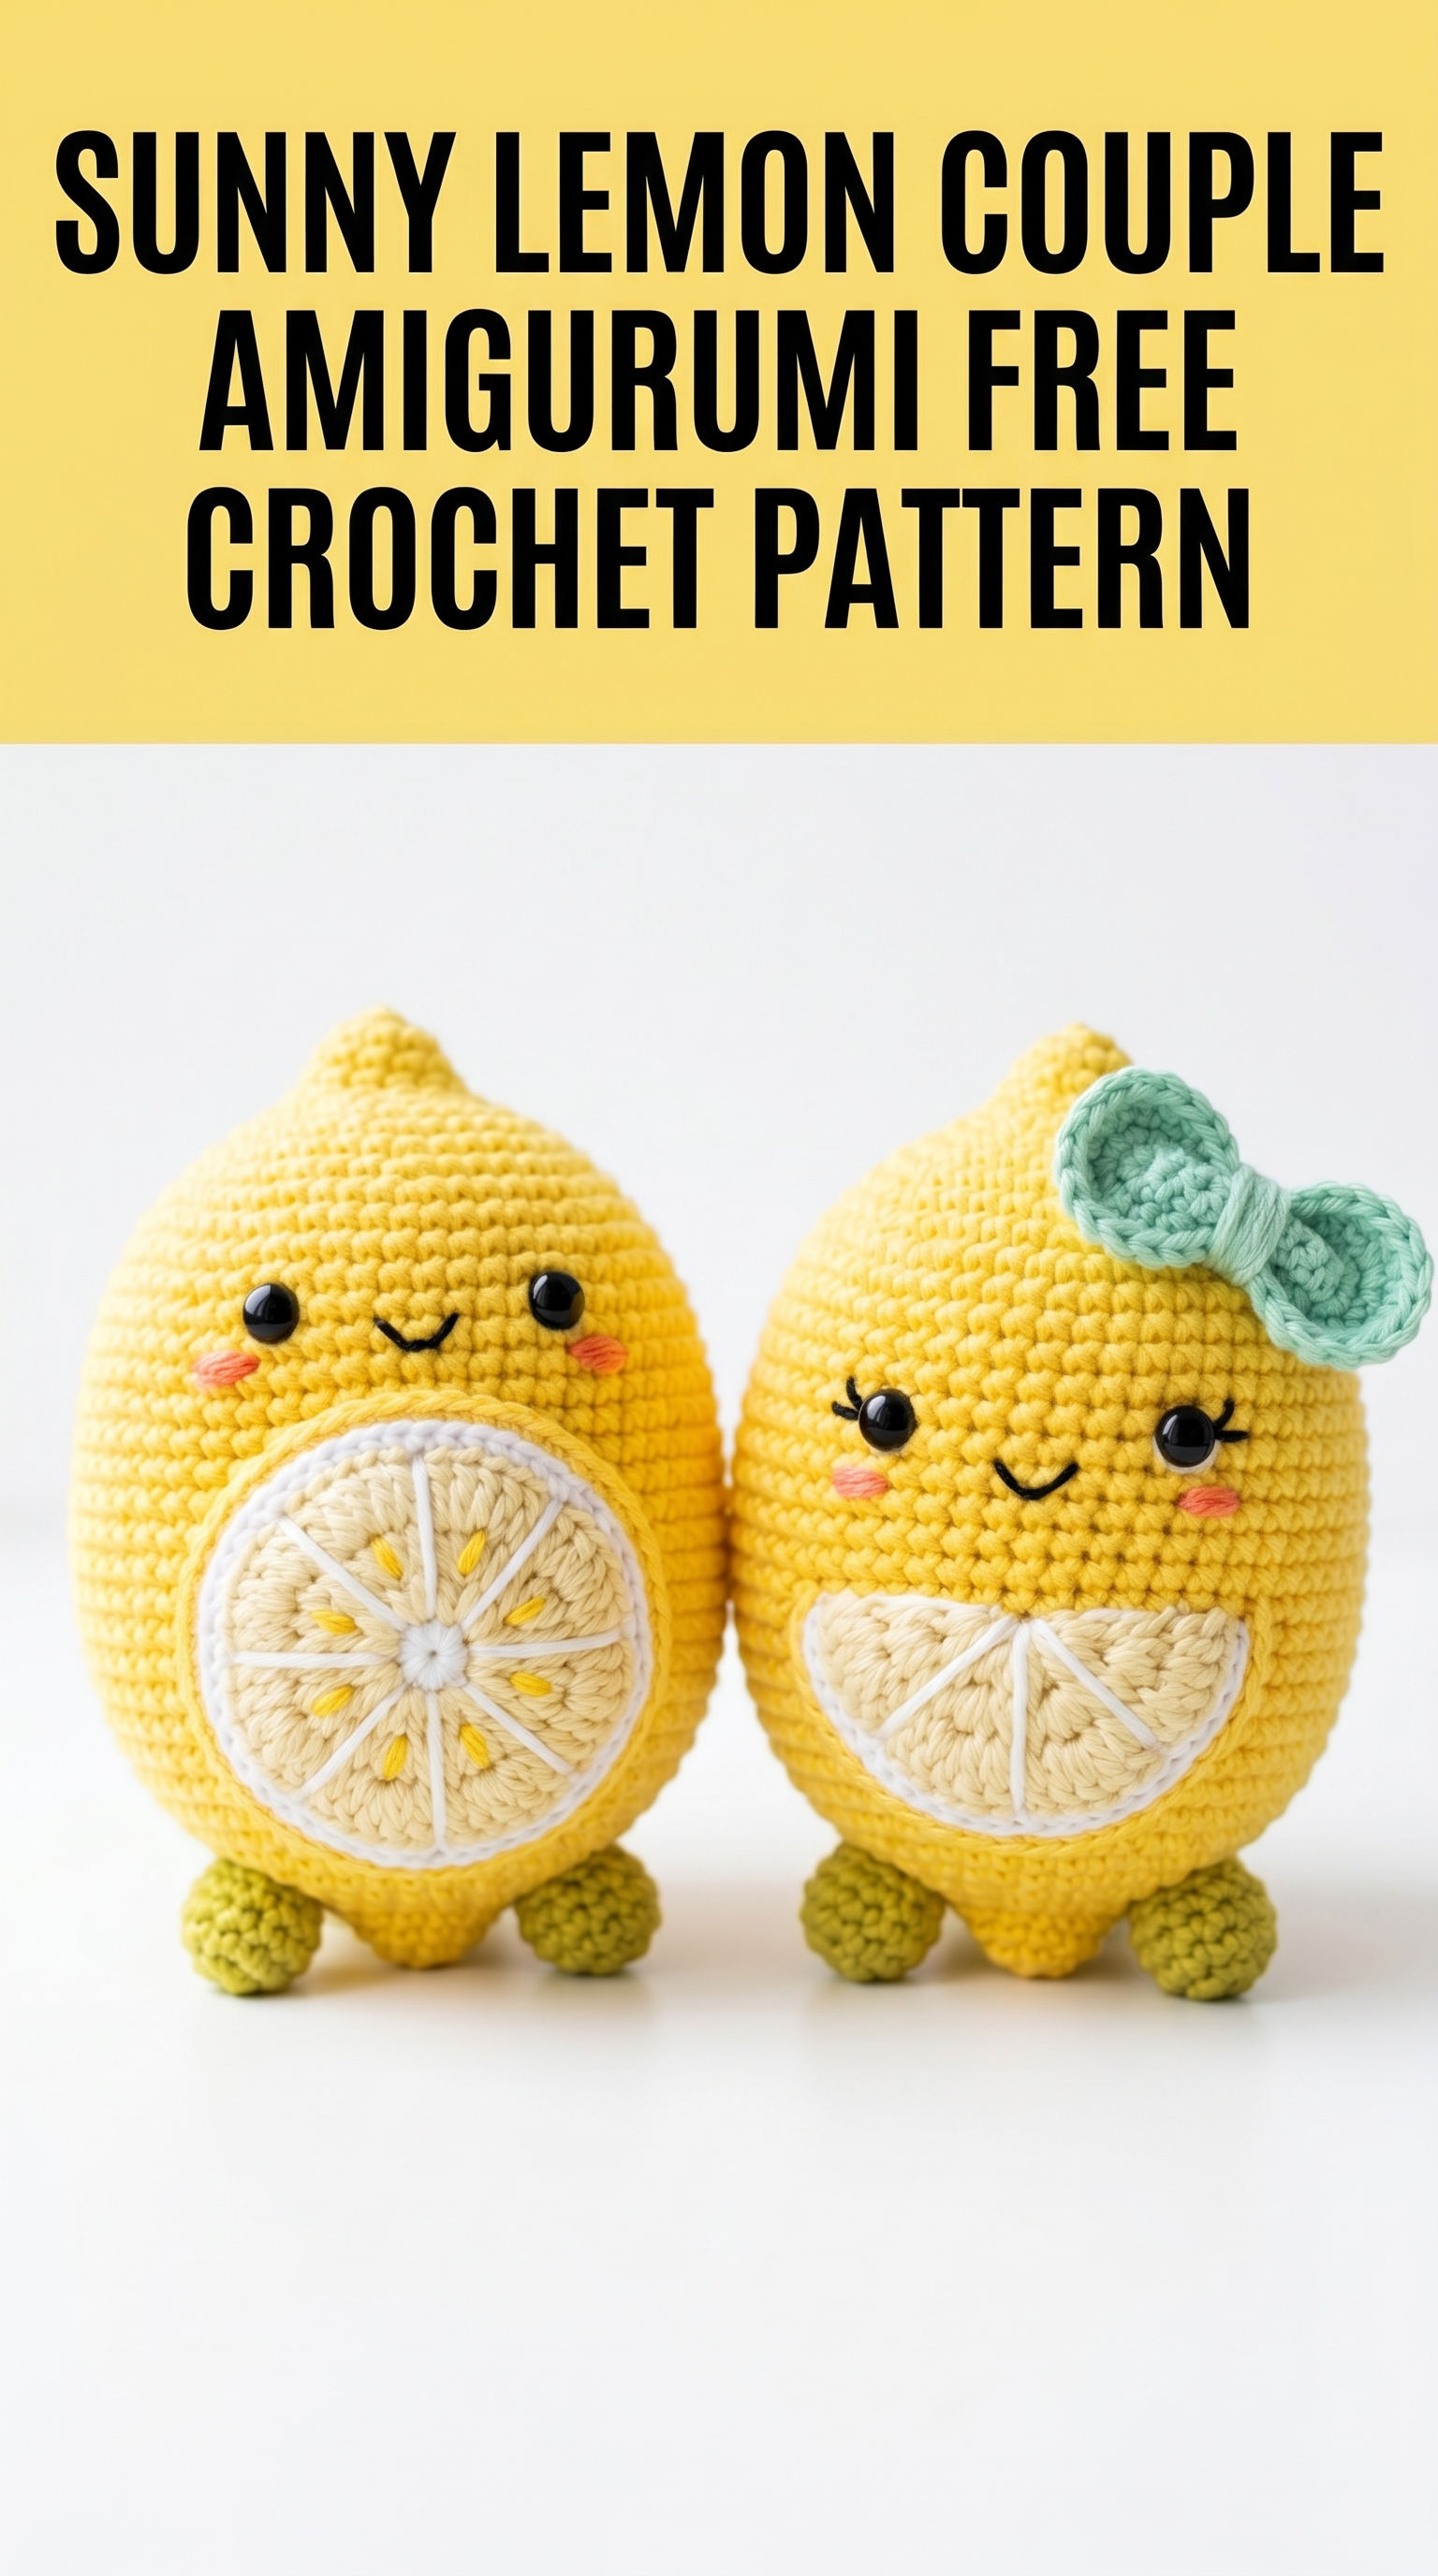
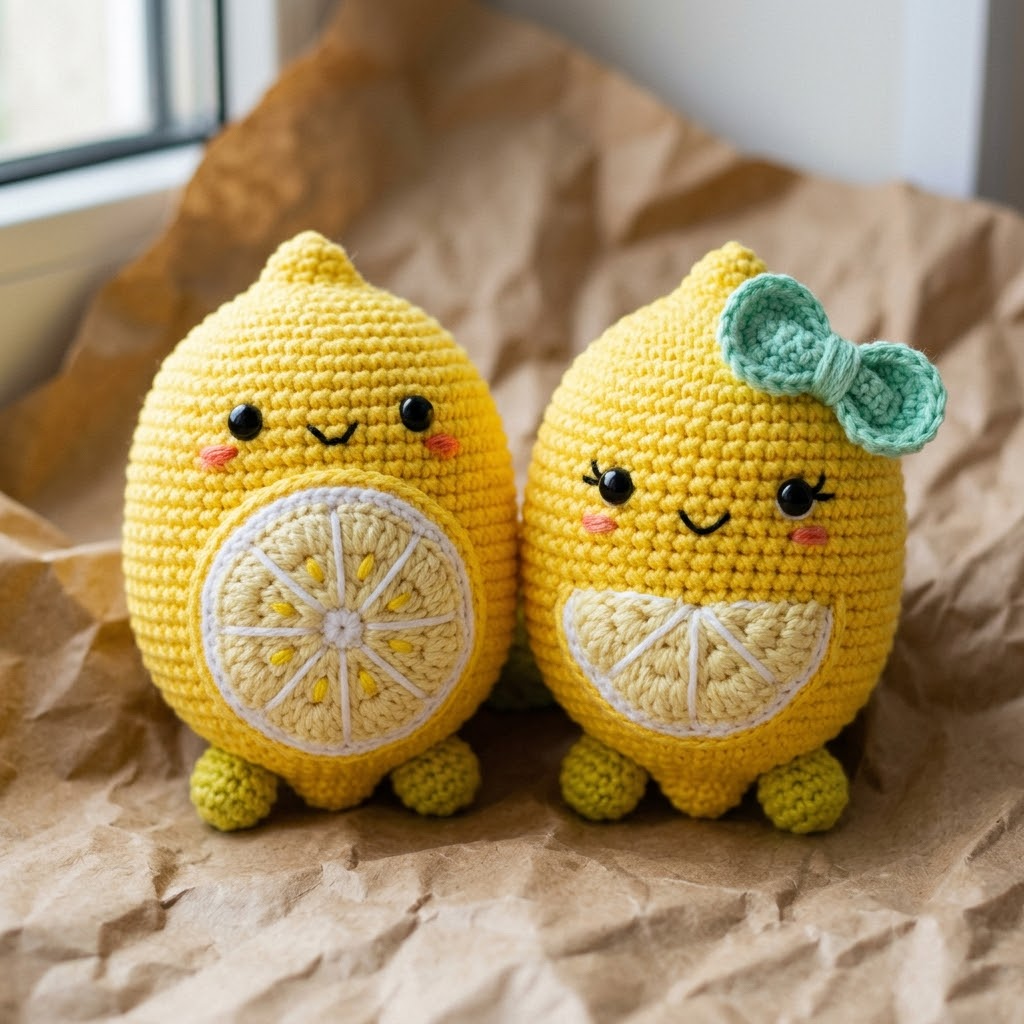
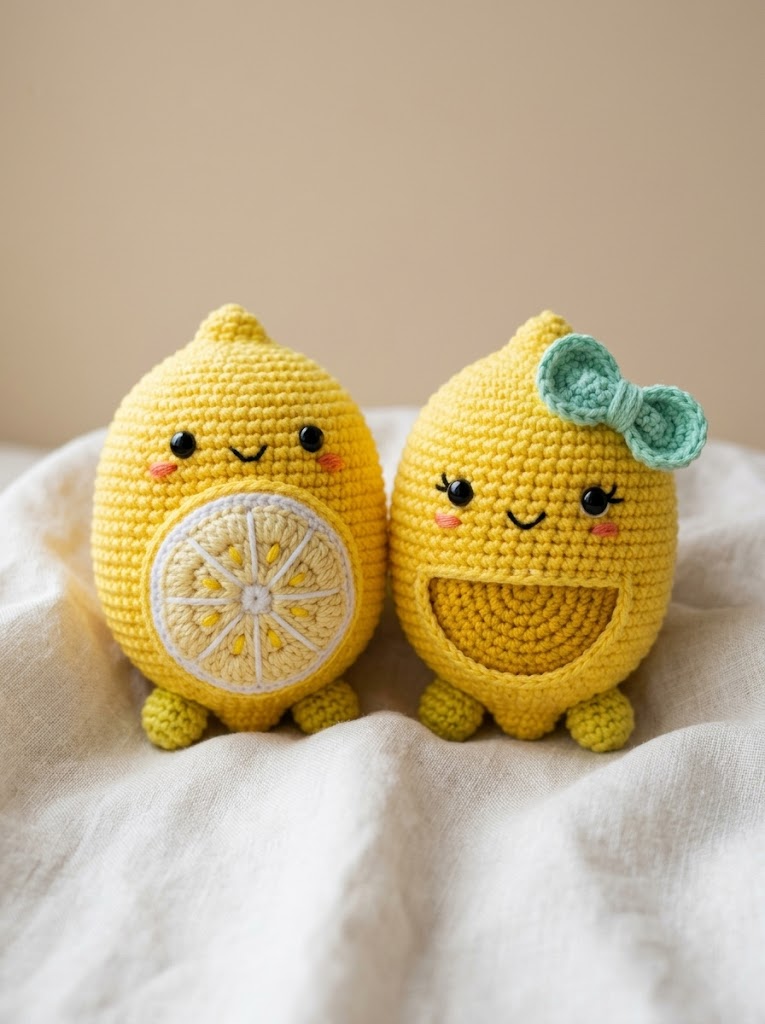
These adorable lemon friends are about to become your new favorite project. This Sunny Lemon Couple Amigurumi crochet pattern creates two cheerful citrus characters with sweet faces, cute little feet, and charming details that make them impossible not to love. One sports a darling mint bow while the other shows off a full lemon slice belly. Both feature half-slice tummy patches that add so much personality.
If you can crochet in the round and know basic increases and decreases, you can absolutely make these. They look impressive but use straightforward amigurumi techniques throughout. I designed this crochet tutorial with clear round-by-round instructions so you can follow along without stress.
Let me walk you through everything you need to bring this citrus duo to life.
Why You Will Love This Lemon Amigurumi Pattern
These little lemons stand about 5 to 6 inches tall when finished. They are the perfect size for shelf decor, photography props, or handmade gifts. The bright yellow color brings instant sunshine to any space.
What makes this crochet pattern special is the combination of simple construction with thoughtful details. The embroidered cheeks, safety eyes, and crocheted lemon slice appliqués transform basic shapes into characters with real personality.
You will learn several useful amigurumi skills here. Shaping a tapered body. Creating flat circular appliqués. Attaching small parts invisibly. Adding embroidered details. Each technique builds your confidence for future projects.
Materials You Will Need
Yarn:
Hook:
Using a smaller hook than typically recommended for worsted weight creates a tight fabric. This prevents stuffing from showing through. Amigurumi always works best with a tighter gauge.
Notions:
Abbreviations and Stitch Definitions
Let me explain every stitch before we begin. Refer back here anytime you need a refresher.
Magic Ring (MR): An adjustable loop that lets you start crocheting in the round with no hole in the center. Pull the tail to close it tight.
Chain (ch): The foundation stitch. Yarn over, pull through the loop on your hook.
Single Crochet (sc): Insert hook into stitch, yarn over and pull up a loop (2 loops on hook), yarn over and pull through both loops.
Increase (inc): Work 2 single crochet stitches into the same stitch. This adds one stitch to your count.
Invisible Decrease (invdec): Insert hook through the front loops only of the next 2 stitches, yarn over and pull through both front loops, yarn over and pull through both loops on hook. Creates a neater decrease than standard decrease.
Slip Stitch (sl st): Insert hook, yarn over, pull through stitch and loop on hook in one motion. Used for joining or moving position.
Fasten Off (FO): Cut yarn, pull tail through final loop, pull tight to secure.
Gauge Note
Exact gauge is not critical for amigurumi. What matters is that your stitches are tight enough to hold stuffing inside without it showing through. If you see white fiberfill peeking between stitches, try a smaller hook.
A good test: crochet 6 sc into a magic ring and pull it closed. If the center closes completely with no gap, your tension works.
Lemon Body Pattern
Both lemons use the same body pattern. Work in continuous rounds. Do not join rounds. Use a stitch marker to track the first stitch of each round.
With bright yellow yarn:
Round 1: 6 sc in magic ring, pull closed (6 sts)
Round 2: Inc in each st around (12 sts)
Round 3: *Sc 1, inc* repeat around (18 sts)
Round 4: *Sc 2, inc* repeat around (24 sts)
Round 5: *Sc 3, inc* repeat around (30 sts)
Round 6: *Sc 4, inc* repeat around (36 sts)
Round 7: *Sc 5, inc* repeat around (42 sts)
Round 8: *Sc 6, inc* repeat around (48 sts)
Rounds 9 through 22: Sc in each st around (48 sts) — 14 rounds total
This creates the rounded middle section of the lemon body.
Round 23: *Sc 6, invdec* repeat around (42 sts)
Round 24: Sc in each st around (42 sts)
Round 25: *Sc 5, invdec* repeat around (36 sts)
Round 26: Sc in each st around (36 sts)
Round 27: *Sc 4, invdec* repeat around (30 sts)
Round 28: Sc in each st around (30 sts)
Pause here. Insert safety eyes between rounds 15 and 16, spaced about 8 to 10 stitches apart. The exact placement depends on where you want to attach the lemon slice later. Position eyes above where the slice will sit.
Begin stuffing the body firmly. Continue stuffing as you decrease.
Round 29: *Sc 3, invdec* repeat around (24 sts)
Round 30: Sc in each st around (24 sts)
Round 31: *Sc 2, invdec* repeat around (18 sts)
Round 32: Sc in each st around (18 sts)
Round 33: *Sc 1, invdec* repeat around (12 sts)
Round 34: Sc in each st around (12 sts)
Add more stuffing to the top point. Pack it gently but firmly.
Round 35: *Sc 2, invdec* repeat around (9 sts)
Round 36: Sc in each st around (9 sts)
Round 37: *Sc 1, invdec* repeat around (6 sts)
Fasten off. Use yarn needle to weave through remaining 6 stitches. Pull tight to close. Weave in end securely inside the body.
The body should have an egg or lemon shape. Wider at the bottom, tapering to a gentle point at the top.
Lemon Slice Appliqué (Make 2)
Each lemon gets one slice on its belly. One lemon has a full circle slice. The other has a half circle slice. I will give both versions.
Full Circle Lemon Slice
Inner section with pale yellow:
Round 1: 6 sc in magic ring (6 sts)
Round 2: Inc in each st around (12 sts)
Round 3: *Sc 1, inc* repeat around (18 sts)
Round 4: *Sc 2, inc* repeat around (24 sts)
Sl st to first st. Fasten off, leaving a long tail for sewing.
White outline:
Join white yarn to any stitch of the pale yellow circle. Working in the same round 4 stitches, sc in each st around (24 sts). Sl st to join. Fasten off, leaving a long tail.
This creates a white border around the pale yellow center.
Half Circle Lemon Slice
With pale yellow:
Row 1: Ch 2, 3 sc in second ch from hook, turn (3 sts)
Row 2: Ch 1, inc, sc 1, inc, turn (5 sts)
Row 3: Ch 1, inc, sc 3, inc, turn (7 sts)
Row 4: Ch 1, inc, sc 5, inc, turn (9 sts)
Row 5: Ch 1, inc, sc 7, inc, turn (11 sts)
Row 6: Ch 1, inc, sc 9, inc (13 sts)
Do not turn. Continue around the curved edge with sc stitches, working evenly around the half circle shape. Approximately 8 to 10 sc along the curved side.
Fasten off with white yarn. Join white to the beginning corner. Sc evenly around the entire half circle edge to create a white border. Fasten off, leaving a tail for sewing.
Adding Segment Lines
Using white yarn and a yarn needle, embroider straight lines from the center outward to create the lemon segment look. For the full circle, embroider 6 to 8 lines radiating from center. For the half circle, embroider 3 to 4 lines.
This detail really brings the slice to life. Take your time here.
Feet (Make 4)
With olive green or yellow-green yarn:
Round 1: 5 sc in magic ring (5 sts)
Round 2: Inc in each st around (10 sts)
Rounds 3 and 4: Sc in each st around (10 sts)
Sl st to first st. Fasten off, leaving a tail for sewing. Stuff lightly. These are small so do not overstuff.
Each lemon needs 2 feet attached at the bottom front.
Bow (Optional, Make 1)
With mint green yarn:
Center piece:
Ch 5. Sc in second ch from hook and across (4 sts). Fasten off, leaving a tail.
Bow loops:
Ch 12. Sl st in first ch to form a ring. Ch 1, sc 12 around the ring. Sl st to join. Fasten off.
Pinch the ring in the center to form the bow shape. Wrap the center piece around the pinched middle. Secure with yarn tails. Sew to the top of one lemon beside the point.
Assembly Instructions
Step 1: Pin the lemon slice appliqué to the front of the body, centered below the eyes. Sew in place using matching yarn and whip stitch. Work through back loops of the slice edge only for a cleaner look.
Step 2: Pin both feet to the bottom front of the lemon body. Position them so the lemon sits upright and slightly tilted forward. Sew securely. These bear some weight so reinforce your stitches.
Step 3: For the bow lemon, sew the bow near the top point on one side.
Step 4: Using pink embroidery floss, add rosy cheeks beneath and slightly to the outside of each eye. Small oval shapes work best. Just 3 to 4 satin stitches per cheek.
Step 5: Using black yarn or embroidery floss, add a small curved smile between the eyes and slice. A simple curved line of 2 to 3 small stitches creates a sweet expression.
Helpful Tips for Best Results
Stuffing: Use small pieces of fiberfill rather than one large clump. This distributes more evenly and prevents lumps. Pack the bottom and top points firmly. The middle can be slightly softer.
Eye placement: Insert safety eyes before closing the body. Test placement with pins first. Step back and look from a distance. Small adjustments make a big difference in expression.
Invisible seams: When sewing appliqués, work slowly. Match your yarn tension to the body tension. Loose stitches show. Tight stitches pucker.
Blocking feet: If your feet curl, you can wet block them flat before stuffing and attaching.
Customization Ideas
Make a whole lemon family in different sizes by adjusting your hook and yarn weight. Sport weight yarn with a 2.75mm hook creates mini lemons perfect for keychains.
Try different fruit colors. This same basic pattern works for oranges in orange yarn, limes in green, or grapefruits in pink.
Add a loop at the top for ornaments. Crochet a small chain and attach during finishing.
Embroider seeds on the slice using dark yellow or brown yarn for extra realism.
Final Thoughts on This Lemon Amigurumi Crochet Pattern
These sunny lemons bring so much joy to make. The step by step construction keeps the project manageable while the finishing details let your creativity shine. Whether you make one or both, you will end up with a handmade treasure that makes people smile.
This beginner friendly amigurumi pattern teaches valuable techniques you will use again and again. Shaping, appliqué work, embroidery details. Each skill builds on the last.
Thank you so much for choosing this pattern. I genuinely hope you enjoy every stitch. When you finish your lemon couple, I would absolutely love to see them. Tag me on Instagram or share in my Facebook group. Seeing your creations makes my day brighter than these little yellow friends.
Happy crocheting, and may your stitches be tight and your yarn never tangle.
