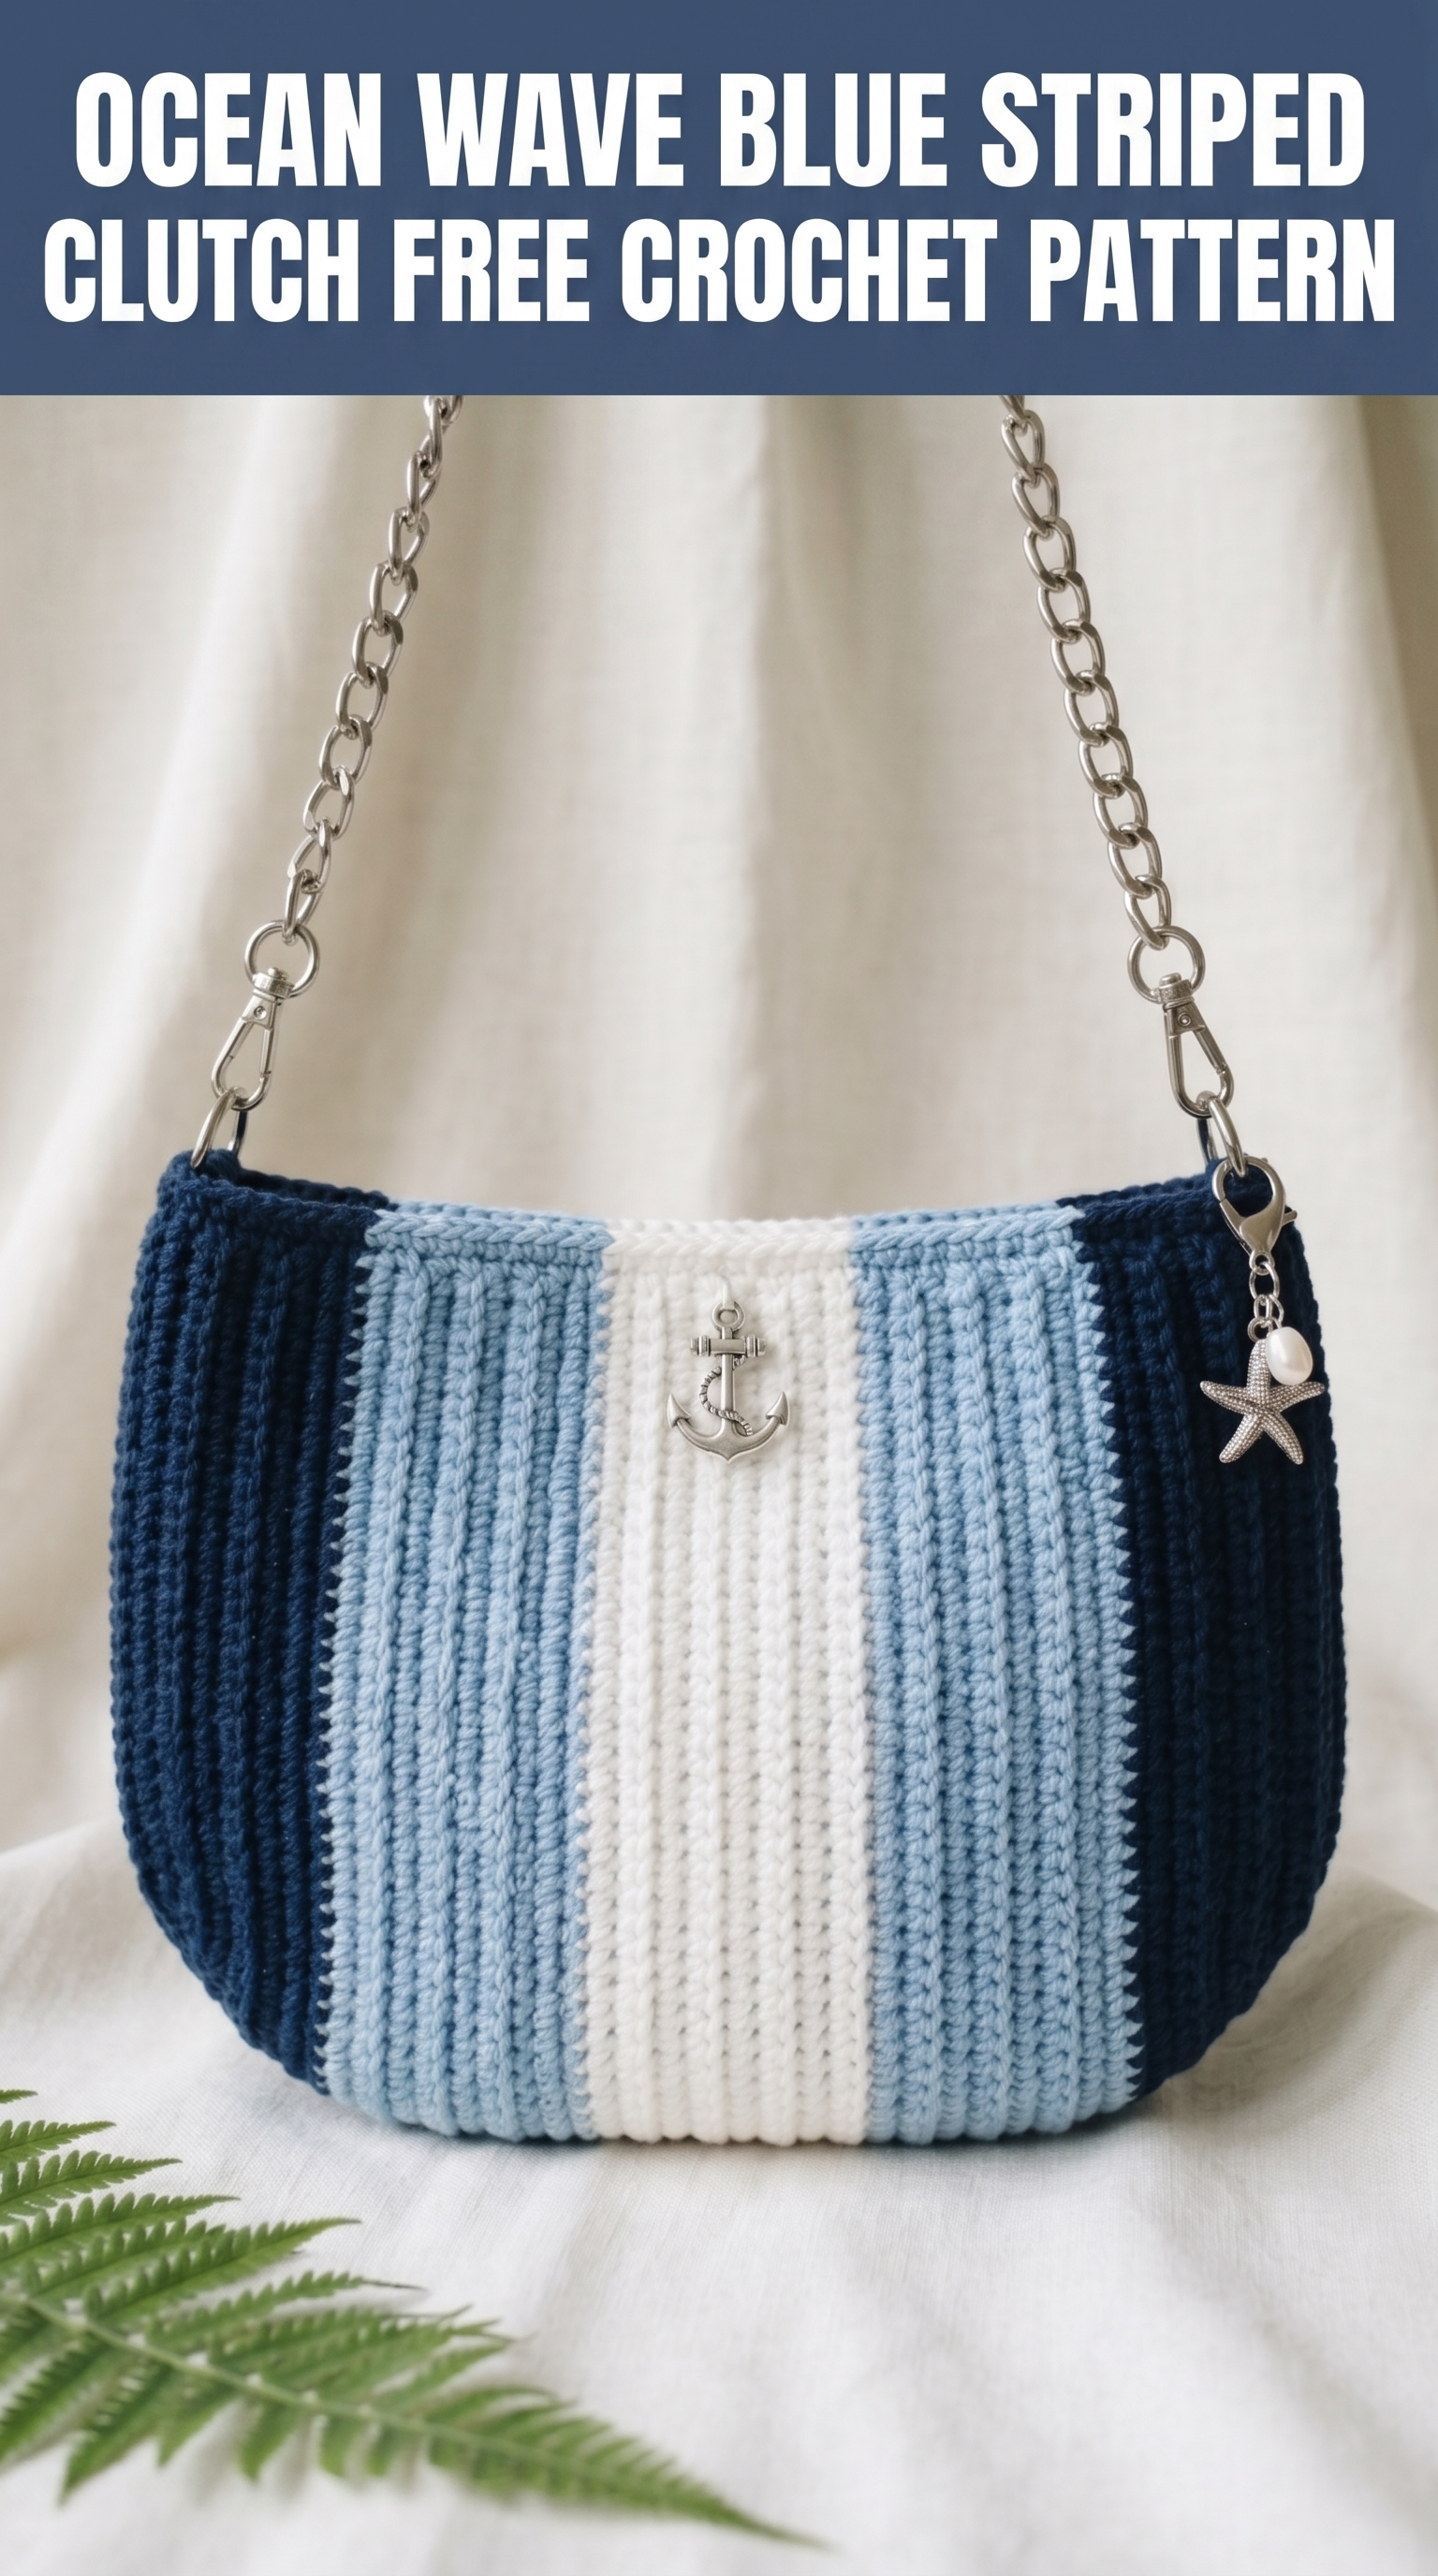
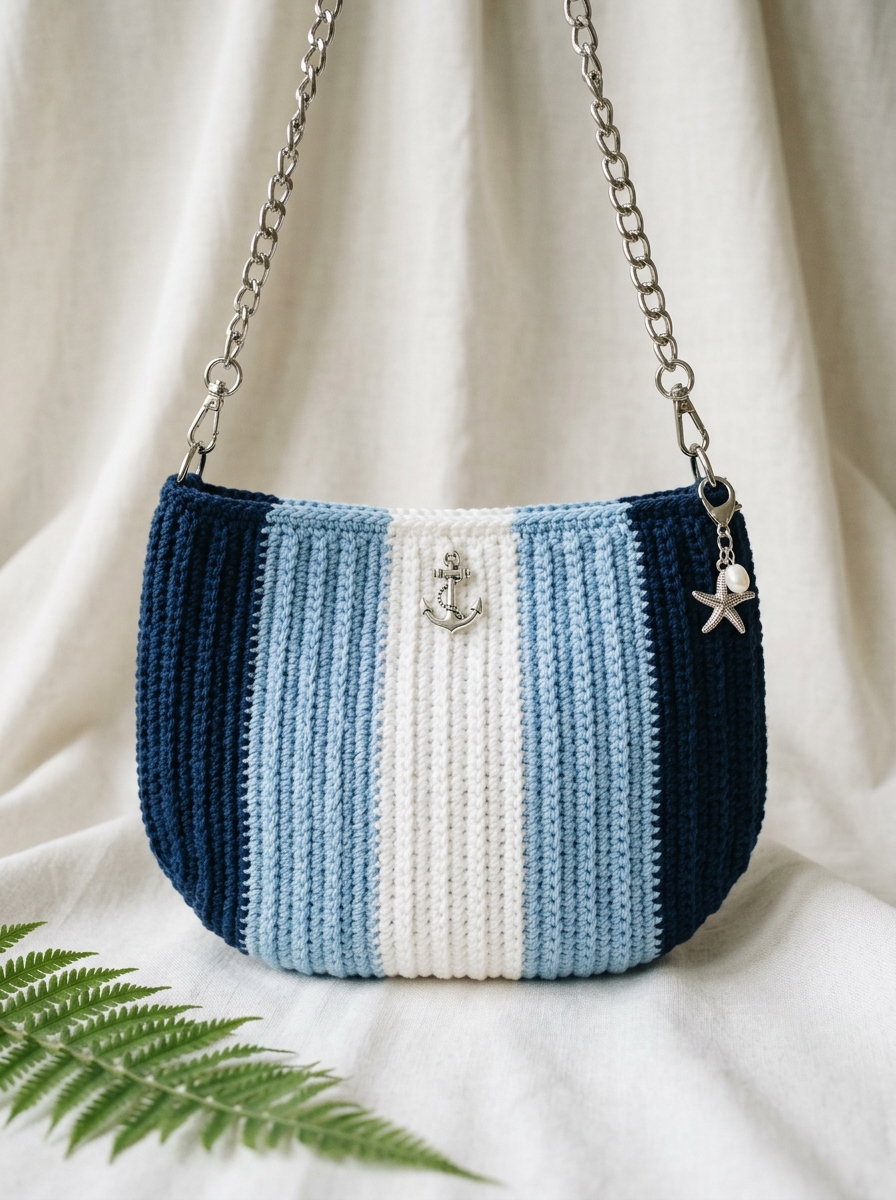
This nautical-inspired striped clutch is exactly the kind of project that makes you feel like a crochet rockstar. I designed this bag with bold vertical stripes in navy, light blue, and cream, and honestly, I cannot stop reaching for it. The ribbed texture gives it that professional boutique look, and the silver chain strap with anchor charm takes it from handmade to high-end.
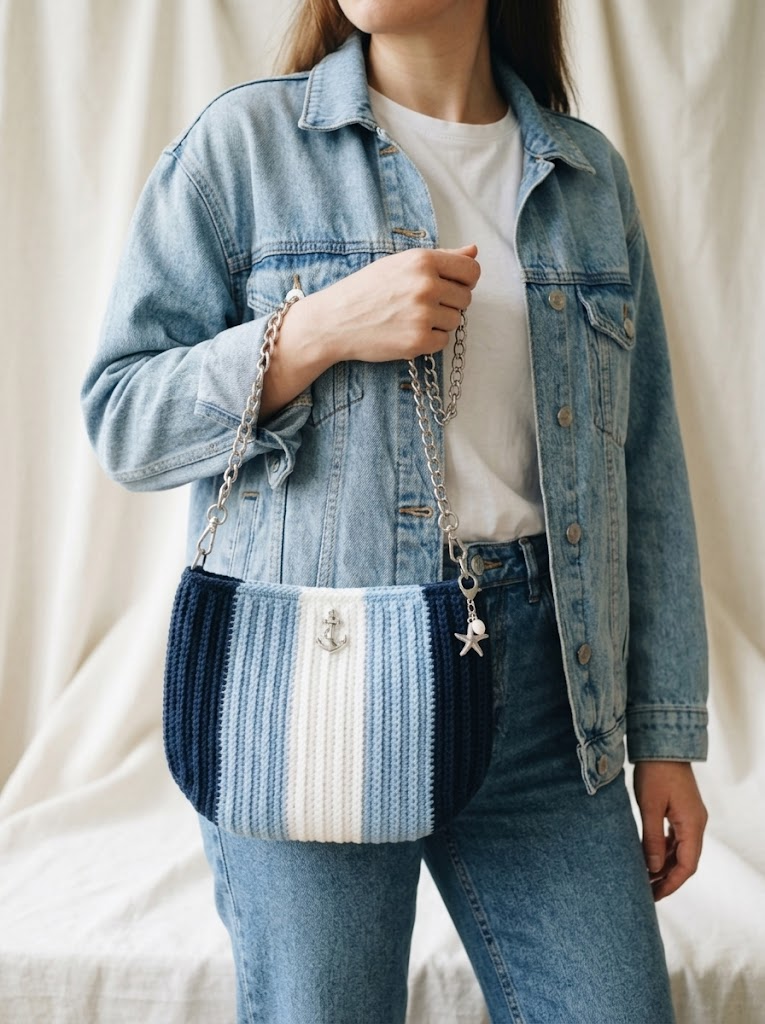
If you can single crochet and work in rows, you can absolutely make this bag. I promise. This step by step crochet tutorial walks you through every detail, and by the end, you will have a stunning accessory perfect for summer outings, beach trips, or adding coastal charm to any outfit.
Why You Will Love This Crochet Pattern
This ocean wave blue striped clutch combines beginner friendly techniques with a result that looks far more advanced than it actually is. The secret? Ribbed single crochet worked in the back loop only. This simple modification creates those gorgeous vertical ridges you see running from top to bottom.
The construction method is straightforward. You work the body as one flat rectangle, seam the bottom and side, then add a simple border at the top. No complicated shaping. No confusing increases. Just steady rows building up into something beautiful.
I chose a cotton blend yarn for this project because it holds the structure perfectly and shows off stitch definition like nothing else. Cotton also handles the weight of hardware beautifully without stretching out over time.
Materials You Will Need
Before you start this crochet pattern, gather everything so you can work uninterrupted. There is nothing worse than being mid-project and realizing you need something.
Yarn:
Yarn Weight: DK weight (size 3) cotton or cotton blend yarn. I recommend a mercerized cotton for that smooth, slightly shiny finish you see in the photos.
Hook: 3.5mm (US E/4) crochet hook. Adjust if needed to match gauge.
Notions:
Gauge: 18 stitches and 20 rows = 4 inches in single crochet back loop only. Take time to check this. Your bag dimensions depend on it.
Finished Dimensions
Skill Level
Confident Beginner to Intermediate
You should be comfortable with:
If you have never worked in the back loop only, do not worry. I explain it below, and it is genuinely one of the easiest modifications to learn.
Abbreviations and Stitch Definitions
Let me break down every abbreviation before we begin. I will use these throughout the pattern.
ch = chain: Wrap yarn over hook, pull through loop on hook. This creates the foundation for your work.
sc = single crochet: Insert hook into stitch, yarn over, pull up a loop (2 loops on hook), yarn over, pull through both loops. This is your main stitch for this entire project.
BLO = back loop only: Instead of inserting your hook under both loops at the top of a stitch, you insert it under only the back loop (the one furthest from you). This creates the ribbed texture.
st(s) = stitch(es)
sl st = slip stitch: Insert hook, yarn over, pull through stitch and loop on hook in one motion. Used for joining.
FO = fasten off: Cut yarn and pull tail through final loop to secure.
Understanding the Construction
Here is what you need to know before diving in. This clutch is worked sideways in rows. That means your foundation chain becomes the height of the bag, and your rows build the width.
You will create one large rectangle with vertical color stripes. Then you fold it in half, seam the bottom and one side, and finish the top opening with a simple border.
The stripes are worked by changing colors at the beginning of specific rows. I will tell you exactly when.
Color Stripe Sequence (from left to right when looking at finished bag):
Total: 80 rows
This creates a symmetrical gradient effect with the lightest color in the center.
Ocean Wave Blue Striped Clutch Pattern Instructions
Take a breath. You have got this. Let us make something gorgeous.
Foundation Chain
With Color A (Navy) and your 3.5mm hook:
Ch 32.
Your chain should measure approximately 7 inches. If it is significantly off, adjust your tension or hook size.
Body of the Bag
Row 1: Sc in 2nd ch from hook and in each ch across. Turn. (31 sts)
Row 2: Ch 1 (does not count as stitch here or throughout), sc in BLO of each st across. Turn. (31 sts)
Rows 3 through 18: Repeat Row 2. (31 sts each row)
You now have 18 rows of navy ribbing. This completes your first stripe.
Color Change to Light Blue
At the end of Row 18, on your last sc, complete the stitch but pull through with Color B (Light Blue) instead of navy. Cut the navy yarn, leaving a 6 inch tail to weave in later.
Rows 19 through 34: Ch 1, sc in BLO of each st across. Turn. (31 sts each row)
You now have 16 rows of light blue ribbing.
Color Change to Cream
At the end of Row 34, complete the final stitch with Color C (Cream). Cut the light blue yarn.
Rows 35 through 46: Ch 1, sc in BLO of each st across. Turn. (31 sts each row)
You now have 12 rows of cream ribbing in the center.
Color Change Back to Light Blue
At the end of Row 46, complete the final stitch with Color B (Light Blue) again. Cut the cream yarn.
Rows 47 through 62: Ch 1, sc in BLO of each st across. Turn. (31 sts each row)
You have another 16 rows of light blue.
Color Change Back to Navy
At the end of Row 62, complete the final stitch with Color A (Navy). Cut the light blue yarn.
Rows 63 through 80: Ch 1, sc in BLO of each st across. Turn. (31 sts each row)
After Row 80: Fasten off, leaving a long tail (approximately 18 inches) for seaming.
Assembling the Clutch
Now comes the satisfying part. You are about to watch this rectangle become a bag.
Step 1: Fold
Lay your rectangle flat with the ribbed texture facing up. Fold it in half widthwise, bringing Row 1 to meet Row 80. The wrong sides should be facing each other (right sides facing out).
Step 2: Seam the Bottom
Using your long navy tail and yarn needle, whip stitch or mattress stitch along the foundation chain edge. This closes the bottom of the bag. Work through both layers, keeping stitches even and snug.
A quick note: Mattress stitch creates an invisible seam, which I prefer here. But whip stitch works perfectly fine and is faster. Use whatever feels comfortable.
Step 3: Seam One Side
Continue seaming up one side edge, joining the row ends together. Stop when you reach the top.
Step 4: Leave Top Open
The opposite side edge and the entire top remain open for now. The open side will become your second side seam.
Wait, that sounds confusing. Let me clarify: you actually need to seam BOTH side edges. Seam the second side just like the first. Leave only the top open.
Weave in your seaming tail securely.
Top Border
Turn your bag right side out. The seams should be on the inside now.
Join Color A (Navy) at one side seam at the top opening with a slip stitch.
Round 1: Ch 1, sc evenly around the entire top opening. Work approximately 1 sc into each row end. Join with sl st to first sc. (Approximately 80 sts)
Tip: You want your border to lie flat, not pucker or ruffle. If it pulls in, add a few extra stitches. If it ruffles, skip a stitch here and there.
Round 2: Ch 1, sc in each st around. Join with sl st. (80 sts)
Round 3: Ch 1, sc in each st around. Join with sl st. FO. (80 sts)
Weave in all remaining ends.
Adding the Hardware
This is where your clutch transforms into a true statement piece.
Attaching Chain Strap Hardware:
Locate where you want your strap to attach. I placed mine about 1 inch in from each side seam.
If your hardware includes lobster clasps or swivel hooks, you can simply clip them directly onto your stitches. For a cleaner look, crochet two small loops at your attachment points:
Chain Loop (make 2):
Join navy yarn at attachment point. Ch 10, sl st to starting point to form a loop. FO and weave in ends.
Attach your chain strap through these loops.
Adding Charms:
Thread your anchor charm, starfish charm, or pearl dangle onto a small jump ring and attach to the chain or hardware. This is entirely optional but adds that extra nautical flair.
Tips for Success
Tension matters. Keep your stitches consistent throughout. Uneven tension will show in the ribbing.
Block if needed. After seaming, you can lightly steam block your clutch to even out any irregularities. Do not press hard on the ribbing or you will flatten it.
Lining is optional. For everyday use, a fabric lining prevents small items from poking through stitches. Cut fabric slightly smaller than your bag dimensions, hem the edges, and hand stitch inside.
Substitute colors freely. This pattern works beautifully in any color combination. Try coral, peach, and sand for a sunset vibe. Or go bold with rainbow stripes.
How to Crochet This Pattern if You Are a Beginner
If this is your first bag project, here is my honest advice:
Start by practicing the back loop only technique on a small swatch. Chain 15, work 10 rows in BLO single crochet. Feel how different it is from standard sc. Notice the ridges forming.
Color changes can feel awkward at first. The key is completing that final yarn over of your last stitch with the new color. Watch a quick video if you need to see it in motion.
Take your time with seaming. Rushed seams show. Nobody will see your stitches if you go slowly.
And please, do not compare your first attempt to the photos. Your first bag teaches you. Your second bag impresses you. That is just how it works.
Frequently Asked Questions
Can I use a different yarn weight?
Yes, but your dimensions will change. Worsted weight will create a larger, sturdier bag. Sport weight will be smaller and more delicate. Adjust your hook size and chain count accordingly.
What if I do not want a chain strap?
You can crochet a strap instead. Chain 100 or your desired length, sc in each chain across, and attach to each side. Or add wrist loop for a true clutch style.
Is this bag sturdy enough for daily use?
With cotton yarn, absolutely. Cotton holds structure well. If using acrylic, consider a stiffer interfacing or fabric lining for added support.
Wrapping Up Your Ocean Wave Blue Striped Clutch Crochet Pattern
You did it. Or you are about to do it. Either way, I am genuinely excited for you.
This crochet pattern combines simple techniques with stunning results, and that is my favorite kind of project. The ocean wave blue striped clutch looks like something you would find in a coastal boutique, but you made it with your own hands. There is something deeply satisfying about that.
Thank you so much for choosing this pattern and trusting me to guide you through it. I truly appreciate you being here.
When you finish your clutch, I would absolutely love to see it. Tag me on Instagram or share in our Facebook group. Seeing your creations genuinely makes my day, and it helps other crocheters feel confident to try it too.
Now go grab that hook and make something beautiful. You have got this.
Happy crocheting!
