Let me tell you, this bag stops people in their tracks. The Midnight Black Crescent Bag combines dramatic bobble texture with an elegant half-moon silhouette that looks straight off a designer runway. But here is the secret: it is completely achievable for confident beginners and intermediate crocheters alike.
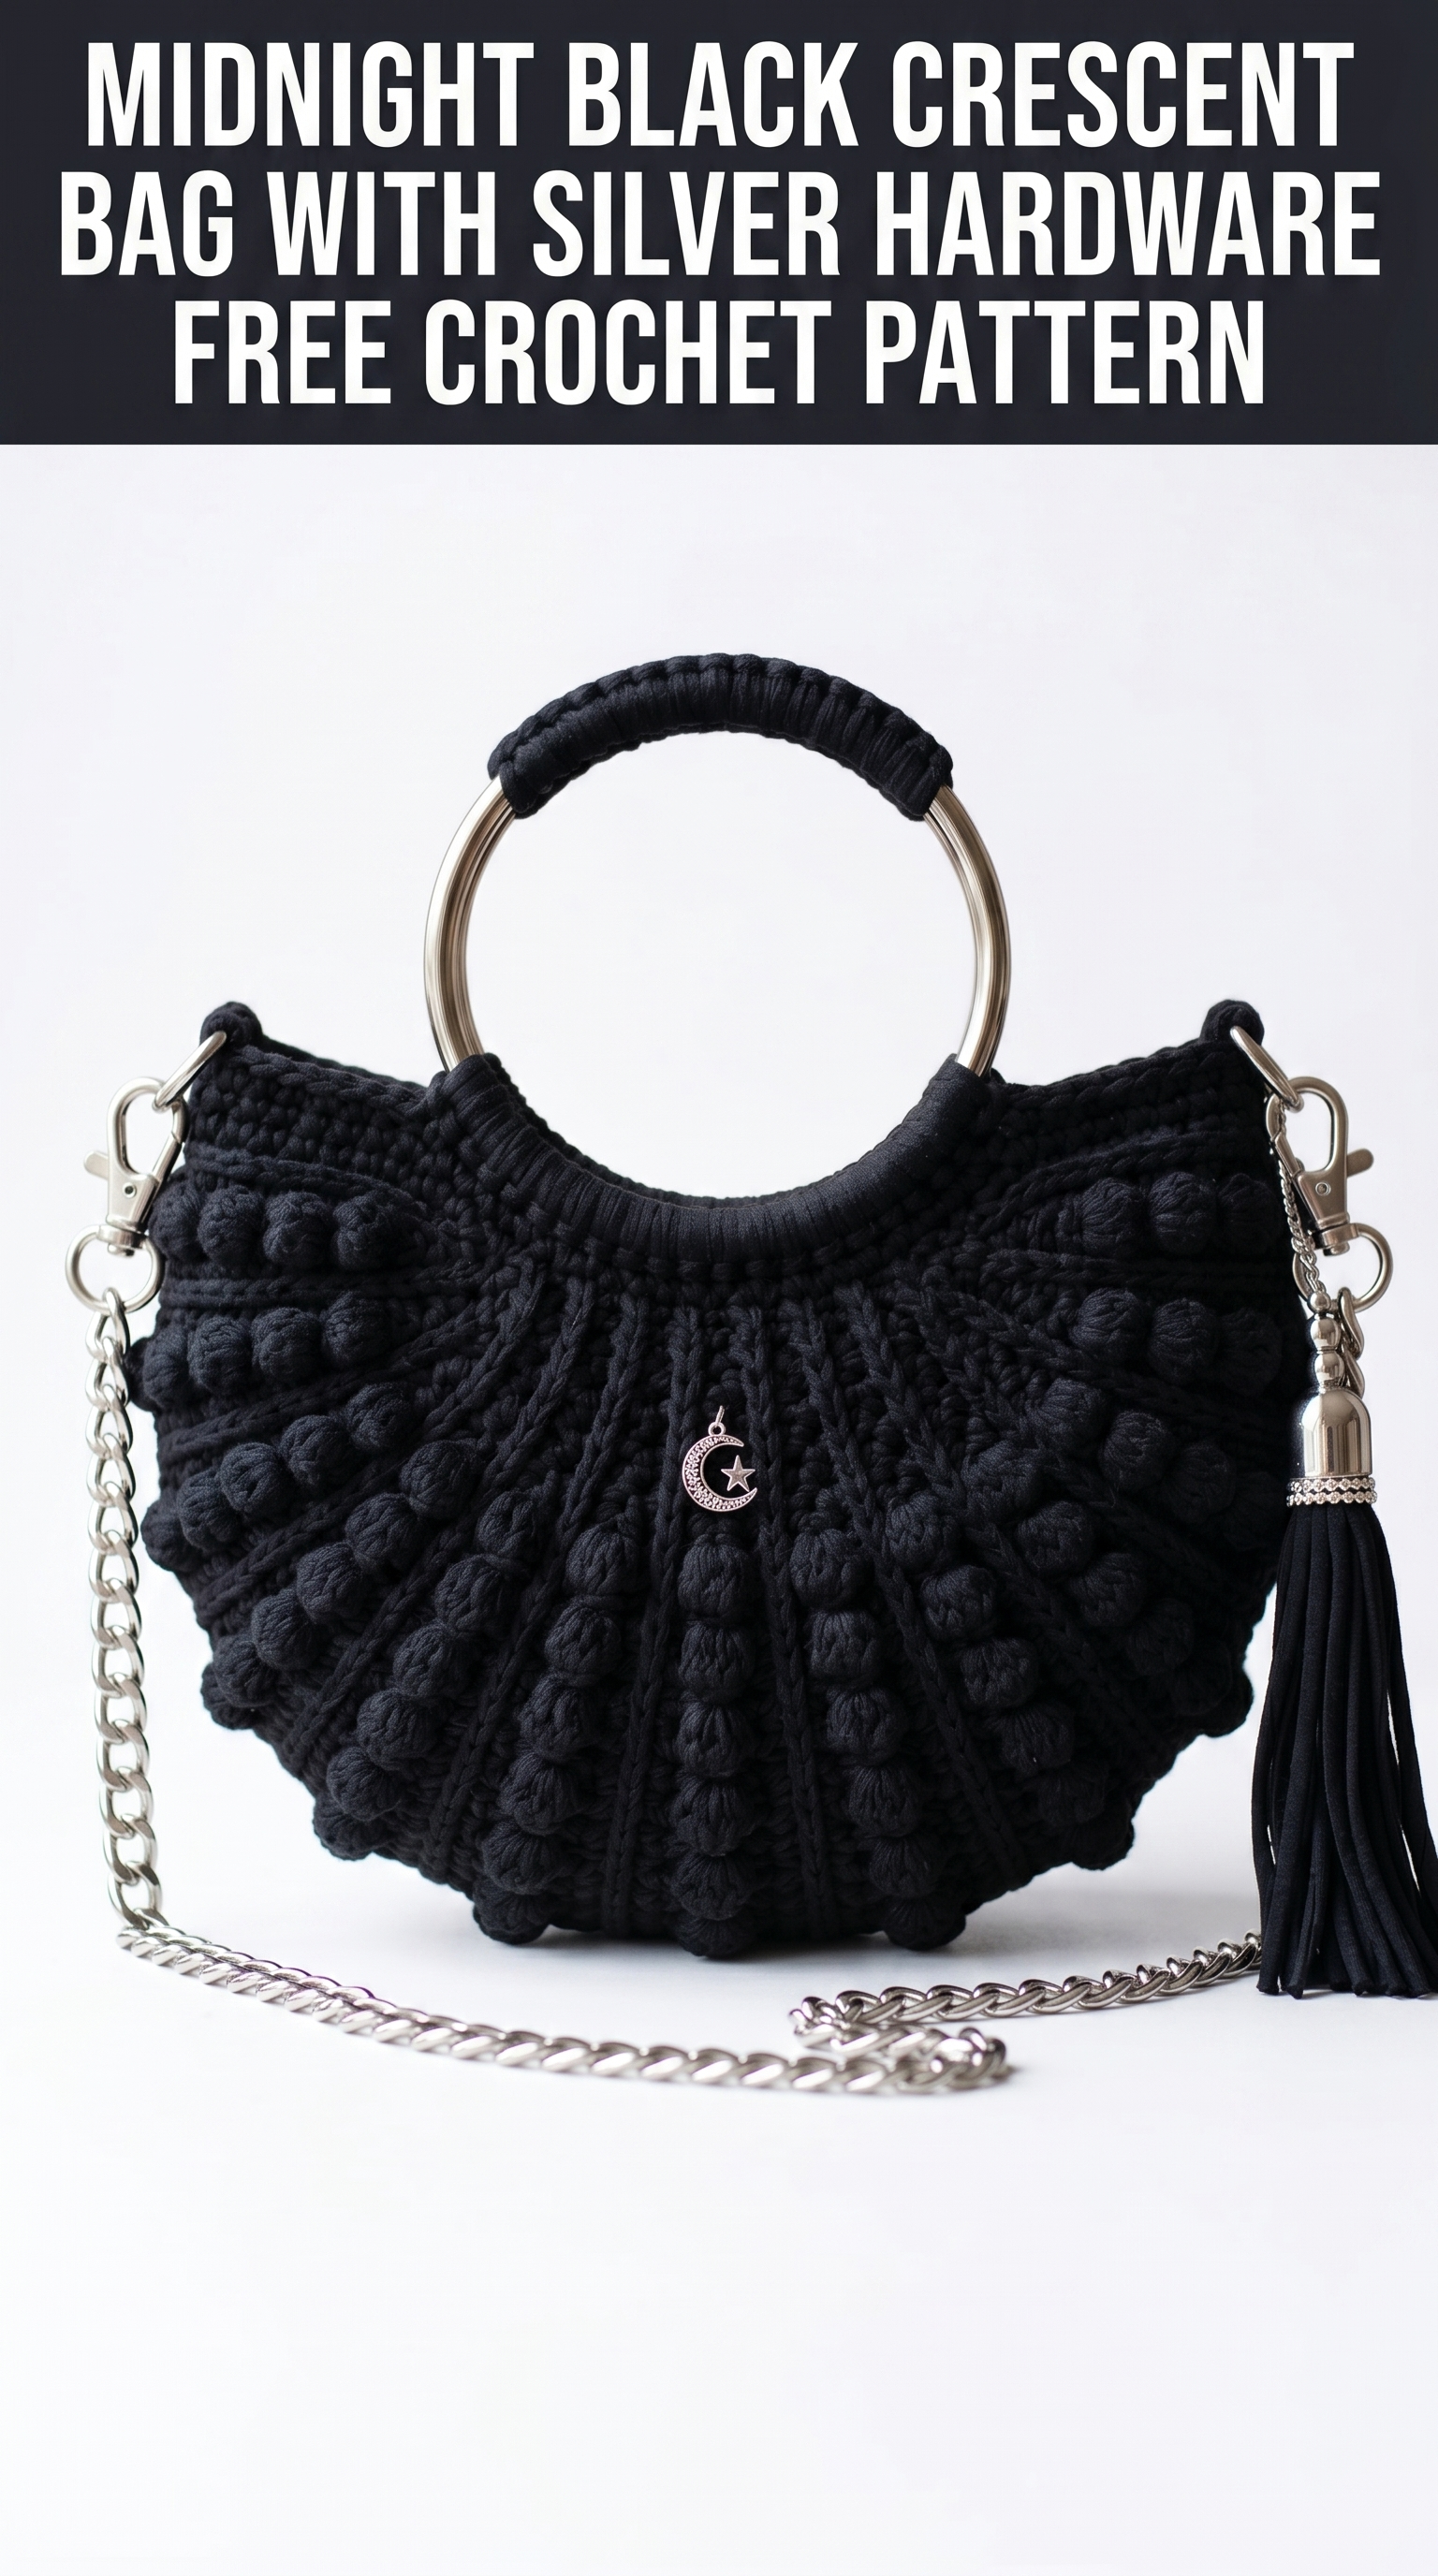
This crochet pattern walks you through every single step to create a stunning statement piece. We are talking textured bobble stitches radiating outward, a structured crescent shape, wrapped metal ring handles, and polished silver hardware that elevates the whole design. If you can work basic stitches and follow a rhythm, you can absolutely make this bag.
I designed this piece because I wanted something that felt luxurious but handmade. Something with that artisan quality you cannot find at any store. The bobble texture creates incredible visual interest, especially in solid black where the shadows play off every raised stitch. Trust me, you are going to love making this one.
Why This Crescent Bag Crochet Pattern Works So Well
The construction here is smarter than it looks. You work two identical crescent panels flat, then join them together. No complicated shaping. No confusing decreases. Just steady rows that build into that gorgeous curved shape naturally.
The bobble stitches sit in diagonal lines that radiate from the center top. This creates movement and draws the eye exactly where you want it. Between the bobble sections, simple single crochet provides contrast and lets those textured pops really shine.
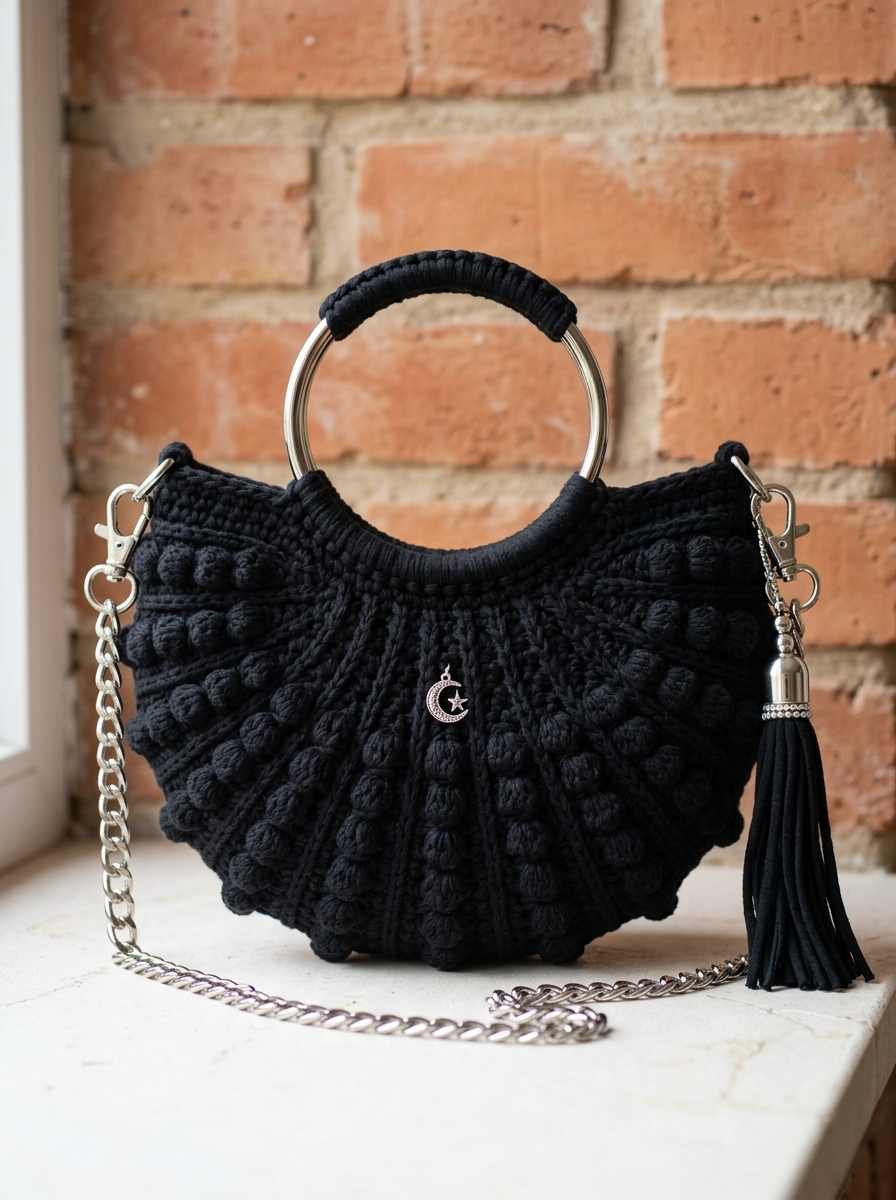
And the hardware? It transforms handmade into high-end. The silver ring handles, chain strap, and little moon charm take this from craft project to conversation piece.
Materials You Will Need
Yarn:
Hook:
Hardware and Notions:
Finished Dimensions:
Gauge
Work 18 single crochet (sc) stitches and 20 rows to make a 4 inch (10cm) square.
Gauge matters here because the bag needs structure. Too loose and it becomes floppy. Too tight and the bobbles will not pop properly. Take time to swatch. I know, I know. But your finished bag will thank you.
Abbreviations and Stitch Definitions
ch — chain: yarn over, pull through loop on hook
sl st — slip stitch: insert hook, yarn over, pull through stitch and loop on hook in one motion
sc — single crochet: insert hook, yarn over, pull up a loop (2 loops on hook), yarn over, pull through both loops
hdc — half double crochet: yarn over, insert hook, yarn over, pull up a loop (3 loops on hook), yarn over, pull through all 3 loops
dc — double crochet: yarn over, insert hook, yarn over, pull up a loop (3 loops on hook), yarn over, pull through 2 loops, yarn over, pull through remaining 2 loops
bob — bobble stitch: work 5 double crochet stitches into the same stitch but do not complete them. You will have 6 loops on your hook. Yarn over and pull through all 6 loops at once. This creates that raised cluster. Push the bobble to the front (right side) of your work.
inc — increase: work 2 stitches into the same stitch
dec — decrease: work 2 stitches together as one
Skill Level
Confident Beginner to Intermediate
You should be comfortable with basic stitches and reading row-by-row instructions. The bobble stitch might be new to you, and that is perfectly fine. I will walk you through it. The pattern itself is repetitive once you establish the rhythm, which actually makes it quite relaxing to work.
Step by Step Crochet Pattern for the Crescent Bag
Crescent Panel (Make 2)
You will work from the top center outward and downward, increasing to create that curved crescent shape.
Foundation Row:
Ch 43.
Row 1 (Right Side):
Sc in 2nd ch from hook and in each ch across. Turn. (42 sc)
Row 2:
Ch 1, sc in first 3 sts, *bob in next st, sc in next 3 sts* repeat across, ending with sc in last 3 sts. Turn. (42 sts: 32 sc + 10 bobbles)
Row 3:
Ch 1, sc in each st across. Turn. (42 sc)
Row 4:
Ch 1, sc in first st, 2 sc in next st (inc made), sc in next st, *bob in next st, sc in next 3 sts* repeat to last 4 sts, bob in next st, sc in next st, 2 sc in next st, sc in last st. Turn. (44 sts)
Row 5:
Ch 1, sc in each st across. Turn. (44 sc)
Row 6:
Ch 1, sc in first 5 sts, *bob in next st, sc in next 3 sts* repeat to last 7 sts, bob in next st, sc in last 6 sts. Turn. (44 sts: 33 sc + 11 bobbles)
Row 7:
Ch 1, sc in each st across. Turn. (44 sc)
Row 8:
Ch 1, sc in first st, 2 sc in next st, sc across to last 2 sts, 2 sc in next st, sc in last st. Turn. (46 sc)
Continue this established pattern, working bobble rows every other row with the bobbles staggered (offset by 2 stitches from the previous bobble row). Increase 2 stitches total at the edges every 4th row.
Continue until piece measures approximately 9 inches from foundation chain at the center.
Your final row should have approximately 58 to 62 stitches depending on your gauge.
Shaping the Curved Bottom Edge
This is where the crescent magic happens. Do not worry, it is easier than it sounds.
Decrease Row 1:
Ch 1, skip first st, sc in next 2 sts, sc2tog, sc across to last 5 sts, sc2tog, sc in next 2 sts, skip last st. Turn. (4 sts decreased)
Decrease Row 2:
Ch 1, sc in each st across. Turn.
Decrease Row 3:
Ch 1, skip first st, sc2tog, sc across to last 3 sts, sc2tog, skip last st. Turn. (4 sts decreased)
Decrease Row 4:
Ch 1, sc in each st across. Turn.
Continue decreasing every other row until you have approximately 8 to 10 stitches remaining.
Final Row:
Sl st across to close. Fasten off and weave in ends.
Border and Top Edge Finishing
With right side facing, join yarn at the top corner of one panel.
Round 1:
Ch 1, work sc evenly around the entire panel edge. Work 3 sc into each corner point to keep edges flat. Join with sl st to first sc.
Round 2:
Ch 1, sc in each st around, working 3 sc in corners. Join. Fasten off.
Repeat for second panel.
Joining the Panels
Place both panels with wrong sides together. The bobbles should face outward on both sides.
Using a yarn needle and matching yarn, whip stitch the panels together along the curved bottom edge and partially up each side. Leave the top approximately 3 inches open on each side to create the bag opening.
Alternatively, you can single crochet the panels together for a more decorative seam. This creates a slight ridge that looks intentional and polished.
Attaching the Ring Handles
Here is where patience pays off. Take your time with this step.
Wrapping the Handle:
Cut a length of yarn approximately 3 yards long. Wrap the top portion of the metal ring handle tightly with yarn, covering about one third of the ring. Secure ends by tucking them under the wraps and gluing lightly if needed.
Attaching to Bag:
Position the wrapped portion of the ring at the center top of one panel. Using yarn needle and matching yarn, stitch the bag edge securely to the ring. Work small tight stitches through both the bag fabric and around the ring metal.
Work approximately 15 to 20 attachment stitches, keeping them close together. The bag should hang below the ring naturally with the curve facing down.
Repeat for second panel and second ring handle.
Adding the Chain Strap and Hardware
D-Ring Attachment Points:
Using yarn, crochet small tabs at each upper side corner of the bag. These tabs should loop through D-rings.
Ch 8. Sl st to form a ring. Sc 12 around the ring. Join and fasten off. Thread through D-ring and stitch securely to bag corner.
Make 4 total tabs (2 on each side).
Attach Chain:
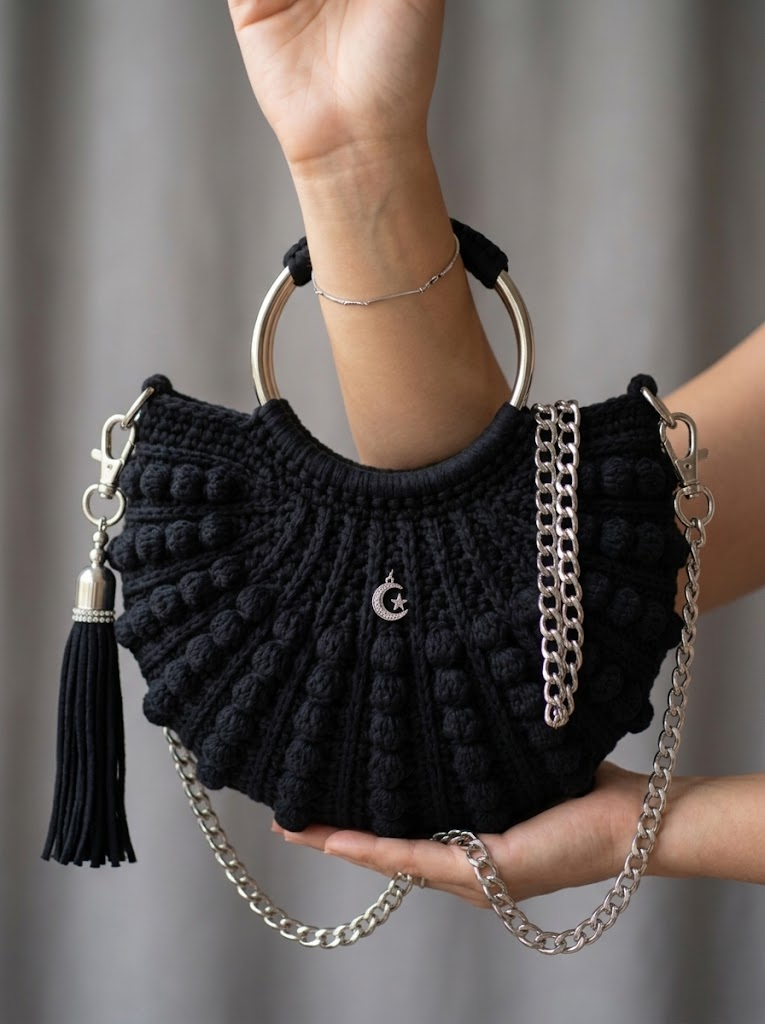
Clip the lobster clasps of your chain strap to the D-rings. Your bag can now be worn crossbody or on the shoulder.
Add Tassel and Charm:
Thread tassel onto one D-ring. Add decorative charm to center front of bag using a small jump ring. Stitch charm loop securely or attach to a D-ring at the handle.
Tips for Success with This Crochet Tutorial
Bobble Consistency:
Keep your bobbles uniform by counting those 5 double crochets every single time. It is easy to accidentally work 4 or 6. Uniform bobbles make all the difference in the finished texture.
Blocking:
Steam block your finished panels before joining. This evens out the stitches and helps the crescent shape settle properly. Do not wet block heavily since cotton can stretch.
Lining (Optional):
For extra structure and to protect contents, add a fabric lining. Cut fabric to match panel shape plus seam allowance. Hand stitch in place after joining panels.
Color Variations:
This pattern works beautifully in any solid color. Deep jewel tones like emerald or burgundy would be stunning. Cream or white creates a summery vibe. Just keep in mind that bobble texture shows best in solid shades rather than variegated yarns.
What Makes This Bag Special
Honestly? It is the combination of handcraft and hardware. So many crochet bags look homemade in a way that feels unfinished. But those silver ring handles, that chunky chain, the little moon charm, they tell a different story. They say this bag was designed, not just made.
The crescent shape itself is romantic and slightly vintage. It references those beautiful 1970s macrame pieces but feels completely modern. And the bobble texture catches light in the most gorgeous way, especially in that deep black.
When you carry this bag, people will ask where you bought it. And you get to say you made it yourself. That moment never gets old.
Wrapping Up Your Midnight Black Crescent Bag
You did it. You created a statement accessory that rivals anything in a boutique window. This crochet pattern taught you bobble placement, crescent shaping, hardware attachment, and how to bring it all together into something genuinely beautiful.
Take your time with the finishing details. They matter more than you might think. A well-attached handle, an evenly wrapped ring, hardware that hangs just right, these touches separate good from gorgeous.
Thank you so much for choosing this pattern and trusting me to guide you through it. I genuinely love seeing what you create, so please share your finished bags on Instagram or Facebook and tag me. Seeing your interpretations, your color choices, your personal touches, that is the best part of sharing patterns.
Now go show off that bag. You earned it.
